
There are days when the snack craving hits, but the energy reserves are lower than a forgotten piece of toast. You need elegance, flavor, and instant gratification—you need the magic of the5 Minute Olive Tapenade.
Forget complicated appetizers; this recipe is the culinary equivalent of putting on sweatpants but looking like you’re ready for the Riviera. It’s salty, bright, rich, and ridiculously fast.
- Effortless sophistication means you can transition from kitchen zero to gourmet hero in less time than it takes to choose a streaming movie.
- The bold, savory Mediterranean flavor profile bursts with bright capers and fresh citrus, delivering an intense yet balanced taste sensation every time.
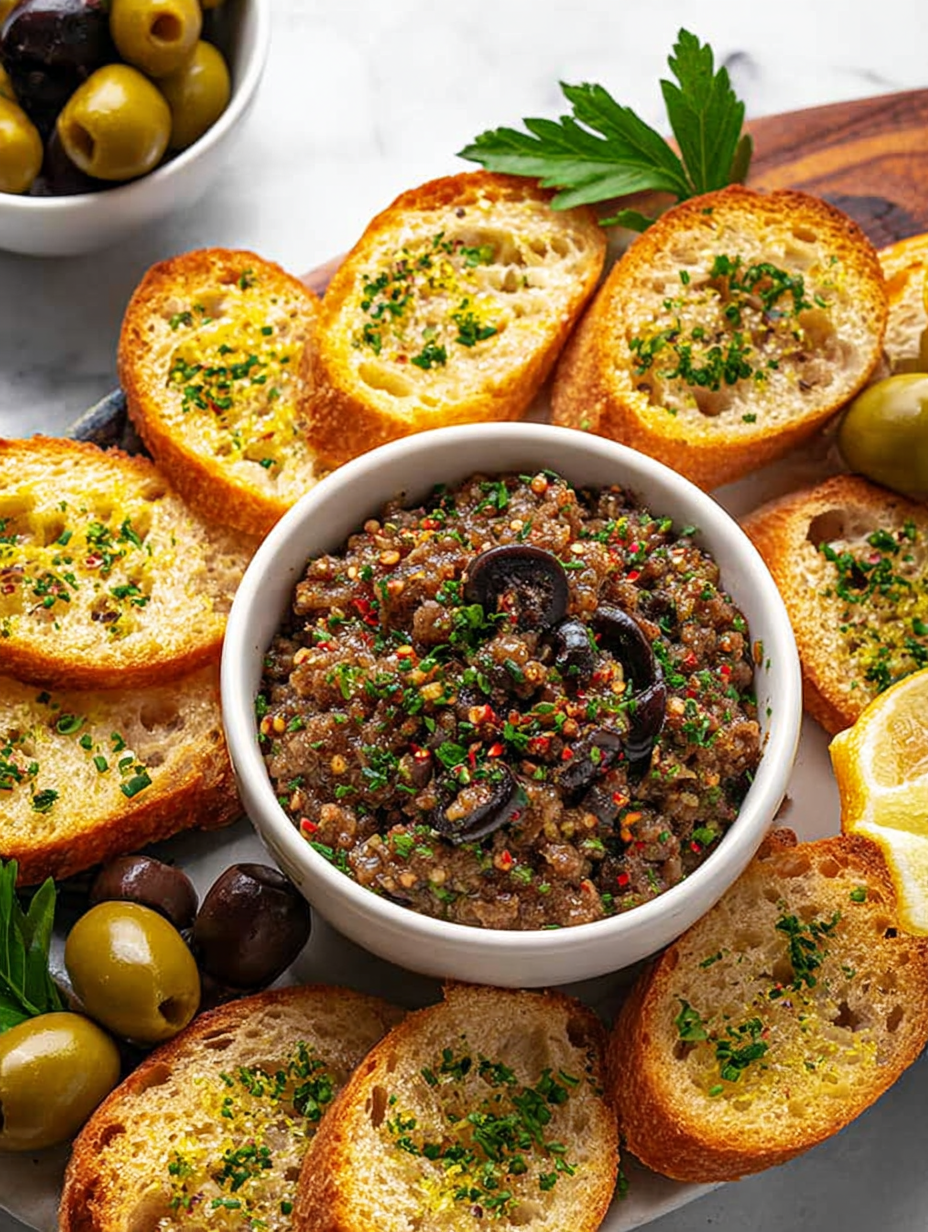
- Visually stunning with its deep, rich colors and rustic texture, this tapenade instantly elevates any cracker or charcuterie board you present.
- Incredibly versatile, this spread pairs flawlessly with sliced baguette, roasted chicken, or even smeared inside a humble grilled cheese sandwich.
The Glorious, Salty History of Tapenade
Tapenade isn’t just a fancy spread; it’s a culinary masterpiece with roots firmly planted in Provence, France. Historically, the word “tapenade” comes fromtapena, the Provençal word for capers, which were traditionally a key ingredient, not just olives. While people have been crushing olives and mixing them with savory components since antiquity, the recipe we recognize today gained prominence in the late 19th century, supposedly perfected by a chef in Marseille who decided to blend olives with capers, anchovies, and olive oil to stuff eggs.
What I love about this spread is its sheer resilience and adaptability. It’s the ultimate culinary wingman—always ready to step up and make whatever you serve look instantly more impressive. It demands respect without demanding hours of your precious time. When you pull out a jar of this homemade spread, people assume you’ve spent all afternoon delicately pitting fruit and whispering sweet nothings to an ancient mortar and pestle. You haven’t. You’ve successfully blended sophisticated flavors faster than ordering take-out, and that, my friends, is true kitchen victory.
Choosing Your Olives: The Foundation of Flavor
The success of your5 Minute Olive Tapenadehinges almost entirely on the quality and type of olives you select. Think of the olives as the lead singer of this rock band; everything else is just backup. You have two main routes: the dark, rich route (Black Olives) or the sharp, vibrant route (Green Olives).
A classic tapenade typically uses black olives, specifically Niçoise olives, because they offer a gentle, fruity, and slightly earthy flavor that provides a wonderful base. However, Niçoise can be pricey or hard to find. The secret weapon for speed and flavor is often a high-quality jar of pitted Kalamata olives. Kalamatas are dark, robust, and bring a slightly tangy complexity that instantly sets your tapenade apart. Be warned: they are salty, so you may need to adjust the amount of added salt later in the recipe.
If you prefer a bolder, saltier, and more piquant spread, mix black and green olives. Green olives, especially the Castelvetrano variety, offer a buttery texture and brighter hue. The combination creates a beautifully balanced flavor profile that hits both the deep, earthy notes and the sharper, fresher ones. Remember, always start with pitted olives. We are making a 5-minute recipe, not dedicating 45 minutes to surgical olive excavation.
Achieving the Perfect Tapenade Texture
Texture is everything when it comes to tapenade. You are aiming for a rustic, chunky spread, not a smooth, olive-flavored baby food puree. The entire point is to have varying textures—the bite of the olive pieces, the firmness of the capers, and the occasional crunch of a nut. Over-processing is the most common mistake home cooks make, turning this elegant dish into a sorrowful paste.
I find that using a simple food processor works best, but you must pulse it. Pulse, pause, scrape down the sides, and pulse again. I recommend no more than 8 to 10 short pulses. You should still see distinct chunks of olives and capers when you look at the finished product. If you don’t own a food processor, a good old-fashioned knife and chopping board will yield a more authentic, coarse texture, though it will take closer to 8 minutes rather than 5. It’s still worth the extra effort if you crave that extra rustic charm.
Ingredients for 5 Minute Olive Tapenade
Here’s what you’ll need to make this delicious dish:
- Kalamata OlivesSelect high-quality, pitted olives as they form the backbone of the flavor and texture of the tapenade.
- CapersThese briny little buds add a crucial element of sharp acidity and saltiness, balancing the richness of the olives and oil.
- Fresh GarlicUse one medium clove to provide an aromatic punch without overpowering the delicate olive flavor.
- Fresh Lemon JuiceA squeeze of fresh juice is necessary to cut through the oil and salt, adding brightness and vibrancy.
- Dried OreganoJust a pinch of this herb brings necessary Mediterranean depth and warmth to the blend.
- Extra Virgin Olive OilUse high-quality oil not only for binding the mixture but also for lending its own fruity notes to the final product.
- Almonds or WalnutsA small handful of toasted nuts provides a subtle crunch and richness, enhancing the overall textural complexity.
The full ingredients list, including measurements, is provided in the recipe card directly below.
How to Make 5 Minute Olive Tapenade
Follow these simple steps to prepare this delicious dish:
Step 1: The Flavor Foundation Prep
Combine the pitted olives, drained capers, fresh garlic clove, dried oregano, and your chosen nuts (almonds or walnuts) into the bowl of a food processor. Do not add the olive oil or lemon juice yet, as they will turn the mixture too liquidy too quickly.
Step 2: Pulse to Perfection
Secure the lid on the food processor and begin pulsing the ingredients. Use short, sharp bursts—think one second per pulse. Aim for 8 to 10 pulses, stopping frequently to scrape down the sides with a rubber spatula, ensuring even distribution and avoiding creating a paste at the bottom. The goal is a rough chop, still recognizing the distinct ingredients.
Step 3: Add Liquid Brightness
Once the desired chunky texture is achieved, add the fresh lemon juice and begin drizzling in the extra virgin olive oil while pulsing gently one or two more times. You want just enough oil to bind the mixture without making it slick or soupy. The tapenade should hold its rustic shape.
Step 4: Taste and Adjust Seasoning
Transfer the tapenade mixture from the food processor to a small serving bowl. Taste a small amount with a cracker. Because olives and capers are inherently salty, you likely won’t need much, but add a very small pinch of fresh black pepper or maybe a tiny drizzle more olive oil if the mixture seems dry.
Transfer to plates and drizzle with sauce for the perfect finishing touch.
Storage Secrets and Serving Suggestions
One of the best qualities of tapenade, besides its speed, is its excellent shelf life. If you have any leftovers (a highly unlikely scenario, but still possible), transfer the mixture to an airtight container. Pour a thin layer of extra virgin olive oil over the top before sealing. This acts as a natural barrier, preventing oxidation and keeping the tapenade fresh. Stored properly in the refrigerator, this tapenade will keep beautifully for up to two weeks, making it an excellent candidate for meal prep or emergency appetizer situations.
Beyond the Cracker: Creative Ways to Use Tapenade
While serving tapenade with a crispy, sliced baguette or crackers is the traditional and arguably perfect application, thinking outside the bread basket can unlock a world of flavor potential. Tapenade is incredibly versatile and shines when used as a vibrant accompaniment to proteins or vegetables.
Try spreading a thin layer beneath the skin of a whole roasted chicken before cooking. The salt, acid, and oil penetrate the meat, resulting in incredibly moist, flavorful poultry. It also makes a fantastic addition to sandwiches and wraps; a simple smear on a turkey or roasted vegetable panini transforms it from bland lunch to Mediterranean vacation.
For a delicious appetizer that isn’t bread-based, try stuffing cherry tomatoes or mushrooms with a dollop of tapenade and a sprinkle of crumbled feta cheese. The combination of creamy cheese and salty, punchy tapenade is irresistible. Finally, use it as a vibrant base for homemade pizza or flatbread instead of traditional tomato sauce—it pairs exceptionally well with grilled eggplant and roasted bell peppers.
Troubleshooting Common Tapenade Mishaps
Even though this recipe is incredibly straightforward, a few pitfalls can ruin the experience if you’re not careful. The number one mistake, as mentioned, is over-processing. If your tapenade turns into a smooth, sad paste, all is not lost! Stir in a few tablespoons of roughly chopped whole olives to bring back some texture, or try adding a bit more chopped almonds for crunch.
The second common issue is excessive saltiness. If you used Kalamata olives, you might find the final product overwhelming. To remedy this, introduce elements that absorb or balance salt. Adding a teaspoon of apple cider vinegar or a bit more lemon juice can help counteract the salinity. Alternatively, you can mix in a few tablespoons of ricotta or cream cheese just before serving; the fat and dairy will help mellow out the sharp edges. Tapenade is forgiving, but respecting the strong flavors of the olives and capers is key to success.
The Accidental Discovery of Sunshine on a Plate

I needed a fancy appetizer fast. Guests were due in five minutes, and all I had were jars of olives and panic. I blitzed everything together, expecting disaster, but instead, I created the most vibrant, punchy spread imaginable. This5 Minute Olive Tapenadewasn’t just fast; it was shockingly gourmet, instantly turning my kitchen chaos into culinary triumph.
There are kitchen emergencies, and then there arekitchen catastrophes. Mine occurred precisely three minutes after my friend, Sarah, texted that they were turning the corner. I had forgotten the appetizer entirely. My original plan involved some elaborate, oven-baked puff pastry creation that required at least 45 minutes of gentle persuasion and patience—two things I completely lacked that Tuesday evening.
I stared into the pantry abyss. Olives. So many olives. A jar of salty, dark Kalamatas, a small can of capers, and a few cloves of forgotten garlic. It was a desperate situation calling for a desperate, speedy solution. I hauled out the food processor, tossed in the savory ingredients, pushed the ‘on’ button, and held my breath. What emerged five minutes later was not just palatable, but genuinely exceptional. It smelled of the Mediterranean coast, looked rich and vibrant, and paired perfectly with the stale crackers I miraculously located under a box of cereal. This speedy tapenade recipe became my secret weapon, the ultimate proof that sophistication doesn’t require suffering.
Why Speed is the Ultimate Spice
The beauty of the5 Minute Olive Tapenadelies in its utter simplicity. This is not a recipe that demands precision or endless chopping. It demands speed and decent quality ingredients. If you can operate a food processor or a blender, you can make this dip. Forget blanching, sautéing, or reducing; this recipe respects your schedule while delivering maximum flavor impact. It’s perfect for last-minute gatherings, or when you just need a potent, salty hit to elevate a simple lunchtime sandwich.
Many traditional tapenade recipes insist on hand-chopping for a rustic texture, but frankly, if you need this dish in five minutes, that level of manual labor is a fantasy. A few rapid pulses in the food processor achieve a wonderfully rustic consistency without requiring a culinary degree or surgical dexterity. The texture should be chunky enough to provide bite, but smooth enough to spread easily. Resist the urge to turn it into a paste—we are making tapenade, not olive butter.
The Essential Ingredients for Instant Gratification
While the focus is on speed, selecting the right ingredients guarantees that intense, robust flavor profile. Quality matters here, especially since there is no cooking to mask inferior products. Look for olives packed in brine, not oil, as the brine adds that necessary salty punch.
Here is everything you need to execute this kitchen miracle:
- 1 ½ cups pitted Kalamata olives (or a mix of Kalamata and ripe black olives)
- ¼ cup capers, drained (rinse them lightly if they seem excessively salty)
- 2 small cloves garlic, peeled
- 2 tablespoons fresh lemon juice
- ½ teaspoon dried oregano
- ¼ cup extra virgin olive oil (plus more for finishing)
- Freshly ground black pepper to taste
- Optional additions: A few sprigs of fresh thyme or a small pinch of red pepper flakes
The Blitzing Technique That Saves the Day
The entire preparation relies on strategic pulsing. We want control, not chaos. Start with the dry, hard ingredients first to ensure they are adequately broken down before the liquid turns everything soupy. This technique is what separates a vibrant, chunky spread from a thin, sad paste. Make sure your capers are well-drained; excess moisture can dilute the overall intensity of the tapenade.
Place the olives, capers, garlic, lemon juice, and dried oregano into the bowl of the food processor. Secure the lid tightly. Use the ‘pulse’ function about 8 to 10 times until the mixture is roughly chopped. Now, while the machine is running (or between short pulses), slowly drizzle in the olive oil through the feed tube until the mixture comes together into a spreadable consistency. Stop as soon as it looks uniform but still textured. Taste and adjust the pepper immediately. If it needs a little lift, add a tiny bit more lemon juice.
Perfecting the Cooking Process
Since we are skipping the stovetop, the process involves speed and sequence. First, gather all ingredients—garlic, capers, olives—and ensure your food processor is ready. Pulse the hard items first for a rough chop, then add the oil slowly while running the machine for that perfectly emulsified texture, stopping immediately when smooth but still rustic.
A Quick Note on Olive Selection
While Kalamata olives are the traditional star, giving the tapenade its characteristic dark color and intense, fruity saltiness, don’t feel constrained. You can easily substitute up to half of the Kalamatas with Castelvetrano olives for a slightly milder, buttery profile, or use Niçoise olives for a more delicate, herby background note. The key is balance; ensure the total quantity remains the same to maintain the correct ratio of liquid to solids.
If you find your olives are particularly bland—a tragedy that sometimes occurs when buying bulk—you can enhance their flavor by adding a teaspoon of good quality jarred roasted red pepper (drained completely). This adds depth without altering the essential Mediterranean character of the quick olive spread.
Remember that garlic is potent, especially when raw. If you are serving this instantly, stick to two small cloves. If you plan to let the tapenade sit for an hour or two, the garlic flavor will mellow slightly. Never be tempted to use powdered garlic; the raw, sharp punch of fresh garlic is irreplaceable in this rapid recipe.
Add Your Touch
Don’t be afraid to experiment! If you crave more depth, try incorporating sun-dried tomatoes (oil-packed) or a dash of chili flakes for heat. For a creamier, milder spread, switch out half the Kalamata olives for Spanish Manzanilla olives. A small splash of pomegranate molasses also introduces a delightful tang.
Serving Suggestions That Wow
The beauty of this quick olive tapenade is its versatility. It doesn’t just sit prettily next to crackers; it can completely transform a simple meal. Use it as a vibrant spread on crusty bread, smear it onto grilled chicken or turkey burgers before serving, or thin it slightly with extra olive oil and use it as a robust dressing for roasted vegetables or a simple pasta salad.
- As an Appetizer:Serve alongside warm pita bread, crisp cucumber slices, or artisanal crackers.
- With Protein:Use it as a marinade or topping for grilled fish or chicken breasts.
- Breakfast Boost:Spread a thin layer on toasted sourdough and top with scrambled eggs.
I once used a generous dollop of this tapenade mixed with a little mayonnaise to create an instant, incredible sandwich spread. It took the bland turkey and cheese sandwich from zero to hero in less than ten seconds. It is truly an ingredient that gives back ten times the effort you put in.
Storing & Reheating
Store your speedy tapenade in an airtight container in the refrigerator, ensuring you drizzle a thin layer of olive oil on top to prevent browning and keep it fresh. It will last beautifully for up to seven days. Simply allow the tapenade to come back to room temperature before serving to maximize the flavors.
Chef’s Insider Tips for Perfecting Your Instant Olive Dip
- Always use cold capers and olives directly from the jar; the low temperature helps maintain texture when pulsed in the food processor.
- If your tapenade tastes too bitter, balance it immediately by adding a few drops of maple syrup or honey to round out the strong olive and garlic flavors.
- Scrape down the sides of the food processor bowl between pulses. This ensures all the ingredients blend uniformly and prevents large chunks from being missed.
My family now demands this instant olive spread every time we host. They have no idea it took less time to prepare than it takes to preheat the oven; that’s the magic of the5 Minute Olive Tapenade.
Conclusion for 5 Minute Olive Tapenade
This lightning-fast5 Minute Olive Tapenadeproves that extraordinary flavor doesn’t require complex preparations or lengthy cooking times. By strategically using your food processor and focusing on high-quality ingredients like pungent Kalamata olives, salty capers, and fresh garlic, you can achieve a sophisticated, intensely flavorful spread in mere minutes. Whether you are facing a sudden influx of guests or simply need a punchy topping for your lunchtime routine, this tapenade is the perfect solution. Remember the secrets: sequence the blending carefully, adjust the acidity with lemon juice, and use extra virgin olive oil generously. Enjoy the sunshine on a plate!
Print
5 Minute Olive Tapenade
Ditch the store-bought spread! This vibrant 5 Minute Tapenade demands Kalamata olives, sharp capers, and a hint of anchovy. Just pulse quickly for a chunky, authentic texture.
- Total Time: 35 minutes
- Yield: 4 servings 1x
Ingredients
- 1 1/2 cups Kalamata olives (pitted)
- 2 tablespoons capers (drained)
- 2 cloves garlic
- 2 anchovy fillets (optional, but highly recommended for flavor)
- 1/4 cup extra virgin olive oil
- 1 tablespoon fresh lemon juice
- 1/4 teaspoon freshly ground black pepper
Instructions
- Step 1: Combine the olives, capers, garlic cloves, and anchovy fillets (if using) in the bowl of a small food processor.
- Step 2: Pulse the mixture 5 to 7 times until the ingredients are coarsely chopped and well combined. Ensure the mixture remains chunky and avoid processing it into a smooth paste.
- Step 3: Add the fresh lemon juice and ground black pepper. With the motor running, slowly drizzle in the extra virgin olive oil until the tapenade is just moistened and holds together.
- Step 4: Stop the processor, scrape down the sides of the bowl with a spatula, and taste the tapenade. Adjust with more pepper or lemon juice if desired (it should not require additional salt due to the olives and capers).
- Step 5: Transfer the finished tapenade to a small serving bowl. Serve immediately with crusty bread, crackers, or fresh vegetables.
Notes
- Store leftovers in an airtight container in the refrigerator for up to 5 days; pouring a thin layer of olive oil over the surface helps prevent oxidation and keeps the tapenade fresh.
- Tapenade is best served at room temperature, so remove it from the refrigerator 20-30 minutes before serving to let the flavors bloom and the olive oil soften up perfectly.
- Try using this rich tapenade as a savory boost for mains by spreading it thinly on grilled chicken or fish, or stirring a teaspoon into scrambled eggs.
- For the best flavor, don't skip the optional anchovy fillets; they melt away completely, providing necessary umami depth without adding a fishy taste.
- Prep Time: 15 minutes
- Cook Time: 20 minutes
- Method: Stovetop
- Cuisine: American


Leave a Comment