
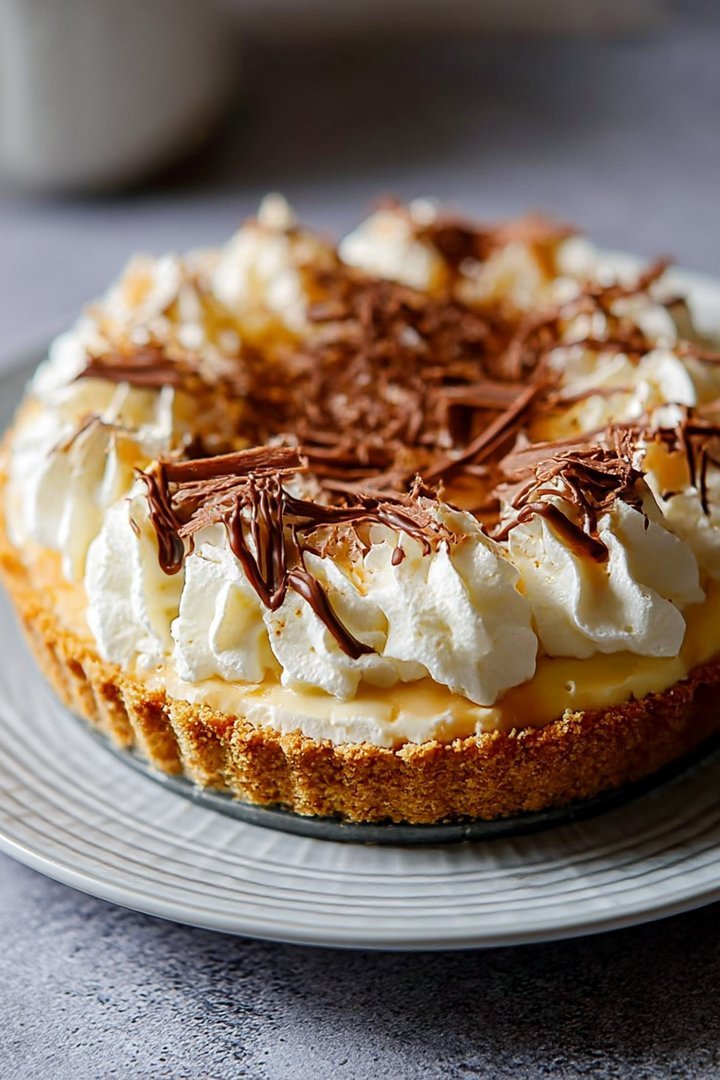
Ah, Banoffee Pie! Just the name conjures up images of sweet, sticky caramel, creamy bananas, and a buttery biscuit base that crumbles just so. It’s a symphony of textures and flavors that dance on your tongue, making you feel like you’ve won the dessert lottery.
Imagine biting into a slice of this decadent delight – the initial crunch of the base gives way to a soft banana layer, then the rich, gooey caramel embraces your palate before finally, the whipped cream provides a light and airy finish. It’s like a hug for your taste buds, perfect for any occasion where you need a little extra sweetness.
Here’s why you’ll fall head-over-heels for this recipe:
- This banoffee pie is so simple to make, even a dessert novice can whip it up with ease and impress everyone.
- The combination of sweet bananas, rich caramel, and a buttery crust creates an unforgettable explosion of flavors that will leave you craving more.
- With its beautiful layers and appealing toppings, this banoffee pie looks as good as it tastes, making it perfect for any celebration.
- You can customize this dessert with different toppings and variations to suit your personal taste preferences, ensuring that it’s always a crowd-pleaser.
Ingredients for Banoffee Pie
Here’s what you’ll need to make this delicious dish:
The full ingredients list, including measurements, is provided in the recipe card directly below.
How to Make Banoffee Pie
Follow these simple steps to prepare this delicious dish:
Step 1: Prepare the Biscuit Base
Crush the digestive biscuits into fine crumbs using a food processor or by placing them in a ziplock bag and crushing them with a rolling pin. Melt the butter in a saucepan or microwave, then mix it thoroughly with the biscuit crumbs until evenly moistened.
Step 2: Press the Base into the Tin
Press the biscuit mixture firmly into the base of a 9-inch pie dish or springform pan. Use the bottom of a measuring cup or your hands to create a smooth, even layer. Chill the base in the refrigerator for at least 30 minutes to allow it to set.
Step 3: Make the Caramel
Pour the sweetened condensed milk and brown sugar into a saucepan over medium heat. Stir continuously until the sugar has dissolved and the mixture begins to simmer. Reduce the heat to low and continue to stir for about 20-25 minutes, or until the caramel has thickened and turned a deep golden brown color. Be careful not to burn it, patience is key.
Step 4: Assemble the Pie
Remove the biscuit base from the refrigerator. Slice the bananas and arrange them evenly over the base. Pour the caramel sauce over the bananas, ensuring they are fully covered. Allow the pie to cool for at least 2 hours, or preferably overnight, in the refrigerator.
Step 5: Add the Finishing Touches
Just before serving, whip the double cream with vanilla extract until soft peaks form. Spread the whipped cream evenly over the caramel layer. Sprinkle chocolate shavings over the top for a final flourish.
Step 6: Serve and Enjoy
Slice the banoffee pie into wedges and serve chilled. Enjoy the delightful combination of flavors and textures!
Perfecting the Cooking Process
To ensure your Banoffee Pie turns out perfectly, begin by chilling the crust thoroughly. While it chills, prepare the caramel filling to allow it time to cool and thicken. Finally, layer with bananas and whipped cream just before serving to prevent soggy fruit.
Add Your Touch
Feel free to experiment with different crusts. A gingersnap crust would add a spicy kick! For a tropical twist, consider adding a hint of lime zest to the whipped cream. You could also sprinkle chocolate shavings on top for extra richness.
Storing & Reheating
Banoffee Pie is best enjoyed fresh, but if you have leftovers, store them in the refrigerator for up to 24 hours. Unfortunately, reheating is not recommended, as the whipped cream and bananas will not hold up well. Enjoy it cold!
Banoffee Bliss: Top Tips for Pie Perfection
- Make sure your caramel is thick enough by testing a small spoonful on a cold plate; it should set softly.
- To prevent browning, toss your sliced bananas with a little lemon juice before adding them to the pie.
- Don’t over whip the cream; aim for soft peaks to create a light and airy topping.
(Personal anecdote)
I still remember the first time I made this for my friend’s birthday. It was gone in minutes! Everyone raved about the creamy texture and rich caramel flavor. It’s been a dessert staple ever since.
Banoffee Pie: A Culinary Comedy of Errors (and Deliciousness!)
Alright, folks, gather ’round, because we’re about to embark on a culinary adventure filled with creamy caramel, sweet bananas, and a whole heap of deliciousness. We’re talking about Banoffee Pie. Now, I know what you’re thinking: “Banoffee Pie? Sounds fancy.” And you’re not entirely wrong. It *looks* fancy. But trust me, if I can make it without setting the kitchen on fire, you absolutely can too. It’s a surprisingly simple dessert that’s guaranteed to impress.
This isn’t just any dessert; it’s a love story between a buttery biscuit base, a ridiculously rich caramel filling (that we’ll make from scratch, because we’re fancy like that), layers of perfectly ripe bananas, and a cloud of whipped cream so light it practically floats off the plate. It’s a symphony of textures and flavors that dance on your tongue, leaving you begging for more.
And let’s be honest, who doesn’t love a good pie? It’s the ultimate comfort food, a sweet escape from the mundane, a sugary hug in a dish. And this Banoffee Pie? It’s the king of all pies, the crème de la crème, the… okay, I’ll stop. I’m getting carried away. But seriously, this pie is *good*.
The Crust: The Foundation of Flavor
First, let’s talk about the crust. Now, you *could* buy a pre-made graham cracker crust. But where’s the fun in that? Plus, homemade always tastes better. So, we’re going to make our own biscuit base that will make your taste buds sing.
This crust is ridiculously easy to make. Think of it as adult play-doh, only instead of making lopsided animals, you’re creating a buttery, crumbly canvas for all that glorious filling. If you’re feeling adventurous, you can add a pinch of cinnamon or some finely chopped nuts to the mix. Get creative! It’s your pie, after all.
The Caramel: Liquid Gold
Now, for the star of the show: the caramel. This isn’t your average, store-bought caramel. We’re talking about homemade, melt-in-your-mouth, ridiculously decadent caramel. And yes, I know making caramel can seem intimidating. Visions of burnt sugar and sticky messes probably dance in your head. But fear not! I’m here to guide you through the process, step-by-step, so you can achieve caramel perfection without any kitchen catastrophes.
The secret to perfect caramel is patience. You can’t rush it. You need to let the sugar melt slowly, swirling it gently until it transforms into a beautiful, amber-colored liquid. And don’t even *think* about stirring it with a spoon! That’s a recipe for disaster. Trust me, I’ve been there. It is a sticky situation you definitely want to avoid.
Once the sugar is melted, you’ll add in some butter and cream, and that’s when the magic really happens. The mixture will bubble and froth, filling your kitchen with the most amazing aroma. At this point, you’ll want to resist the urge to stick your face in the pot. It’s hot! But seriously, the smell is intoxicating.
Bananas: The Underappreciated Heroes
Now, let’s talk bananas. I know, I know, they’re just bananas. But in this pie, they’re so much more. They’re the perfect counterpoint to the rich caramel, adding a touch of sweetness and a creamy texture that ties everything together.
The key is to use perfectly ripe bananas. Not too green, not too brown. Just right. You want them to be soft enough to mash slightly, but firm enough to hold their shape. And be sure to slice them evenly so each bite is perfectly balanced. You don’t want any rogue banana chunks throwing off the flavor equilibrium.
Whipped Cream: The Crowning Glory
Finally, we have the whipped cream. This isn’t just any whipped cream. It’s light, airy, and slightly sweetened, the perfect finishing touch to our masterpiece. And the best part? It’s incredibly easy to make.
Forget the store-bought stuff. We’re making our own! All you need is some heavy cream, a little sugar, and a whisk. And a little elbow grease. Okay, maybe a lot of elbow grease. But trust me, it’s worth it. There’s nothing quite like a dollop of freshly whipped cream.
Assembling the Masterpiece: A Step-by-Step Guide
Alright, now that we’ve tackled each component separately, it’s time to bring it all together. This is where the magic really happens. Think of yourself as a culinary artist, carefully layering each element to create a masterpiece of flavor and texture.
First, spread that glorious caramel over the cooled biscuit base. Make sure it’s nice and even, covering every inch of that buttery goodness. Then, arrange the sliced bananas over the caramel, creating a beautiful mosaic of fruity goodness. Finally, top it all off with a generous dollop of whipped cream, swirling it artfully across the surface.
And there you have it: Banoffee Pie perfection. Now, go forth and conquer the dessert world!
Banoffee Pie Recipe
Here is the recipe for the best Banoffee Pie.
Ingredients:
- **For the Crust:**
- 1 1/2 cups biscuit crumbs (about 25 biscuits)
- 1/2 cup (1 stick) unsalted butter, melted
- 2 tablespoons granulated sugar
- **For the Caramel:**
- 1 cup granulated sugar
- 1/2 cup unsalted butter, cut into pieces
- 1/2 cup heavy cream
- 1/4 teaspoon sea salt
- **For the Filling:**
- 3-4 ripe bananas, sliced
- 2 tablespoons lemon juice (to prevent browning)
- **For the Whipped Cream:**
- 1 1/2 cups heavy cream
- 2 tablespoons powdered sugar
- 1 teaspoon vanilla extract
Instructions:
1. **Make the Crust: ** In a medium bowl, combine the biscuit crumbs, melted butter, and granulated sugar. Press the mixture firmly into the bottom of a 9-inch pie plate. Chill in the refrigerator for at least 30 minutes.
2. **Make the Caramel: ** In a medium saucepan, melt the granulated sugar over medium heat, swirling occasionally, until it turns into a golden amber color. Add the butter and stir until melted and smooth. Gradually pour in the heavy cream, stirring constantly. Be careful, as the mixture will bubble up. Stir in the sea salt. Reduce heat to low and simmer for 5-7 minutes, or until the caramel has thickened. Remove from heat and let cool slightly.
3. **Assemble the Pie: ** Pour the caramel over the chilled crust. Arrange the sliced bananas over the caramel, tossing them with lemon juice first. In a large bowl, whip the heavy cream with powdered sugar and vanilla extract until soft peaks form. Spread the whipped cream evenly over the bananas.
4. **Chill and Serve: ** Refrigerate the pie for at least 2 hours before serving. This allows the caramel to set and the flavors to meld together. Enjoy!
Substitutions and Variations: Let Your Creativity Shine
Now, I’m a firm believer in following recipes… to a point. Once you’ve mastered the basics, it’s time to let your creativity shine! This Banoffee Pie recipe is a great starting point, but feel free to experiment with different flavors and textures to make it your own.
- **Crust Variations:** Try using different kinds of biscuits for the crust. Gingersnaps, chocolate wafers, or even gluten-free biscuits would all work well. You could also add some chopped nuts or spices to the crust mixture for extra flavor.
- **Caramel Variations:** If you’re feeling adventurous, try adding a splash of vanilla extract or a pinch of sea salt to the caramel. You could also use brown sugar instead of granulated sugar for a deeper, more molasses-like flavor.
- **Filling Variations:** Not a fan of bananas? Blasphemy! Just kidding. You could try using other fruits like berries, peaches, or apples. Just be sure to adjust the sweetness accordingly.
- **Whipped Cream Variations:** For an extra touch of flavor, try adding a splash of flavored extract (like almond or peppermint) to the whipped cream. You could also sprinkle some chocolate shavings, chopped nuts, or cocoa powder on top.
Troubleshooting Tips: Avoiding Kitchen Catastrophes
Even the most experienced cooks run into trouble sometimes. So, if you’re having a Banoffee Pie emergency, don’t panic! I’m here to help.
- **Caramel Too Runny:** If your caramel is too runny, it probably hasn’t cooked long enough. Return it to the heat and simmer for a few more minutes, stirring constantly, until it thickens up.
- **Caramel Too Hard:** If your caramel is too hard, you may have overcooked it. Add a tablespoon or two of heavy cream and stir until it softens up.
- **Bananas Browning:** To prevent the bananas from browning, toss them with lemon juice before arranging them on the pie.
- **Whipped Cream Not Whipping:** If your whipped cream isn’t whipping, make sure your bowl and beaters are cold. You can also try adding a tablespoon of powdered sugar to help stabilize the cream.
Banoffee Pie: A Dessert for Every Occasion
Whether you’re celebrating a special occasion or just craving a sweet treat, Banoffee Pie is the perfect dessert. It’s easy to make, impressive to look at, and utterly delicious. Plus, it’s a guaranteed crowd-pleaser. So, what are you waiting for? Get baking!
Conclusion for Banoffee Pie :
In conclusion, this Banoffee Pie recipe is a guaranteed crowd-pleaser. With its simple ingredients, easy-to-follow instructions, and customizable variations, it’s perfect for any occasion. Remember to blind-bake your crust, prepare your caramel with love (and maybe a sprinkle of sea salt), and don’t skimp on the whipped cream. So go ahead, grab your ingredients, and get ready to bake a pie that will have everyone begging for more! Enjoy the delicious journey of crafting this delightful dessert!
Print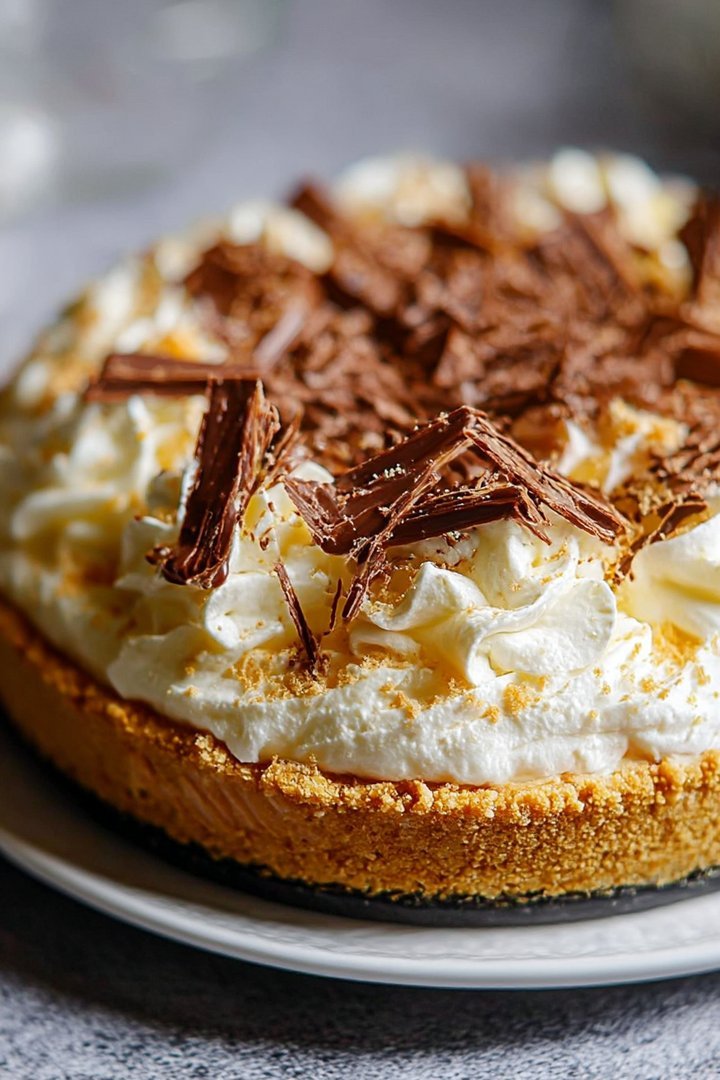
Banoffee Pie
Delicious banoffee pie recipe with detailed instructions and nutritional information.
- Total Time: 35 minutes
- Yield: 4 servings
Ingredients
- Digestive biscuits: 250g
- Unsalted butter: 125g, melted
- Sweetened condensed milk: 397g tin
- Unsalted butter: 50g
- Soft light brown sugar: 50g
- Bananas: 2-3, depending on size
- Double cream: 300ml
- Milk chocolate: 50g, grated (optional)
Instructions
- Step 1: Crush the digestive biscuits in a food processor or in a plastic bag with a rolling pin until they resemble fine crumbs. Mix the crumbs with the melted butter until well combined. Press the mixture evenly into the base of a 23cm loose-bottomed tart tin. Chill in the fridge for at least 30 minutes.
- Step 2: While the base is chilling, make the caramel. In a saucepan, melt the 50g butter over a medium heat. Add the light brown sugar and stir until dissolved. Pour in the sweetened condensed milk and bring to a simmer, stirring constantly. Reduce the heat and continue to simmer for 10-15 minutes, stirring frequently, until the caramel has thickened and darkened in colour. Be careful not to burn it.
- Step 3: Pour the caramel over the chilled biscuit base and spread evenly. Allow to cool completely and set in the fridge for at least 1 hour, or preferably longer.
- Step 4: Just before serving, peel and slice the bananas. Arrange the banana slices over the caramel.
- Step 5: Whip the double cream until it forms soft peaks. Spread or pipe the cream over the bananas.
- Step 6: Grate milk chocolate over the top of the cream for decoration, if desired. Serve immediately.
Notes
- Store leftover banoffee pie in the fridge, but know the banana layer will soften over time.
- This pie is best served fresh, so avoid reheating and instead enjoy at room temperature.
- A sprinkle of sea salt on top of the caramel beautifully complements the sweetness of the pie.
- For a richer caramel, simmer it for the full 15 minutes, watching closely to prevent burning.
- Prep Time: 15 minutes
- Cook Time: 20 minutes
- Method: Stovetop
- Cuisine: American
FAQs :
What makes this Banoffee Pie recipe so ridiculously good?
Okay, picture this: a buttery biscuit base that’s like a hug for your taste buds. Then, a layer of rich, homemade caramel so decadent it’ll make you question all your life choices (in a good way, of course!). Finally, it is topped with perfectly ripe bananas and a cloud of whipped cream. This banoffee pie is not just a dessert; it’s an experience. We’ve tweaked the traditional recipe to ensure maximum flavor without any unnecessary ingredients. It’s the kind of pie that disappears in minutes, leaving behind only smiles and empty plates. Trust me, you need this in your life.
Can I make this Banoffee Pie ahead of time?
Absolutely! In fact, I highly recommend it. The biscuit base and caramel layer can be prepared up to two days in advance. Just store them separately in airtight containers at room temperature. The bananas and whipped cream should be added closer to serving time to prevent the bananas from browning and the cream from deflating. This makes it a perfect dessert for entertaining because you can focus on other things without worrying about a last-minute dessert disaster. Plus, chilling the pie allows the flavors to meld together beautifully, resulting in an even more delicious treat.
What are some variations I can try with this Banoffee Pie recipe?
Oh, the possibilities are endless! If you are feeling adventurous, try adding a sprinkle of sea salt to the caramel for a salted caramel banoffee pie. Or, for a chocolatey twist, drizzle melted dark chocolate over the bananas before adding the whipped cream. You could also experiment with different types of biscuits for the base, like graham crackers or digestive biscuits. Another fun idea is to incorporate chopped nuts, such as pecans or walnuts, into the biscuit base for added texture and flavor. Let your creativity run wild and create a unique banoffee pie that’s all your own.
How do I prevent my Banoffee Pie crust from becoming soggy?
Ah, the dreaded soggy bottom! Fear not, my friend, for I have a solution. The key is to blind-bake the biscuit base before adding the filling. This means baking the crust on its own until it’s golden brown and slightly firm. To prevent it from puffing up during baking, prick the bottom with a fork and weigh it down with baking beans or dried rice. Once baked, let it cool completely before adding the caramel layer. This will create a sturdy barrier that prevents the moisture from the filling from seeping into the crust.


Leave a Comment