
Ah, pumpkin pie. The mere mention of it conjures images of crackling fireplaces, cozy sweaters, and the comforting aroma of cinnamon and spice wafting through the air. It’s not just a dessert; it’s a symbol of warmth, togetherness, and that feeling of utter bliss after a satisfying meal.
This isn’t just any pumpkin pie recipe; it’s *the* pumpkin pie recipe to impress your guests. A masterpiece that balances creamy texture with a rich, spiced flavor that will have everyone clamoring for seconds, whether it’s Thanksgiving or a casual get-together.
Why you absolutely *need* this recipe:
- Effortless Preparation: This recipe comes together with minimal fuss, allowing you more time to enjoy the party.
- Divine Flavor Profile: A harmonious blend of pumpkin, warm spices, and a hint of vanilla creates an unforgettable taste.
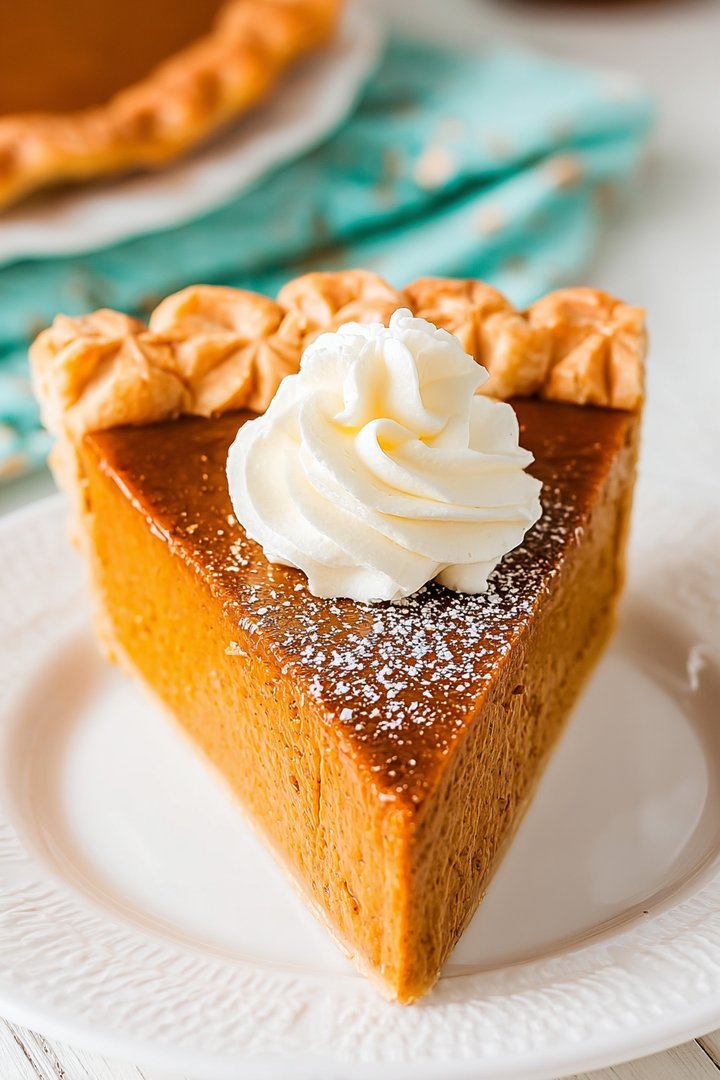
- Stunning Visual Appeal: The golden-brown, perfectly set filling is a feast for the eyes, as good as it tastes.
- Incredible Versatility: Enjoy it warm, cold, or with a dollop of whipped cream; it’s amazing.
Ingredients for The Best Pumpkin Pie Recipe to Impress Your Guests
Here’s what you’ll need to make this delicious dish:
The full ingredients list, including measurements, is provided in the recipe card directly below.
How to Make The Best Pumpkin Pie Recipe to Impress Your Guests
Follow these simple steps to prepare this delicious dish:
Step 1: Prepare the Pie Crust
Preheat oven to 375°F (190°C). If you’re using a store-bought pie crust, remove it from the refrigerator and let it sit at room temperature for about 15 minutes to soften slightly. Place the crust in a 9-inch pie plate and crimp the edges for a decorative finish.
Step 2: Mix the Filling Ingredients
In a large bowl, whisk together the pumpkin puree, evaporated milk, eggs, brown sugar, granulated sugar, cinnamon, ginger, nutmeg, cloves, salt, and vanilla extract until the mixture is smooth and well combined. Ensure there are no lumps for a silky texture.
Step 3: Pour Filling into Crust
Gently pour the pumpkin pie filling into the prepared pie crust. Be careful not to overfill it; leave about a 1/4-inch space from the top edge to prevent spills during baking.
Step 4: Bake the Pie
Place the pie in the preheated oven and bake for 50-60 minutes, or until the filling is set but still has a slight jiggle in the center. To prevent the crust from browning too quickly, you can cover the edges with foil during the last 20 minutes of baking.
Step 5: Cool and Refrigerate
Remove the pie from the oven and let it cool completely on a wire rack. Once cooled, cover it with plastic wrap and refrigerate for at least 2 hours to allow the filling to set completely.
Step 6: Serve and Enjoy
Slice the pie and serve chilled or at room temperature. For an extra touch, garnish each slice with a dollop of whipped cream or a sprinkle of cinnamon. Enjoy every bite of this amazing pumpkin pie!
Perfecting the Cooking Process
For pie perfection, remember to pre-bake your crust to avoid a soggy bottom. Next, gently mix your pumpkin filling to prevent overmixing. This ensures a silky-smooth texture. Finally, check for doneness by inserting a knife into the center – it should come out clean!
Add Your Touch
Feeling adventurous? A dash of cinnamon or nutmeg can add warmth. For a richer flavor, try brown sugar instead of white. Add chopped pecans or walnuts for an extra layer of nutty deliciousness. The possibilities are endless. Personalize your pumpkin pie!
Storing & Reheating
To keep your pie fresh, store it in the refrigerator, covered, for up to three days. Reheat individual slices in the microwave for 30-45 seconds. For a warmed-through pie, bake at 350°F (175°C) for 10-15 minutes.
Here are some tips for a truly fantastic pumpkin pie experience:
- Don’t overfill your pie crust; leave about a quarter-inch of space at the top to prevent spillage during baking.
- Use room temperature ingredients for a smoother filling that blends together more evenly, resulting in a better texture.
- Let the pie cool completely before slicing. This helps the filling set properly, giving you clean, beautiful slices every time.
(Personal anecdote formated as paragraph subheading)
I remember when I first made this pie for Thanksgiving, my picky Uncle George actually asked for a second slice. That’s when I knew I’d truly nailed it!
Decoding The Best Pumpkin Pie Recipe to Impress Your Guests: A Journey of Flavors
Ah, pumpkin pie! The quintessential dessert that screams autumn. Forget the bland, store-bought versions – we’re diving headfirst into crafting the best pumpkin pie recipe to impress your guests! This isn’t just any recipe; it’s a culinary adventure filled with laughter, maybe a few mishaps, and ultimately, a pie that will have everyone begging for seconds. Consider this your trusty guide as we embark on a journey to pie perfection! We are ready to make the best pumpkin pie for everyone’s enjoyment.
The Quest Begins: Gathering Your Pumpkin Pie Arsenal
First, let’s gather our ingredients. Think of it as assembling your superhero team – each player has a crucial role. We’re talking about the usual suspects, but with a few secret weapons thrown in to elevate our pie to legendary status.
You will need:
- **Pumpkin Puree:** The heart and soul of our pie. Make sure it’s 100% pumpkin, not pumpkin pie filling (that stuff is pre-sweetened and spiced – we want to control the flavors ourselves!)
- **Evaporated Milk:** This adds creaminess without being overly rich. You can substitute with full fat coconut milk for a dairy-free alternative.
- **Eggs:** These bind everything together and give the pie its beautiful texture.
- **Sugar:** A mix of granulated and brown sugar adds depth and warmth. The brown sugar brings a molasses-like flavor that complements the pumpkin perfectly.
- **Spices:** Cinnamon, ginger, nutmeg, and cloves. This is where the magic happens! Don’t be afraid to experiment with the ratios to find your perfect blend.
- **Vanilla Extract:** A touch of vanilla enhances all the other flavors.
- **Salt:** A pinch of salt balances the sweetness and brings out the spices.
- **Pie Crust:** You can use a store-bought crust (no judgment!) or make your own. A homemade crust adds that extra layer of love (and bragging rights).
The Secret Weapon: Elevating Your Pumpkin Pie Game
Now, for the secret weapon! A tablespoon of apple cider vinegar. Yes, you read that right! It brightens the flavors and adds a subtle tang that cuts through the sweetness. Trust me on this one – it’s a game-changer.
Think of it like this: you want a pie that whispers sweet nothings of autumn delight into the ears of your guests. The apple cider vinegar is the secret note that makes them swoon.
Crafting The Best Pumpkin Pie Filling Recipe: A Symphony of Spices
Alright, let’s get down to business. In a large bowl, whisk together the pumpkin puree, evaporated milk, eggs, sugars, vanilla extract, apple cider vinegar, salt, and spices. Mix until everything is smooth and well combined.
Don’t overmix! Overmixing can incorporate too much air, which can lead to cracks in your pie during baking. Aim for a smooth, even consistency.
The Art of the Blind Bake: Preventing Soggy Bottoms
If you’re using a homemade crust (bravo!), or even a store-bought one, blind baking is key to preventing a soggy bottom. Line the crust with parchment paper, fill it with pie weights (or dried beans – they work just as well), and bake at 375°F (190°C) for 15 minutes. Remove the weights and parchment paper and bake for another 5-10 minutes, or until the crust is lightly golden brown.
This ensures a crisp, sturdy base for your delicious filling. No one wants a soggy bottom!
Pouring Perfection: Filling and Baking Your Pumpkin Masterpiece
Carefully pour the pumpkin filling into the prepared crust. Fill it almost to the top, leaving a little room for expansion during baking.
Bake at 350°F (175°C) for 50-60 minutes, or until the filling is set but still has a slight jiggle in the center. This jiggle is important – it means the pie is perfectly moist and creamy.
The Jiggle Test: Knowing When Your Pie is Ready for Stardom
The jiggle test is crucial! If the entire pie is solid, it’s likely overbaked and will be dry. You want a slight wiggle in the center.
If the crust starts to brown too quickly, you can cover it with foil. This will prevent it from burning while the filling finishes baking.
Cooling Down: The Patience Game
Once the pie is baked, let it cool completely on a wire rack. This can take several hours, so plan ahead. As the pie cools, the filling will continue to set, resulting in a firmer, more sliceable pie.
Resist the urge to cut into it while it’s still warm! I know, it’s tempting, but trust me – it’s worth the wait.
Serving Suggestions: The Grand Finale
Now for the best part – serving your masterpiece! A dollop of whipped cream is a classic pairing. Or, for a dairy-free option, try coconut whipped cream. A sprinkle of cinnamon or nutmeg adds a touch of elegance.
And there you have it! The best pumpkin pie recipe to impress your guests. Enjoy!
Troubleshooting Your Pumpkin Pie Adventures
Even the best chefs face occasional hiccups. Here are some common pumpkin pie problems and how to solve them:
- **Cracked Pie:** This is usually caused by overbaking or rapid temperature changes. To prevent cracks, avoid overbaking and let the pie cool slowly.
- **Soggy Crust:** Blind baking is your best defense against a soggy crust. Also, make sure to cool the pie completely before slicing.
- **Gummy Filling:** This can be caused by overmixing or using too much liquid. Be sure to mix the filling gently and use the correct ratios of ingredients.
Variations on a Theme: Pumpkin Pie Remixes
Want to get creative? Here are some fun variations on the classic pumpkin pie:
- **Chocolate Pumpkin Pie:** Add melted dark chocolate to the filling for a rich, decadent twist.
- **Maple Pumpkin Pie:** Use maple syrup instead of sugar for a naturally sweet and earthy flavor.
- **Spiced Pumpkin Pie:** Add a pinch of cayenne pepper for a subtle kick.
The Legacy of Your Pie: Creating Memories, One Slice at a Time
The true magic of pumpkin pie isn’t just in the taste; it’s in the memories it creates. It’s the laughter shared around the table, the warm feeling of togetherness, and the joy of indulging in something truly special. So go forth, bake your heart out, and create a pie that will be remembered for years to come.
Conclusion for The Best Pumpkin Pie Recipe to Impress Your Guests :
In short, this recipe aims to be more than just a set of instructions; it’s a guide to creating a memorable dessert that will be a showstopper. Remember, a well-made pumpkin pie isn’t just about following the directions. It’s about embracing the spirit of the season, adding your own personal flair, and sharing a delicious treat with those you care about. So go forth, bake boldly, and prepare to be showered with compliments. With this recipe, the glory of perfect pumpkin pie will be yours!
Print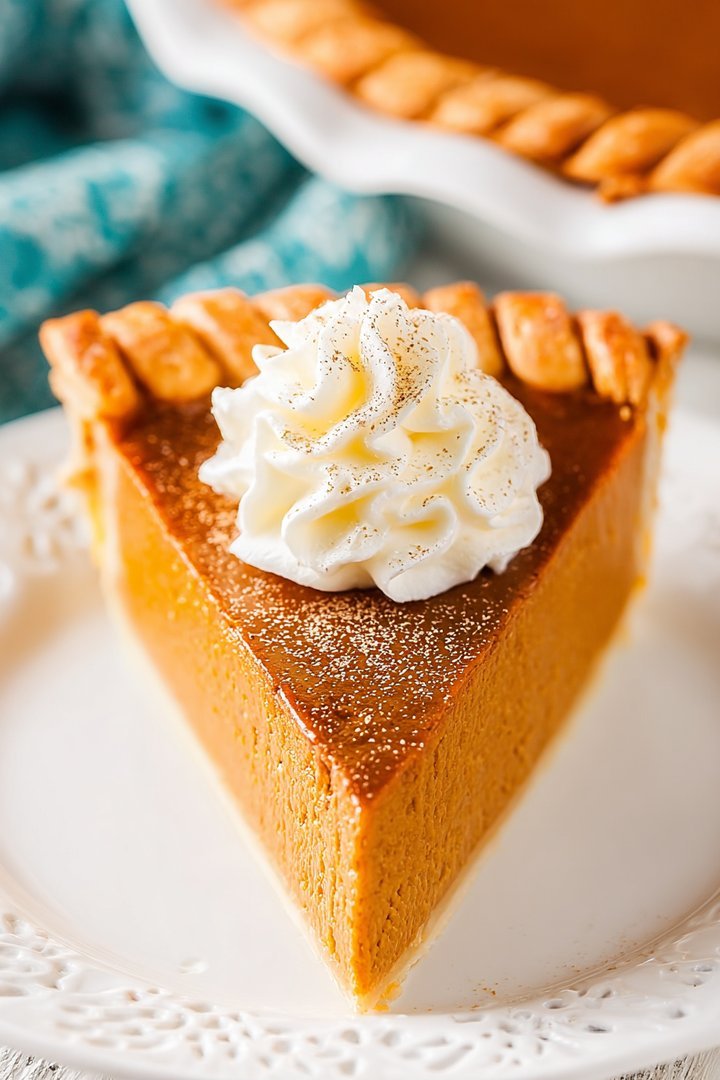
The Best Pumpkin Pie Recipe to Impress Your Guests
Delicious the best pumpkin pie recipe to impress your guests recipe with detailed instructions and nutritional information.
- Total Time: 35 minutes
- Yield: 4 servings
Ingredients
- Pumpkin puree: 1 (15 ounce) can
- Sweetened condensed milk: 1 (14 ounce) can
- Eggs: 2 large
- Pumpkin pie spice: 1 teaspoon
- Ground cinnamon: 1/2 teaspoon
- Salt: 1/4 teaspoon
- Vanilla extract: 1 teaspoon
- Refrigerated pie crust: 1 (9 inch)
Instructions
- Step 1: Preheat oven to 425 degrees F (220 degrees C). Place the pie crust in a 9-inch pie plate. Crimp the edges decoratively.
- Step 2: In a large bowl, combine the pumpkin puree, sweetened condensed milk, eggs, pumpkin pie spice, cinnamon, salt, and vanilla extract. Mix until smooth and well combined.
- Step 3: Pour the pumpkin mixture into the prepared pie crust.
- Step 4: Bake for 15 minutes at 425 degrees F (220 degrees C).
- Step 5: Reduce the oven temperature to 350 degrees F (175 degrees C) and bake for an additional 40-50 minutes, or until a knife inserted near the center comes out clean.
- Step 6: Let cool completely on a wire rack before serving. Refrigerate any leftovers.
Notes
- Store leftover pie in the refrigerator, loosely covered, for up to 3 days.
- For a warm slice, gently reheat individual portions in the microwave in 30-second intervals until heated through.
- Serve each slice with a dollop of freshly whipped cream or a scoop of vanilla ice cream for a delightful finish.
- To prevent cracking, place a pan of water on the lower rack of the oven while baking at 350°F for added moisture.
- Prep Time: 15 minutes
- Cook Time: 20 minutes
- Method: Stovetop
- Cuisine: American
FAQs :
How do I prevent my pumpkin pie from cracking on top?
Ah, the dreaded pie crack! It’s like the Grand Canyon of desserts, but less impressive and more…crumbly. The secret? Don’t overbake it! Overbaking causes the pie to dry out and contract, leading to those unsightly fissures. Start checking for doneness about 10 minutes before the recipe suggests. The filling should be set around the edges but still have a slight jiggle in the center. Think of it as a gentle shimmy, not a full-on earthquake. Cooling it slowly also helps prevent cracks; let it cool gradually on a wire rack.
Can I use fresh pumpkin instead of canned for this Best Pumpkin Pie?
Absolutely! If you’re feeling ambitious and want to embrace the “farm-to-table” vibe, go for it. Roast your pumpkin until it’s soft, then scoop out the flesh and puree it. Keep in mind that fresh pumpkin can be a bit more watery than canned, so you might need to strain the puree through cheesecloth to remove excess moisture. A drier puree will help prevent a soggy bottom. Plus, roasting your own pumpkin gives you major bragging rights. Just imagine casually mentioning at the dinner table, “Oh, this pie? Yeah, I grew the pumpkin myself.” Instant culinary superhero status!
What’s the best way to store leftover pumpkin pie?
First, congratulations on having leftover pie! That’s a rare and wonderful occurrence. To keep your pumpkin pie tasting its best, store it in the refrigerator. Cover it loosely with plastic wrap or place it in an airtight container. This prevents the filling from drying out and absorbing any funky fridge odors. It’ll happily hang out in the fridge for up to three to four days, ready for a sneaky midnight snack or a well-deserved second slice. After that, the crust might start to get a little soggy, and nobody wants a soggy bottom.
Can I make this Best Pumpkin Pie Recipe ahead of time?
You bet! Pumpkin pie is actually a fantastic make-ahead dessert. The flavors meld together beautifully as it sits in the fridge, creating an even richer, more delicious experience. Bake the pie one or two days before you plan to serve it. Let it cool completely, then wrap it well and refrigerate. On the day of, simply slice and serve! This also takes a ton of pressure off you when you’re juggling a million other dishes for a big gathering. Think of it as your culinary secret weapon for a stress-free holiday.

Leave a Comment