
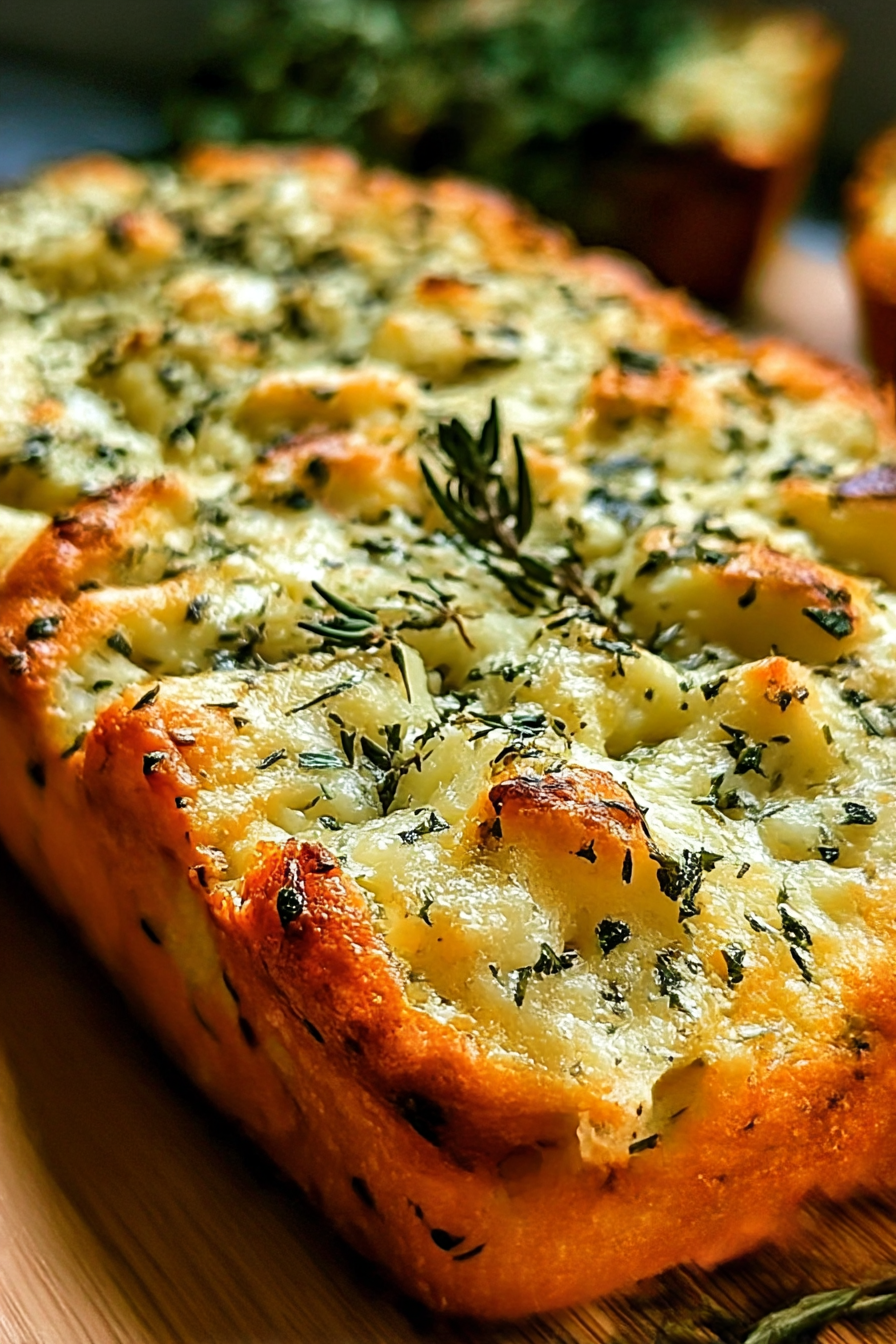
Imagine biting into a warm, savory slice of bread, the aroma of fresh herbs dancing in the air. This isn’t just any bread; it’s an Herb & Cheese Quick Bread, a symphony of flavors baked to golden perfection.
This quick bread is more than just a recipe; it’s an invitation to create moments of comfort and joy. Its ease of preparation makes it perfect for any occasion, from casual brunches to cozy weeknight dinners.
Here’s why you’ll adore this Herb & Cheese Quick Bread:
- Whip it up in under an hour, making it the ultimate last-minute baking project for busy days and unexpected guests.
- The combination of fragrant herbs and savory cheese creates an irresistible flavor profile that will leave everyone wanting more.
- Its rustic appearance, with a golden crust and speckled herbs, makes it a stunning addition to any table spread.
- Enjoy it warm with butter, use it for sandwiches, or serve it alongside soup or salad; it’s incredibly versatile.
Ingredients for Herb & Cheese Quick Bread
Here’s what you’ll need to make this delicious dish:
The full ingredients list, including measurements, is provided in the recipe card directly below.
How to Make Herb & Cheese Quick Bread
Follow these simple steps to prepare this delicious dish:
Step 1: Get Ready to Bake
Preheat your oven to 350°F (175°C). Grease and flour a 9×5 inch loaf pan to prevent the bread from sticking. Alternatively, you could line the pan with parchment paper, leaving an overhang for easy removal.
Step 2: Mix the Dry Squad
In a large bowl, whisk together the flour, baking powder, salt, and sugar. Make sure there are no lumps of baking powder remaining. This ensures even distribution and a good rise for your bread.
Step 3: Wet Ingredients Join the Party
In a separate bowl, whisk together the eggs, milk, and olive oil. Make sure the eggs are well combined to create a smooth mixture. This helps incorporate air and creates a tender crumb.
Step 4: Combine and Conquer
Pour the wet ingredients into the dry ingredients and stir until just combined. Be careful not to overmix, as this can result in a tough bread. A few streaks of flour are okay at this stage.
Step 5: Herb and Cheese Extravaganza
Gently fold in the fresh herbs and shredded cheese. Distribute evenly throughout the batter. This will ensure that every slice of bread is packed with flavor.
Step 6: Bake to Golden Perfection
Pour the batter into the prepared loaf pan and bake for 50-60 minutes, or until a toothpick inserted into the center comes out clean. If the top starts to brown too quickly, you can tent it with foil during the last 15 minutes of baking.
Step 7: Cool and Enjoy
Let the bread cool in the pan for 10 minutes before transferring it to a wire rack to cool completely. This prevents the bread from becoming soggy. Slice and serve warm with butter or your favorite spread.
Perfecting the Cooking Process

For the best results with this herb and cheese quick bread, mix the dry ingredients first, then gently fold in the wet. Bake immediately to ensure the leavening agents work their magic without delay, creating a perfect rise and texture.
Add Your Touch
Feel free to experiment with different cheeses like Gruyere or Monterey Jack for unique flavor profiles. Add sun-dried tomatoes or roasted garlic for an extra savory kick. A sprinkle of red pepper flakes can also introduce a pleasant hint of spice.
Storing & Reheating
Wrap the cooled herb and cheese quick bread tightly in plastic wrap or store it in an airtight container at room temperature for up to three days. To reheat, slice and toast lightly for a warm, crusty treat that tastes fresh.
Here are a few golden nuggets of wisdom to elevate your herb & cheese quick bread game:
- Don’t overmix the batter; a few lumps are fine! Overmixing develops the gluten, leading to a tough, less tender bread.
- Make sure your baking powder is fresh. Test a small amount in hot water; it should bubble vigorously.
- For an extra golden crust, brush the top with melted butter or olive oil before baking. It adds flavor and visual appeal.
(Personal anecdote formated as paragraph subheading)
I once brought this bread to a potluck, and it was gone within minutes! My friend swore I bought it from a fancy bakery. That’s when I knew this recipe was a keeper!
Conclusion for Herb & Cheese Quick Bread :
This Herb & Cheese Quick Bread is a winner! Quick to make, adaptable to your taste, and utterly delicious, it’s a recipe you’ll return to again and again. With its savory flavor and satisfying texture, it’s perfect as a side to soups, salads, or simply enjoyed on its own with a smear of butter. Experiment with different herbs and cheeses to create your signature loaf, and don’t be surprised when it disappears in minutes. Enjoy the delightful simplicity of homemade goodness!
Print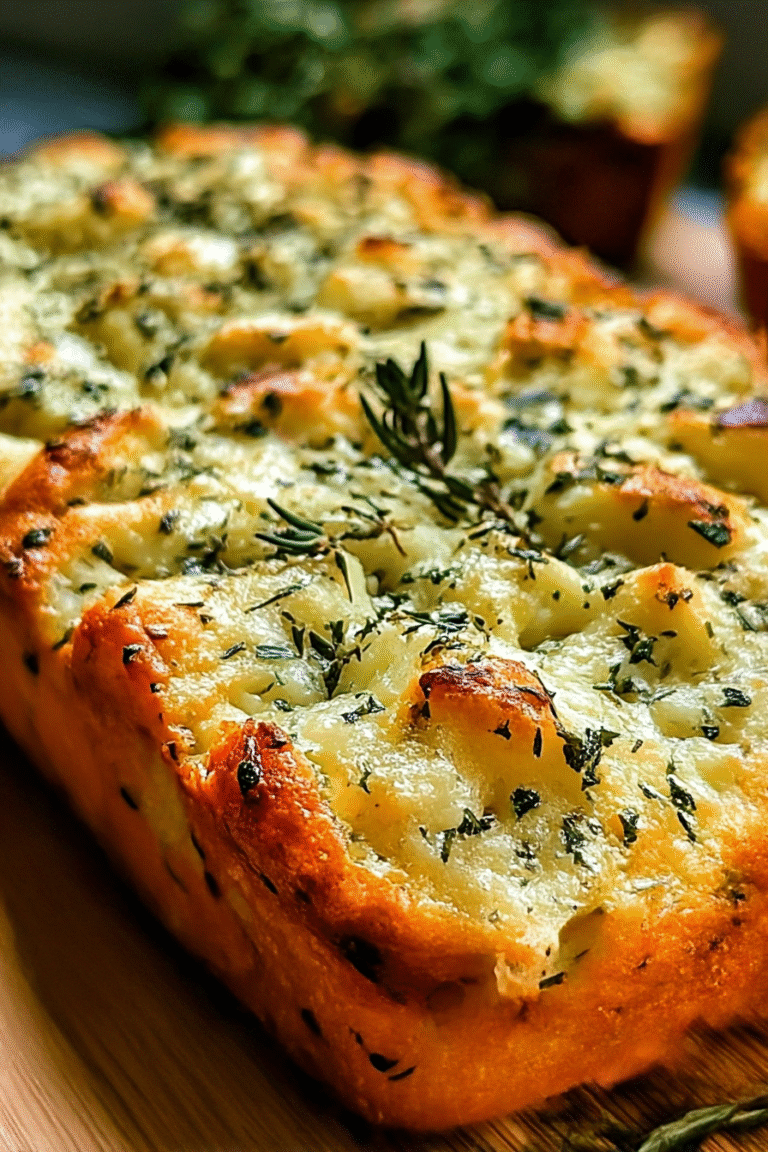
Herb & Cheese Quick Bread
Delicious herb & cheese quick bread recipe with detailed instructions and nutritional information.
- Total Time: 35 minutes
- Yield: 4 servings
Ingredients
- All-purpose flour: 3 cups
- Baking powder: 4 teaspoons
- Salt: 1 teaspoon
- Sugar: 1 tablespoon
- Milk: 1 1/2 cups
- Vegetable oil: 1/4 cup
- Shredded cheddar cheese: 1 cup
- Dried herbs (Italian mix or similar): 2 tablespoons
Instructions
- Step 1: Preheat oven to 350°F (175°C). Grease and flour a 9×5 inch loaf pan.
- Step 2: In a large bowl, whisk together the flour, baking powder, salt, and sugar.
- Step 3: In a separate bowl, combine the milk and vegetable oil.
- Step 4: Pour the wet ingredients into the dry ingredients and stir until just combined. Do not overmix.
- Step 5: Gently fold in the shredded cheese and dried herbs.
- Step 6: Pour the batter into the prepared loaf pan and bake for 50-60 minutes, or until a wooden skewer inserted into the center comes out clean. Let cool in the pan for 10 minutes before transferring to a wire rack to cool completely.
Notes
- Store cooled quick bread tightly wrapped at room temperature for up to 3 days, or freeze slices for longer storage.
- To reheat, warm slices in a toaster oven or microwave for a few seconds until heated through.
- Serve warm with a smear of softened butter or a dollop of cream cheese for a simple yet satisfying treat.
- For a richer flavor, try using a sharp cheddar and bloom the dried herbs in the warm milk and oil mixture before adding to the dry ingredients.
- Prep Time: 15 minutes
- Cook Time: 20 minutes
- Method: Stovetop
- Cuisine: American
FAQs :
Can I use different herbs in this Herb & Cheese Quick Bread recipe?
Absolutely! This quick bread is incredibly versatile. Feel free to experiment with your favorite fresh or dried herbs. Rosemary, thyme, oregano, or even a blend of Italian herbs would be delicious. Just remember that dried herbs are more potent than fresh, so use about one-third the amount. Get creative and tailor the herb profile to your own taste preferences. The key is to have fun and create a savory bread that perfectly complements your meals. Don’t be afraid to add a pinch of red pepper flakes for a little kick!
What kind of cheese works best in this cheesy quick bread?
The beauty of this recipe lies in its flexibility! While cheddar and Gruyere are excellent choices for their flavor and melting properties, feel free to experiment. Parmesan adds a salty, nutty dimension, while Monterey Jack provides a creamy texture. You could even try a combination of cheeses for a more complex flavor profile. Just be sure the cheese you choose melts well and complements the herbs you’re using. If you’re feeling adventurous, a little crumbled feta could add a tangy twist!
How do I store this delicious Herb & Cheese Quick Bread?
Once baked, this savory bread is best stored at room temperature in an airtight container. This will help to maintain its moisture and prevent it from drying out. It should stay fresh for about 2-3 days. You can also freeze the bread for longer storage. Wrap it tightly in plastic wrap and then in foil before freezing. When you’re ready to enjoy it, simply thaw it at room temperature and warm it in the oven for a few minutes to restore its delicious, crusty texture.
Can I make this a gluten-free Herb & Cheese Quick Bread?
Yes, you absolutely can! To make this recipe gluten-free, simply substitute the all-purpose flour with a gluten-free all-purpose flour blend. Make sure the blend contains xanthan gum or add it separately, as it helps to bind the ingredients together and provides structure to the bread. Keep in mind that gluten-free flours can sometimes be a little drier than regular flour, so you may need to add a tablespoon or two of extra milk to achieve the desired batter consistency.


Leave a Comment