
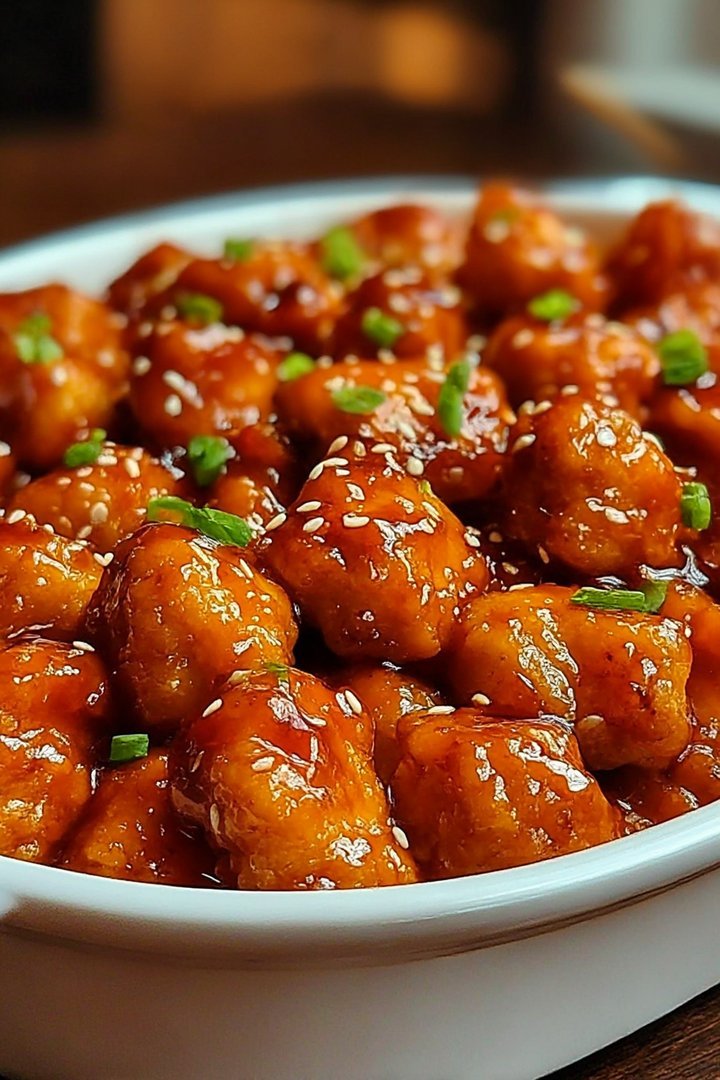
Picture this: succulent chicken, bathed in a tangy glaze, fresh from the oven, its aroma filling your kitchen with a symphony of sweet and savory notes. This Baked Sweet and Sour Chicken is not just a meal; it’s an experience that will transport your taste buds to a realm of pure culinary joy.
I remember the first time I tasted sweet and sour chicken. It was a soggy, questionable takeout order, but even then, the allure of that sweet and tangy combination sparked a culinary curiosity that has stayed with me. Now, years later, I’ve perfected my own baked version, and believe me, this is a game-changer, ideal for a cozy weeknight dinner or a delightful weekend gathering, promising an experience that will leave everyone craving more.
- Effortless preparation makes this recipe perfect for busy weeknights.
- The harmonious blend of sweet and tangy flavors creates an unforgettable taste.
- Its vibrant colors and glossy glaze make it a visually stunning dish.
- Versatile enough to pair with rice, noodles, or roasted vegetables.
Ingredients for Baked Sweet and Sour Chicken
Here’s what you’ll need to make this delicious dish:
The full ingredients list, including measurements, is provided in the recipe card directly below.
How to Make Baked Sweet and Sour Chicken
Follow these simple steps to prepare this delicious dish:
Step 1: Prepare the Chicken
Preheat your oven to 375°F (190°C). Cut the chicken breasts into 1-inch cubes. This ensures even cooking and allows the chicken to absorb the flavors of the sauce.
Step 2: Sauté the Vegetables
In a large skillet, heat sesame oil over medium heat. Add diced onion and sauté until translucent. Then add the bell peppers and pineapple chunks and cook for an additional 5 minutes, until slightly softened. This creates a flavorful base for the dish.
Step 3: Make the Sweet and Sour Sauce
In a separate bowl, whisk together ketchup, apple cider vinegar, brown sugar, soy sauce, and cornstarch until smooth. This ensures there are no lumps in your sauce and the flavors are well combined.
Step 4: Combine and Bake
Add the cubed chicken to the skillet with the vegetables. Pour the sweet and sour sauce over the chicken and vegetables, stirring to ensure everything is well coated. Transfer the mixture to a baking dish and bake for 25-30 minutes, or until the chicken is cooked through and the sauce has thickened.
Step 5: Serve and Enjoy
Remove the baked sweet and sour chicken from the oven and let it rest for a few minutes before serving. Serve hot over steamed rice or noodles, garnished with sesame seeds and chopped green onions. Enjoy your homemade baked sweet and sour chicken!
Perfecting the Cooking Process
To achieve the most delightful result, begin by searing the chicken to golden perfection, locking in those delicious juices. While the chicken rests, turn your attention to crafting the vibrant sweet and sour sauce. This strategic sequence ensures each component is at its peak.
Add Your Touch
Feel free to sprinkle in some roasted pineapple chunks for an extra layer of tropical sweetness. Prefer a spicier kick? A pinch of red pepper flakes will do the trick. Don’t be afraid to experiment with your favorite veggies; bell peppers and onions work wonders!
Storing & Reheating
Leftovers can be stored in an airtight container in the refrigerator for up to three days. When ready to enjoy again, simply reheat in the microwave or oven until warmed through. A splash of chicken broth can help retain moisture during reheating.
Here are some tips to elevate your **Baked Sweet and Sour Chicken** game:
- Pat the chicken dry before searing to ensure a beautifully browned crust, essential for locking in flavor and creating a delightful texture.
- Don’t overcrowd the pan while searing the chicken; work in batches to maintain a consistent temperature and achieve that perfect golden color.
- Taste and adjust the sweet and sour sauce as you go; balancing the sweet, sour, and savory elements is the key to a truly irresistible dish.
(Personal anecdote formated as paragraph subheading)
I remember when my notoriously picky cousin devoured this dish. He even asked for seconds! That’s when I knew this **baked sweet and sour chicken** was a guaranteed crowd-pleaser.
Unveiling the Magic: Sweet and Sour Chicken From Scratch
Let’s face it, takeout is tempting. But nothing beats the satisfaction of creating a delectable **baked sweet and sour chicken** masterpiece right in your own kitchen. This recipe isn’t just about following instructions; it’s about embarking on a culinary adventure filled with vibrant flavors and delightful aromas. Get ready to impress yourself (and maybe your friends and family, too!). This isn’t just dinner; it’s an experience!
Why This Recipe Rocks
Forget those gloppy, overly sweet takeout versions. This **baked sweet and sour chicken** recipe is all about fresh ingredients, balanced flavors, and a cooking process that’s surprisingly simple. We’re talking juicy chicken coated in a tangy, homemade sauce that will make your taste buds sing. Plus, baking the chicken keeps it healthier than frying, without sacrificing any of that satisfying crunch. It’s a win-win!
Gathering Your Arsenal: Ingredients You’ll Need
Before we dive into the deliciousness, let’s make sure you have everything you need. Don’t worry, you probably already have most of these ingredients in your pantry!
- 1.5 lbs boneless, skinless chicken breasts, cut into bite-sized pieces
- 1/2 cup cornstarch
- 1/4 teaspoon salt
- 1/4 teaspoon black pepper
- 2 tablespoons olive oil
- 1 red bell pepper, cut into chunks
- 1 green bell pepper, cut into chunks
- 1 onion, cut into chunks
- 1 (20 ounce) can pineapple chunks, drained (reserve the juice!)
**For the Sweet and Sour Sauce: **
- 1/2 cup reserved pineapple juice
- 1/4 cup rice vinegar
- 1/4 cup ketchup
- 2 tablespoons brown sugar
- 2 tablespoons soy sauce (low sodium preferred)
- 1 tablespoon cornstarch
- 1 teaspoon garlic powder
- 1/2 teaspoon ground ginger
Let’s Get Cooking: Step-by-Step Instructions for Perfect Baked Sweet and Sour Chicken
Alright, apron on, music playing, let’s do this! Follow these steps carefully, and you’ll be rewarded with a **baked sweet and sour chicken** dish that rivals any restaurant.
1. **Prep the Chicken: ** In a large bowl, combine the chicken pieces, cornstarch, salt, and pepper. Toss until the chicken is evenly coated. This cornstarch coating is key to that delightful crispy texture.
2. **Sear the Chicken (Optional but Recommended): ** Heat the olive oil in a large skillet over medium-high heat. Sear the chicken in batches until lightly browned on all sides. This step adds an extra layer of flavor and helps to seal in the juices. Don’t overcrowd the pan; give the chicken some space!
3. **Bake the Chicken and Veggies: ** Preheat your oven to 400°F (200°C). In a large baking dish, combine the seared chicken (or the coated chicken if you skipped the searing), bell peppers, onion, and pineapple chunks.
4. **Whip Up the Sauce: ** In a medium bowl, whisk together the pineapple juice, rice vinegar, ketchup, brown sugar, soy sauce, cornstarch, garlic powder, and ginger. Make sure there are no lumps!
5. **Pour and Bake: ** Pour the sweet and sour sauce over the chicken and vegetables in the baking dish. Toss to coat everything evenly. Bake for 20-25 minutes, or until the chicken is cooked through and the sauce has thickened. The sauce should be bubbly and glistening!
6. **Serve and Enjoy: ** Serve your **baked sweet and sour chicken** hot over rice or noodles. Garnish with sesame seeds or chopped green onions, if desired. Prepare for compliments!
Tackling Common Kitchen Catastrophes: Troubleshooting Tips
Even the best chefs encounter hiccups in the kitchen. Here’s how to avoid some common **baked sweet and sour chicken** pitfalls:
- **Sauce Too Thin?** If your sauce isn’t thickening up, dissolve an extra teaspoon of cornstarch in a tablespoon of cold water and add it to the sauce during the last few minutes of baking.
- **Chicken Overcooked?** Make sure to use an oven thermometer to ensure your oven is at the correct temperature. Overcooking chicken leads to dryness, so keep a close eye on it!
- **Not Enough Flavor?** Taste the sauce before baking and adjust the seasonings to your liking. A little extra soy sauce for saltiness, a dash of rice vinegar for tang, or a pinch of brown sugar for sweetness can make all the difference.
Sweet and Sour Chicken: A Healthier Twist on a Classic
One of the great things about making **baked sweet and sour chicken** at home is that you have control over the ingredients. You can easily make it healthier by using lean chicken breast, low-sodium soy sauce, and reducing the amount of sugar in the sauce. Baking instead of frying significantly reduces the fat content. It’s a delicious and guilt-free meal!
Spice It Up: Variations and Twists on Your Baked Sweet and Sour Chicken
Feeling adventurous? Here are a few ideas to take your **baked sweet and sour chicken** to the next level:
- **Add Some Heat:** Incorporate a pinch of red pepper flakes or a tablespoon of sriracha into the sauce for a spicy kick.
- **Get Fruity:** Add other fruits like mandarin oranges or sliced peaches to the baking dish for an extra burst of sweetness.
- **Veggie Power:** Load up on the veggies! Broccoli florets, snow peas, and carrots all work well in this dish.
- **Nutty Delight:** Sprinkle some chopped cashews or peanuts over the finished dish for added crunch and flavor.
(Personal anecdote formated as paragraph subheading)
My first attempt at this? Let’s just say the sauce was more “sour” than “sweet.” But hey, learning is part of the fun! Now, it’s a family favorite.
The Secret Ingredient: A Dash of Confidence
The most important ingredient in any recipe is confidence. Don’t be afraid to experiment, have fun, and make it your own. This **baked sweet and sour chicken** recipe is a starting point, a blank canvas for your culinary creativity. So go ahead, unleash your inner chef and create a dish that’s uniquely you! Happy cooking!
Conclusion for Baked Sweet and Sour Chicken :
This baked sweet and sour chicken recipe is a winner for a reason: it’s easy, flavorful, and a guaranteed crowd-pleaser. Remember to use fresh ingredients, avoid overcrowding the pan for optimal crispiness, and don’t be afraid to customize the sauce to your liking. Whether you serve it with rice, veggies, or noodles, this dish is sure to become a regular in your dinner rotation. So go ahead, give it a try and prepare to be amazed by the delightful combination of sweet, tangy, and savory flavors. Enjoy!
Print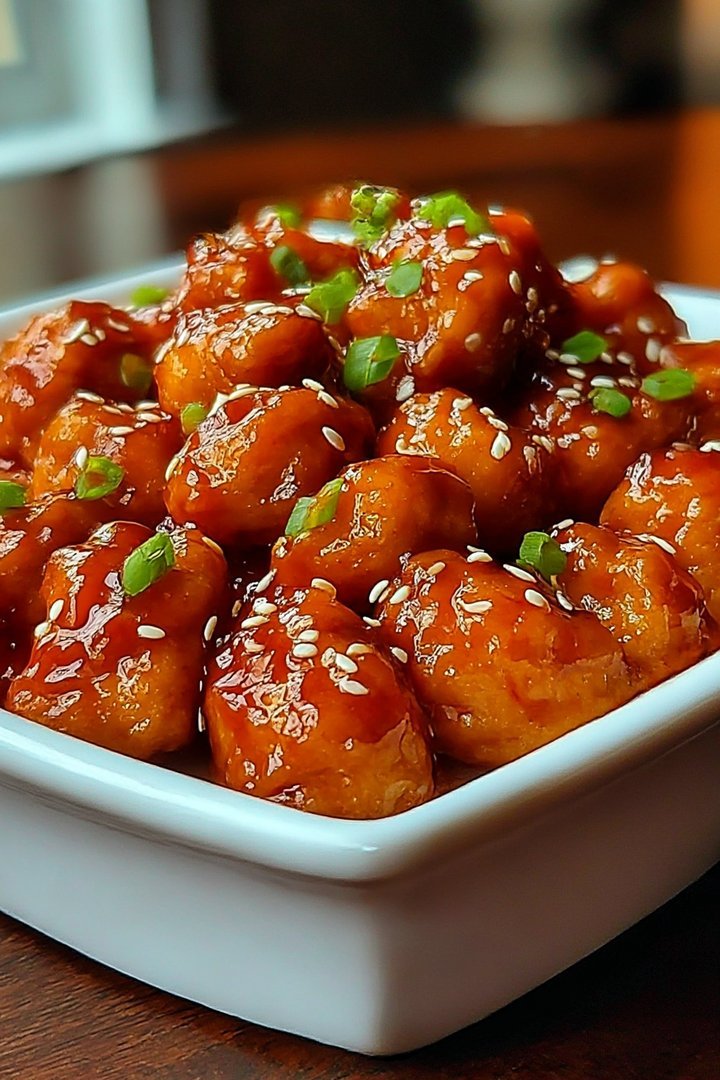
Baked Sweet and Sour Chicken
Delicious baked sweet and sour chicken recipe with detailed instructions and nutritional information.
- Total Time: 35 minutes
- Yield: 4 servings 1x
Ingredients
- 1.5 lbs boneless, skinless chicken breasts, cut into 1-inch cubes
- 1/2 cup all-purpose flour
- 1/2 teaspoon salt
- 1/4 teaspoon black pepper
- 1 tablespoon olive oil
- 1 green bell pepper, cut into 1-inch pieces
- 1 red bell pepper, cut into 1-inch pieces
- 1 (20 ounce) can pineapple chunks, drained, reserve juice
Instructions
- Step 1: Preheat oven to 375 degrees F (190 degrees C). Lightly grease a 9×13 inch baking dish.
- Step 2: In a bowl, combine flour, salt, and pepper. Dredge the chicken pieces in the flour mixture, shaking off excess.
- Step 3: Heat olive oil in a large skillet over medium-high heat. Brown the chicken on all sides. It doesn't need to be cooked through.
- Step 4: In a separate bowl, whisk together the reserved pineapple juice, 1/4 cup brown sugar, 1/4 cup white vinegar, 2 tablespoons soy sauce, and 1 tablespoon ketchup.
- Step 5: Arrange the browned chicken, green bell pepper, red bell pepper, and pineapple chunks in the prepared baking dish.
- Step 6: Pour the sweet and sour sauce over the chicken and vegetables. Bake in the preheated oven for 30-35 minutes, or until the chicken is cooked through and the sauce has thickened slightly.
Notes
- Store leftovers in an airtight container in the refrigerator for up to 3 days.
- For best results, reheat the chicken in the oven at 350°F (175°C) to maintain its texture, adding a splash of water if the sauce has thickened too much.
- Serve over fluffy rice to soak up all that delicious sweet and sour sauce.
- For extra flavor, try marinating the chicken in a tablespoon of soy sauce and a teaspoon of grated ginger for 30 minutes before dredging.
- Prep Time: 15 minutes
- Cook Time: 20 minutes
- Method: Stovetop
- Cuisine: American
FAQs :
Can I use chicken thighs instead of chicken breast for Baked Sweet and Sour Chicken?
Absolutely! While this recipe calls for chicken breast, chicken thighs are a fantastic alternative. They bring a richer flavor and stay wonderfully moist during baking. Just make sure to trim any excess fat before you get started. You might need to adjust the baking time slightly, as thighs can take a bit longer to cook through. Keep an eye on the internal temperature; you want it to reach 165°F (74°C) for safe eating. Get ready for a flavor explosion with those juicy, tender thighs coated in that irresistible sweet and tangy sauce!
What’s the best way to prevent the Baked Sweet and Sour Chicken from getting soggy?
Nobody likes soggy chicken! The key is to ensure the chicken pieces are not overcrowded in the baking dish. Overcrowding steams the chicken instead of baking it, leading to a less-than-crispy result. Give each piece some breathing room. Also, pat the chicken dry with paper towels before coating it in the sauce. This helps the sauce adhere better and prevents excess moisture. For extra crispiness, try broiling the chicken for the last few minutes of baking, keeping a close watch to prevent burning.
Can I prepare the Baked Sweet and Sour Chicken sauce in advance?
You sure can! Making the sweet and tangy sauce ahead of time is a brilliant idea, especially if you’re short on time later. Just whisk all the sauce ingredients together and store it in an airtight container in the refrigerator for up to 3 days. The flavors actually meld together and deepen over time, making the finished dish even more delicious. When you’re ready to bake the chicken, simply pour the prepared sauce over the chicken pieces and bake as directed. This make-ahead tip will save you valuable minutes in the kitchen!
What can I serve with this amazing Baked Sweet and Sour Chicken dish?
Oh, the possibilities! This Baked Sweet and Sour Chicken recipe pairs wonderfully with a variety of sides. Steamed rice is a classic choice, soaking up all that delicious sauce. You could also serve it with quinoa or cauliflower rice for a lighter option. For vegetables, consider stir-fried broccoli, green beans, or bell peppers. A simple side salad with a light vinaigrette adds a refreshing contrast. Don’t forget a sprinkle of sesame seeds and some chopped green onions for a pop of color and flavor!


Leave a Comment