
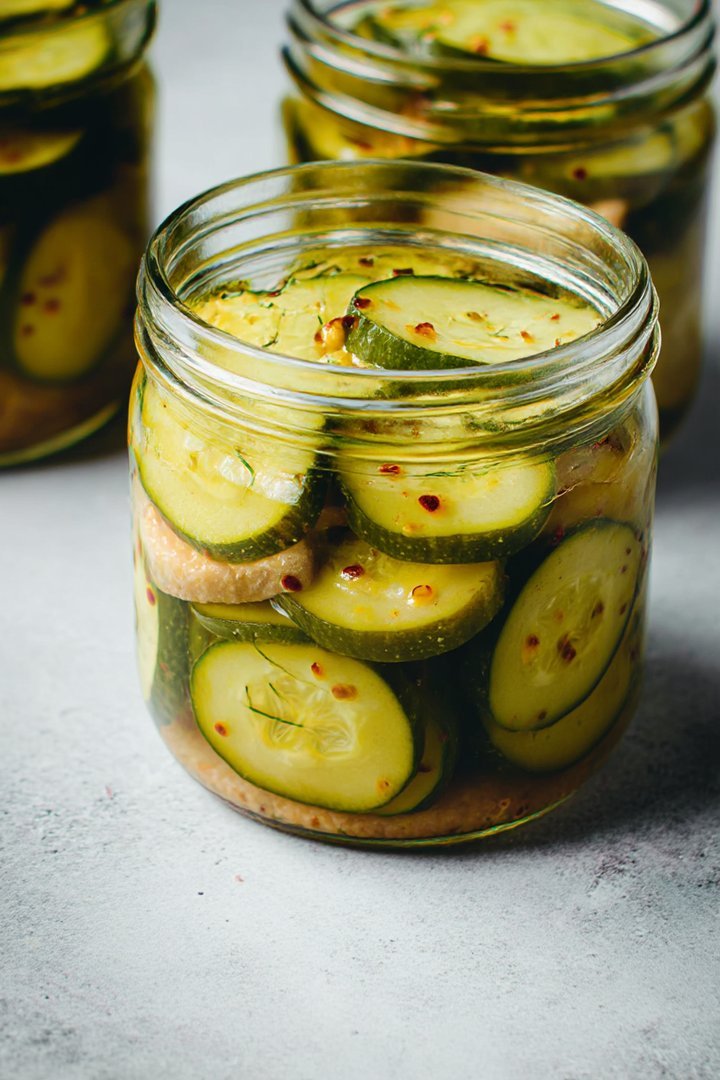
Bread and butter pickles: that tangy, sweet, crunchy delight that can turn any ordinary sandwich into a culinary masterpiece. Imagine biting into a crispy pickle, the sweetness dancing on your tongue, followed by a satisfying tartness that just wakes up your taste buds.
These aren’t your grandma’s dill pickles, unless your grandma was a rebel with a sweet tooth! Bread and butter pickles are a symphony of flavors, a little bit sweet, a little bit sour, and a whole lot addictive. Get ready to pucker up and enjoy the ride!
- Quick to make: A delightful homemade treat ready in under an hour.
- Sweet and Tangy: Perfectly balances sweet and sour flavors that everyone will love.
- Versatile Snack: Great as a snack, a sandwich addition, or a barbecue side dish.
- Visually Appealing: The vibrant yellow hue adds a pop of color to any table.
Ingredients for Bread and Butter Pickles
Here’s what you’ll need to make this delicious dish:
The full ingredients list, including measurements, is provided in the recipe card directly below.
How to Make Bread and Butter Pickles
Follow these simple steps to prepare this delicious dish:
Step 1: Prepare the Vegetables
Wash and thinly slice the cucumbers, onions, and bell pepper. Place them in a large bowl. Sprinkle with salt and mix well. Let them sit for at least 30 minutes to draw out excess moisture. This step is crucial for achieving the perfect pickle crunch.
Step 2: Make the Brine
In a large pot, combine the white vinegar, sugar, turmeric powder, mustard seeds, celery seeds, and black peppercorns. Bring the mixture to a boil over medium-high heat, stirring until the sugar dissolves completely. This sweet and sour brine is what transforms the cucumbers into delicious pickles.
Step 3: Combine and Simmer
Drain the cucumbers, onions, and bell pepper thoroughly. Add them to the boiling brine. Reduce the heat to low and simmer for about 10 minutes, stirring occasionally, until the cucumbers turn translucent and slightly softened. Make sure not to overcook the cucumbers, as they will lose their crunch.
Step 4: Jar the Pickles
Carefully transfer the hot pickles and brine into sterilized jars, leaving about 1/2 inch of headspace. Remove any air bubbles by gently tapping the jars on the counter. Wipe the rims of the jars clean and place the lids and rings on top, tightening them until they are finger-tight.
Step 5: Process for Storage (Optional)
For long-term storage, process the jars in a boiling water bath for 10 minutes. If you plan to refrigerate and consume the pickles within a few weeks, this step is unnecessary. This process ensures that the pickles remain shelf-stable for an extended period.
Step 6: Cool and Store
Let the jars cool completely on a towel-lined surface. As they cool, you should hear a popping sound, indicating that the jars have sealed properly. Store the sealed jars in a cool, dark place for at least 2 weeks to allow the flavors to meld. Refrigerate after opening. Enjoy these sweet and tangy Bread and Butter Pickles as a snack, on sandwiches, or as a delightful addition to any meal!
Perfecting the Cooking Process
To achieve the best flavor and texture, it’s all about timing. First, prepare your pickling brine and let it simmer while you slice the cucumbers. Pack everything tightly into jars, then pour the hot brine over them. This ensures even flavor distribution and proper preservation.
Add Your Touch
Want to get wild? Swap out regular sugar for brown sugar for a molasses-like depth. Add a pinch of red pepper flakes for a subtle kick. Or, throw in some mustard seeds for a bit of tang. The possibilities are endless, so make these bread and butter pickles your own!
Storing & Reheating
After canning, store your bread and butter pickles in a cool, dark place for at least two weeks to allow the flavors to meld. Once opened, refrigerate for up to a month. There’s no reheating required – these are best enjoyed cold, straight from the jar!
Here are some tips for making truly spectacular pickles:
- Don’t skimp on the quality of your vinegar; it’s the backbone of the entire pickling process, impacting the flavor and the preservation.
- Make sure you slice those cucumbers uniformly. Uneven slices mean uneven pickling, and nobody wants a mushy pickle next to a crunchy one.
- Be patient! Those pickles need time to sit and soak up all that delicious brine. Resist the urge to dig in too soon or you’ll be disappointed.
(Personal anecdote formated as paragraph subheading)
My grandma used to make these every summer. Her secret ingredient? A tiny bit of dill. Now, every time I make them, I think of her and her slightly-too-sweet, perfectly crunchy bread and butter pickles.
The Charming Tale of Bread and Butter Pickles
Okay, let’s talk about pickles. But not just *any* pickles. We’re diving headfirst into the briny, sweet, tangy world of bread and butter pickles! These aren’t your average, run-of-the-mill dill spears. These are the pickles with a story, a personality, and a flavor that just screams “summer picnic.”
You know, I’ve always wondered about the name. Bread and butter? Are we supposed to spread these on toast? Well, technically, you *could*, but that’s a culinary adventure for another day. The story goes that a couple struggling to make ends meet during the Depression era came up with this sweet and sour recipe to preserve their cucumber crop. They traded the pickles for groceries, including, you guessed it, bread and butter! How’s that for a slice of history? (Pun intended).
Why These Pickles Are The Best Thing Since Sliced Bread (and Butter!)
What makes bread and butter pickles so darn irresistible? It’s the perfect balance of sweet and tangy. That vinegary zip combined with a touch of sugar creates a flavor explosion that dances on your tongue. Plus, the crisp, slightly softened texture of the cucumbers is just divine.
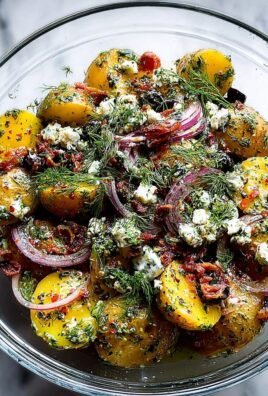
These pickles are ridiculously versatile. Obviously, they’re amazing straight out of the jar (don’t judge me!), but they also shine in so many other ways. Pile them high on burgers, chop them up in potato salad, or add them to a charcuterie board for a pop of flavor. Trust me; you’ll find yourself reaching for these pickles again and again.
The Great Cucumber Caper: Sourcing Your Stars
Let’s talk cucumbers. Not all cukes are created equal when it comes to pickling. You want to use pickling cucumbers, also known as Kirby cucumbers. They’re smaller, firmer, and have thinner skins than your average slicing cucumber. This means they’ll hold their shape and stay nice and crunchy in the pickling brine.
If you can’t find pickling cucumbers, don’t despair! English cucumbers (the ones wrapped in plastic) will work in a pinch. Just be sure to peel them first, as their skins can be a bit tough. And whatever you do, avoid using those giant, waxy slicing cucumbers. They’ll turn mushy and sad in the brine, and nobody wants sad pickles.
Brine Time: The Magic Potion
The brine is the heart and soul of any pickle recipe. It’s what transforms those humble cucumbers into tangy, sweet, and utterly addictive treats. My brine recipe is a closely guarded secret (okay, not really, I’m about to share it with you), but it’s the perfect blend of vinegar, sugar, and spices.
I prefer to use apple cider vinegar for its mellow flavor and subtle sweetness, but white vinegar works just fine too. As for sugar, granulated sugar is the classic choice, but you can experiment with brown sugar or even honey for a different twist. And don’t forget the spices! Turmeric, mustard seed, and celery seed are essential for that signature bread and butter pickle flavor.
The Ultimate Bread and Butter Pickle Recipe (No Chicken, No Problem!)
Alright, enough chit-chat. Let’s get down to business. Here’s my foolproof recipe for the best bread and butter pickles you’ll ever taste. It’s easy, delicious, and totally Chicken-free!
**Yields: ** About 4 pint jars
**Prep time: ** 30 minutes
**Cook time: ** 15 minutes
**Resting time: ** At least 2 weeks
**Ingredients: **
- 4 pounds pickling cucumbers, sliced into 1/4-inch rounds
- 1 large onion, thinly sliced
- 1 green bell pepper, seeded and thinly sliced
- 1 red bell pepper, seeded and thinly sliced
- 1/4 cup kosher salt
- 4 cups apple cider vinegar
- 2 cups granulated sugar
- 2 tablespoons mustard seeds
- 1 tablespoon celery seeds
- 1 teaspoon turmeric
- 1/2 teaspoon ground cloves
**Equipment: **
- Large pot
- Sterilized pint jars with lids and rings
- Canning tongs or jar lifter
**Instructions**
1. **Prep the Veggies: ** In a large bowl, combine the sliced cucumbers, onion, and bell peppers. Sprinkle with salt and toss to combine. Cover with ice and let stand for at least 2 hours, or up to overnight. This helps draw out excess moisture and keeps the pickles crisp.
2. **Make the Brine: ** In a large pot, combine the apple cider vinegar, sugar, mustard seeds, celery seeds, turmeric, and ground cloves. Bring to a boil over medium-high heat, stirring until the sugar is dissolved.
3. **Drain and Rinse: ** Drain the cucumber mixture and rinse thoroughly with cold water. This removes the excess salt.
4. **Pack the Jars: ** Pack the cucumber mixture into the sterilized pint jars, leaving about 1/2 inch of headspace.
5. **Pour the Brine: ** Carefully pour the hot brine over the cucumbers, leaving 1/2 inch of headspace. Remove any air bubbles by gently tapping the jars on the counter.
6. **Process the Jars (Optional): ** For long-term storage, process the jars in a boiling water bath for 10 minutes. If you’re not planning on canning them, you can skip this step and simply refrigerate the jars.
7. **Cool and Wait: ** Let the jars cool completely. You should hear a “pop” as the lids seal. Store in a cool, dark place for at least 2 weeks before enjoying. This allows the flavors to meld and develop.
Troubleshooting Your Pickles: Common Problems and Solutions
Sometimes, even with the best intentions, things can go awry in the kitchen. Here are a few common pickle problems and how to fix them:
- **Mushy Pickles:** This is usually caused by using the wrong type of cucumbers, overcooking them, or not using enough salt. Make sure you use pickling cucumbers and follow the recipe carefully.
- **Pickles That Are Too Sour:** If your pickles are too tart for your taste, you can add a bit more sugar to the brine. Start with a tablespoon and taste, adding more as needed.
- **Pickles That Are Too Sweet:** Conversely, if your pickles are too sweet, you can add a splash of apple cider vinegar or a pinch of citric acid to the brine.
- **Cloudy Brine:** A cloudy brine is usually caused by starch from the cucumbers. It’s not harmful, but it can be avoided by using pickling lime or calcium chloride.
Beyond the Jar: Creative Ways to Use Bread and Butter Pickles
Okay, so you’ve made a batch of these delicious bread and butter pickles. Now what? Here are a few ideas to get you started:
- **Burger Topping:** Pile them high on your favorite burger for a sweet and tangy kick.
- **Potato Salad:** Chop them up and add them to potato salad for a burst of flavor.
- **Deviled Eggs:** Mix them into your deviled egg filling for a surprising twist.
- **Grilled Cheese:** Add a layer of bread and butter pickles to your grilled cheese sandwich for a gourmet treat.
- **Charcuterie Board:** Serve them alongside cheese, crackers, and meats for a sophisticated appetizer.
The Final Word on Pickles: Go Forth and Pickle!
So there you have it! Everything you need to know to make the best bread and butter pickles in the world. It may seem like a lot of work, but trust me, the results are well worth it. Once you taste that first sweet and tangy bite, you’ll be hooked. Now go forth, gather your cucumbers, and get pickling! And don’t forget to share your creations with friends and family (or not, I won’t judge).
Conclusion for Bread and Butter Pickles
Making your own bread and butter pickles is easier than you think, and infinitely more rewarding than store-bought. With a simple brine, some patience, and your favorite cucumbers, you can create a tangy, sweet, and utterly addictive treat. Remember to experiment with spices to find your perfect flavor combination. These pickles are a fantastic addition to sandwiches, burgers, or even enjoyed straight from the jar! So, grab your cucumbers and get pickling – you won’t regret it.
Print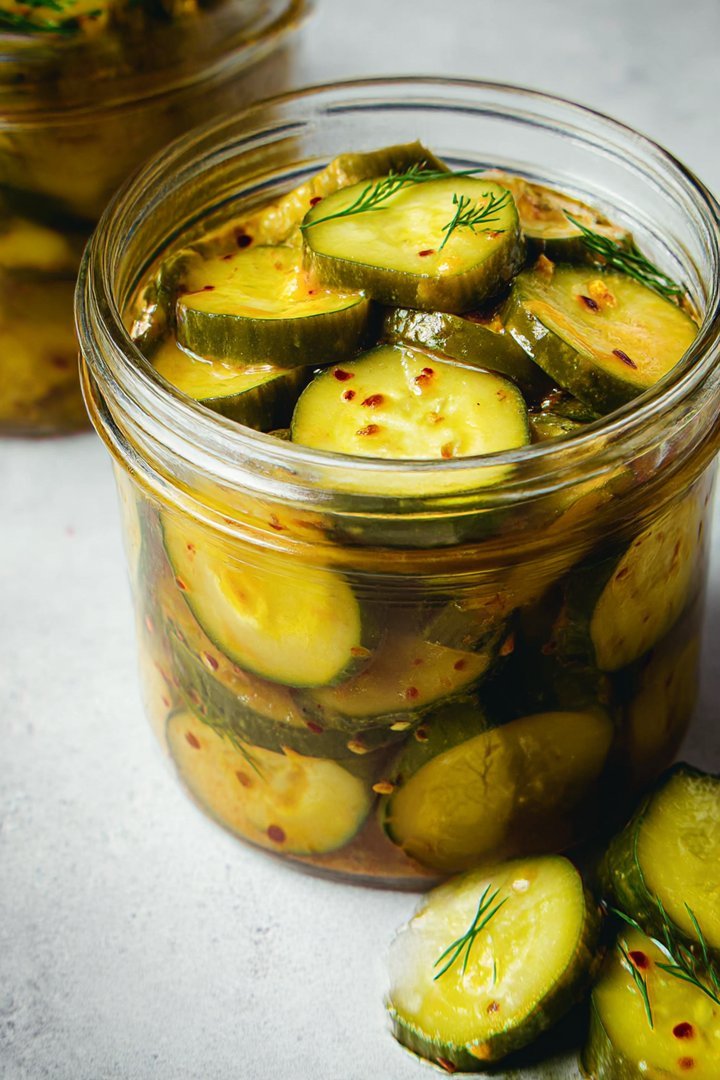
Bread and Butter Pickles
Delicious bread and butter pickles recipe with detailed instructions and nutritional information.
- Total Time: 35 minutes
- Yield: 4 servings
Ingredients
- Cucumbers (medium) – 8 cups, thinly sliced
- Onion (medium) – 1.5 cups, thinly sliced
- Green Bell Pepper – 1 cup, thinly sliced
- White Vinegar – 3 cups
- Granulated Sugar – 4 cups
- Mustard Seed – 2 tablespoons
- Celery Seed – 1 teaspoon
- Turmeric – 1/2 teaspoon
Instructions
- Step 1: Combine sliced cucumbers, onion, and green pepper in a large bowl. Sprinkle with 1/4 cup of salt, cover with ice, and let stand for at least 3 hours, or preferably overnight, in the refrigerator.
- Step 2: Drain the cucumber mixture well, rinse thoroughly under cold water to remove excess salt, and drain again.
- Step 3: In a large stainless steel or enamel pot, combine vinegar, sugar, mustard seed, celery seed, and turmeric. Bring to a boil over medium-high heat, stirring until sugar is dissolved.
- Step 4: Add the drained cucumber mixture to the boiling vinegar mixture. Return to a simmer and cook for 5-10 minutes, stirring frequently, until the cucumbers change color slightly but remain crisp.
- Step 5: Pack the hot pickles into sterilized jars, leaving 1/2 inch headspace. Remove any air bubbles.
- Step 6: Process in a boiling water bath for 10 minutes (adjust processing time according to your altitude). Let jars cool completely before checking seals.
Notes
- Store unopened jars in a cool, dark place for up to a year; refrigerate after opening for the best crunch.
- These pickles don't need reheating – their crisp, tangy flavor is best enjoyed straight from the fridge!
- Serve these sweet and sour pickles alongside grilled cheese sandwiches, burgers, or charcuterie boards for a delightful contrast.
- For extra flavor, try adding a pinch of red pepper flakes to the brine – just remember a little goes a long way!
- Prep Time: 15 minutes
- Cook Time: 20 minutes
- Method: Stovetop
- Cuisine: American
FAQs
Can I use different cucumbers for these Bread and Butter Pickles?
Absolutely! While Kirby cucumbers are the classic choice for bread and butter pickles because of their firm texture and thin skin, feel free to experiment. English cucumbers, with their fewer seeds, also work wonderfully. Just be mindful of the skin thickness; thicker-skinned varieties might benefit from peeling for a more tender final product. Remember, pickling is all about preserving flavors, so choose a cucumber that you enjoy eating fresh, and you’re halfway there. Have fun trying different varieties and discovering your favorite bread and butter pickle cucumber!
How long do Bread and Butter Pickles last in the fridge?
Once you’ve lovingly crafted your batch of bread and butter pickles, the question is: how long can you savor them? Properly sealed and refrigerated, these tangy treats can last for up to two months. The vinegar acts as a preservative, keeping the cucumbers crisp and flavorful. However, always be sure to use clean utensils when reaching into the jar to avoid introducing bacteria, which can shorten their lifespan. Though, let’s be honest, a jar of these rarely lasts that long in my house!
What’s the best way to store homemade Bread and Butter Pickles?
The key to long-lasting bread and butter pickles is proper storage. After you’ve processed your jars in a boiling water bath (or simply let them cool if you’re not canning), ensure the lids are tightly sealed. Store them in the refrigerator to maintain their crispness and prevent spoilage. Glass jars are ideal for preserving their flavor. Avoid using metal containers, as the vinegar can react with the metal and affect the taste. Pro-tip: Storing the jars upside down while cooling can help create a stronger seal.
Can I reduce the sugar in this Bread and Butter Pickles recipe?
Yes, you can! While bread and butter pickles traditionally have a slightly sweeter profile compared to dill pickles, you can certainly adjust the sugar content to suit your taste. Start by reducing the sugar by about 25% and taste the brine before processing. You can always add more if needed. Alternatively, consider using a natural sweetener like honey or agave nectar, but be aware that this may slightly alter the flavor and texture of your pickles. Ultimately, it’s all about finding the perfect balance for your palate.

Leave a Comment