
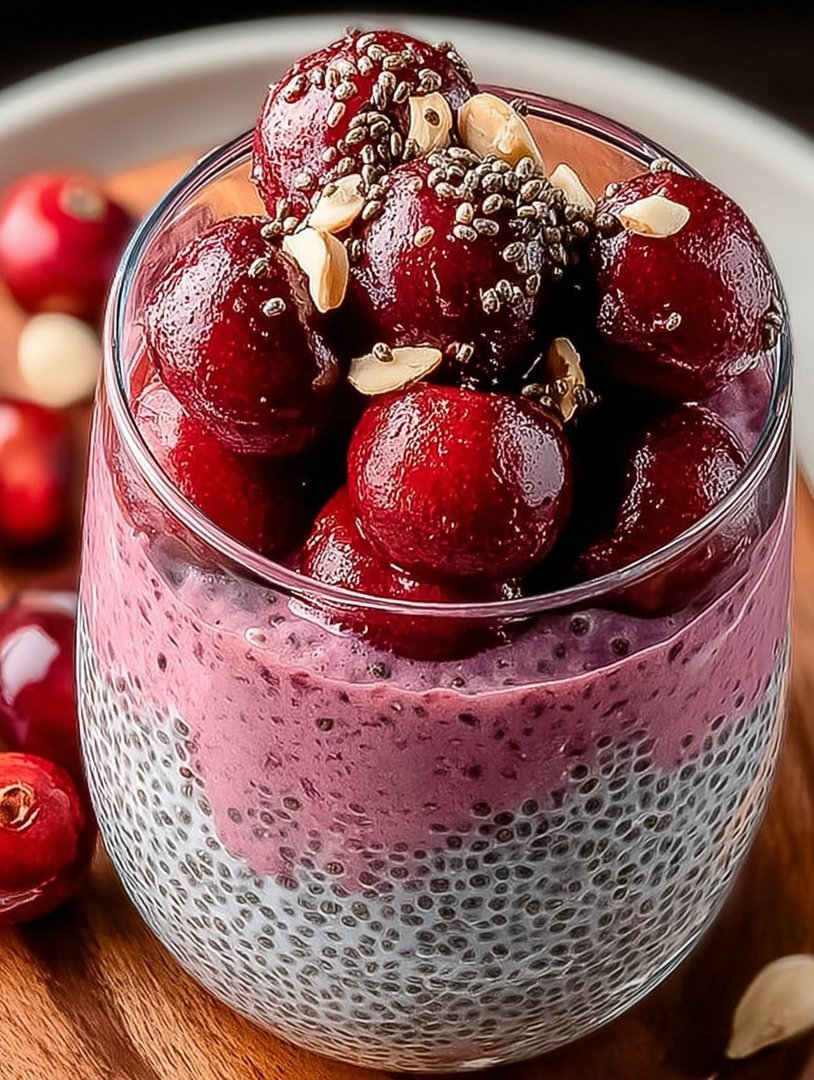
Cherry Chia Pudding: A Spoonful of Summer Sunshine
Imagine starting your day with a vibrant, naturally sweet, and incredibly healthy treat. This cherry chia pudding bursts with the juicy flavor of fresh cherries and the satisfying texture of chia seeds, creating a delightful breakfast or dessert. It’s a simple recipe that requires minimal effort, perfect for busy mornings or a guilt-free indulgence any time of day. Prepare it the night before and wake up to a delicious and nutritious meal ready to enjoy.
- Naturally Sweet and Delicious: Ripe cherries provide a natural sweetness, eliminating the need for refined sugars and creating a flavorful, satisfying treat that everyone will love.
- Packed with Nutrients: Chia seeds are a nutritional powerhouse, offering a great source of fiber, omega-3 fatty acids, and antioxidants, contributing to overall health and well-being.
- Easy to Prepare: This recipe requires minimal effort and only a few ingredients, making it a perfect option for busy weekdays or when you’re craving a quick and healthy snack.
- Versatile and Customizable: Feel free to experiment with different toppings, such as toasted nuts, shredded coconut, or a drizzle of maple syrup, to create your own unique flavor combinations.
Ingredients
- Chia Seeds: These tiny seeds are the base of the pudding, absorbing liquid and creating a thick, creamy texture. Use black or white chia seeds, both offering the same nutritional benefits.
- Cherries: Fresh cherries provide the main flavor and sweetness. Choose ripe, juicy cherries for the best taste. Frozen cherries can also be used, but thaw them slightly before blending.
- Almond Milk: A dairy-free alternative that adds a creamy texture without overpowering the cherry flavor. Other plant-based milks like soy, oat, or cashew milk can be substituted.
- Maple Syrup: A natural sweetener that enhances the cherry flavor and adds a touch of sweetness. Adjust the amount to your preference, or substitute with agave nectar or honey (if not vegan).
- Vanilla Powder: Enhances the overall flavor profile, adding warmth and depth. Use pure vanilla powder for the best taste.
- Lemon Juice: A small amount of lemon juice brightens the flavors and adds a hint of tartness, balancing the sweetness of the cherries. Freshly squeezed is always best.
- Optional Toppings: Shredded coconut, chopped almonds, a sprinkle of cinnamon, or a dollop of plant-based yogurt can add extra texture and flavor to your chia pudding.
Instructions
Step 1: Prepare the Cherries
Pit the cherries. This can be done with a cherry pitter or by carefully slicing them in half and removing the pits with your fingers. A quick way is using a straw! Simply place the cherry on top of an empty glass bottle opening and press the straw through the center of the cherry to pop the pit out into the bottle.
Step 2: Blend the Cherry Mixture
In a blender, combine the pitted cherries, almond milk, maple syrup, vanilla powder, and lemon juice. Blend until smooth and creamy. If using frozen cherries, you may need to add a splash more almond milk to help with blending.
Step 3: Combine with Chia Seeds
Pour the cherry mixture into a bowl. Add the chia seeds and whisk thoroughly to ensure they are evenly distributed. This will prevent clumping and ensure a consistent pudding texture.
Step 4: Refrigerate and Thicken
Cover the bowl and refrigerate for at least 4 hours, or preferably overnight. This allows the chia seeds to absorb the liquid and create a thick, pudding-like consistency. Stir the mixture once or twice during the first hour to prevent the chia seeds from settling at the bottom.
Step 5: Check Consistency and Adjust
After refrigeration, check the consistency of the chia pudding. If it is too thick, add a splash more almond milk to thin it out. If it is too thin, add another tablespoon of chia seeds and let it sit in the refrigerator for another 30 minutes.
Step 6: Serve and Enjoy
Serve the cherry chia pudding chilled. Top with your favorite toppings, such as shredded coconut, chopped almonds, fresh cherries, or a sprinkle of cinnamon. You can also layer it with plant-based yogurt or granola for a more substantial breakfast or dessert. Enjoy this delightful and nutritious treat as a healthy breakfast, snack, or dessert. You can also add other berries on top for additional flavor.
The Secret to Perfecting This Dish
Begin by combining chia seeds and milk, stirring well to prevent clumps. Let it sit for 10 minutes, then stir again. Add cherries and sweetener, then refrigerate for at least 2 hours, or preferably overnight. This allows the chia seeds to fully absorb the liquid, creating the perfect pudding consistency.
Add Your Personal Touch
Feel free to experiment! Swap cherries for berries like raspberries or blueberries. Add a dash of vanilla powder or almond paste for extra flavor. For a vegan option, use almond, soy, or coconut milk. Adjust the sweetener to your liking—honey, maple syrup, or stevia all work well.
Storing & Reheating for Best Quality
Store cherry chia pudding in an airtight container in the refrigerator for up to 5 days. It doesn’t need reheating; it’s best enjoyed cold! If it thickens too much during storage, simply add a splash of milk and stir until it reaches your desired consistency.
Expert Advice
- Use a whisk to thoroughly combine the ingredients and prevent clumps from forming.
- For a smoother texture, blend the chia pudding after it has set.
- If you’re using frozen cherries, thaw them slightly before adding them to the mixture.
My grandmother always made a similar pudding with fresh berries from her garden. I still remember the taste of those sun-ripened berries!
Conclusion for Cherry Chia Pudding
Cherry chia pudding is a delightful and healthy treat that’s incredibly easy to make. The key is to give the chia seeds ample time to absorb the liquid, resulting in a perfectly thick and creamy pudding. Don’t be afraid to customize the recipe with your favorite fruits, extracts, and sweeteners. It’s a fantastic make-ahead breakfast, snack, or dessert that’s both satisfying and nutritious. Plus, its long shelf life when stored properly makes it an ideal option for meal prepping. The versatility of chia seeds also ensures that each batch will be both a creative experience and a delicious treat.
Print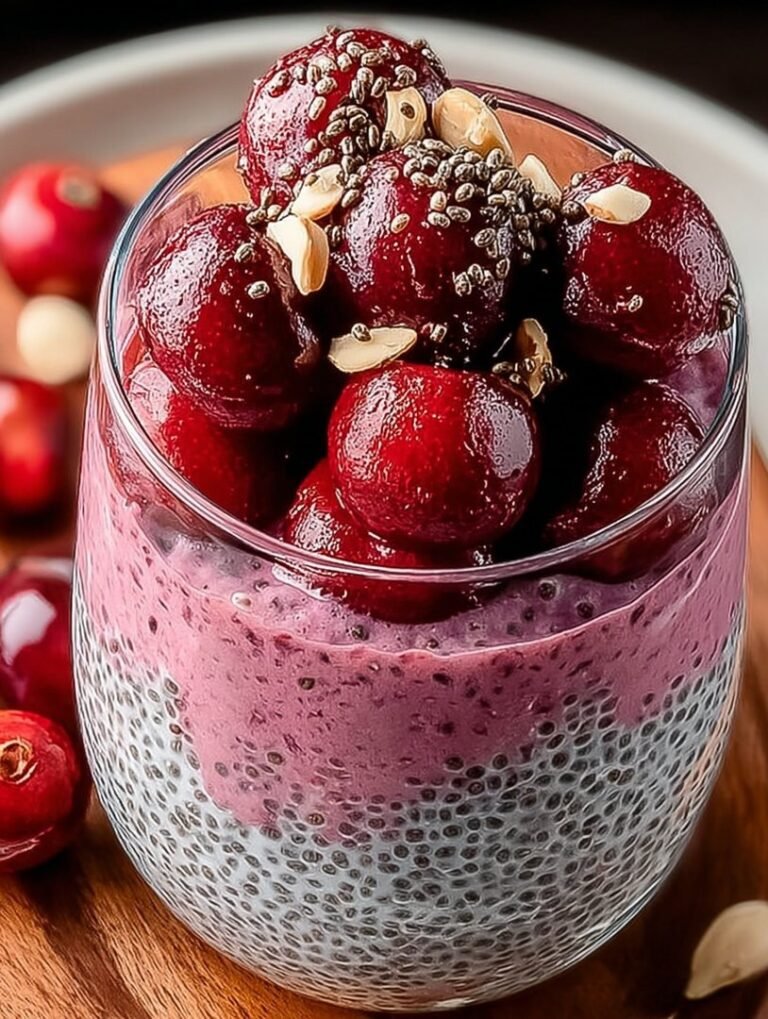
Cherry Chia Pudding
Creamy Cherry Chia Pudding! Blend sweet cherries, almond milk, and chia. Simple steps, plus it’s packed with nutrition. Full recipe included!
- Total Time: 35 minutes
- Yield: 4 servings
Ingredients
- Chia Seeds
- Cherries
- Almond Milk
- Maple Syrup
- Vanilla Powder
- Lemon Juice
- Optional Toppings
Instructions
- Step 1: Prepare the Cherries: Pit the cherries. This can be done with a cherry pitter or by carefully slicing them in half and removing the pits with your fingers. A quick way is using a straw! Simply place the cherry on top of an empty glass bottle opening and press the straw through the center of the cherry to pop the pit out into the bottle.
- Step 2: Blend the Cherry Mixture: In a blender, combine the pitted cherries, almond milk, maple syrup, vanilla powder, and lemon juice. Blend until smooth and creamy. If using frozen cherries, you may need to add a splash more almond milk to help with blending.
- Step 3: Combine with Chia Seeds: Pour the cherry mixture into a bowl. Add the chia seeds and whisk thoroughly to ensure they are evenly distributed. This will prevent clumping and ensure a consistent pudding texture.
- Step 4: Refrigerate and Thicken: Cover the bowl and refrigerate for at least 4 hours, or preferably overnight. This allows the chia seeds to absorb the liquid and create a thick, pudding-like consistency. Stir the mixture once or twice during the first hour to prevent the chia seeds from settling at the bottom.
- Step 5: Check Consistency and Adjust: After refrigeration, check the consistency of the chia pudding. If it is too thick, add a splash more almond milk to thin it out. If it is too thin, add another tablespoon of chia seeds and let it sit in the refrigerator for another 30 minutes.
- Step 6: Serve and Enjoy: Serve the cherry chia pudding chilled. Top with your favorite toppings, such as shredded coconut, chopped almonds, fresh cherries, or a sprinkle of cinnamon. You can also layer it with plant-based yogurt or granola for a more substantial breakfast or dessert. Enjoy this delightful and nutritious treat as a healthy breakfast, snack, or dessert. You can also add other berries on top for additional flavor.
Notes
- Store leftover cherry chia pudding in an airtight container in the refrigerator for up to 5 days.
- This pudding is best enjoyed cold, so there's no need for reheating; if you prefer a slightly warmer treat, let it sit at room temperature for a few minutes.
- For a delightful textural contrast, try topping your cherry chia pudding with crunchy cacao nibs or toasted pecans.
- Chef's tip: Bloom your chia seeds by stirring them vigorously into the cherry mixture at first, and then again after 30 minutes, to avoid a clumpy pudding.
- Prep Time: 15 minutes
- Cook Time: 20 minutes
- Method: Stovetop
- Cuisine: American

Leave a Comment