
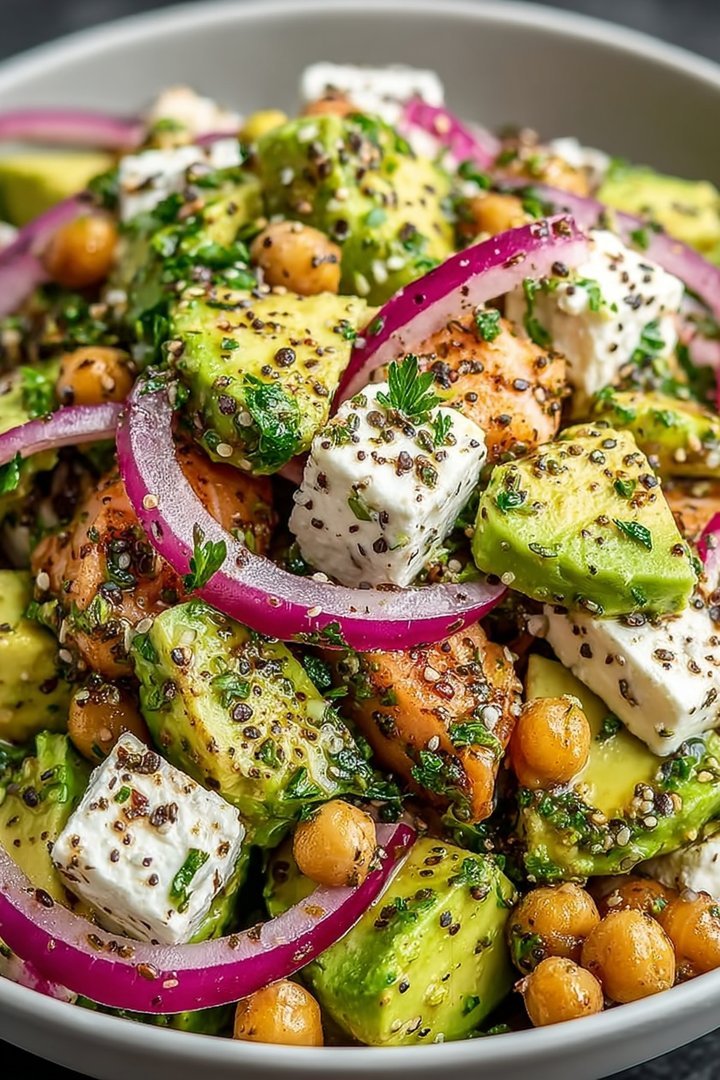
This Chickpea Feta Avocado Salad explodes with fresh, vibrant flavors that dance on your tongue, a symphony of creamy avocado, salty feta, and hearty chickpeas. It’s not just food; it’s a culinary celebration of sunshine and good health.
Imagine a dish so colorful, so delightful, and so incredibly easy to whip up that it becomes your go-to for any occasion. That’s exactly what this Chickpea Feta Avocado Salad offers, a perfect blend of simplicity and satisfaction.
Here’s why you’ll be obsessed with this salad:
- It comes together in under 15 minutes, making it the ideal choice for busy weeknights or impromptu gatherings.
- The combination of creamy avocado, salty feta, and zesty lemon dressing creates a flavor explosion in every bite.
- With its vibrant colors and textures, this salad is a feast for the eyes as well as the palate, impressing everyone.
- Enjoy it as a light lunch, a satisfying side dish, or a flavorful topping for grilled chicken or fish; the options are endless.
Ingredients for Chickpea Feta Avocado Salad
Here’s what you’ll need to make this delicious dish:
The full ingredients list, including measurements, is provided in the recipe card directly below.
How to Make Chickpea Feta Avocado Salad
Follow these simple steps to prepare this delicious dish:
Step 1: Prepare the Dressing
In a small bowl, whisk together the lemon juice, olive oil, Dijon mustard, minced garlic, salt, and pepper until well combined. This tangy dressing will bring all the flavors together.
Step 2: Chop the Vegetables
Dice the avocado, cucumber, red onion, and feta cheese into bite-sized pieces. Halve or quarter the cherry tomatoes. Fresh, vibrant veggies are key to this salad!
Step 3: Combine the Ingredients
In a large bowl, combine the drained and rinsed chickpeas, chopped avocado, cucumber, red onion, cherry tomatoes, feta cheese, and fresh parsley.
Step 4: Dress the Salad
Pour the prepared dressing over the salad and gently toss to coat all the ingredients evenly. Be careful not to overmix, as the avocado can become mushy.
Step 5: Chill and Serve
For the best flavor, chill the salad in the refrigerator for at least 15 minutes before serving. This allows the flavors to meld together.
Step 6: Enjoy
Serve the Chickpea Feta Avocado Salad as a light lunch, a side dish, or a topping for grilled chicken or fish. This is best served immediately or within a few hours.
This recipe is a delightful combination of flavors and textures that make it both satisfying and refreshing.
Perfecting the Cooking Process
To maximize efficiency, start by prepping all your ingredients. Rinse and drain the chickpeas, chop the vegetables, and crumble the feta. Whisk the dressing in advance, so it’s ready when the salad is assembled for ultimate flavor fusion.
Add Your Touch
Feel free to swap out ingredients to suit your taste. Cucumber or bell peppers can stand in for tomatoes. Different herbs like mint or parsley can replace dill. A squeeze of lemon can brighten the whole dish, too.
Storing & Reheating
Store the chickpea feta avocado salad in an airtight container in the refrigerator for up to three days. The avocado may brown slightly, but a quick stir will revive it. There’s no need to reheat; enjoy it cold!
Tips for the Perfect Salad:
- To prevent a soggy salad, gently pat the chickpeas dry with a paper towel before mixing. This allows the dressing to cling better.
- Make sure the avocado is perfectly ripe, but not too soft, to maintain its texture and prevent it from turning into mush when mixed.
- Taste and adjust the seasoning after assembling. A pinch of sea salt or a dash of freshly ground pepper can elevate the flavors.
(Personal anecdote formated as paragraph subheading)
I first made this chickpea feta avocado salad for a summer picnic. My friends raved about it so much, they asked for the recipe, and now it’s a potluck staple in our group.
Conclusion for Chickpea Feta Avocado Salad :
This Chickpea Feta Avocado Salad isn’t just a salad; it’s a celebration of textures and flavors. Combining creamy avocado, salty feta, and hearty chickpeas, it’s a simple recipe that’s perfect for a light lunch, a side dish, or even a quick dinner. Remember to keep your ingredients fresh, prep ahead if needed, and don’t be afraid to experiment with substitutions. Enjoy the freshness, the simplicity, and the sheer deliciousness of this vibrant and satisfying salad.
Print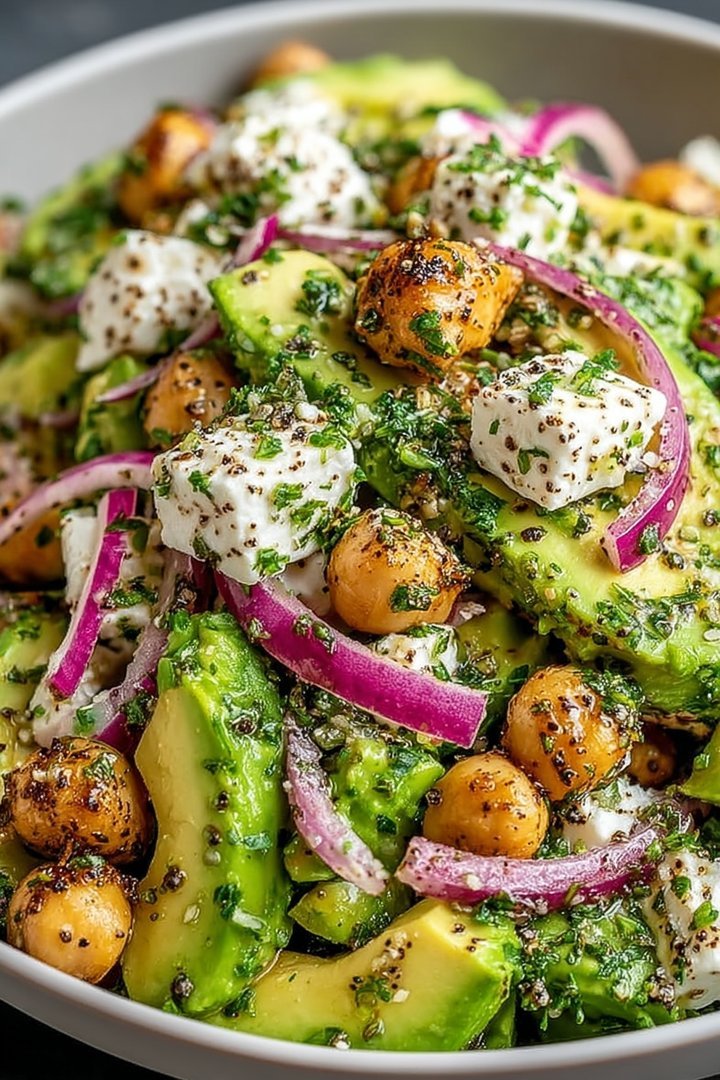
Chickpea Feta Avocado Salad
Delicious chickpea feta avocado salad recipe with detailed instructions and nutritional information.
- Total Time: 35 minutes
- Yield: 4 servings
Ingredients
- Chickpeas, drained and rinsed: 1 (15-ounce) can
- Feta cheese, crumbled: 4 ounces
- Avocado, diced: 1 medium
- Red onion, finely chopped: 1/4 cup
- Cherry tomatoes, halved: 1 cup
- Fresh cilantro, chopped: 1/4 cup
- Lemon juice: 2 tablespoons
- Olive oil: 2 tablespoons
Instructions
- Step 1: In a large bowl, combine the drained and rinsed chickpeas, crumbled feta cheese, diced avocado, and chopped red onion.
- Step 2: Add the halved cherry tomatoes and chopped fresh cilantro to the bowl.
- Step 3: In a small bowl, whisk together the lemon juice and olive oil.
- Step 4: Pour the lemon juice and olive oil dressing over the salad.
- Step 5: Gently toss all ingredients until well combined. Season with salt and pepper to taste.
- Step 6: Serve immediately or chill for later.
Notes
- To prevent the avocado from browning, toss it with a tablespoon of the lemon juice separately before adding it to the salad.
- This salad is best served fresh, but if you must store it, press a piece of plastic wrap directly onto the salad's surface in the fridge to minimize oxidation.
- Enjoy this salad as a light lunch, a vibrant side dish, or even spooned over toasted whole-wheat pita bread for a satisfying snack.
- For a tangier flavor, try adding a pinch of red pepper flakes to the lemon-olive oil dressing.
- Prep Time: 15 minutes
- Cook Time: 20 minutes
- Method: Stovetop
- Cuisine: American
FAQs :
Can I make this Chickpea Feta Avocado Salad ahead of time?
You absolutely can! In fact, sometimes it’s even better after the flavors have had a chance to mingle and get acquainted. I recommend prepping all the ingredients – chopping the veggies, crumbling the feta, and making the dressing – separately. Then, just before serving, toss everything together. This prevents the avocado from turning brown and the greens from getting soggy. If you must assemble it in advance, squeeze a little extra lemon juice over the avocado to slow down oxidation. It’s like giving your avocado a little shield of sunshine!
What are some good substitutions for Feta in this salad?
Not a feta fan? No problem! This salad is super versatile. For a similar salty and tangy flavor, try using crumbled goat cheese. If you want something a little milder, mozzarella or queso fresco would also work nicely. And if you’re avoiding dairy altogether, consider adding some toasted pine nuts or a sprinkle of nutritional yeast for a cheesy flavor. The goal is to add a contrasting element to the creaminess of the avocado and the earthiness of the chickpeas, so experiment and see what you like best.
What’s the best way to store leftover Chickpea Feta Avocado Salad?
If you have any leftovers (which is a big “if” in my house – this stuff disappears fast!), store them in an airtight container in the refrigerator. Keep in mind that the avocado might brown slightly, but it’s still perfectly safe and delicious to eat. To minimize browning, you can press a piece of plastic wrap directly onto the surface of the salad. It will be good for about a day or two, but honestly, it’s best enjoyed fresh. I usually just make a smaller batch to avoid leftovers altogether.
Can I add protein to this Chickpea Avocado Feta Salad to make it a complete meal?
You sure can! While the chickpeas provide a good dose of plant-based protein, you can easily add more to make it a heartier meal. Grilled chicken or turkey breast would be fantastic additions. You could also add some hard-boiled eggs, some canned tuna, or even some cooked quinoa. The possibilities are endless! Just make sure to adjust the dressing accordingly if you’re adding a lot of extra ingredients. Maybe a touch more lemon juice and olive oil will do the trick.


Leave a Comment