
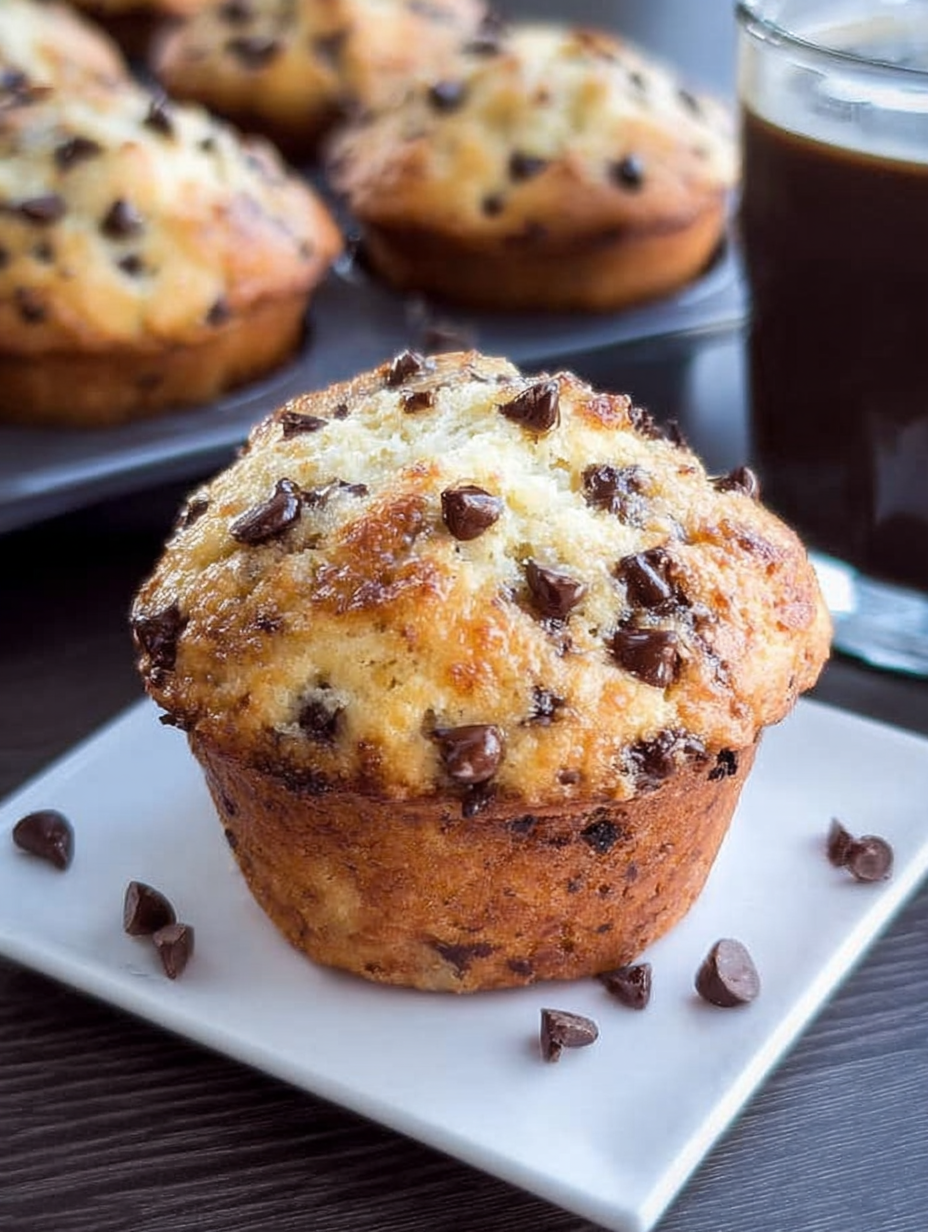
There is a unique type of chaos that ensues when the oven timer dings, announcing the arrival of warm, gooeyChocolate Chip Muffins. That scent—pure vanilla mingling with melting dark chocolate—is the universal signal for ‘drop everything and run.’
Forget the stale bakery versions; we are embarking on a journey to create that soft, cloud-like center and that wonderfully crisp, golden dome that makes every morning feel like a win. It’s time to conquer the muffin top dilemma!
Why This Recipe Will Change Your Life (and Your Breakfast Routine)
- These delightful treats feature a secret baking technique resulting in dramatically tall, bakery-style muffin tops every single time you bake them.
- The recipe balances sweet, rich vanilla batter with generous pockets of semi-sweet chocolate, offering a perfect flavor contrast that wakes up your taste buds.
- You can prepare the batter in under ten minutes, making these impressive, comforting snacks accessible even on the busiest and most rushed weekday mornings.
- Enjoy the incredible versatility of this recipe by swapping in nuts, dried fruit, or different chocolate varieties to customize your next batch of moist, home-baked goodies.
Ingredients for Chocolate Chip Muffins
Here’s what you’ll need to make this delicious dish:
- All-Purpose FlourUse standard bleached or unbleached flour, ensuring it is properly measured by spooning it into the measuring cup and leveling off.
- Granulated SugarEssential for both sweetness and structure; don’t skimp on this crucial element, as it helps create that desirable crisp edge.
- Baking Powder and Baking SodaThese dual leavening agents work together to ensure maximum lift and that signature domed muffin top.
- SaltA small amount of fine sea salt enhances the overall sweetness and complexity of the chocolate flavors in the final baked goods.
- Large EggsMake sure they are brought to room temperature before mixing, as this allows them to emulsify better with the fats, creating a smoother batter.
- Whole Milk or ButtermilkButtermilk adds a slight tang and helps activate the baking soda, resulting in an exceptionally tender crumb.
- Unsalted ButterMelted butter adds richness and moisture; allow it to cool slightly after melting before incorporating it into the wet ingredients.
- Vanilla Bean PasteUse high-quality pure vanilla bean paste for the best flavor; imitation vanilla will not provide the same aromatic depth.
- Chocolate ChipsUse your favorite type—semi-sweet is classic, but a mixture of milk and dark chips creates an interesting, textured experience.
The full ingredients list, including measurements, is provided in the recipe card directly below.
How to Make Chocolate Chip Muffins
Follow these simple steps to prepare this delicious dish:
Step 1: Prep the Oven and Pan
Preheat your oven to a blazing 425°F (220°C). This initial high temperature is critical for creating that beautiful, professional dome. Line a standard 12-cup muffin tin with paper liners, or lightly grease the cups if you prefer not to use liners.
Step 2: Combine the Dry Ingredients
In a large bowl, whisk together the flour, granulated sugar, baking powder, baking soda, and salt. Whisking ensures that the leaveners are evenly distributed—this is key to getting that spectacular rise. Set this bowl aside while you work on the liquids.
Step 3: Mix the Wet Ingredients
In a separate medium bowl, lightly beat the room-temperature eggs. Whisk in the milk or buttermilk, the cooled melted butter, and the vanilla bean paste until fully combined. Ensure the butter is cool enough that it won’t cook the eggs when added.
Step 4: Gentle Mixing and Chip Folding
Pour the wet ingredients into the bowl with the dry ingredients. Stir them together using a rubber spatula just until they are barely combined. Lumps are not just acceptable; they are preferred! Overmixing develops gluten, which leads to tough, chewy muffins. Gently fold in the majority of the chocolate chips, reserving about a quarter cup for topping.
Step 5: The High-Temperature Bake
Divide the batter evenly among the prepared muffin cups, filling them almost completely—this helps the dome form. Sprinkle the reserved chocolate chips over the tops. Bake for 5 minutes at 425°F (220°C), then, without opening the door, immediately reduce the temperature to 375°F (190°C) and bake for another 15 to 18 minutes, or until a toothpick inserted into the center comes out clean.
Transfer to plates and drizzle with sauce for the perfect finishing touch.
The Science Behind the Perfect Muffin Top
Have you ever been deeply disappointed by a flat, sunken muffin? It’s a tragedy rivaled only by spilling coffee on a white shirt. The secret to achieving the quintessential bakery-style muffin, those magnificent giants with sky-high domes, lies in a few counterintuitive scientific tricks—specifically, temperature shock and minimal mixing. When we instruct you to start the oven at 425°F (220°C), we are initiating a dramatic chemical reaction. This extreme heat causes the leavening agents (baking powder and soda) to activate rapidly, releasing a massive burst of carbon dioxide before the batter has time to set. This forceful upward expansion is what creates that impressive initial lift and the towering dome. The quick reduction in temperature then allows the inside of the muffin to catch up and bake thoroughly without burning the tops. Think of it as a culinary sprint followed by a comfortable marathon. If you skip this high-heat blast, your muffins will spread sideways before rising, leading to tragically flat results. Understanding this simple thermal shock principle elevates your baking game instantly, turning you from a casual baker into a certified muffin monarch. Just remember the mantra: hot and fast, then steady and slow.
Mastering the Batter: Why Lumps are Your Friends
When transitioning from cookie dough to muffin batter, many bakers make the fatal mistake of seeking smoothness. They stir and stir, convinced that every truthahn-speck of flour must be perfectly integrated, resulting in a satiny, homogeneous mixture. This is the moment your fluffy treats turn into rubber hockey pucks. Flour contains gluten, a protein network that strengthens the dough when agitated. The more you stir, the more robust and chewy this gluten network becomes. For soft, tender, melt-in-your-mouthChocolate Chip Muffins, we want minimal gluten development. This is why the instructions emphasize mixing “just until combined.” You should see small, dusty patches of flour and distinct lumps in the batter. These lumps provide tender pockets when baked, and the slightly uneven mixing ensures a delicate crumb structure. Embrace the lumps! If you think you’ve mixed enough, stop, fold in the chips, and walk away. This commitment to under-mixing is perhaps the most difficult discipline for the novice baker, but it yields the most dramatic improvement in texture.
Choosing the Right Tools for Muffin Mastery
While muffins seem simple, having the right equipment makes the process much more enjoyable and reliable. A sturdy wire whisk is essential for ensuring your dry ingredients are perfectly aerated and combined before the wet ingredients are introduced. Secondly, a large capacity muffin tin with deep wells is preferable. Shallower tins tend to produce shorter, broader muffins. For the precise high-heat method, a metal pan conducts heat better than silicone, ensuring that crust forms quickly. Lastly, invest in a quality ice cream scoop or cookie scoop. These are invaluable for portioning batter quickly and uniformly, guaranteeing that all 12 muffins bake consistently and finish at the same time. No one wants to pull out a tray where one side is charred and the other is still goo. Uniformity is the secret ingredient for a peaceful kitchen.
Customizing Your Chocolate Chip Muffins Experience
While the classic pairing of vanilla and semi-sweet chocolate is timeless, these morning glories are incredibly versatile and serve as a perfect base for experimentation. This recipe holds up beautifully to various mix-ins and flavor enhancements, allowing you to tailor the bake to whatever craving strikes. If you’re looking for a textural contrast, try adding a half cup of chopped toasted pecans or walnuts alongside the chocolate chips. The nutty crunch provides a wonderful complexity against the soft batter.
Fun Flavor Swaps and Additions
- Citrus Zest:Grating the zest of one whole orange or lemon into the wet ingredients before mixing adds a bright, fresh dimension that cuts through the richness of the butter and chocolate.
- Spice Blend:Incorporate half a teaspoon of ground cardamom or cinnamon into the dry ingredients for a warm, comforting twist, perfect for autumn mornings.
- Cream Cheese Core:For an extra indulgent treat, drop half the batter into the cups, add a small spoonful of sweetened, softened cream cheese mixture (just cream cheese and a touch of sugar), and then top with the remaining batter before baking.
- Double Chocolate Drama:Substitute up to 1/4 cup of the flour with unsweetened cocoa powder to create a rich, dark chocolate batter, perfect for pairing with white chocolate chips.
Remember that if you are adding wet ingredients like purees or jams, you may need to slightly decrease the milk content to maintain the correct batter consistency. However, for dry additions like spices and zest, you can usually incorporate them directly without adjusting the liquids. These simple variations ensure that these wonderful treats never become boring, keeping your kitchen smelling amazing and your family delighted, whether you stick to the pure chocolate chip standard or venture into new culinary territories.
Storing and Serving Your Freshly Baked Delights
Once your beautiful, domed muffins have cooled, proper storage is key to maintaining their moistness. Muffins dry out quickly when left exposed to air. Allow them to cool completely on a wire rack—cooling them in the pan traps steam and makes them soggy—before transferring them to an airtight container. If you plan to eat them within two days, storing them at room temperature is ideal. If you want them to last longer, you can freeze them individually. Wrap cooled muffins tightly in plastic wrap, place them in a freezer-safe bag, and they will keep well for up to three months.
To enjoy a frozen muffin, simply unwrap it and microwave it for about 30 seconds, or let it thaw on the counter for an hour. Reheating them slightly in the microwave brings back that glorious, freshly baked aroma and texture, making them the perfect grab-and-go breakfast or afternoon indulgence. Serve them warm with a slather of soft butter or alongside a strong cup of coffee for the ultimate treat.
The Accidental Discovery of Sunshine on a Plate
I first made theseChocolate Chip Muffinsentirely by accident, grabbing baking powder instead of baking soda during a chaotic weekend morning rush. The result was an impossibly tall, domed beauty—a happy little accident that instantly became a Sunday morning staple in my kitchen, far exceeding my expectations for breakfast.
There are days when the kitchen gods align, and there are days when you realize you haven’t purchased groceries since the previous decade. My journey to the perfect homemadeChocolate Chip Muffinsstarted on one of those latter days. It was a Saturday morning, the kind where the silence of the house screams for a buttery, warm hug. I wanted cookies, but impatience is my defining characteristic, and waiting for cookie dough to chill felt like an act of betrayal. Enter the humble muffin. Muffins, bless their speedy hearts, don’t require patience; they demand instant gratification and a high dome.
My initial attempts were, to put it mildly, flat. They looked like sad, deflated flying saucers rather than the majestic bakery treats I craved. I meticulously followed countless recipes, but my muffins always spread out rather than rising up. It wasn’t until I had a truly embarrassing baking blunder—the accidental swapping of leavening agents—that I unlocked the secret to sky-high domes and a moist, tender crumb. It turns out, sometimes the best cooking advice is to be slightly clumsy and a little bit reckless. These aren’t just baked goods; they are edible little monuments to spontaneous joy, brimming with molten chips and a light, vanilla-scented airiness.
The Architecture of the Perfect Muffin
Before we dive into the ingredients, let’s acknowledge the goal: we are building structure. We are not making cake, and we are certainly not making sad little hockey pucks. The secret to a phenomenal batch ofChocolate Chip Muffinslies in two critical factors: the ratio of wet to dry ingredients and the handling of the batter. Think of it like a delicate negotiation; you want the dry ingredients hydrated, but you absolutely cannot let the gluten develop too much, or you end up with something chewy enough to resole a boot.
I find that many home bakers, eager to ensure everything is fully combined, whisk the batter until their arms ache. Resist this urge. A few lumps are not just acceptable; they are mandatory. Those lumps contain unmixed flour, which absorbs moisture slowly during the baking process, keeping the final product tender. If your batter looks suspiciously smooth, you’ve gone too far. Stop, drop the whisk, and slowly back away.
This recipe forChocolate Chip Muffinsfocuses on high-quality ingredients and a specific heat shock technique that guarantees a truly impressive dome. We use butter for flavor but incorporate a little bit of vegetable oil for tenderness, ensuring that these treats stay moist long after they’ve cooled. If you can manage to hide a few from your family long enough to test the storage viability, you will understand the brilliance of this mixture.
Ingredients for Truly Magnificent Chocolate Chip Muffins
- 2 1/2 cups all-purpose flour
- 1 cup granulated sugar
- 1 tablespoon baking powder (yes, a full tablespoon!)
- 1 teaspoon fine sea salt
- 1 cup milk (whole milk works best for richness)
- 2 large eggs, lightly beaten
- 1/2 cup unsalted butter, melted and cooled slightly
- 1/4 cup neutral-flavored oil (such as canola or sunflower)
- 2 teaspoons pure vanilla bean paste
- 1 1/2 cups semi-sweet chocolate chips (or chunks for maximum melt)
- 2 tablespoons coarse sanding sugar, for topping (optional)
Step-by-Step Baking Blueprint
- Preheat your oven: Adjust your rack to the center position and preheat the oven to a scorching 425°F (220°C). This initial high heat is key to activating the leavening agents quickly and achieving the signature tall dome. Line a standard 12-cup muffin tin with paper liners.
- Combine the dry components: In a large bowl, whisk together the flour, granulated sugar, baking powder, and salt. Make sure the baking powder is fully incorporated.
- Mix the wet components: In a separate medium bowl, whisk together the milk, lightly beaten eggs, melted butter, neutral oil, and vanilla bean paste until just combined.
- Marry the components (The Lumpy Stage): Pour the wet mixture into the dry ingredients. Use a rubber spatula to fold the ingredients together gently until about three-quarters of the flour streaks have disappeared. Do not overmix; a few visible streaks of flour are mandatory for tenderness.
- Fold in the chips: Gently fold in the chocolate chips. If you want a truly professional look, reserve about 1/4 cup of chips for placing directly on top of the batter before baking.
- Fill and Top: Divide the batter evenly among the 12 prepared muffin cups. The cups should be filled almost to the brim—this is crucial for the high dome. Sprinkle the reserved chips and the sanding sugar (if using) over the tops of the batter.
- The Temperature Trick: Bake theChocolate Chip Muffinsat 425°F (220°C) for exactly 5 minutes. Then, without opening the oven door, reduce the temperature to 375°F (190°C) and bake for an additional 15–18 minutes, or until a toothpick inserted into the center comes out clean.
- Cooling: Let the muffins cool in the tin for about five minutes before transferring them to a wire rack to finish cooling completely. Resist the urge to dive in immediately, unless burning your mouth is part of your Saturday ritual.
Perfecting the Cooking Process
Achieve perfect results by mixing the dry ingredients thoroughly first, then combine the wet elements separately before folding them together quickly. Overmixing is the enemy of fluffy muffins; use a high oven temperature initially to get that signature dome, then immediately drop the temperature to finish baking gently.
The high-low temperature trick is honestly the MVP of this entire operation. Starting yourChocolate Chip Muffinsat a fiery 425°F gives that massive blast of heat needed to create steam rapidly within the batter, which causes the leavening agents to spring into action with gusto. This initial surge creates that beautiful, cracked dome. Dropping the temperature then allows the center to cook through without burning the exterior, resulting in a perfect, uniform bake.
Three Golden Rules for Muffin Mastery
- Do not substitute oil for all the butter. The flavor of melted butter is essential, but a quarter cup of oil ensures that the crumb remains incredibly tender and moist for days.
- Always use room temperature wet ingredients, particularly the milk and eggs. This helps them emulsify better with the melted butter and creates a smoother, more uniform batter faster, minimizing the need for over-mixing.
- To truly elevate the chocolate experience, grate one tablespoon of a quality dark chocolate bar into the dry ingredients. This chocolate dust melts immediately, deepening the overall cocoa flavor of the muffin base.
My grandmother, who could make a gourmet meal out of dust and a single radish, always preached the importance of accurate measurement, especially when it comes to flour. If you simply scoop flour directly from the bag with your measuring cup, you compact it, adding up to 25% too much. This makes the muffins dense and dry. Always use the “spoon and level” method: spoon the flour gently into the measuring cup, then level off the excess with a straight edge. This small step is the difference between bakery perfection and breakfast disappointment.
Add Your Touch
Customize your batter with a touch of espresso powder for depth, or swap out chips for white chocolate chunks and pecans. For an extra moist crumb, replace a quarter cup of the milk with plain, full-fat yogurt, introducing a slight tang that complements the richness of the chocolate.
Flavor Variations to Keep Things Interesting
While the classicChocolate Chip Muffinsare fantastic, there’s no harm in experimenting once you master the foundational technique. If you are serving these for a special brunch, consider these tweaks:
- Banana Swirl:Add one cup of mashed, overripe banana and reduce the milk by half. The banana adds natural sweetness and incredible moisture.
- Cinnamon & Spice:Incorporate 1 teaspoon of ground cinnamon and 1/4 teaspoon of nutmeg into the dry mix for a warm, comforting flavor profile.
- Nutty Crunch:Fold in 1/2 cup of toasted walnuts or pecans along with the chips. Make sure they are toasted beforehand to maximize their crunch and flavor.
One time I accidentally added a teaspoon of alcohol-free almond extract instead of vanilla. I was momentarily horrified, believing I had ruined the batch. Instead, the muffins emerged with a sophisticated, slightly nutty undertone that surprised everyone. Since then, I’ve found that a half teaspoon of alcohol-free almond extract alongside the vanilla can add an incredible depth of flavor without being overpowering. Don’t be afraid to let your own minor kitchen mishaps lead to new, delicious discoveries.
Storing & Reheating
Store cooled muffins in an airtight container at room temperature for up to three days. To revive that fresh-baked texture, microwave them for 15 seconds or toast them lightly in a warm oven for a minute. If storing longer, they freeze beautifully for up to three months.
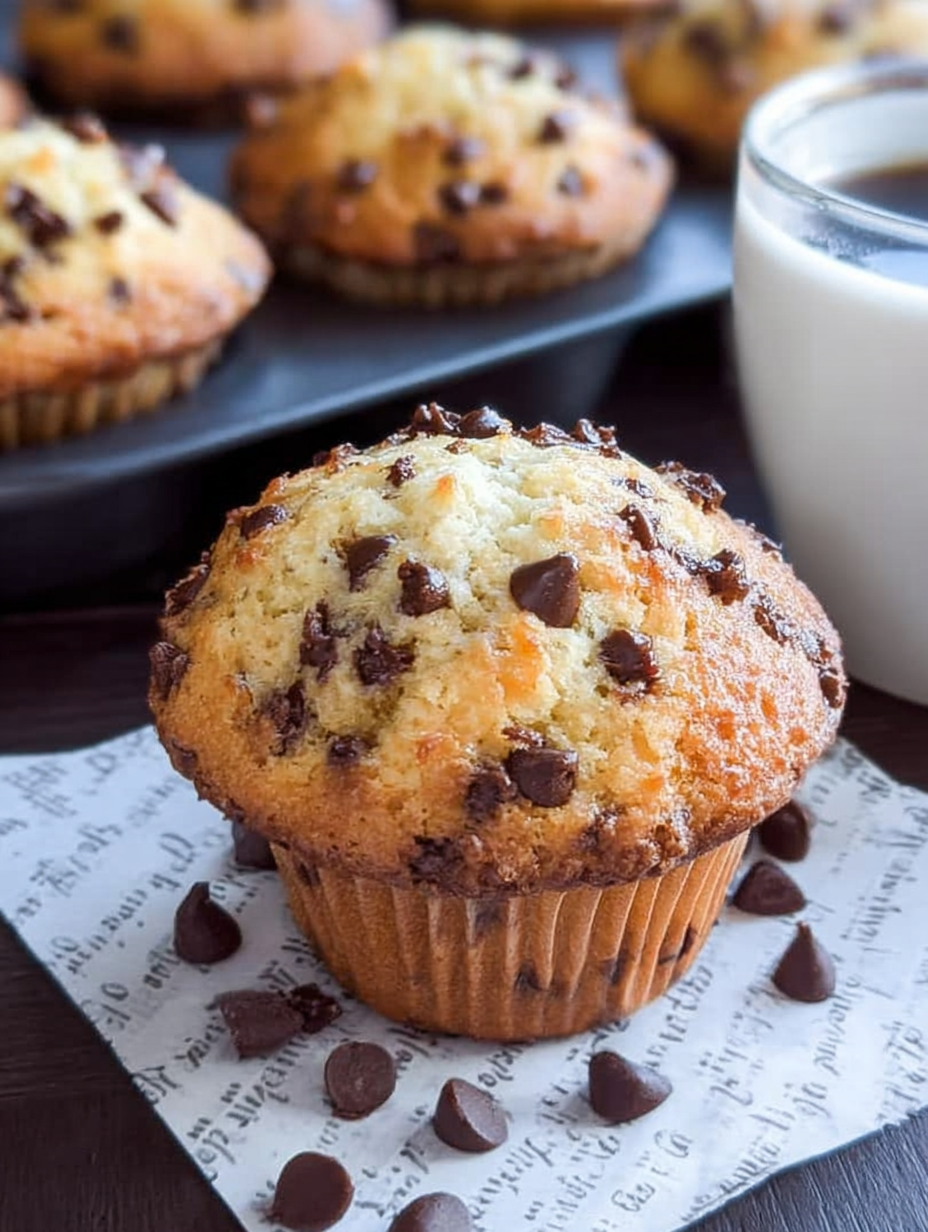
I once brought a batch of these glorious Chocolate Chip Muffins to a family picnic, and my cousin, who typically rejects anything that isn’t store-bought, took a bite and immediately demanded the recipe. That moment sealed the fate of these muffins as a permanent fixture in my baking repertoire.
Conclusion for Chocolate Chip Muffins
Mastering these high-domedChocolate Chip Muffinsis less about precision and more about understanding the delicate balance between high heat and minimal mixing. Remember the key steps: use the spoon and level method for flour, utilize the high-low temperature shock, and leave those lumps in the batter. These simple yet effective techniques guarantee a batch of treats that are moist, fluffy, and absolutely loaded with gooey chocolate goodness. Whether you are seeking a quick breakfast solution or the perfect afternoon snack, these magnificent muffins offer a comforting, bakery-quality experience right from your own oven. Embrace the chaos of baking and enjoy every decadent bite.
Print
Chocolate Chip Muffins
Achieve bakery-quality height! These fluffy, golden Chocolate Chip Muffins require just 2 cups of flour and simple dry mixing (flour, sugar, baking powder) before baking at 400°F.
- Total Time: 35 minutes
- Yield: 4 servings 1x
Ingredients
- 2 cups all-purpose flour
- 3/4 cup granulated sugar
- 2 teaspoons baking powder
- 1/2 teaspoon salt
- 1 large egg
- 1 cup milk
- 1/2 cup (8 tablespoons) unsalted butter, melted and cooled
- 1 cup semisweet chocolate chips
Instructions
- Step 1: Preheat your oven to 400°F (200°C). Line a standard 12-cup muffin tin with paper liners or grease the cups thoroughly.
- Step 2: In a large bowl, whisk together the flour, granulated sugar, baking powder, and salt.
- Step 3: In a separate medium bowl, whisk the milk, egg, and cooled melted butter until the wet ingredients are fully combined.
- Step 4: Pour the wet mixture into the dry ingredients. Stir gently with a rubber spatula until the ingredients are *just* incorporated, being careful not to overmix the batter. Fold in the chocolate chips.
- Step 5: Divide the batter evenly among the 12 prepared muffin cups, filling each cup about two-thirds full.
- Step 6: Bake for 18 to 20 minutes, or until the tops are golden brown and a toothpick inserted into the center of a muffin comes out clean. Let cool in the pan for 5 minutes before moving them to a wire rack.
Notes
- Store cooled muffins in an airtight container at room temperature for up to 3 days, placing a folded paper towel inside the container to absorb moisture and keep the tops fresh.
- If the muffins feel dry the next day, quickly revive them by microwaving individual muffins for 10-15 seconds or wrapping them loosely in foil and heating in a 300°F oven for 5 minutes.
- Serve these warm, split open, and slathered with a pat of quality salted butter or a drizzle of local honey for an extra indulgent breakfast treat.
- The secret to tender muffins is minimal stirring; stop mixing the batter the moment you see the last streak of flour vanish, even if it looks slightly lumpy.
- Prep Time: 15 minutes
- Cook Time: 20 minutes
- Method: Stovetop
- Cuisine: American


Leave a Comment