
When the craving hits for something crunchy, salty, and unapologetically cheesy, nothing else will do. Forget sad, soggy appetizers; we are diving headfirst into the glorious world ofCrispy Pickle Cheese Bites. These aren’t just snacks; they are tiny, deep-fried miracles that deliver an intense flavor punch and will vanish from the platter faster than you can say “dill-lightful.”
Surprisingly simple to assemble, these cheesy pickle appetizers require minimal kitchen skill but deliver maximum party impact every time.
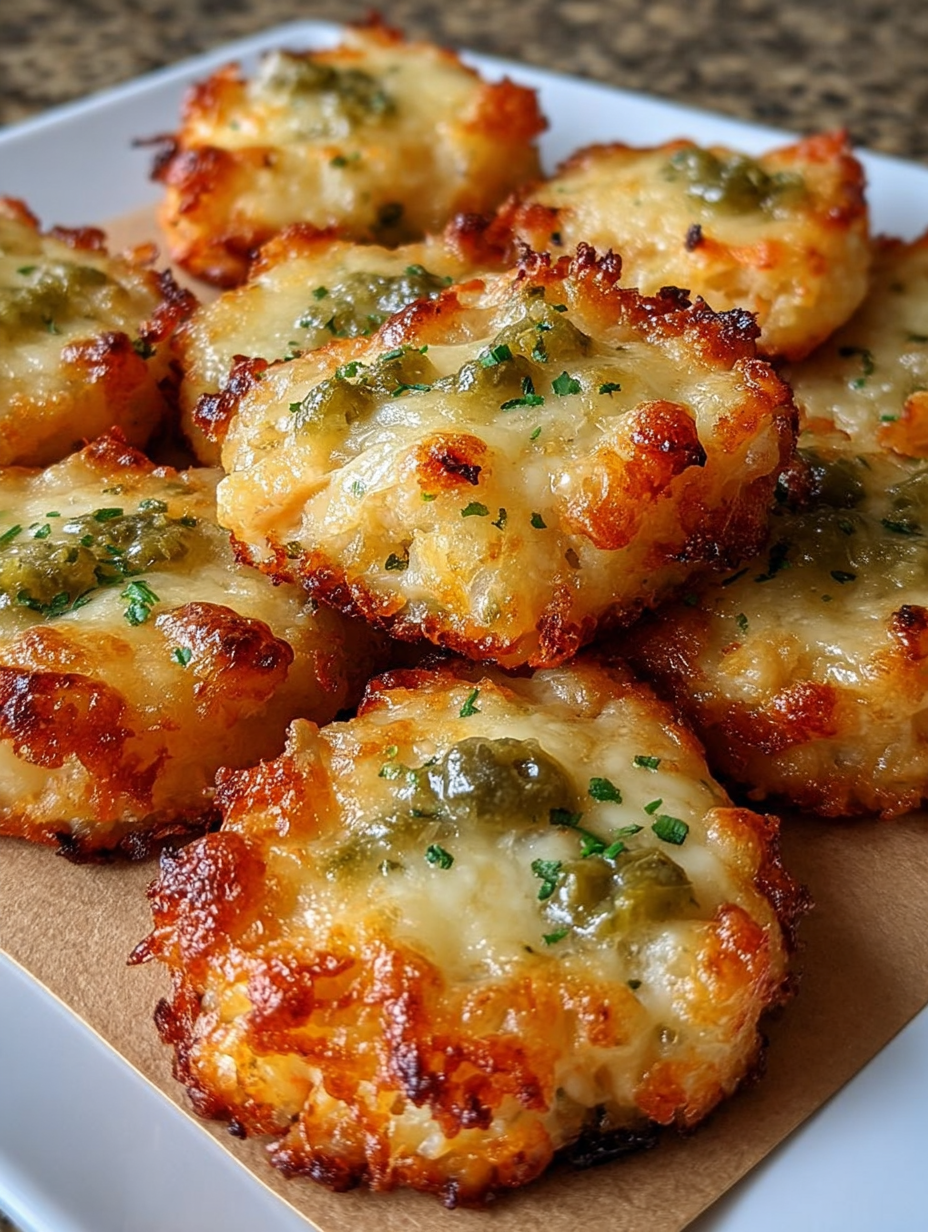
The perfect balance of tangy dill pickle sharpness against rich, melting cheddar and a golden, crunchy exterior is irresistible.
Their appealing golden-brown color and whimsical size make them ideal for impressive, yet effortless, entertaining at any gathering.
Excellent served warm with ranch or a spicy dipping sauce, making them a versatile star for game days or casual movie nights.
The Quest for the Ultimate Crunch
I’ve always maintained that there are two kinds of party snacks: those that are ignored until the second hour, and those that trigger a polite stampede within minutes of hitting the table. I spent years trying to perfect the latter category. My journey led me through several tragic experiments involving cheese puffs that refused to crisp and potato skins that tasted suspiciously like cardboard. But then, the universe spoke, and it demanded pickles.
The standard deep-fried pickle chip, while enjoyable, is flawed. It’s often too thin, absorbing oil like a sponge, or the breading slumps off the second it cools. We needed structural integrity, textural contrast, and a shock factor. The solution was blindingly simple: cheese. Not just any cheese, but a dense block of flavor that acts both as filling and as a barrier, preventing the pickle from turning into a sad, steamy mess. Encasing a perfectly seasoned chunk of cheddar right into the heart of a dill pickle wedge, then double-coating it in a seasoned panko armor, transforms this humble vegetable into a golden-brown legend.
This recipe forCrispy Pickle Cheese Bitesis the result of relentless, highly scientific kitchen testing (read: eating too many pickles). They provide that satisfying, audible crunch, followed by a burst of tangy pickle, and finally, the slow, luxurious melt of warm cheese. It’s an appetizer trifecta. You’ll find yourself becoming a legend among your friends, and the best part is that the preparation is surprisingly Zen—perfect for distracting yourself before the guests arrive and the chaos begins. Just remember the one non-negotiable rule: patience during the freezing phase is the secret to avoiding a catastrophic cheese explosion when frying.
Choosing Your Pickle: Size and Sourness Matters
The quality of the final product hinges entirely on the quality and preparation of the star ingredient: the dill pickle. We are not using sweet pickles here; we need that glorious, mouth-puckering sourness to cut through the richness of the cheese and the oil. Look for whole dill pickles, preferably the larger, crunchier variety, or good-quality spears. Avoid pre-sliced chips or flimsy slices, as they lack the necessary structure to hold the filling.
Preparation is everything. After slicing your pickles into manageable bite-sized wedges or chunks (aiming for pieces roughly 1 to 1.5 inches long), you must commit to the drying process. Pat them down thoroughly. I mean, aggressively. Use a mountain of paper towels or a clean kitchen cloth and squeeze out every possible drop of moisture. Any residual liquid will turn your breading into a slippery disaster zone, guaranteeing separation during cooking. Think of it as preparing your pickle wedge for a spa day, followed by mandatory boot camp. Once dried, they are ready for their cheesy core.
Ingredients for Crispy Pickle Cheese Bites
Here’s what you’ll need to make this delicious dish:
- Dill Pickles (Whole or Spears)Choose large, crunchy pickles, ensuring they are well-drained and patted extremely dry before use.
- Sharp Cheddar CheeseOpt for a block of high-quality cheddar and cut it into small, dense cubes or thick slivers that fit neatly inside the pickle piece.
- All-Purpose FlourEssential for the first dusting, this provides a dry surface for the egg wash to adhere to the pickle perfectly.
- Large EggsWhisked lightly, these act as the sticky “glue” between the flour base and the crunchy panko crust.
- Panko BreadcrumbsThese are non-negotiable for true crunch; standard breadcrumbs will result in a softer, less dramatic texture.
- Smoked PaprikaAdds a beautiful color and a depth of savory, slightly smoky flavor to the breading mixture.
- Garlic Powder and Onion PowderThese aromatics enhance the savory profile of the crust, complementing the tanginess of the dill.
- Canola or Vegetable OilUsed for deep frying, or a suitable cooking spray if you opt for the air fryer or baked version.
The full ingredients list, including measurements, is provided in the recipe card directly below.
How to Make Crispy Pickle Cheese Bites
Follow these simple steps to prepare this delicious dish:
-
Prepare the Pickles and Cheese Inserts
Slice the drained, dried pickles into uniform bite-sized pieces. If using spears, you may need to slice them lengthwise to create a pocket. Carefully insert a small cube or sliver of cheddar cheese into the center of each pickle piece. You want the cheese nestled snugly but not bulging. Press the pickle lightly around the cheese to seal it as much as possible.
-
Set Up the Breading Station
Arrange three shallow dishes in a classic assembly line. Dish 1 holds the all-purpose flour. Dish 2 contains the whisked eggs. Dish 3 is where the magic happens: combine the panko breadcrumbs, smoked paprika, garlic powder, onion powder, salt, and black pepper. Mix the panko mixture thoroughly until the seasonings are evenly distributed and the crumbs are lightly colored.
-
Execute the Critical Double Dip
Take each cheese-stuffed pickle bite and coat it thoroughly in the flour, shaking off the excess. Next, dip it into the egg wash, ensuring full coverage. Finally, press the egg-coated bite firmly into the seasoned panko mixture. This is the crucial first coat. Immediately repeat the egg and panko step for a mandatory second coating. This double breading prevents leaks and maximizes the glorious crunch factor.
-
The Mandatory Freezing Protocol
Arrange the breaded bites on a parchment-lined baking sheet, ensuring they do not touch. Transfer the sheet to the freezer for a minimum of 45 minutes, or up to 2 hours. This step is absolutely non-negotiable; it firms up the breading and chills the cheese, ensuring the bites hold their shape and the cheese stays inside instead of melting out prematurely during cooking.
-
Fry or Bake to Golden Perfection
If frying, heat about two inches of oil in a heavy-bottomed pot to 350°F (175°C). Carefully drop the frozen bites into the hot oil in batches, ensuring you do not overcrowd the pot. Fry for 2–3 minutes until they are deep golden brown and crunchy. Alternatively, if baking or air frying, preheat to 400°F (200°C) and cook for 8–10 minutes, flipping halfway, until golden and crispy.
Troubleshooting and Achieving Maximum Crunch
The difference between a stellar appetizer and a disappointing, soggy mess often comes down to a few small details. First, oil temperature management is key. If the oil is too cool, the bites will absorb too much fat and become greasy. If it’s too hot, the outside will burn before the cheese has a chance to melt properly. Invest in a thermometer and keep that 350°F target steady. If you are frying multiple batches, allow the oil temperature to recover between rounds.
Secondly, do not skimp on the freezing time. I know you are hungry, and the smell of the panko is intoxicating, but trust the process. Freezing creates a structural shell that stabilizes the breading. If you skip this, the hot oil will cause the cheese to liquefy instantly and burst through the thin breading layer. Think of the freezer as the protective exoskeleton for your future appetizers.
If you opt for baking instead of frying, a light misting of cooking spray or melted butter over the panko before they go into the oven significantly helps achieve that desirable golden hue and crisp texture that frying naturally provides. Remember, the goal is always maximum surface area crunchiness, contrasting the soft, warm interior. Don’t stack the finished bites; let them drain on a wire rack lined with paper towels immediately after removing them from the heat, which allows air circulation and prevents steaming.
Serving Suggestions and Dipping Sauce Dramatics
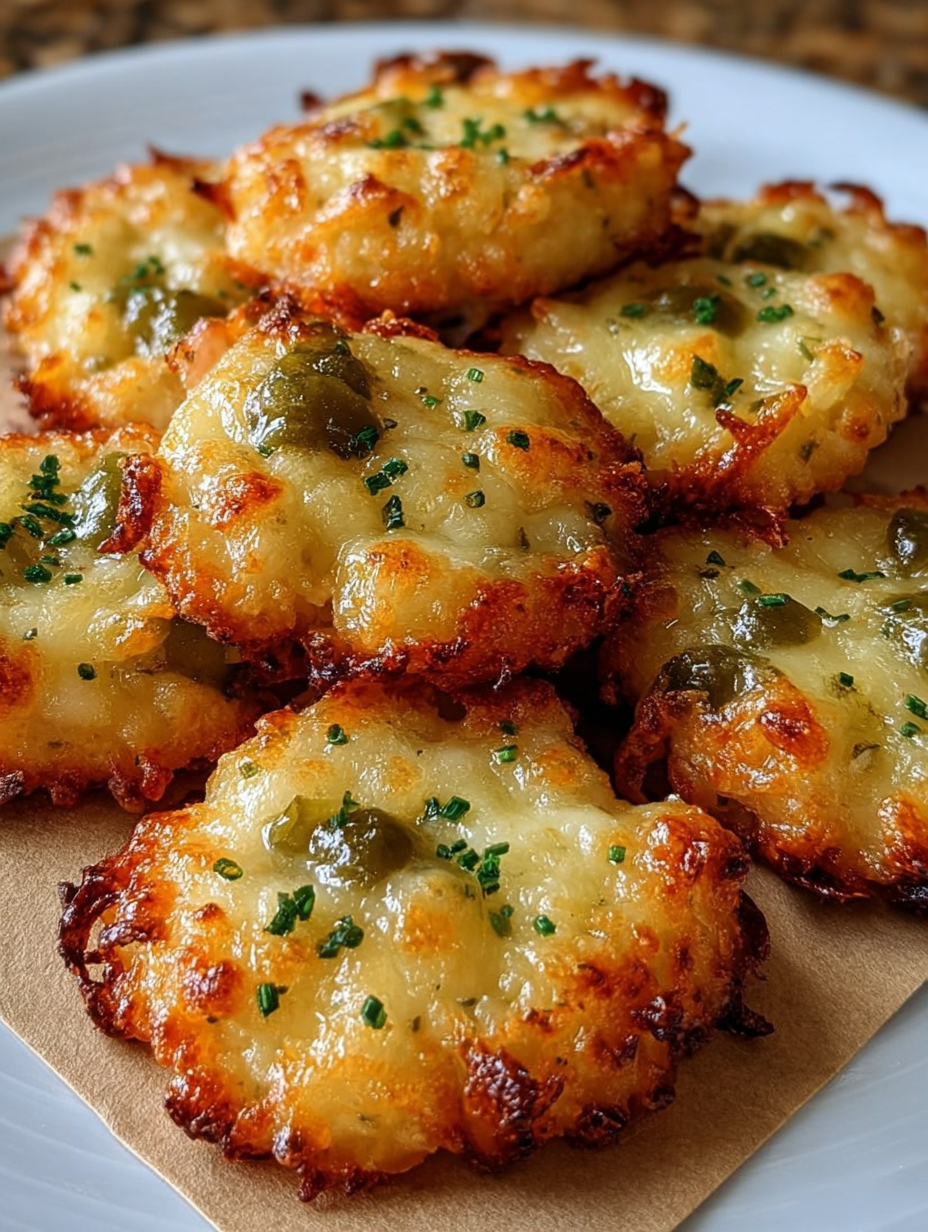
When theCrispy Pickle Cheese Bitesemerge, radiant and golden, they demand immediate attention. Serve them piping hot. The delightful pull of the melted cheese is part of the experience, and nobody wants a room-temperature pickle-cheese hybrid, no matter how crispy the exterior is. Transfer to plates and drizzle with sauce for the perfect finishing touch.
While these bites are spectacular on their own, a strategic dipping sauce elevates them to legendary status. Classic ranch dressing is always a crowd-pleaser; the cool, creamy herbiness is the perfect foil for the salty, fried crunch. For those who enjoy a bit of heat, mix sour cream with a dash of smoky chipotle pepper powder, lime juice, and a pinch of cumin to create a vibrant, spicy crema. You could also try a simple honey-mustard mix for a sweet and tangy contrast.
These crunchy dill snacks are incredibly versatile. They are the ideal addition to a game day spread, the perfect accompaniment to a movie marathon, or a sophisticated, yet fun, starter for a casual dinner party. When serving, arrange them artistically on a platter garnished with a few fresh dill sprigs to emphasize their tangy flavor profile. They won’t last long, so make sure you sneak one or two for yourself before announcing that the appetizers are ready.
The Accidental Discovery of Sunshine on a Plate
I stumbled upon these during a desperate pantry raid when the fridge was yelling “Empty!” I only had dill pickles and a forgotten block of cheddar. Frying them up wasn’t culinary genius; it was pure, hungry survival. The resulting tangy, crunchy, cheesy perfection was the happiest accident of my appetizer career.
Perfecting the Cooking Process
For flawless Crispy Pickle Cheese Bites, start by chilling the breaded bites for 30 minutes—this prevents disastrous cheese leaks. While they chill, preheat your oil or air fryer. Cook them quickly in small batches to maintain a steady temperature, ensuring that signature golden crust.
Add Your Touch
Swap sharp cheddar for pepper jack for a spicy kick, or use smoked Gouda for depth. For seasoning, skip plain salt and pepper; try a dash of smoked paprika or garlic powder mixed into the breadcrumbs. Don’t forget dipping sauces—ranch is classic, but a creamy chipotle sauce elevates these dramatically.
Storing & Reheating
Store cooled leftover Crispy Pickle Cheese Bites in an airtight container in the fridge for up to three days. Never microwave them! Reheat in a 350°F (175°C) oven or air fryer for about 5 minutes until crisp again. This preserves that crucial crunchy texture we crave.
The Culinary Marvel of the Crispy Pickle Cheese Bite
Let’s be honest, the world didn’t exactly need another fried appetizer. We have onion rings, mozzarella sticks, and approximately 700 variations of potato product. But then, the universe conspired to bring us the Crispy Pickle Cheese Bites, and everything changed. This snack is not just an appetizer; it’s an emotional experience, a delightful collision of the briney, the rich, and the utterly crunchy. If you’ve ever doubted the transformative power of a deep-fried (or air-fried) dill pickle slice hugged tightly by melted cheese, prepare for enlightenment.
The beauty of the Crispy Pickle Cheese Bites recipe lies in its simplicity and its sheer audacity. Who decided that sharp cheddar and pungent dill pickles should be best friends encased in panko crumbs? A genius, clearly. The contrast is the key: the cool, acidic snap of the pickle against the gooey, salty warmth of the melted cheese, all wrapped up in a golden, shattering shell. These are perfect for game days, existential snack crises, or simply convincing your skeptical friends that yes, a pickle appetizer is the pinnacle of human achievement.
Essential Ingredients for Pickle Perfection
Making these bites requires focusing on quality, not quantity. We are keeping this ingredient list tight and effective. Forget the fancy imports; we need dependable staples that deliver maximum flavor and structure. Remember, the pickle is the star—choose thick, crunchy dill spears or chips, avoiding those floppy, overly processed varieties that collapse under heat. A good pickle holds its structure and delivers that necessary acidic counterpoint to the richness of the cheese.
- Pickles:1 jar (16 oz) of thick-cut dill pickle chips or spears (pat them bone dry!).
- Cheese:8 oz sharp cheddar cheese, sliced into small, thick cubes (or block Monterey Jack).
- Binding Agents:1/2 cup all-purpose flour, 2 large eggs (beaten lightly), 1 1/2 cups Panko breadcrumbs (for maximum crunch).
- Seasoning:1 teaspoon garlic powder, 1/2 teaspoon smoked paprika, salt, and black pepper.
- Frying Oil:High smoke point oil like canola, vegetable, or peanut oil (enough for 1 inch of depth), or cooking spray for the air fryer.
The Two-Step Crunch Coating Method
The secret to preventing the dreaded cheese ooze catastrophe—where the filling escapes and leaves you with a sad, empty shell—lies in the coating process. You must be methodical, treating each bite like a precious piece of art. This recipe employs the classic “dredge, dip, dredge” method, but we add a crucial second breading layer for ultimate structural integrity and that glorious, audible crunch. Think of it as giving your pickles a tiny, armored suit.
First, thoroughly dry your pickles. Moisture is the enemy of crispiness. Once patted dry, pair each pickle slice with a cube of cheese. Now for the dipping stations: one bowl of flour seasoned with salt and pepper; one bowl of beaten egg; and one bowl of Panko mixed with garlic powder and smoked paprika. Dredge the pickle and cheese combo lightly in flour, ensuring full coverage, then dip into the egg, letting excess drip off. Finally, roll firmly in the seasoned Panko.
Double Dipping for Deliciousness
But wait, we aren’t done! This is where the magic happens. After the first coat, dip the Panko-coated bite back into the egg wash quickly, and then return it immediately to the Panko bowl for a second, heavy coating. This double-breading layer is non-negotiable for keeping the cheese safely locked inside until serving. Once coated, place these future stars onto a sheet pan lined with parchment paper. Crucially, refrigerate them for at least 30 minutes. This chilling time sets the breading and ensures minimal leakage during cooking. Patience, while difficult when Crispy Pickle Cheese Bites are involved, truly pays off here.
The Perfect Cook: Frying vs. Air Frying
Whether you prefer the glorious, golden depth of deep-frying or the convenient health halo of air frying, these bites adapt beautifully. The goal remains the same: a crispy exterior and a molten, tangy center. Do not rush this stage; undercooked breading leads to disappointing sogginess, which is a tragedy we simply cannot afford.
Deep Frying Method
Heat your oil to a steady 350°F (175°C). Use a thermometer—guessing oil temperature is the fastest route to greasy snacks. Carefully drop the chilled Crispy Pickle Cheese Bites into the hot oil, working in small batches of 6-8. Overcrowding drops the oil temperature immediately, resulting in oily, sad bites. Fry for 2 to 3 minutes, flipping halfway through, until they are deeply golden brown and the cheese is just beginning to soften. Use a slotted spoon to remove them, transferring them immediately to a wire rack lined with paper towels to drain excess oil. Serve immediately!
Air Frying Method (The Speedy Option)
Preheat your air fryer to 380°F (195°C). Lightly spray the chilled bites with cooking spray—this mimics the effect of oil and helps achieve that golden color. Place them in the air fryer basket, ensuring they do not touch. Air fry for 6 to 8 minutes, flipping them gently halfway through. They are done when they are intensely golden and crunchy. The air fryer method delivers a fantastic crispness with significantly less cleanup, making it the champion for spontaneous snacking.
Expert Tips for Flawless Crispy Pickle Cheese Bites
- Always use cold cheese cubes and extremely dry pickles; internal moisture and warmth are the main culprits behind explosions during frying.
- Ensure your Panko breadcrumbs are mixed thoroughly with the seasonings before the double dredge; this guarantees even flavor distribution across the surface.
- Do not skip the 30-minute chilling period; this mandatory step helps the coating adhere firmly, locking the melted cheese securely inside the shell.
My younger brother, who claims to hate all things green, devoured an entire plate of these Crispy Pickle Cheese Bites before realizing he was eating pickles, proving their irresistible power.
Conclusion for Crispy Pickle Cheese Bites
Creating perfect Crispy Pickle Cheese Bites is less about complex culinary skills and more about dedication to the crunch. By prioritizing the double-breading technique, ensuring sufficient chilling time, and cooking them at the correct temperature, you guarantee a memorable appetizer experience. Whether you opt for the deep-fried indulgence or the quick air-fried option, these tangy, cheesy morsels are guaranteed crowd-pleasers. They are the ultimate testament to the fact that sometimes, the simplest ingredients, when treated with respect and a good coat of Panko, can create snack nirvana. Go ahead, unleash the glorious combination of dill and melted cheese upon the world, and prepare for the applause.
Print
Crispy Pickle Cheese Bites
These unique Crispy Pickle Cheese Bites feature tangy dill spears, carefully trenched and stuffed with a creamy cheddar filling, then panko-crusted.
- Total Time: 35 minutes
- Yield: 4 servings 1x
Ingredients
- 1 (16 oz) jar dill pickle spears
- 4 oz softened cream cheese
- 1 cup shredded sharp cheddar cheese
- 2 large eggs, lightly beaten
- 1 cup Panko breadcrumbs
- 1/2 cup all-purpose flour
- 1 teaspoon garlic powder
- 3 cups vegetable oil, for frying
Instructions
- Step 1: Thoroughly drain the pickle spears and pat them extremely dry with paper towels. Slice each spear lengthwise and carefully scoop out a small trench or pocket in the center of the spear half to hold the filling.
- Step 2: In a small bowl, combine the softened cream cheese, shredded cheddar cheese, and garlic powder until well mixed. Use a small spoon or piping bag to fill the trenches of each pickle half with the cheese mixture.
- Step 3: Set up a standard breading station: Place the flour in a shallow dish, the beaten eggs in a second dish, and the Panko breadcrumbs in a third dish. Gently dredge each filled pickle bite first in the flour (shaking off excess), then dip into the egg, and finally coat heavily in the Panko breadcrumbs, pressing firmly to adhere.
- Step 4: Heat the vegetable oil in a deep skillet or pot to 350°F (175°C). Carefully add the coated pickle bites in batches, ensuring not to overcrowd the pan. Fry for 2-3 minutes per batch, turning occasionally, until they are golden brown and crispy.
- Step 5: Remove the Crispy Pickle Cheese Bites using a slotted spoon and transfer them to a plate lined with paper towels to drain excess oil. Serve immediately with ranch dressing or dipping sauce of choice.
Notes
- To prep ahead, assemble and bread the bites, then freeze them solid on a sheet pan; fry directly from frozen for the best crispness.
- Avoid the microwave; for optimal crunch, quickly reheat leftovers in an air fryer or oven at 350°F until the cheese is gooey again.
- Elevate the flavor profile by serving these crunchy, savory bites with a tangy horseradish dipping sauce or a slightly sweet pepper jelly for contrast.
- The secret to perfect breading is moisture removal; ensure the drained pickle spears are patted "extremely dry" before filling, or the Panko coating will detach during frying.
- Prep Time: 15 minutes
- Cook Time: 20 minutes
- Method: Stovetop
- Cuisine: American


Leave a Comment