

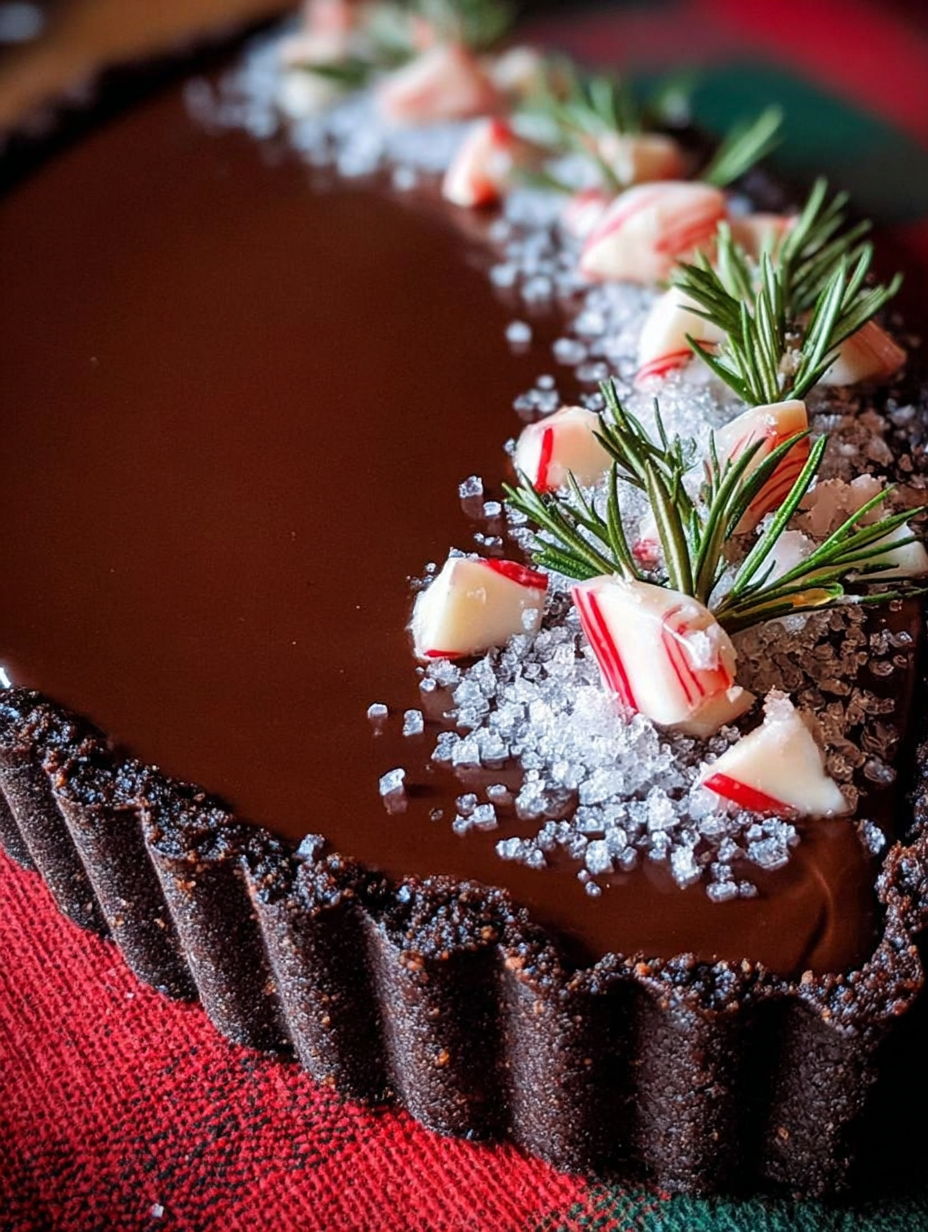
When the chill hits and the holiday lights start twinkling, there is only one dessert that truly captures that perfect, refreshing winter magic: the decadent and strikingDark Chocolate Peppermint Mousse Tart. It is the sophisticated, velvety cousin of the standard peppermint bark, offering a lush combination of intense cocoa and a bright, cool burst that makes every bite unforgettable.
This tart is the dessert of champions—the kind of showstopper that convinces your most skeptical in-laws that you are actually a culinary genius, or at least someone who owns a really great whisk. Forget complicated holiday baking; we are making elegance simple and delicious today.
- Velvet Texture:Achieves a light, airy, and intensely satisfying mousse without relying on pectin, utilizing careful whipping techniques for stability and lift.
- Intense Flavor Profile:Marries the deep bitterness of high-quality dark chocolate with the crisp, cooling sensation of natural peppermint extract for exquisite balance.
- Effortless Elegance:This recipe boasts stunning visual contrast and high presentation value, making it look incredibly complex despite its straightforward preparation process.
- Make-Ahead Marvel:Perfect for busy schedules as the entire tart can be assembled and chilled up to two days in advance, allowing the flavors to deepen beautifully.
The Anatomy of a Showstopping Holiday Tart
If you have ever tried to host a holiday dinner, you know the drill: the kitchen transforms into a warzone of flour dust and anxiety. You want a dessert that screams “I worked tirelessly for this moment,” but secretly, you want to spend more time enjoying the party than frantically scrubbing sticky pots. That is precisely where the magic of theDark Chocolate Peppermint Mousse Tartcomes into play. It requires precision, yes, but almost zero last-minute fuss. It is the James Bond of desserts—smooth, cool, and incredibly effective.
My journey to perfecting this recipe began years ago during a disastrous attempt at a yule log that resembled a scorched log floating in a melted marshmallow puddle. I needed something sturdy, impressive, and distinctly seasonal. I decided to pivot entirely, focusing on the powerful duo of dark chocolate and peppermint. But the challenge was finding that perfect texture. Standard mousse often requires finicky methods or ingredients I wanted to avoid. After much experimentation—and several failed attempts where the crust crumbled into despair—I landed on a genius combination of a simple, robust chocolate crust and a stabilized, egg-free mousse that sets up beautifully in the refrigerator.
The secret to the depth of flavor here lies in selecting the right ingredients, particularly the cocoa percentage. Do not reach for the generic baking chips; invest in a high-quality dark chocolate, ideally 70% or higher. This intensity provides a beautiful, slightly bitter foil to the sweetness of the sugar and the sharp coolness of the peppermint. Think of the tart as the culinary equivalent of wearing a black velvet gown—it is dramatic, rich, and instantly elevates the entire occasion. When you bring this out, people stop talking about Uncle Jerry’s questionable investment advice and start focusing on the main event.
Building the Perfect Chocolate Crust Foundation
A good tart requires a great foundation. The crust here is not just a container; it is an essential flavor layer. We are bypassing the often-sandy texture of typical shortcrust by using a simple yet effective mixture of chocolate cookies, a touch of cocoa powder, and melted butter. This creates a deeply colored, structurally sound crust that holds the creamy mousse without getting soggy. Remember, pressing the crust into the tart pan is a therapeutic process. Use the bottom of a measuring cup to achieve a beautifully uniform thickness on the base and up the sides. Ensure those edges are tight and smooth; nobody likes a jagged crust edge. Bake it just until it sets, usually about 10 to 12 minutes, which is just enough time for you to clean up the minimal mess you just made and start melting the chocolate for the filling. Do not overbake the crust, or it will become brittle and difficult to slice later. The goal is richness, not rigidity.
The Art of the Airy Peppermint Mousse
The mousse is where the fun truly begins. It must be light, impossibly airy, and infused with the perfect amount of peppermint—enough to register, but not so much that it tastes like mouthwash. We achieve this texture through two distinct steps: melting the rich dark chocolate into warm cream until silky smooth, and then whipping a separate batch of heavy cream until stiff peaks form. The trick is the fold. Once you combine the slightly cooled chocolate mixture with the peppermint extract and the vanilla, you must gently fold this into the stiffly whipped cream. This folding action is crucial; it preserves the air pockets you worked so hard to create. If you stir vigorously, you will deflate the mousse, resulting in a dense, sad filling that refuses to smile. Use a spatula and cut down the middle, then sweep up and over, turning the bowl slowly. Patience is your greatest tool during this stage. The final mixture should resemble a voluminous, pale brown cloud that smells utterly divine.
Ingredients for Dark Chocolate Peppermint Mousse Tart
Here’s what you’ll need to make this delicious dish:
- Dark Chocolate Cookie CrumbsUse sandwich cookies (without the filling) or high-quality chocolate wafers processed into fine crumbs for the crust foundation.
- Unsalted ButterEssential for binding the crust crumbs together; melt it gently and ensure it is not scorching hot when mixing.
- High-Quality Dark Chocolate (70% Cacao minimum)This forms the base of the mousse; use baking bars or feves for the best flavor and melting quality.
- Heavy Whipping CreamUsed both for the chocolate ganache base and whipped into stiff peaks to create the light, airy mousse texture.
- Granulated SugarA small amount is added to the whipped cream to stabilize it and balance the bitterness of the intense dark chocolate.
- Pure Peppermint ExtractUse only pure extract, not candy flavoring, to ensure a clean, bright, and natural mint flavor in the finished mousse.
- Pure Vanilla PowderEnhances the complexity of the chocolate flavor, offering a warm note against the cooling peppermint.
- Powdered Sugar and Crushed Candy Canes (optional for garnish)Used for a simple dusting and festive topping once the tart has fully set and is ready for serving.
The full ingredients list, including measurements, is provided in the recipe card directly below.
How to Make Dark Chocolate Peppermint Mousse Tart
Follow these simple steps to prepare this delicious dish:
Step 1: Prepare and Bake the Tart Crust
Preheat your oven to 350°F (175°C). In a medium bowl, combine the chocolate cookie crumbs and melted unsalted butter until the mixture resembles wet sand. Press the mixture firmly and evenly into a 9-inch tart pan with a removable bottom, ensuring the crust goes up the sides. Bake the crust for 10 to 12 minutes until it is set. Allow the crust to cool completely on a wire rack before adding the filling, which prevents melting.
Step 2: Create the Dark Chocolate Base
While the crust cools, chop the high-quality dark chocolate finely. In a small saucepan, heat one cup of the heavy whipping cream just until simmering around the edges, but do not allow it to boil vigorously. Pour the hot cream over the chopped chocolate in a heatproof bowl. Let it stand undisturbed for two minutes, then gently whisk until the mixture is completely smooth and forms a glossy, thick ganache.
Step 3: Whip the Mousse Stabilizer
In a separate, large, chilled mixing bowl, pour the remaining heavy whipping cream. Add the granulated sugar and the pure vanilla powder. Using an electric mixer fitted with the whisk attachment, beat the cream on medium-high speed until stiff peaks form. This means the cream holds its shape sharply when the whisk is lifted; stop just before it turns into butter.
Step 4: Incorporate Peppermint and Fold the Mousse
Allow the chocolate ganache base from Step 2 to cool slightly, ensuring it is only lukewarm. Stir in the pure peppermint extract. Gently transfer about one-third of the whipped cream into the chocolate mixture and fold it in quickly to lighten the base. Then, add the remaining whipped cream and fold very carefully using a large rubber spatula. The goal is to incorporate the ingredients while minimizing air loss; stop folding once no streaks of white cream remain.
Step 5: Chill and Set the Tart
Pour the prepared dark chocolate peppermint mousse filling evenly into the cooled crust. Smooth the top gently with the spatula. Carefully transfer the tart to the refrigerator. Allow the tart to chill and set completely for a minimum of 4 hours, or preferably overnight. A long chill time guarantees the cleanest slices and best texture.
Step 6: Garnish and Serve
Once the tart is firm, carefully remove the outer ring of the tart pan. Dust the top generously with powdered sugar through a fine-mesh sieve for a snowy effect. Scatter crushed candy canes or small chocolate shavings around the edges for festive color and crunch. Transfer to plates and serve slices with a cup of hot coffee for the perfect finishing touch.
Achieving Peak Peppermint Perfection
While the recipe itself is straightforward, a few advanced tips will ensure your Dark Chocolate Peppermint Mousse Tart transitions from good to legendary. First, temperature control is paramount for the mousse. If the chocolate base is too hot when you fold it into the whipped cream, it will instantly melt the air pockets, leaving you with chocolate sludge. If it is too cold, it will seize and create lumps. Aim for a temperature that feels slightly warm to the touch—lukewarm is perfect.
Secondly, consider the crust moisture barrier. If you are concerned about your crust possibly softening over time, brush a very thin layer of melted dark chocolate over the inside of the cooled, baked crust before pouring in the mousse. This creates a waterproof seal that protects the crumbs from the moisture in the filling. While often unnecessary if the tart is consumed within two days, it is a great insurance policy for humid environments or if you are preparing the dessert several days ahead.
Finally, do not skimp on the extracts. Peppermint extract is potent, so start with the suggested amount and taste test before adding more. It is always easier to add more mintiness than it is to take it away. Using pure extracts also guarantees a cleaner flavor, avoiding the synthetic taste that often plagues lesser peppermint desserts. This tart is elegant because its flavors are balanced—rich chocolate supported by a clear, refreshing burst of mint.
Storage and Flavor Variations
This tart is an excellent make-ahead dessert. You can prepare and assemble the entire thing up to 48 hours in advance. Store the tart, loosely covered with plastic wrap, in the refrigerator. Do not add the candy cane or powdered sugar garnish until just before serving, as moisture in the fridge can dissolve the sugar and make the candy canes sticky. If you somehow have leftovers—a highly unlikely scenario, in my experience—you can cover individual slices tightly and store them in the freezer for up to a month. Thaw them overnight in the refrigerator for optimal enjoyment.
If you want to play with the flavor profile slightly, consider swapping the standard vanilla powder for a subtle almond paste, which adds a nutty depth to the chocolate. For a slightly different crust, you could use cocoa rice cereal crumbs mixed with the butter for an added textural crunch. You could also swirl a layer of slightly tart raspberry puree into the mousse before chilling. The combination of intense dark chocolate, cooling peppermint, and bright raspberry provides a spectacular contrast that will definitely garner compliments. Remember, the goal is always to deliver a spectacular experience that tastes like you spent an entire weekend laboring over it, when in reality, you were catching up on holiday movies while the fridge did all the hard work.
There are desserts, and then there areevents. This isn’t just a sweet treat; it’s the showstopper, the grand finale, the culinary equivalent of dropping the microphone. Every year, when the calendar flips to December, I start craving something intensely rich yet fantastically refreshing. I needed a dessert that felt decadent but tasted like a brisk winter’s night—and frankly, a simple brownie just wasn’t going to cut it.
My kitchen often feels like a testing pflanzliches lab where flavor combinations fight for dominance. For years, I struggled with the perfect texture for a creamy chocolate filling that wouldn’t weep or collapse. The challenge was maintaining that robust, deep cocoa flavor while integrating the sharp, cool blast of peppermint oil. Most attempts resulted in either a gritty mess or something resembling chocolate-flavored toothpaste. We won’t discuss the great “Peppermint Disaster of ’18.” Eventually, after much trial and error—and countless scraped bowls—I finally cracked the code, resulting in this unbelievably smooth and stable confection.
This dessert is elegant, yet surprisingly straightforward to execute. It requires patience for chilling, but the active preparation time is minimal, making it an ideal choice for holiday hosting when you need to focus on seven other dishes simultaneously. The foundation is a sturdy, deep-colored chocolate shortbread crust, which offers a delightful textural contrast to the clouds of airy, velvety mousse resting on top. Get ready to experience the perfect marriage of rich cocoa and winter freshness in every single slice.
Let’s dive into the creation of this stunning dessert. Remember, confidence is your best ingredient, especially when whipping cream!
The Accidental Discovery of Sunshine on a Plate
I accidentally left a tube of peppermint extract sitting next to my dark chocolate ganache, and the resulting scent collision was immediate and intoxicating. That’s when I realized the rich bitterness of cocoa needed that vibrant, cool counterpoint, leading directly to the creation of this impressive Dark Chocolate Peppermint Mousse Tart.
The Anatomy of Pure Decadence: Ingredients You Need
Gathering high-quality ingredients is non-negotiable for this recipe. Because the flavor profile is so simple—chocolate and mint—the quality of your cocoa powder and chocolate chips will dramatically affect the final taste. Opt for at least 70% cacao dark chocolate for that satisfying, deep note that cuts through the sweetness.
For the Ultra-Chocolate Crust
- 1 3/4 cups all-purpose flour
- 1/2 cup unsweetened cocoa powder
- 1/4 teaspoon fine salt
- 1/2 cup powdered sugar
- 1 cup unsalted butter, chilled and cubed
- 1 large egg yolk
- 1 tablespoon ice water (if needed)
For the Whipped Peppermint Mousse Filling
- 12 ounces high-quality dark chocolate (70% cacao or higher), chopped
- 1 1/2 cups heavy whipping cream, divided (use 1 cup for ganache, 1/2 cup for whipping)
- 1/4 cup granulated sugar
- 1 teaspoon pure peppermint extract (or less, depending on potency)
- 1/4 teaspoon pure vanilla powder
- A pinch of salt
- 1 packet (about 2 teaspoons) plant-based setting agent, like agar-agar powder (optional, for extra stability)
For Garnishing
- Extra chilled whipping cream
- Crushed peppermint candies or white chocolate shavings
Step-by-Step Assembly: Building the Perfect Dessert
The process involves three main phases: baking the shell, preparing the dense chocolate ganache base, and folding in the whipped peppermint component. Timing is crucial for ensuring the mousse sets correctly without separation.
- Crust Creation:Preheat your oven to 350°F (175°C). In a food processor, pulse together the flour, cocoa powder, salt, and powdered sugar. Add the cold, cubed butter and pulse until the mixture resembles coarse crumbs. Add the egg yolk and pulse until the dough just begins to come together. Press the mixture evenly into a 9-inch tart pan with a removable bottom, making sure the sides are uniform. Blind bake for 15 minutes, then remove the weights and bake for another 5-10 minutes until set. Let cool completely on a wire rack.
- Ganache Base:Place the chopped dark chocolate in a large, heatproof bowl. In a small saucepan, heat 1 cup of heavy cream and sugar until it simmers. Pour the hot cream mixture over the chocolate, letting it sit undisturbed for 5 minutes. Whisk gently from the center outwards until smooth and glossy.
- Mousse Magic:In a separate, chilled bowl, whip the remaining 1/2 cup of heavy cream with the peppermint extract and vanilla powder until stiff peaks form. If using the plant-based setting agent, prepare it according to package directions and gently fold it into the whipped cream before combining with the chocolate.
- Folding and Setting:Carefully fold the peppermint whipped cream into the still-warm (but not hot) ganache base in two stages. This keeps the mixture light and airy. Pour the completed mousse filling into the cooled chocolate crust shell.
- Chill Out:Refrigerate the Dark Chocolate Peppermint Mousse Tart for at least 4 hours, or preferably overnight, until the filling is fully firm and easy to slice cleanly.
This is where the magic happens. The patience required during the chilling phase is truly the hardest part of the entire operation, but trust me, it pays off when you slice into that smooth, rich filling. One of the most common pitfalls people encounter when making chocolate desserts is rushing the cooling phase. If the crust is warm when you add the mousse, the heat will melt the delicate structure of the whipped cream, resulting in a dense, heavy filling instead of the desired light, cloud-like confection. Ensure that both your crust and the ganache base (before folding in the whipped cream) are appropriately cooled or merely lukewarm. Temperature control is your secret weapon here.
Perfecting the Cooking Process
For peak efficiency, start by making and baking the crust while the oven heats up; cooling the shell completely is vital to prevent a runny filling. Next, prepare the intense ganache base, then focus on whipping the cream to stiff, airy perfection before gently folding everything together for that smooth, velvety texture.
Addressing Texture and Flavor Balance
Achieving the perfect balance between the bitterness of the dark chocolate and the bright coolness of peppermint is an art form. Start conservatively with the peppermint extract—you can always add more, but you certainly cannot take it out once it’s mixed in! I suggest starting with half the amount listed and tasting the whipped cream before folding it into the chocolate base. If you feel daring, a tiny sprinkle of fine sea salt in the crust and the ganache base elevates the overall flavor profile by sharpening the cocoa notes.
For those who love an extra textural element, consider adding a thin layer of crushed, toasted hazelnuts or pecans at the bottom of the baked crust before pouring in the mousse. This provides a delightful crunch against the soft filling. Just remember to finely chop them so they don’t interfere with slicing the elegant tart. My grandmother once told me, “Baking is chemistry, but dessert is emotion.” This creation truly embodies that sentiment. It’s scientifically perfect, yet evokes the joyous nostalgia of winter holidays.
Add Your Touch
You can substitute the dark chocolate with high-quality semi-sweet chips for a slightly sweeter finish. If you crave citrus, swap the peppermint extract for orange zest and extract to create a delicious chocolate-orange combination. For a richer crust, replace 1/4 cup of flour with ground almonds for a nutty undertone.
This dessert is extremely flexible when it comes to garnishing. While crushed peppermint candies are classic for the season, you could also drizzle white chocolate across the top just before serving, creating beautiful, intricate patterns. If you want a more subtle look, simply pipe small dollops of unsweetened whipped cream around the edges and dust lightly with extra cocoa powder. Think of the tart as a beautiful canvas awaiting your artistic flair.
- Always ensure your mixing bowl and whisk are perfectly chilled before whipping the cream; cold temperatures stabilize the air bubbles for firm, lasting peaks.
- Use high-quality peppermint extract, not flavoring oil. Oil can sometimes seize the chocolate, whereas extract mixes seamlessly into the cream.
- Avoid over-mixing the dough for the crust; overworking the gluten results in a tough, crumbly crust instead of the desired crisp, buttery shortbread base.
The feedback was immediate: my neighbor insisted this gorgeous dessert tasted exactly like a fancy restaurant creation, not something whipped up in my chaotic kitchen on a Tuesday afternoon. That affirmation made all the temperature monitoring worthwhile.
Storing & Reheating
Store the finished tart tightly covered in the refrigerator for up to 4 days; the mousse holds its texture well due to the high-fat content and setting time. Do not freeze the assembled tart, as thawing can cause the mousse to weep and develop an unappetizing texture. Serve straight from the fridge for the best, coldest experience.
Conclusion for Dark Chocolate Peppermint Mousse Tart
Creating this stunning Dark Chocolate Peppermint Mousse Tart transforms simple ingredients into an unforgettable holiday showpiece. We started with a crisp, cocoa-rich crust and layered it with a light, intensely flavored peppermint chocolate mousse, balancing deep bitterness with refreshing coolness. Remember the key techniques: chill everything properly, start conservatively with the peppermint essence, and fold gently to maintain that cloud-like texture. This dessert offers elegance without complexity, proving that the most dramatic results often come from patience and high-quality ingredients. Whether you’re entertaining guests or simply seeking a sophisticated sweet treat, this beautiful confection is guaranteed to earn rave reviews and become a treasured part of your seasonal baking repertoire.
Print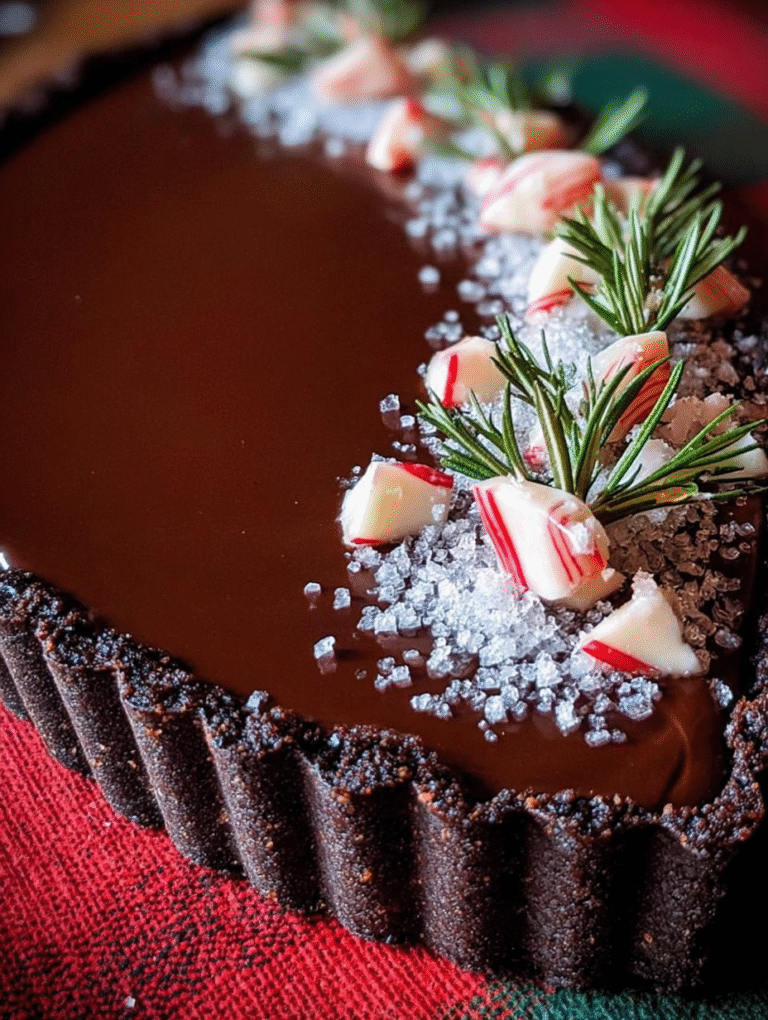
Dark Chocolate Peppermint Mousse Tart
Indulge in our intensely dark chocolate tart, featuring a rich 70% cocoa base and a refreshing peppermint cloud mousse over a buttery cookie crust. Simple chill method ensures perfection.
- Total Time: 35 minutes
- Yield: 4 servings 1x
Ingredients
- 8 ounces high-quality dark chocolate (70% cocoa minimum), chopped
- 2 cups heavy whipping cream, divided
- 1 1/2 cups chocolate wafer or Oreo cookie crumbs
- 1/4 cup unsalted butter, melted
- 1/2 cup powdered sugar
- 1 teaspoon pure peppermint extract
- 1 teaspoon instant espresso powder
- 1/4 cup crushed candy canes, for garnish
Instructions
- Step 1: Prepare the Tart Crust. In a medium bowl, combine the chocolate cookie crumbs and melted butter until fully saturated. Press the mixture firmly and evenly into a 9-inch tart pan with a removable bottom. Chill the crust in the freezer for at least 30 minutes while preparing the mousse.
- Step 2: Melt the Dark Chocolate Base. Place the chopped dark chocolate and the instant espresso powder in a heatproof bowl. In a small saucepan, heat 1/2 cup of the heavy cream until steaming (do not boil), then pour the hot cream over the chocolate. Let sit for 5 minutes, then stir until the chocolate is completely smooth; set aside to cool slightly to room temperature.
- Step 3: Whip the Peppermint Cream. In a separate large bowl, using a stand mixer fitted with a whisk attachment (or a hand mixer), whip the remaining 1 1/2 cups of heavy cream, the powdered sugar, and the peppermint extract on medium-high speed until stiff peaks form.
- Step 4: Fold the Mousse Filling. Gently fold about one-third of the whipped cream mixture into the cooled chocolate mixture until just combined to lighten the base. Then, carefully fold in the remaining whipped cream in two additions, taking care not to deflate the air, until the mousse is uniform and streak-free.
- Step 5: Assemble, Chill, and Garnish. Pour the finished mousse filling into the chilled tart crust and smooth the top with an offset spatula. Refrigerate the tart for at least 6 hours, or preferably overnight, until the mousse is completely set. Before serving, remove the tart from the pan, and garnish the top with extra whipped cream (optional) and crushed candy canes.
Notes
- Store any leftovers tightly covered in the refrigerator for up to 3 days; avoid freezing the finished tart, as the high dairy content will cause the mousse to become grainy upon thawing.
- Do not attempt to reheat this dessert under any circumstance, as the delicate whipped cream and set chocolate will immediately melt; always serve the tart well-chilled, directly from the refrigerator.
- For a decadent presentation, serve slices alongside a dollop of slightly sweetened crème fraîche or a small cup of freshly brewed espresso to balance the intense richness of the dark chocolate.
- The key to a perfectly airy mousse is gentle folding; always use a large rubber spatula and the "cut and lift" technique, scraping the bottom of the bowl frequently, to fully incorporate the cream without deflating the air.
- Prep Time: 15 minutes
- Cook Time: 20 minutes
- Method: Stovetop
- Cuisine: American


Leave a Comment