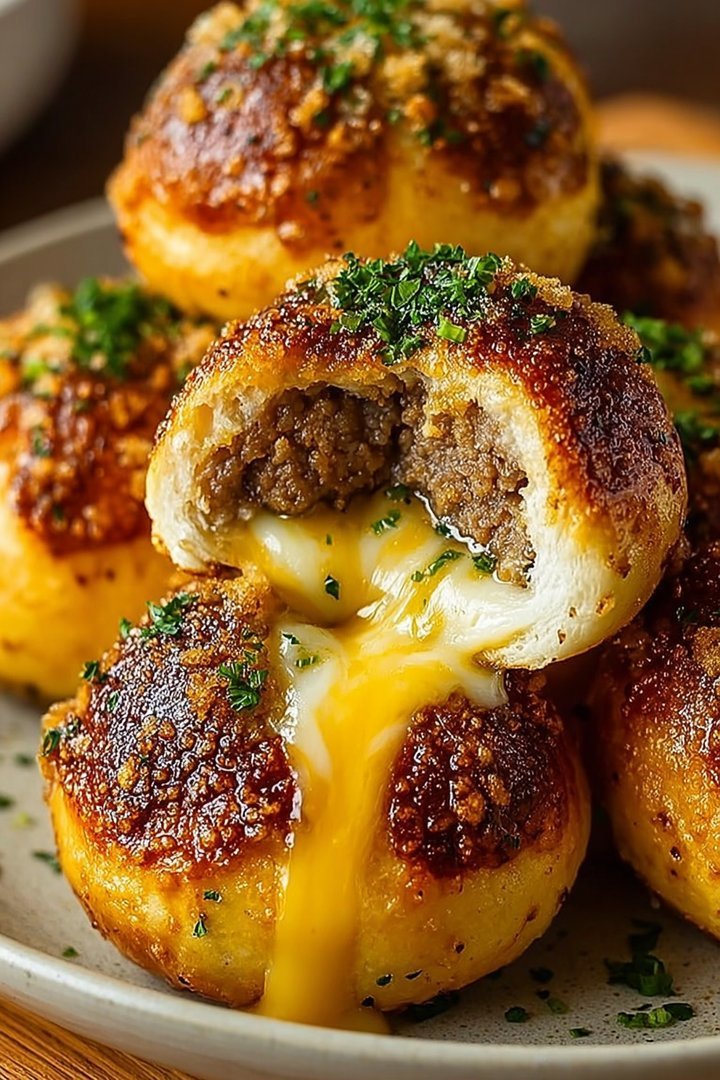
Imagine sinking your teeth into a warm, golden sphere, the aroma of garlic and Parmesan swirling around you as a molten river of cheese and savory beef explodes in your mouth. That’s the magic of a Delicious Garlic Parmesan Cheeseburger Bombs Recipe – pure comfort food elevated to an irresistible experience.
These aren’t your average burgers; they’re flavor-packed orbs of joy, perfect for game day, a fun family dinner, or even a quirky appetizer that’ll leave everyone begging for more. These cheeseburger bombs are the ultimate crowd-pleaser.
- Effortless to create, these bombs bring gourmet flavor to your table with minimal kitchen stress and maximum enjoyment.
- The blend of savory beef, aromatic garlic, rich Parmesan, and gooey cheese creates an explosion of delectable flavors in every bite.
- Their golden-brown, perfectly round shape makes them a visually stunning dish that will impress your guests and family alike.
- Versatile enough to be a main course, appetizer, or party snack, these cheeseburger bombs fit any occasion with flair.
Ingredients for Delicious Garlic Parmesan Cheeseburger Bombs Recipe
Here’s what you’ll need to make this delicious dish:
- Ground Beef Use lean ground beef (80/20) for the best flavor and texture. It should have enough fat to stay juicy but not so much that the bombs become greasy.
- Parmesan Cheese Freshly grated Parmesan cheese will provide the most authentic and intense flavor. Avoid using pre-grated Parmesan, as it often contains cellulose and doesn’t melt as well.
- Garlic Fresh garlic cloves, minced finely, offer the most pungent and aromatic flavor. If you’re in a pinch, garlic powder can be used, but fresh is highly recommended.
- Cheddar Cheese Sharp cheddar cheese adds a tangy and melty contrast to the Parmesan. You can also use other cheeses like mozzarella or Monterey Jack for a milder flavor.
- Egg The egg acts as a binder, helping the ground beef mixture hold its shape. Use a large egg for the right consistency.
- Breadcrumbs Plain breadcrumbs help absorb excess moisture and bind the ingredients together. You can use store-bought breadcrumbs or make your own by toasting bread and pulsing it in a food processor.
- Italian Seasoning This blend of herbs adds depth and complexity to the beef mixture. You can find it in most grocery stores, or make your own using a mix of oregano, basil, thyme, and rosemary.
- Burger Buns Soft burger buns provide the perfect vessel for these flavor bombs. Choose your favorite type, such as brioche, sesame, or potato buns.
- Olive Oil Olive oil is used to grease the baking dish, preventing the bombs from sticking. You can also use cooking spray.
The full ingredients list, including measurements, is provided in the recipe card directly below.
How to Make Delicious Garlic Parmesan Cheeseburger Bombs Recipe
Follow these simple steps to prepare this delicious dish:
Step 1: Prepare the Ground Beef Mixture
In a large bowl, combine the ground beef, grated Parmesan cheese, minced garlic, cheddar cheese, egg, breadcrumbs, and Italian seasoning. Season with salt and pepper to taste. Mix well until all ingredients are thoroughly combined. This step ensures that every bite is packed with flavor and the right consistency for forming the bombs.
Step 2: Shape the Cheeseburger Bombs
Preheat your oven to 375°F (190°C). Grease a baking sheet with olive oil. Take a portion of the ground beef mixture (about 1/4 cup) and flatten it in your palm. Place a cube of cheddar cheese in the center, then carefully wrap the beef around the cheese to form a ball, ensuring the cheese is completely sealed inside. Repeat with the remaining mixture. This will ensure that the cheese melts evenly inside each bomb.
Step 3: Bake the Cheeseburger Bombs
Place the formed cheeseburger bombs onto the prepared baking sheet. Bake for 20-25 minutes, or until the bombs are golden brown and cooked through. The internal temperature should reach 160°F (71°C) to ensure the beef is fully cooked.
Step 4: Prepare the Garlic Parmesan Topping
While the cheeseburger bombs are baking, melt butter in a small saucepan over medium heat. Add minced garlic and cook until fragrant, about 1 minute. Remove from heat and stir in grated Parmesan cheese. This garlic Parmesan topping adds an extra layer of flavor and richness to the bombs.
Step 5: Assemble the Cheeseburger Bombs
Once the cheeseburger bombs are done, remove them from the oven. Brush each bomb with the garlic Parmesan topping. Serve immediately on toasted burger buns. This will create a delicious and satisfying meal.
Transfer to plates and serve immediately. For an extra touch, consider adding your favorite burger toppings like lettuce, tomato, or a drizzle of your favorite sauce for the perfect finishing touch. Enjoy the burst of flavors!
Perfecting the Cooking Process
To make the most efficient use of your time, start by prepping all your ingredients. Then, brown the ground beef, assemble the cheeseburger bombs, and finally, bake them to golden, cheesy perfection. This streamlined approach ensures that everything comes together seamlessly.
Add Your Touch
Feel free to get creative with your cheeseburger bombs! Try swapping ground beef for ground turkey or lamb. You can also experiment with different cheeses, like pepper jack for a spicy kick, or add diced onions or bell peppers to the beef mixture.
Storing & Reheating
These delightful cheeseburger bombs are best enjoyed fresh, but you can store leftovers in an airtight container in the refrigerator for up to three days. Reheat them in a preheated oven at 350°F (175°C) or in the microwave until warmed through.
Here are a few helpful tips to guide you on your cheeseburger bomb journey:
- Don’t overmix the ground beef mixture; overmixing can lead to tough burgers. Handle the meat gently to keep them tender and juicy.
- Make sure to seal the edges of the dough tightly to prevent the cheese from leaking out during baking. Nobody likes a cheesy escapee!
- For an extra golden-brown finish, brush the tops of the cheeseburger bombs with melted butter or an egg wash before baking.
(Personal anecdote formated as paragraph subheading)
I remember the first time I made these for a game night. Everyone devoured them so quickly; I barely got one! The cheesy, garlicky goodness was a total crowd-pleaser.
Conclusion for Delicious Garlic Parmesan Cheeseburger Bombs Recipe :
This Delicious Garlic Parmesan Cheeseburger Bombs Recipe is your new secret weapon for easy, crowd-pleasing snacks. They’re simple to make, customizable to your taste, and always a hit. Remember to get creative with your fillings and toppings, and don’t be afraid to experiment! Whether you’re prepping for a party or just want a tasty treat, these cheeseburger bombs are guaranteed to bring smiles. Bake them up, share them with friends, and prepare for rave reviews!
Print
Delicious Garlic Parmesan Cheeseburger Bombs Recipe
Delicious delicious garlic parmesan cheeseburger bombs recipe recipe with detailed instructions and nutritional information.
- Total Time: 35 minutes
- Yield: 4 servings
Ingredients
- Ground beef: 1 pound
- Garlic powder: 1 teaspoon
- Parmesan cheese: 1/2 cup, grated
- Cream cheese: 4 ounces, softened
- Cheddar cheese: 1 cup, shredded
- Refrigerated biscuit dough: 1 can (16 ounces)
- Butter: 2 tablespoons, melted
- Dried parsley: 1 teaspoon
Instructions
- Step 1: Preheat oven to 375°F (190°C). In a large bowl, combine ground beef and garlic powder. Mix well and form into 8 equal-sized patties.
- Step 2: In a separate bowl, mix together the Parmesan cheese, cream cheese, and cheddar cheese until well combined.
- Step 3: Flatten each biscuit dough into a thin circle. Place a beef patty on top of each circle, then top with a spoonful of the cheese mixture.
- Step 4: Carefully wrap the biscuit dough around the patty and cheese, pinching the edges to seal completely. Place seam-side down on a baking sheet.
- Step 5: Brush the tops of the biscuit bombs with melted butter and sprinkle with dried parsley.
- Step 6: Bake for 15-20 minutes, or until golden brown and the beef is cooked through. Let cool slightly before serving.
Notes
- Store cooled cheeseburger bombs in an airtight container in the refrigerator for up to 3 days.
- For best results, reheat these in an air fryer or oven to re-crisp the biscuit dough.
- Serve these bombs with a side of marinara sauce or a creamy garlic dip for extra flavor.
- Don't overfill the biscuit dough, or the filling might ooze out during baking; a smaller spoonful is best!
- Prep Time: 15 minutes
- Cook Time: 20 minutes
- Method: Stovetop
- Cuisine: American
FAQs :
Can I prepare the Delicious Garlic Parmesan Cheeseburger Bombs Recipe in advance?
Absolutely! You can assemble these savory bombs a day ahead of time. Just keep them covered in the refrigerator. When you’re ready to bake, simply pop them in the oven. This makes them perfect for potlucks or when you’re expecting company. Who wants to be stuck in the kitchen when guests arrive? Not me! Make sure to add a few minutes to the baking time if they’re cold from the fridge. You’ll have delicious, cheesy goodness ready in no time, without all the last-minute fuss.
How can I customize my Garlic Parmesan Cheeseburger Bombs?
Get creative! Feel free to swap out the ground beef for ground turkey or lamb if you’re feeling adventurous. Add some finely chopped onions, bell peppers, or even jalapeños to the meat mixture for an extra kick. Experiment with different cheeses too! A little bit of cheddar or mozzarella would be fantastic. You can even sprinkle some everything bagel seasoning on top before baking for added flavor and texture. Don’t be afraid to experiment and make these bombs your own.
What should I serve with these Cheeseburger Bombs?
These savory little treats are incredibly versatile! They pair perfectly with a simple side salad for a light meal. Or, you could serve them with some crispy sweet potato fries for a more indulgent experience. Coleslaw is another great option to add a bit of freshness and crunch. For a fun appetizer spread, arrange them alongside some dipping sauces like ranch, marinara, or a creamy garlic aioli. Honestly, they’re so good, you could just eat them straight up!
Are these suitable for freezing and reheating?
Yes, they are! These delightful bombs freeze beautifully. Once baked, let them cool completely, then wrap them individually in plastic wrap before placing them in a freezer-safe bag or container. They can be stored in the freezer for up to two months. To reheat, simply bake them in a preheated oven at 350°F (175°C) until heated through, or microwave them for a quick snack. These make meal prep a breeze, ensuring you always have a tasty bite on hand.


Leave a Comment