
The moment that tangy, aromatic blend of dill and fermented starter hits your nose, you know you’ve stumbled upon carb perfection. Forget standard loaves; this is the savory, crunchy, deeply satisfying experience you never knew you needed.
Prepare yourself for the glorious crunch ofGourmet Dill Pickle Sourdough Bread, proving that the best culinary innovations start in the depths of your refrigerator.
- This recipe provides the perfect balance of sourdough tang and salty pickle punch, creating an addictive and unique flavor profile for any sandwich you desire.
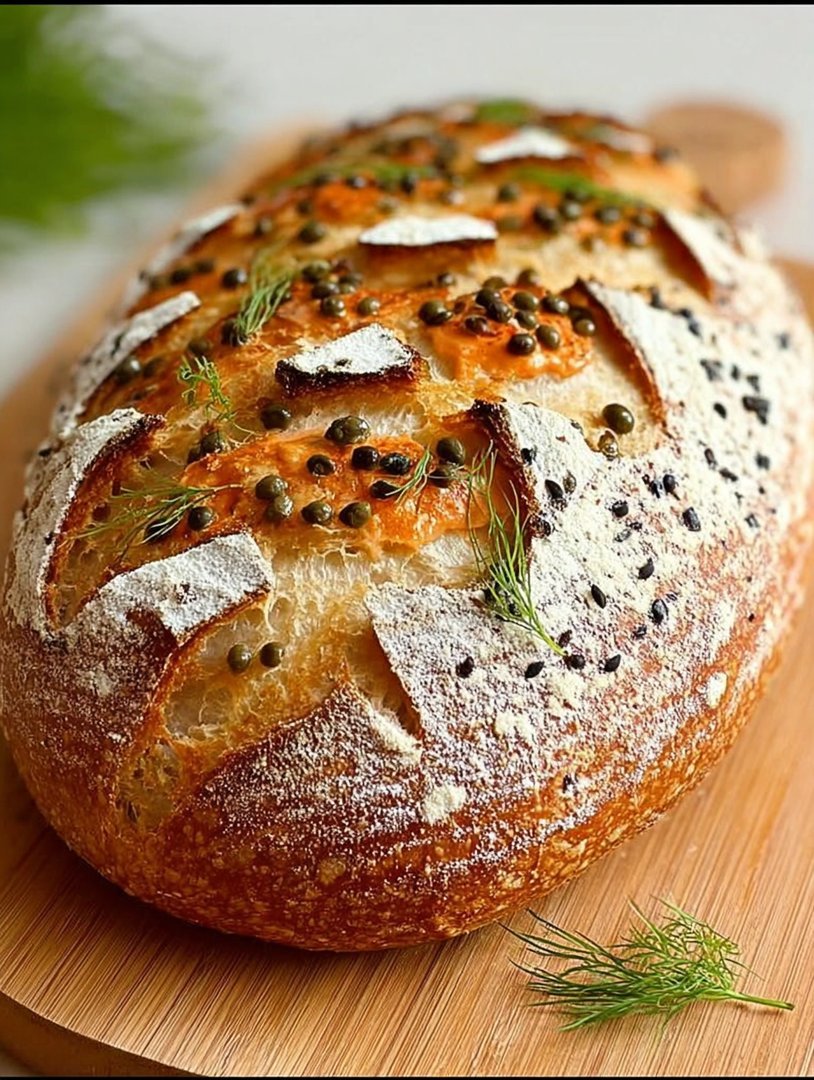
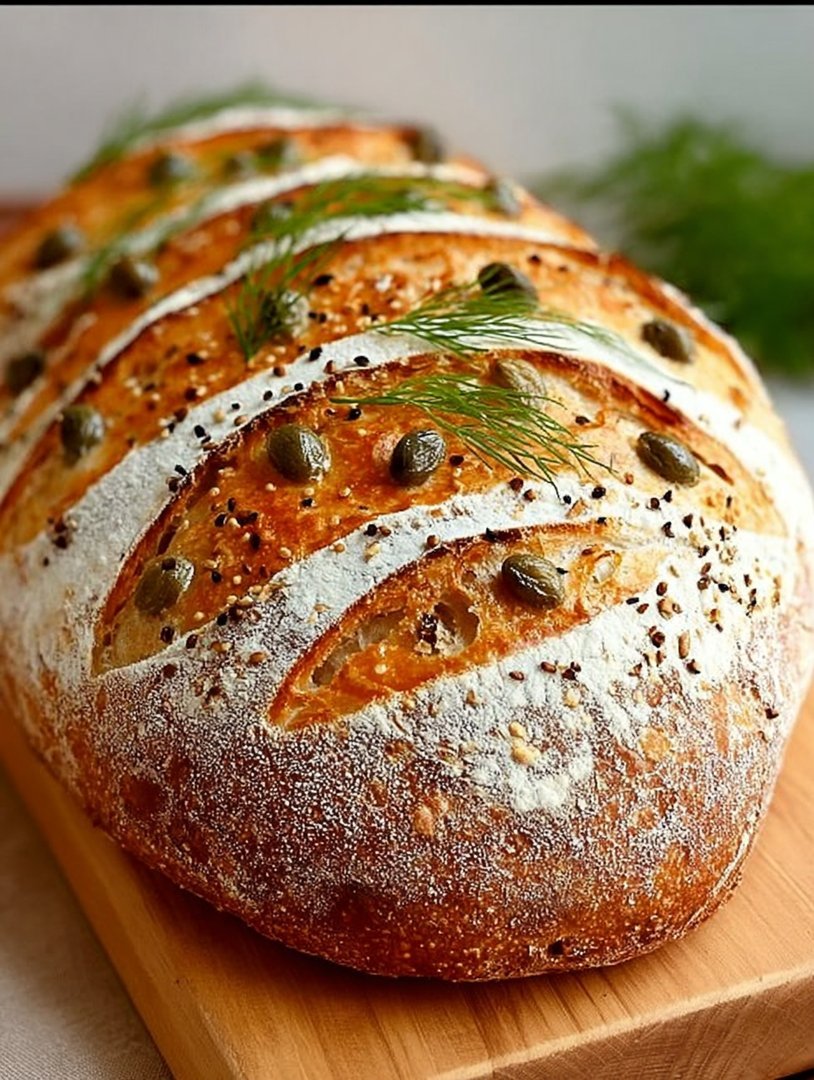
- Achieving a stunning, crackling crust and an unbelievably chewy interior crumb makes this artisanal loaf visually irresistible on any table spread you present.
- The detailed, yet straightforward, preparation steps ensure that even intermediate bakers can achieve professional-quality bread with minimal fuss and complication.
- Its exceptional versatility means this bread is fantastic toasted alongside hearty chicken soup, paired with soft cheese, or simply enjoyed slathered in butter.
The Tangy Tale: Why Dill Pickles Belong in Sourdough
I confess, my relationship with standard white bread is purely functional, a relationship based solely on transportation for butter. It gets the job done, but where is the drama? Where is the plot twist? Baking should be an adventure, a commitment to maximal flavor, not just a vehicle for your sandwich fillings. That’s precisely how I arrived at the concept ofGourmet Dill Pickle Sourdough Bread.
The skepticism was palpable in my kitchen the first time I attempted this. My partner, a traditionalist when it comes to fermentation, watched me dump finely chopped pickles and a splash of brine into my pristine, bubbling sourdough starter. The look on his face suggested I was committing a felony against flour. But I knew the chemistry was sound. Sourdough needs complexity; it needs acidity to enhance its natural sourness and salt to control the fermentation speed. What delivers acid and salt in glorious abundance, accompanied by the fresh, herbaceous complexity of dill? The humble, crunchy pickle, of course.
This isn’t merely bread with stuff thrown in. This is a collaboration. The fermented tang of the sourdough starter complements the brine’s vinegar notes perfectly, deepening the overall flavor profile while preventing the bread from tasting overwhelmingly “pickly.” Instead, you get a bright, herbaceous lift on the front end, followed by the deep, complex chewiness that only a proper long-fermented sourdough can deliver. It’s the kind of bread that doesn’t wait patiently for a topping; it demands attention all on its own. If you’re tired of bland bread, this recipe is your rallying cry against the tyranny of the beige loaf.
Taming the Pickle Brine Beast
Working with inclusions, especially wet and chunky ones like pickles, presents specific challenges in sourdough baking. You are introducing moisture and interrupting the delicate gluten network, which can lead to a slack, soupy dough if not handled correctly. The key to successfully incorporating pickles and achieving that gorgeous, open crumb lies in strategic timing and careful preparation of the inclusions. First, always drain your pickles meticulously. Excess brine will throw off your hydration levels, potentially turning your robust dough into a sticky, unmanageable mess. We want the flavor of the brine, but only in measured doses, usually replacing a small portion of the water in the initial mix. Second, chop those pickles small. Large chunks create air pockets that interrupt the crumb structure, leading to large, irregular holes that make slicing impossible.
We perform the inclusion mix during the second set of stretch and folds. By this time, the gluten has begun to develop, giving the dough enough strength to handle the addition without falling apart. Incorporate them slowly, ensuring even distribution throughout the dough mass. Think of this process as gently massaging the pickle pieces into the developing matrix. This method maintains the dough’s structural integrity while ensuring every slice of your finishedGourmet Dill Pickle Sourdough Breadis packed with flavor. The result? A beautifully textured loaf that smells divine and crunches in all the right places, without sacrificing that airy interior structure we all crave.
Achieving the Perfect Crumb Texture
The crumb is the measure of a baker’s skill, and achieving an ideal crumb in an inclusion dough requires discipline. Hydration is key, but so is patience. Sourdough, especially one laden with inclusions, benefits immensely from a lengthy bulk fermentation. We’re aiming for a slightly stickier dough than usual, as the pickles will release some internal moisture during the bake, which keeps the final bread incredibly moist. Perform the stretch and folds gently but firmly, aiming to build strength without tearing the delicate gluten strands around the pickle pieces. This process is your main workout; don’t skip it, and don’t rush it.
Once the bulk fermentation is complete—look for a 30-50% rise and a beautiful jiggly texture—you move into shaping. Because the pickles slightly weaken the dough, a firm shaping technique is crucial. You need to create significant surface tension to encourage a good oven spring. Use minimal flour and work quickly to form a tight boule or batard, ensuring the outer layer is smooth and taut. Finally, the cold proofing step in the refrigerator (the final retard) is non-negotiable for this bread. The extended chilling not only enhances the sour flavor but also firms up the dough, making it easier to score and ensuring a spectacular bloom when it hits the heat of the oven. A properly proofed loaf yields a light, open, and satisfyingly chewy crumb.
Essential Equipment for a Baker’s Triumph
While sourdough baking relies heavily on time and temperature, having the right tools makes the journey smoother and guarantees professional results. You do not need a fancy commercial kitchen, but a few specific items will elevate your bread game, especially when tackling a specialty loaf likeGourmet Dill Pickle Sourdough Bread. The single most important piece of equipment for achieving that phenomenal crust is the Dutch oven. Baking the dough inside a preheated, covered cast-iron vessel traps the steam released by the dough. This trapped moisture keeps the crust pliable during the initial rise, allowing for maximum oven spring before the lid is removed for browning. This method is the secret weapon for any home baker aiming for an artisan-quality crust that cracks when you touch it.
Another item you simply must invest in is a decent banneton (proofing basket). While a bowl lined with a heavily floured tea towel works in a pinch, the coiled structure of a banneton helps wick away just the right amount of surface moisture during the cold proof. This results in a much better crust formation and prevents the dough from sticking when you turn it out. Finally, precision tools like a digital scale for accurate ingredient measurement and a sharp lame (scoring razor) are essential. Scoring the dough correctly not only creates a beautiful artistic pattern but, more importantly, controls where the bread expands, preventing blowouts and ensuring that perfect, uniform rise. Remember, baking is a science, and consistency starts with accurate measurement and reliable tools.
Ingredients for Gourmet Dill Pickle Sourdough Bread
Here’s what you’ll need to make this delicious dish:
- Active Sourdough Starter (Levain)Ensure your starter is active and ripe, having doubled in volume 4–6 hours after feeding, which provides the necessary lift and tang.
- High-Protein Bread FlourUse a strong bread flour with a protein content of 12% or higher to guarantee sufficient gluten development for a chewy, robust crumb structure.
- Filtered WaterChlorine in tap water can inhibit starter activity, so use filtered or spring water, ensuring the temperature is slightly warm (around 85°F/29°C) for optimal mixing.
- Fine Sea SaltSalt controls fermentation speed and adds crucial flavor; ensure it is fully dissolved in the water before mixing to prevent localized inhibition of yeast.
- Kosher Dill Pickles (Firm)Select firm, high-quality dill pickles, drained well and finely chopped; avoid sweet or overly soft varieties that will release too much moisture.
- Dill Pickle Brine (Unsweetened)Use a small amount of the pickle brine to replace some of the recipe water, intensifying the signature flavor without compromising the dough structure.
- Fresh Dill WeedFinely chop fresh dill leaves for maximum aromatic impact and color; dried dill can be used in a pinch, but fresh provides superior flavor.
The full ingredients list, including measurements, is provided in the recipe card directly below.
How to Make Gourmet Dill Pickle Sourdough Bread
Follow these simple steps to prepare this delicious dish:
- Step 1: Mixing the Dough (The Autolyse and Initial Mix)Combine the bread flour, filtered water, and pickle brine in a large mixing bowl until just combined into a shaggy mass. Cover the bowl and let the mixture rest for 30 minutes (the autolyse phase) to allow the flour to fully hydrate. After the rest, gently mix in the active sourdough starter until incorporated, followed by the salt, mixing thoroughly for 2-3 minutes until the dough looks slightly smoother.
- Step 2: Building Strength (Bulk Fermentation and Folds)Cover the bowl and begin the bulk fermentation period, typically lasting 4–6 hours at room temperature (around 74°F/23°C). During the first two hours, perform four sets of stretch and folds every 30 minutes. On the third set of folds, gently incorporate the finely chopped dill pickles and fresh dill weed, ensuring they are evenly distributed throughout the dough without tearing the gluten significantly.
- Step 3: Shaping and Final ProofingOnce the dough has increased by about 40% and feels airy and bubbly, turn it out onto a lightly floured surface. Perform a firm preshape, allowing the dough to rest uncovered for 20 minutes (the bench rest). Then, perform the final shape, creating maximum surface tension. Place the shaped dough seam-side up into a well-floured banneton. Cover the banneton tightly and place it immediately into the refrigerator for a cold proof lasting 12–16 hours.
- Step 4: Preheat and Prepare for BakingAbout one hour before baking, place your Dutch oven (with the lid on) inside your oven and preheat the oven to 500°F (260°C). Heating the Dutch oven ensures a blast of intense heat that provides immediate oven spring. Carefully remove the very hot Dutch oven from the oven.
- Step 5: Scoring and Initial Steam BakeGently flip the cold dough from the banneton directly onto a piece of parchment paper. Use a sharp lame or razor blade to score the dough with your preferred pattern, usually one deep, long cut. Carefully transfer the dough (using the parchment paper slings) into the hot Dutch oven, cover it immediately with the lid, and place it back into the oven. Reduce the temperature immediately to 450°F (230°C) and bake for 20 minutes.
- Step 6: Finish the Bake and CoolingAfter 20 minutes, carefully remove the lid of the Dutch oven. The bread should be beautifully puffed and pale golden. Reduce the oven temperature to 425°F (220°C) and continue baking uncovered for another 25–30 minutes until the crust is deeply golden brown and sounds hollow when tapped. The internal temperature should register 208°F (98°C). Transfer the finished loaf to a wire rack to cool completely for at least 2 hours before slicing to set the crumb structure.
Transfer to plates and drizzle with sauce for the perfect finishing touch.
The Accidental Discovery of Sunshine on a Plate
I had leftover sourdough discard and an unfortunate surplus of crunchy deli pickles. Necessity, or perhaps pure boredom, birthed this monster. The first slice of that pickle-studded loaf felt less like baking and more like a culinary coup—a sour, savory burst of unexpected joy.
There are days when you realize your baking hobby has gone slightly off the rails. You start by making plain country loaves, then maybe you tackle cinnamon rolls, and suddenly you are staring at a jar of pickles, asking, “Could this work?” The answer, dear reader, is a resounding, flavor-packed yes. This isn’t just bread; it’s a personality statement baked into a magnificent crust.
The Sourdough Starter: Your Moody Roommate
Before we dive into the delightful weirdness of combining tangy fermentation with briny crunch, we must acknowledge the foundation: the sourdough starter. Think of your starter as a moody, highly sensitive roommate who requires constant feeding and attention. For this specific recipe, you want your starter active, bubbly, and smelling wonderfully sour, like a perfect blend of yogurt and mild vinegar. If it’s sleepy, give it a double feed twelve hours before you plan to mix the dough; it needs to be ready to battle the moisture content introduced by the copious amounts of dill and pickle chunks.
Working with a unique inclusion like pickles presents a fun challenge. Pickles are essentially sponges saturated with brine. If you toss wet pickles directly into your dough, you end up with a sticky, unwieldy mess that refuses to hold its shape—a flat, dense pancake posing as bread. The trick is preparing the inclusions meticulously. Drain them, chop them into small, manageable confetti pieces, and then commit to patting them bone dry. Yes, you will spend five minutes toweling off pickles, and yes, it is absolutely worth it for that perfect open crumb.
Mixing and the Dance of Hydration
Traditional sourdough recipes often call for a high hydration level, but when you are creating Gourmet Dill Pickle Sourdough Bread, you need to account for the inherent moisture still lurking in the pickles and the fresh dill. We start by mixing the flour, water (some of which is reserved pickle brine for flavor intensity), and the active starter. Allow this mixture to rest, a process known as autolyse, which helps the flour fully absorb the liquid before the salt is added. Once the salt goes in, the structure-building begins.
The first few hours of fermentation, or bulk proofing, are critical. This is where you perform the stretch and folds. These gentle yet firm movements develop the gluten and build the internal strength necessary to support the weighty inclusions later. Do four sets of stretches and folds over two hours. Only after the third set, when the dough feels slightly stronger and smoother, do you introduce the celebrity ingredients—the dried pickles and the freshly chopped dill. Folding them in gradually ensures they are evenly distributed without tearing the hard-won gluten network.
The Art of the Inclusion Fold
Imagine the dough as a delicate sleeping bag. You don’t want to violently shake the contents; you want to tuck them in gently. Lay the dough out carefully, sprinkle about half of your pickle and dill mixture over the top, fold it, and repeat with the remaining ingredients. This method prevents all the heavy pieces from sinking directly to the bottom during the long rest period. If you manage this correctly, when you slice your beautifully rustic loaf later, you will see glorious green flecks and crunchy pickle pieces distributed from crust to crust.
Perfecting the Cooking Process
Start by gently folding the chopped pickles and fresh dill into the dough right after the final series of stretch and folds. Ensure even distribution without tearing the gluten structure. Bake hot initially to establish the crust, then drop the temperature for a perfect, golden, and fully cooked loaf.
Shaping and the Final Proof
After bulk fermentation, the dough will have expanded considerably and look beautifully puffy. Now comes shaping, which is perhaps the most nerve-wracking part of sourdough baking. Gently turn the dough onto a lightly floured surface. For this type of inclusion bread, a round boule shape tends to hold up best. Shape quickly and confidently, creating tension on the surface of the dough, which acts like a balloon stretched over the contents.
Transfer your shaped loaf, seam-side up, into a heavily floured proofing basket (a banneton). The final proof can happen either at room temperature for a couple of hours or, for maximum flavor development, in the refrigerator overnight. The cold proof slows the yeast activity, allowing the sourdough culture to develop those deep, complex, tangy notes that make this particular Gourmet Dill Pickle Sourdough Bread truly shine.
Baking for Maximum Crunch and Color
Preheat your oven and your baking vessel (a Dutch oven is highly recommended) to the maximum temperature your recipe allows. High heat is essential for the initial steam burst and the oven spring. Carefully score the top of the cold dough with a sharp razor blade—this controls where the bread expands and adds aesthetic appeal. Transfer the dough to the searingly hot Dutch oven, cover it, and bake for twenty minutes. The lid traps the moisture evaporating from the bread, creating the necessary steam for an epic, blistered crust. Remove the lid, reduce the oven temperature slightly, and finish baking until the crust achieves a deep mahogany color. You are aiming for an internal temperature of 200–210°F (93–99°C).
Add Your Touch
If you crave extra depth, consider adding a tablespoon of dried minced onion or garlic granules to the dough mixture for an umami hit. Substitute sweet gherkins for a slightly sweeter loaf, or use jalapeño brine instead of water for a fiery twist on this delicious Gourmet Dill Pickle Sourdough Bread.
Serving Suggestions: Beyond the Butter
While this tangy fermented bread is delightful with just a smear of butter, its complex savory profile makes it an incredible base for heavier toppings. Try pairing slices with a generous layer of cream cheese and everything bagel seasoning. It also works beautifully sliced thin and toasted for croutons in a rich turkey soup or paired with thinly sliced smoked beef brisket for a truly unforgettable sandwich experience. Don’t be afraid to use this bread as the savory canvas it was meant to be.
Storing & Reheating
Store this tangy bread wrapped tightly at room temperature for up to three days. If freezing, slice the loaf first and seal it airtight. To revive the crust, lightly spritz slices with water and toast them briefly in a hot oven or toaster until crispy and delightfully crunchy again.
Chef’s Secrets for Flawless Dill Sourdough
-
Always reserve a portion of the brine for the water mixture; the vinegar acidifies the dough slightly, enhancing the sour flavor profile beautifully.
-
Drain the pickles thoroughly and pat them dry with paper towels before mixing. Excess moisture is the enemy of a sturdy sourdough crumb structure.
-
Brush the loaf top with melted butter and sprinkle flaky salt and extra dried dill just before baking to prevent the external spices from burning.
My neighbor swore he didn’t like sourdough until I gifted him a slice slathered in cream cheese. He called it “dill-lightful” and now begs for a loaf every week.
Conclusion for Gourmet Dill Pickle Sourdough Bread
The journey to creating the perfect Gourmet Dill Pickle Sourdough Bread is an adventure in managing moisture and maximizing flavor. We learned that the secret lies in dry pickles and a slow fermentation that allows the tang of the brine to fully integrate. This savory bread is more than just an ingredient; it is a conversation starter, perfect for sandwiches, toast, or enjoying plain. Embrace the sour, the crunchy, and the utterly addictive nature of this beautifully unique loaf. It’s time to elevate your home bakery game.
Print
Gourmet Dill Pickle Sourdough Bread
Tangy brine meets savory dill inclusions in this incredible sourdough. Achieve a perfect, complex crumb via slow bulk fermentation and autolyse.
- Total Time: 35 minutes
- Yield: 4 servings 1x
Ingredients
- 450g Bread Flour, plus extra for dusting
- 280g Warm Dill Pickle Brine (strained, approximately 85-90°F)
- 100g Active Sourdough Starter
- 9g Fine Sea Salt
- 1 cup (about 150g) Drained and Finely Chopped Dill Pickles
- 1 tbsp Dried Dill Weed
- 1 tsp Minced Garlic (optional, for intensified flavor)
Instructions
- Step 1: In a large bowl, whisk together the warm pickle brine and the active sourdough starter until combined. Add the bread flour and the salt, mixing until a shaggy dough forms. Cover the bowl and allow the dough to rest (autolyse) for 30 minutes.
- Step 2: Incorporate the Inclusions: Flatten the dough slightly, then sprinkle the finely chopped dill pickles (ensure they are very well-drained), dried dill, and minced garlic over the surface. Perform four sets of "stretch and folds" every 30 minutes, folding the edges of the dough over the inclusions until they are evenly distributed. Cover and allow the dough to bulk ferment at room temperature for 4-6 hours, or until it has visibly increased in volume by about 50%.
- Step 3: Shape and Cold Proof: Gently turn the dough out onto a lightly floured surface. Shape the dough into a tight round or oval (depending on your banneton), creating surface tension. Place the dough seam-side up in a floured proofing basket (banneton). Cover the basket tightly with plastic wrap or place it inside a large plastic bag and refrigerate for a cold proof of 12-18 hours.
- Step 4: Preheat the Oven: About one hour before baking, place a Dutch oven with the lid on inside the oven and preheat to 500°F (260°C). Carefully flip the cold dough onto a piece of parchment paper, then use a sharp lame or knife to score the surface of the bread with your desired design.
- Step 5: Bake the Bread: Lower the oven temperature to 450°F (232°C). Carefully lift the dough by the parchment paper and place it inside the preheated Dutch oven. Cover with the lid and bake for 20 minutes. Remove the lid and continue baking for another 25-35 minutes, or until the crust is a deep golden brown and the internal temperature reaches 200-210°F (93-99°C). Cool completely on a wire rack before slicing.
Notes
- To keep the signature crust crisp, store the cooled loaf loosely wrapped in a clean linen towel or paper bag at room temperature for the first 24 hours.
- To revive a day-old slice, lightly mist the crust with water and bake on a wire rack at 350°F for 5 minutes until the exterior is crunchy again.
- Embrace the savory tang by serving thick slices toasted with cultured butter, or use it as the perfect base for grilled cheese sandwiches featuring sharp cheddar.
- Ensure the finely chopped pickles are meticulously dry—press them between paper towels before incorporating, as any excess moisture will negatively impact the final dough structure and oven spring.
- Prep Time: 15 minutes
- Cook Time: 20 minutes
- Method: Stovetop
- Cuisine: American


Leave a Comment