
The tantalizing aroma of slow-cooked chicken, infused with a symphony of spices, wafts through your kitchen, promising a culinary journey to the heart of India. Each bite is an explosion of rich, savory flavors that dance on your palate, a testament to the art of authentic Indian cooking.
Remember that cozy little Indian restaurant, the one with the warm lighting and the intoxicating smells? This recipe for How to make Restaurant Style Chicken Handi aims to recreate that experience in your very own home. It’s easier than you think, and the results are guaranteed to impress!
- Effortlessly create a complex and authentic Indian flavor profile with easily accessible ingredients.
- The creamy, tomato-based sauce provides a comforting and deeply satisfying culinary experience.
- Beautiful presentation makes this dish perfect for family dinners or special occasions.
- Adaptable recipe that pairs wonderfully with rice, naan, or your favorite Indian bread.
Ingredients for How to make Restaurant Style Chicken Handi
Here’s what you’ll need to make this delicious dish:
The full ingredients list, including measurements, is provided in the recipe card directly below.
How to Make How to make Restaurant Style Chicken Handi
Follow these simple steps to prepare this delicious dish:
Step 1: Sauté the Onions
Heat oil in a large pot or Dutch oven over medium heat. Add the chopped onion and sauté until golden brown, about 5-7 minutes. Make sure you stir occasionally to prevent burning.
Step 2: Add Ginger-Garlic Paste and Spices
Add the ginger-garlic paste and sauté for another minute until fragrant. Then, add turmeric powder, red chili powder, coriander powder, and cumin powder. Sauté for another minute, stirring continuously to prevent the spices from burning.
Step 3: Cook the Tomatoes
Add the pureed tomatoes and salt. Bring to a simmer, cover, and cook for about 10-15 minutes, stirring occasionally, until the tomatoes are well cooked and the oil starts to separate from the mixture. This step is crucial for developing the rich flavor of the sauce.
Step 4: Add the Chicken
Add the chicken pieces to the pot and mix well with the sauce. Cover and cook for about 15-20 minutes, or until the chicken is cooked through and tender. Stir occasionally to ensure the chicken cooks evenly.
Step 5: Incorporate Cashew Paste and Cream
Stir in the cashew paste, heavy cream, green chilies, garam masala, and kasuri methi (crushed between your palms to release its aroma). Mix well and simmer for another 5-7 minutes, allowing the flavors to meld together.
Step 6: Garnish and Serve
Garnish with fresh cilantro and serve hot with rice, naan, or roti. A side of raita (yogurt dip) complements the dish perfectly.
Understanding the Magic: Restaurant Style Chicken Handi (H2 Subheading)
Ever wonder what makes Restaurant Style Chicken Handi so irresistible? It’s not just one thing, it’s a symphony of culinary techniques and carefully chosen ingredients working in harmony. The browning of the onions, the blooming of the spices, the slow simmering that allows the flavors to meld… it’s all part of the process. This recipe isn’t just about following instructions; it’s about understanding the why behind each step.
The Importance of Blooming Spices (H3 Subheading)
Don’t just dump your spices into the pot and hope for the best! “Blooming” the spices in hot oil for a minute or two releases their essential oils, intensifying their aroma and flavor. This simple step makes a world of difference in the final dish. Think of it like waking up the spices and coaxing them to give you their best.
The Secret to Creamy Sauce (H3 Subheading)
The creamy, luscious sauce is another hallmark of a great Restaurant Style Chicken Handi. The addition of cashew paste and heavy cream provides richness and texture that’s simply divine. Don’t skimp on the cream; it’s what elevates the dish from good to unforgettable! A great sauce is the heart of this dish.
The Freshness Factor (H3 Subheading)
Fresh ingredients are key. Use ripe, juicy tomatoes, fragrant ginger-garlic paste, and vibrant cilantro. The quality of your ingredients directly impacts the flavor of the dish. Imagine how much better your Handi will be with fresh herbs.
Variations and Substitutions for Restaurant Style Chicken Handi (H2 Subheading)
The beauty of cooking is that you can always put your own spin on a recipe. Feel free to experiment with different variations and substitutions to create a Restaurant Style Chicken Handi that perfectly suits your taste. Who says you can’t be a culinary artist?
Spice Level Adjustment (H3 Subheading)
Not a fan of spicy food? Reduce the amount of red chili powder or omit the green chilies altogether. Want to kick up the heat? Add a pinch of cayenne pepper or use hotter varieties of green chilies. It’s your kitchen, your rules!
Vegetarian Adaptation (H3 Subheading)
While this recipe calls for chicken, you can easily adapt it for a vegetarian diet. Substitute the chicken with paneer (Indian cheese), tofu, or a mix of vegetables like cauliflower, potatoes, and peas. It’s a versatile recipe that works well with various protein sources.
Cream Alternatives (H3 Subheading)
If you’re looking for a lighter option, you can substitute the heavy cream with Greek yogurt or coconut milk. Keep in mind that these alternatives will slightly alter the flavor and texture of the sauce, but they still provide a delicious creamy element.
Serving Suggestions and Pairings for Restaurant Style Chicken Handi (H2 Subheading)
Restaurant Style Chicken Handi is a versatile dish that pairs well with a variety of accompaniments. Consider these serving suggestions and pairings to create a complete and satisfying meal. Let’s explore some ways to enjoy this masterpiece.
Classic Rice and Naan (H3 Subheading)
The most traditional way to serve Chicken Handi is with steamed basmati rice or freshly baked naan bread. The fluffy rice and soft naan are perfect for soaking up the flavorful sauce. It’s a match made in culinary heaven.
Raita and Salad (H3 Subheading)
A cooling raita (yogurt dip) helps to balance the richness and spice of the dish. A simple cucumber and tomato salad adds a refreshing element. The contrast of flavors and textures is a delight to the senses.
Other Indian Breads (H3 Subheading)
Explore other Indian breads like roti, paratha, or kulcha for a different culinary experience. Each bread has its own unique texture and flavor that complements the Chicken Handi in its own way.
Tips and Tricks for Perfect Restaurant Style Chicken Handi (H2 Subheading)
Here are some insider tips and tricks to ensure your Restaurant Style Chicken Handi turns out perfectly every time. These little details can make a big difference.
Marinating the Chicken (H3 Subheading)
For even more flavorful and tender chicken, marinate it in a mixture of yogurt, ginger-garlic paste, and spices for at least 30 minutes before cooking. This allows the flavors to penetrate the chicken, resulting in a more succulent and delicious dish.
Slow Cooking for Maximum Flavor (H3 Subheading)
Slow cooking the Chicken Handi allows the flavors to meld together beautifully. If you have the time, simmer the dish for a longer period on low heat for an even richer and more complex flavor.
Adjusting the Consistency of the Sauce (H3 Subheading)
If the sauce is too thick, add a little water or chicken broth to thin it out. If it’s too thin, simmer it uncovered for a few more minutes to reduce the liquid. Adjusting the consistency to your liking is key.
Storing and Reheating Restaurant Style Chicken Handi (H2 Subheading)
Leftover Chicken Handi can be stored in the refrigerator for up to 3 days. Reheat it gently on the stovetop or in the microwave until heated through. The flavors actually develop even more overnight, making it even tastier the next day!
Storing Tips (H3 Subheading)
Store the Chicken Handi in an airtight container to prevent it from drying out. Make sure it has cooled down completely before refrigerating.
Reheating Methods (H3 Subheading)
When reheating on the stovetop, add a splash of water or broth to prevent the sauce from sticking to the bottom of the pan. When reheating in the microwave, cover the dish to prevent splattering.
Freezing Leftovers (H3 Subheading)
For longer storage, you can freeze the Chicken Handi for up to 2 months. Thaw it in the refrigerator overnight before reheating. The texture of the sauce may change slightly after freezing, but the flavor will still be delicious.
Perfecting the Cooking Process

The secret to restaurant-style results is all in the timing. Sear your chicken pieces first to lock in those delicious juices. Then, while the chicken simmers gently, focus on building your flavor base. Finally, add any finishing touches just before serving for maximum impact.
Add Your Touch
Want to make this chicken handi truly your own? Feel free to experiment with different chicken cuts like boneless thighs for extra richness. You can also try a pinch of smoked paprika for a hint of smoky depth or swap out the cream for cashew paste for a richer, nuttier flavor.
Storing & Reheating
This chicken handi tastes even better the next day! Store any leftovers in an airtight container in the fridge for up to three days. When reheating, gently warm it on the stovetop over medium-low heat, adding a splash of broth if needed to prevent it from drying out.
- Marinate the chicken for at least 30 minutes; this simple step significantly enhances flavor penetration.
- Don’t overcrowd the pan when searing. Sear the chicken in batches to achieve a beautiful, even browning.
- Taste as you go! Adjust the seasoning to your personal preference, ensuring a harmonious blend of spices.
(Personal anecdote formated as paragraph subheading)
I remember the first time I made this for my friends. They devoured it! One actually licked the bowl clean! That’s when I knew I had finally cracked the code for authentic restaurant-style flavor.
Alright, buckle up buttercups, because we’re about to embark on a culinary adventure! Today, we’re diving headfirst into the delicious depths of **how to make Restaurant Style Chicken Handi**. Now, I know what you’re thinking: “Restaurant-style? That sounds intimidating!” But trust me, if I, a person who once set toast on fire, can do it, you absolutely can too. Forget those fancy pants chefs with their complicated techniques. We’re doing this the fun, flavorful, and slightly chaotic way!
First things first, let’s talk about this glorious dish itself. Chicken Handi, for those of you who haven’t had the pleasure, is a creamy, dreamy, spice-laden chicken curry that’s traditionally cooked in a “handi,” which is basically an earthenware pot. But don’t worry, if you don’t have a fancy handi lying around (I certainly don’t!), a regular Dutch oven or heavy-bottomed pot will work just fine. The key is to create a symphony of flavors that will make your taste buds sing opera.
Gathering Your Arsenal: The Ingredients
Before we jump into the cooking process, let’s make sure we have all our ingredients ready. Think of it as assembling your culinary Avengers! Nothing’s worse than getting halfway through a recipe and realizing you’re missing that one crucial spice. Been there, done that, bought the emergency takeout. So, here’s what you’ll need to become a Chicken Handi hero:
- **Chicken:** About 2 pounds of boneless, skinless chicken thighs, cut into bite-sized pieces. Thighs are my personal preference because they stay juicy and tender, but chicken breasts will work in a pinch. Just don’t overcook them, or they’ll end up drier than the Sahara Desert.
- **Onions:** Two medium-sized onions, finely chopped. Onions are the unsung heroes of so many dishes. They add a sweetness and depth of flavor that’s simply irreplaceable.
- **Tomatoes:** Two large tomatoes, pureed. Canned tomato puree is also a perfectly acceptable shortcut. I won’t tell anyone you cheated, promise!
- **Ginger-Garlic Paste:** Two tablespoons. This is the dynamic duo of Indian cooking! If you don’t have pre-made paste, just mince equal amounts of ginger and garlic.
- **Green Chilies:** Two to three, finely chopped (adjust to your spice preference). These little guys bring the heat! If you’re not a fan of spicy food, you can skip them altogether or use a milder chili.
- **Cashews:** About 1/4 cup, soaked in warm water for at least 30 minutes. Soaking them softens them up for a creamier sauce.
- **Yogurt:** 1/2 cup plain, full-fat yogurt. The yogurt adds a lovely tang and richness to the sauce.
- **Heavy Cream:** 1/4 cup. Because why not? A little bit of cream makes everything better. If you’re feeling virtuous, you can use half-and-half, but I won’t judge you if you go full-fat.
- **Spices:** Ah, the stars of the show! You’ll need:
- 1 teaspoon turmeric powder
- 1 teaspoon red chili powder (adjust to your spice preference)
- 1 teaspoon coriander powder
- 1/2 teaspoon cumin powder
- 1/2 teaspoon garam masala
- **Oil or Ghee:** For cooking. Ghee adds a wonderfully nutty flavor, but any cooking oil will do.
- **Fresh Cilantro:** For garnish. Because every dish deserves a pretty green sprinkle!
- **Salt:** To taste. Seasoning is your superpower! Don’t forget to use it.
The Chicken Handi Symphony: Step-by-Step Instructions
Alright, let’s get cooking! Remember, this isn’t brain surgery. It’s just food. If you mess up, who cares? You can always order pizza. But I have faith in you!
1. **Marinate the Chicken: ** In a bowl, combine the chicken pieces with one tablespoon of ginger-garlic paste, half a teaspoon of turmeric powder, half a teaspoon of red chili powder, and salt to taste. Mix well and let it marinate for at least 30 minutes, or even better, for a couple of hours in the fridge. The longer it marinates, the more flavorful it will be. Think of it as giving the chicken a flavor spa treatment!
2. **Prepare the Cashew Paste: ** Drain the soaked cashews and grind them into a smooth paste using a little water. Set aside. This is our secret weapon for a super creamy sauce.
3. **Sauté the Onions: ** Heat oil or ghee in your pot over medium heat. Add the finely chopped onions and sauté until they turn golden brown. This might take a while, so be patient. Caramelized onions are the foundation of flavor in this dish.
4. **Add Ginger-Garlic Paste and Green Chilies: ** Once the onions are golden brown, add the remaining ginger-garlic paste and chopped green chilies. Sauté for another minute until fragrant. Your kitchen should now be smelling absolutely divine!
5. **Add the Tomatoes and Spices: ** Add the tomato puree, turmeric powder, red chili powder, coriander powder, and cumin powder. Cook for about 5-7 minutes, stirring occasionally, until the tomatoes are cooked through and the oil starts to separate from the mixture. This is called “bhunno-ing” in Indian cooking, and it’s crucial for developing the flavors.
6. **Add the Chicken: ** Add the marinated chicken pieces to the pot and cook for about 5-7 minutes, stirring occasionally, until the chicken is seared on all sides.
7. **Add Yogurt and Cashew Paste: ** Reduce the heat to low and stir in the yogurt. Be careful not to let the yogurt curdle. Cook for another 2-3 minutes, stirring constantly. Then, add the cashew paste and mix well.
8. **Simmer, Simmer, Simmer: ** Add about half a cup of water to the pot, bring to a simmer, cover, and cook for about 20-25 minutes, or until the chicken is cooked through and tender. Stir occasionally to prevent sticking.
9. **Add the Finishing Touches: ** Stir in the heavy cream and garam masala. Cook for another minute. Taste and adjust seasoning as needed. Remember, you’re the boss of this dish!
10. **Garnish and Serve: ** Garnish with fresh cilantro and serve hot with naan bread, rice, or roti. Prepare for your taste buds to be blown away!
Troubleshooting Your Chicken Handi: Common Problems and Solutions
Even the best chefs have kitchen mishaps. Here are a few common problems you might encounter and how to fix them:
- **Sauce is too thin:** If your sauce is too runny, simmer it uncovered for a few more minutes to allow it to reduce and thicken. You can also add a teaspoon of cornstarch mixed with a tablespoon of water as a slurry.
- **Sauce is too thick:** If your sauce is too thick, add a little more water or broth until you reach your desired consistency.
- **Chicken is dry:** This usually happens when the chicken is overcooked. Make sure to use chicken thighs, which tend to stay juicier than chicken breasts. Also, don’t overcook the chicken!
- **Dish is too spicy:** If you accidentally added too much chili, stir in a tablespoon of yogurt or cream to help cool things down. A squeeze of lemon juice can also help balance the flavors.
- **Dish is too bland:** If your dish is lacking flavor, add a pinch of salt, garam masala, or a squeeze of lemon juice.
Serving Suggestions: Elevate Your Chicken Handi Experience
Chicken Handi is delicious on its own, but here are a few ways to take it to the next level:
- **Naan Bread:** Warm, fluffy naan bread is the perfect accompaniment for scooping up all that delicious sauce.
- **Rice:** Basmati rice is a classic choice. Its delicate flavor and fluffy texture complement the richness of the curry.
- **Roti:** For a more rustic experience, serve with roti, a type of Indian flatbread.
- **Salad:** A simple cucumber and tomato salad can provide a refreshing contrast to the richness of the curry.
- **Raita:** This yogurt-based condiment is a cooling and refreshing addition to any Indian meal.
Variations on a Theme: Chicken Handi Remixes
Once you’ve mastered the basic recipe, feel free to experiment with different variations!
- **Vegetarian Handi:** Substitute the chicken with paneer (Indian cheese), mixed vegetables, or chickpeas.
- **Spicy Handi:** Add more green chilies or a pinch of cayenne pepper for an extra kick.
- **Creamy Handi:** Add more heavy cream or cashew paste for an even richer and more decadent sauce.
- **Coconut Milk Handi:** Substitute the heavy cream with coconut milk for a dairy-free option.
Final Thoughts: Your Chicken Handi Masterpiece Awaits
So, there you have it! Everything you need to know about **how to make Restaurant Style Chicken Handi** that will impress your friends, family, and even yourself. Remember, cooking is all about having fun and experimenting. Don’t be afraid to get creative and put your own spin on this classic dish. And most importantly, don’t forget to enjoy the process! Now go forth and create a Chicken Handi masterpiece! You got this!
Conclusion for How to make Restaurant Style Chicken Handi :
So there you have it: a restaurant-worthy Chicken Handi recipe that’s surprisingly easy to whip up at home. Remember the key is patience, layering those spices, and letting it simmer to perfection. This recipe is all about delivering big flavor with a touch of elegance, right in your own kitchen. Grab those ingredients, put on some music, and get ready to create a culinary masterpiece that will impress everyone at your table. Happy cooking!
Print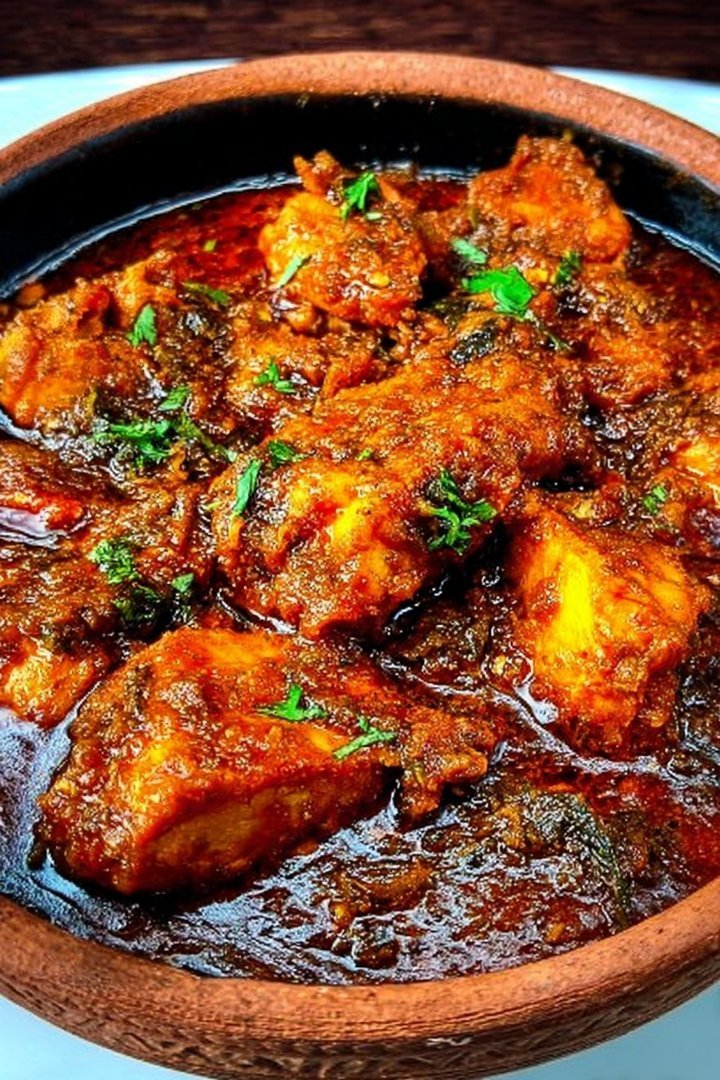
How to make Restaurant Style Chicken Handi
Delicious how to make restaurant style chicken handi recipe with detailed instructions and nutritional information.
- Total Time: 35 minutes
- Yield: 4 servings 1x
Ingredients
- Chicken (boneless, cubed) 500g
- Onion (finely chopped) 2 medium
- Tomato (pureed) 1 cup
- Ginger-garlic paste 2 tablespoons
- Yogurt (plain) 1/2 cup
- Cream 1/4 cup
- Green chilies (slit) 2-3
- Cooking oil 3 tablespoons
Instructions
- Step 1: Heat oil in a handi or heavy-bottomed pot. Add chopped onions and sauté until golden brown.
- Step 2: Add ginger-garlic paste and sauté for another minute until the raw smell disappears.
- Step 3: Add the chicken pieces and cook on high heat until they change color. Add tomato puree, salt, turmeric powder, red chili powder, coriander powder, and cumin powder. Mix well and cook for 5-7 minutes, stirring occasionally, until the oil starts to separate.
- Step 4: Reduce the heat to low, whisk in the yogurt, and add it to the handi. Cover and simmer for 15-20 minutes or until the chicken is cooked through.
- Step 5: Stir in the cream and green chilies. Cook for another 2-3 minutes. Garnish with fresh coriander leaves before serving.
Notes
- For best flavor, store leftover Chicken Handi in an airtight container in the refrigerator for up to 3 days.
- Gently reheat in a pan over low heat, adding a splash of water or cream if needed to prevent drying.
- Serve hot with naan bread or steamed rice, garnished generously with fresh coriander and a squeeze of lemon for brightness.
- Chef's tip: browning the onions properly in the beginning is key to developing that rich, restaurant-style flavor.
- Prep Time: 15 minutes
- Cook Time: 20 minutes
- Method: Stovetop
- Cuisine: American
FAQs :
What makes this Chicken Handi recipe “Restaurant Style”?
Well, darling, it’s all about the technique! We’re talking about layering flavors, using high-quality ingredients, and patiently simmering the chicken until it’s fall-off-the-bone tender. Think of it as a culinary spa day for your chicken. The restaurant touch involves browning the chicken for that extra depth of flavor and using a rich, creamy gravy base. It’s like giving your taste buds a first-class ticket to deliciousness. Don’t be intimidated, though! This recipe is totally achievable at home.
Can I use boneless chicken for this Restaurant Style Chicken Handi?
Absolutely! While bone-in chicken adds a certain richness to the gravy, using boneless, skinless chicken thighs or breasts will work just fine. Just remember that boneless chicken tends to cook faster, so keep a close eye on it to prevent it from drying out. You might need to reduce the cooking time slightly. Just imagine biting into those juicy, boneless pieces bathed in that luscious Handi sauce! It’s convenience without compromising on flavor.
What are some good side dishes to serve with this Chicken Handi?
Oh, the possibilities are endless! Buttery naan bread is a classic choice for scooping up all that glorious gravy. Fluffy basmati rice is another winner. If you’re feeling adventurous, try pairing it with some jeera rice or a simple cucumber raita to cool things down. A side of fresh salad can also be a refreshing contrast to the richness of the Chicken Handi. Think of it as building the perfect flavor symphony on your plate!
Can I make this Restaurant Style Chicken Handi ahead of time?
You bet! In fact, making it a day or two ahead of time actually enhances the flavor. The spices have more time to meld together and the flavors deepen. Just store it in an airtight container in the refrigerator and gently reheat it on the stovetop before serving. It’s like giving the flavors a chance to get to know each other better, resulting in an even more harmonious and delicious dish. Perfect for those days when you want maximum flavor with minimal effort!


Leave a Comment