
Forget fussy pastry crusts and stressful meringue peaks. Summer desserts should be effortless, bright, and slightly ridiculous, delivering maximum flavor with minimal kitchen trauma. Enter the sunshine-in-a-square: the glorious, tangy, perfectKey Lime Pie Rice Krispie Treats. This is instant tropical bliss without turning on the oven, proving that true genius lies in simplicity.
- These no-bake wonders come together faster than you can find your pie dish, making them perfect for last-minute cravings and impromptu gatherings.
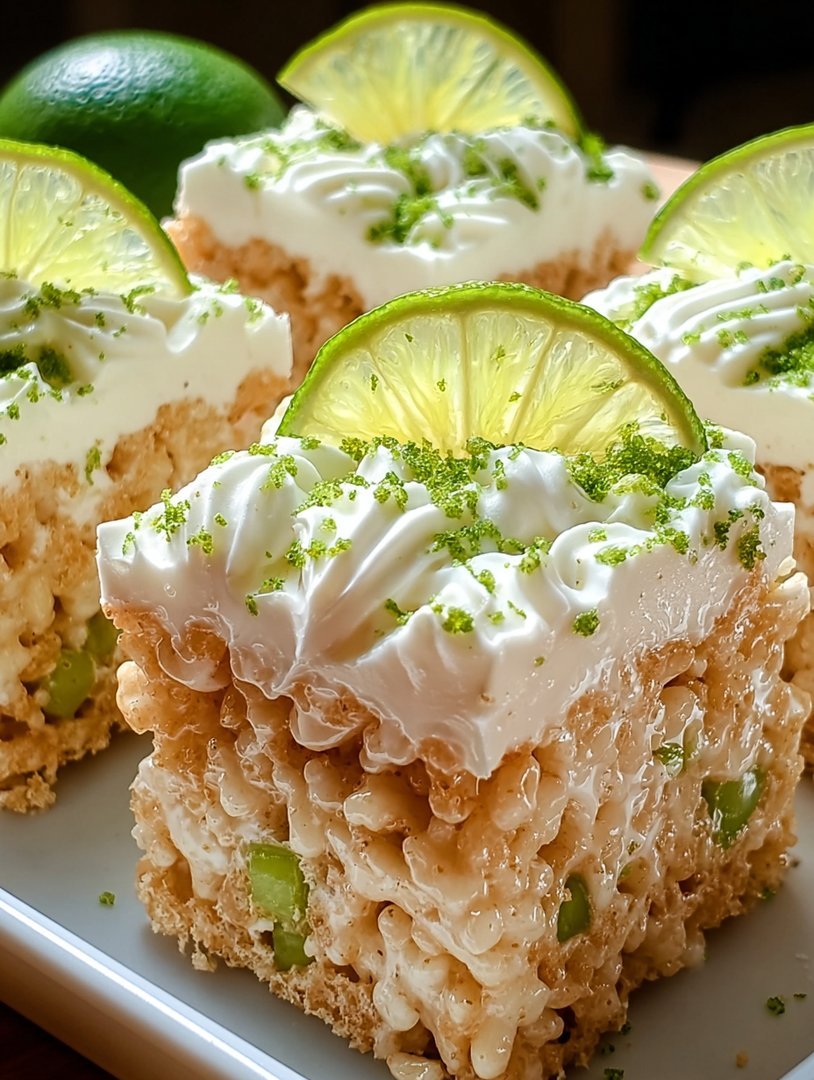
- Experience the essential tart pucker of fresh lime balanced by creamy marshmallow sweetness and a satisfying, delightfully crunchy texture.
- The vibrant green color and crunchy composition make these treats a visually exciting and highly Instagrammable addition to any dessert table.
- Easily transportable and endlessly customizable, they are the ideal dessert for picnics, potlucks, or just hiding strategically in your pantry drawer.
The Secret History of the World’s Easiest “Pie”
I adore Key Lime Pie. I really do. The problem is that traditional baking and I have a relationship best described as “frenemies who occasionally set things on fire.” Every time I attempt a classic pastry, I end up with a soggy bottom or a crust so hard it could be repurposed as roofing material. The humidity warps the meringue, the filling cracks, and the entire endeavor leaves me wondering if I should just stick to pre-packaged cookies. It was during one particularly spectacular pie failure—involving six rejected limes and a very dramatic puff of smoke from the oven—that I had an epiphany. Why bother with the complexity when the texture of a classic graham cracker crust is, essentially, just sweet, crunchy bits held together by butter? That realization led me down the path of pure, unadulterated laziness and resulted in these incredibleKey Lime Pie Rice Krispie Treats. We are taking the essence of that tropical vacation dessert—the tartness, the sweet creaminess, the satisfying crunch—and combining it with the absolute ease of a childhood favorite. Think of this as the culinary equivalent of wearing pajamas to a black-tie event: slightly cheeky, totally comfortable, and surprisingly chic. The result is a dessert bar that requires about fifteen minutes of active time and zero fear of the oven thermostat. It’s sweet nostalgia colliding with sophisticated, tangy flavor, making it perfect for every age group. You get all the essential flavor notes without any of the high-stakes culinary pressure.
Why Key Lime and Marshmallow Are Soulmates
The marriage of lime and marshmallow might sound odd at first, especially if you usually prefer your marshmallows toasted over a campfire. However, when you introduce the sharp acidity of fresh Key lime juice and zest, the marshmallow transforms from a sticky, simple sweet into a creamy, luscious binding agent. It provides the necessary volume and chewiness while acting as a perfect canvas for the citrus punch. Crucially, the butter combined with the melted marshmallow creates a foundation that mimics the rich, buttery quality of a traditional pie crust without any actual baking. We aren’t aiming for a subtle hint of lime here; we are going for that unmistakable tropical pucker that makes you involuntarily squint your eyes, followed by the immediate relief of the sweet cereal crunch. This dynamic interplay is what makes these treats so addictive. We also often incorporate a little splash of vibrant food coloring to achieve that signature light green hue, ensuring they look every bit as tropical as they taste. If you prefer a more natural look, you can certainly skip the coloring, but they won’t scream “tropical vacation” quite as loudly on the plate.
Ingredients for Key Lime Pie Rice Krispie Treats
Here’s what you’ll need to make this delicious dish:
- Unsalted ButterUse high-quality butter, as its flavor serves as the necessary rich base, binding the marshmallows and cereal together firmly.
- MarshmallowsStandard size marshmallows are best here, providing the optimal ratio for melting into a gooey, binding cloud of sweetness.
- Crisped Rice CerealThe structural backbone of the treat, ensuring the necessary crunch that contrasts beautifully with the soft, gooey filling.
- Fresh Key Lime JuiceThis is non-negotiable; bottled lime juice simply lacks the required sharp, vibrant acidity and authentic flavor profile we are building.
- Key Lime ZestThe zest contains the essential oils that deliver the most concentrated citrus aroma and pungent flavor, making the treat truly sing.
- Vanilla PowderA small amount helps to deepen the overall sweetness and provide a comforting background note, balancing the strong lime presence.
- Green Food Coloring (Optional)Use a few drops of gel coloring to achieve the iconic pale green color associated with traditional Key Lime desserts.
The full ingredients list, including measurements, is provided in the recipe card directly below.
How to Make Key Lime Pie Rice Krispie Treats
Follow these simple steps to prepare this delicious dish:
Step 1: Prepare the Pan and Citrus
Lightly grease a 9×13 inch baking pan with butter or line it with parchment paper, ensuring an overhang for easy removal. Thoroughly wash and dry your Key limes, then zest them finely. Juice the limes until you have the required measurement; make sure there are no seeds in the juice.
Step 2: Melt the Marshmallow Base
In a large, nonstick pot or Dutch oven, melt the butter over medium-low heat. Once the butter is completely melted and foamy, add all of the marshmallows. Stir continuously using a rubber spatula until the marshmallows are completely smooth and liquid, usually taking about 5 to 7 minutes. Remove the pot immediately from the heat once fully melted to prevent the mixture from hardening too quickly.
Step 3: Introduce the Key Lime Flavor
Working quickly, stir in the vanilla powder, Key lime zest, and the fresh Key lime juice. If you are using food coloring, mix a few drops in now until you achieve a pale, uniform green color. The mixture may seize slightly due to the liquid lime juice, but keep stirring until it smooths out into a cohesive, tangy paste.
Step 4: Combine the Cereal
Gently fold the crisped rice cereal into the marshmallow mixture. Use firm but light strokes to coat the cereal thoroughly without crushing it. Ensure every piece is covered in the gooey, lime-infused marshmallow base. Work efficiently, as the mixture will start to cool and become difficult to manage quickly.
Step 5: Press and Chill
Transfer the sticky mixture immediately into the prepared 9×13 inch pan. Use a piece of parchment paper or buttered hands to press the mixture firmly and evenly into the pan. Do not compress the mixture too tightly, or the treats will be hard instead of chewy. Allow the treats to cool and set completely at room temperature for at least two hours, or chill in the refrigerator for 30 minutes for a faster set.
Step 6: Cut and Finish
Once fully set, use the parchment paper overhang to lift the entire block of treats out of the pan. Cut into 12 to 16 even squares. For an extra touch of Key lime elegance, you can drizzle the tops with a simple white chocolate glaze and a sprinkle of extra zest before serving.
Tips for Achieving the Perfect Tropical Crunch
Creating the perfect Key Lime Pie Rice Krispie Treats involves striking a delicate balance between gooey moisture and structural integrity. One common mistake is overheating the marshmallows. If you allow the marshmallows to boil or simmer aggressively, they become brittle and hard once cooled. Always use medium-low heat and remove the mixture from the stove the moment it is fully melted. This ensures that your treats remain wonderfully chewy and don’t require the jaw strength of a lumberjack to consume. Another key component is the quality and quantity of the lime flavoring. Always use fresh Key lime juice; regular Persian limes are acceptable in a pinch, but the Key limes offer a uniquely intense, floral tartness that defines the dessert. Make sure you also include the zest. Zesting the lime before juicing ensures you capture the maximum essential oils. If you try to zest a juiced lime, it turns into a messy, unproductive chore. When pressing the mixture into the pan, remember the goal is evenness, not compression. Pressing too hard crushes the air pockets in the cereal, resulting in a dense, rock-like bar. Use gentle pressure, just enough to ensure the bars hold their shape.
Customizing Your Key Lime Pie Experience
These treats are incredibly versatile, offering several ways to customize them based on your preferences or the occasion. To enhance the “pie” experience, consider adding a layer of crushed vanilla wafers or shortbread cookies to the bottom of the pan before pressing in the marshmallow mixture. This creates a denser, more defined crust layer beneath the soft filling. For an extra tropical punch, try folding in a quarter cup of finely shredded unsweetened coconut along with the rice cereal. The coconut adds depth of flavor and another enjoyable textural contrast. If you want a truly decadent topping, melt a half cup of white chocolate with a teaspoon of coconut oil and drizzle it generously over the cooled bars before they are cut. You can then immediately sprinkle the top with extra lime zest or even some freeze-dried raspberry powder for a beautiful color contrast. Store any uneaten bars in an airtight container at room temperature for up to three days, though honestly, they seldom last that long once the secret of their deliciousness gets out.
The Accidental Discovery of Sunshine on a Plate
I was trying to make key lime pie for a summer picnic, but the oven failed spectacularly. Panicked, I grabbed a box of cereal and some limes, resulting in this marvelous, no-bake fusion. The first bite of the Key Lime Pie Rice Krispie Treats instantly transported me to a breezy beach, proving sometimes kitchen disasters birth genius.
The Magic Behind the Key Lime Zing
Let’s face it: summer is too hot for ovens, and sometimes you need dessert gratification right now. This recipe combines the nostalgic comfort of a classic marshmallow crisp with the vibrant, sun-soaked punch of a tart key lime pie. It’s the ultimate mashup—a vacation for your taste buds delivered in a neat, gooey square. The real genius here lies in how we manage to incorporate liquid juice without completely dissolving the structural integrity of the sticky marshmallow matrix. It requires speed, precision, and a willingness to accept that your kitchen will smell exactly like a Florida beach bar.
The Essential Ingredient List
To craft these perfect citrus squares, you will need ingredients that are both familiar and bright. Remember that quality matters, especially when dealing with such simple components. Seek out fragrant, tiny key limes; their flavor is intensely different from standard Persian limes.
What You Need
- 6 tablespoons unsalted butter (or plant-based alternative)
- 1 (10-ounce) bag of marshmallows (ensure they are agar-agar-free if required)
- 6 cups toasted rice cereal
- 1/2 cup fresh key lime juice, strained (about 10-12 limes)
- 2 tablespoons key lime zest
- 1/4 teaspoon salt
- Optional: 1 cup crushed vanilla wafers or graham crackers
- Optional Topping: Powdered sugar or melted white chocolate for drizzling
The Science of Sweetness and Texture
The precision of the butter-to-marshmallow-to-cereal ratio is the bedrock of a perfect rice crispy treat. Too much butter, and the treat becomes greasy and fails to hold its shape; too little marshmallow, and the treats crumble immediately upon cutting. We use six cups of cereal for a standard 10-ounce bag of marshmallows because this ratio provides the maximum chewiness without sacrificing structural integrity. When introducing the key lime juice, we are slightly disrupting this ratio, which is why working quickly is essential. The lime juice provides the necessary tartness, but it also contains water, which slightly dilutes the sugar matrix. If the resulting mixture seems slightly too loose, you can quickly stir in an extra handful of cereal to tighten it up, ensuring a firm set.
Creating the Perfect Marshmallow Base
The foundation of any great marshmallow treat is a flawless sticky base. Never use high heat; this causes the butter and sugar in the marshmallows to separate, resulting in brittle, hard treats later. Low and slow is the mantra here. Stir continuously until the mixture is 90% melted. Then, remove it from the heat and stir until the residual heat finishes the job. This technique ensures a perfectly smooth, silky, and pliable mixture that will hold its chewiness for days. Adding the key lime zest directly into the melting butter releases the oils, intensifying the citrus aroma throughout the entire dessert. This small step is a major flavor booster.
Perfecting the Cooking Process
Start by zesting your limes before juicing them—you want maximum aroma! Melt the butter and marshmallows gently over low heat, stirring constantly to prevent scorching. Only after the mixture is smooth should you stir in the key lime juice and then fold in the crispy cereal immediately, pressing quickly into the pan.
A Deep Dive into Key Lime Flavor
Many people assume that adding juice directly to melted marshmallow will result in a soupy, sugary mess, and they are largely correct if they dump it all in at once. The secret to maintaining that glorious stickiness is to introduce the acidic liquid slowly and strategically, right off the heat. The acid helps cut through the overwhelming sweetness of the marshmallow while ensuring the mixture sets up correctly. We are aiming for that sublime balance where the tartness makes your cheeks tingle, but the sugary marshmallow provides a soft, comforting hug afterward. This tropical dessert doesn’t just taste good; it tells a story of unexpected harmony between two culinary worlds.
Once you incorporate the lime juice, the clock is ticking. You must work quickly. The mixture will begin to tighten almost immediately due to the introduction of the cooler liquid and the inherent properties of the starch and sugar reaction. Have your pan prepped and your crispy rice cereal ready to go. The folding motion should be gentle yet swift, ensuring every piece of cereal is coated without crushing the crisp texture we crave. Crushed cereal is a tragedy, second only to a sticky mess that refuses to leave the mixing bowl. Use a large rubber spatula coated in a little extra butter for the easiest folding experience.
Troubleshooting Common Sticky Situations
Even the most seasoned home cook encounters sticky situations, especially when marshmallow is involved. The number one complaint when making these lime-infused marshmallow treats is stickiness during the pressing phase. The solution, as we briefly mentioned, is simple: fat is your friend. Do not rely solely on parchment paper. Before touching the mixture, coat your hands, the bottom of a measuring cup, or your spatula generously with butter or a light spray of cooking oil. This creates a non-stick barrier that allows you to press the mixture into the pan without half of the dessert clinging stubbornly to your skin. If you find your mixture cooling too quickly before you can press it fully, place the pan near a slightly warm spot (like the stove top after you’ve turned it off) for a moment to soften it slightly, then proceed quickly.
Add Your Touch
If you enjoy extra crunch, try mixing in some crushed vanilla wafers or graham cracker crumbs for a mock crust effect. You can substitute the lime juice with lemon juice for a different citrus zing. For a creamier treat, swirl in a tablespoon of sweetened condensed milk before adding the cereal.
Presentation Perfection and Slicing Strategies
The visual appeal of these tropical crispies truly elevates them beyond a simple snack. Once the mixture is pressed into the pan, consider dusting the top lightly with extra lime zest or drizzling them with a thin layer of melted white chocolate—the white chocolate adds a beautiful contrast in color and enhances the creamy background notes without overpowering the tart lime. When pressing the mixture into the pan, be firm but gentle; over-compressing the treats squeezes out the air, leading to dense, brick-like squares instead of delightfully chewy ones.
To achieve perfectly clean slices, chill the pan in the refrigerator for about 15 minutes before cutting. This quick chill sets the mixture enough so that when you run a large, sharp knife through it, the marshmallow doesn’t stick and drag. For extra professional-looking results, lightly grease the knife with a neutral cooking oil before each slice. These tropical squares are ideal for cutting into small, bite-sized portions, making them excellent for parties or lunchboxes.
Sourcing the Best Ingredients for Maximum Flavor
While this recipe seems straightforward, the treats depend heavily on ingredient quality. Do not skimp on the butter; using high-quality, unsalted butter imparts a rich, creamy background flavor that complements the tart lime perfectly. For the citrus, if key limes are unavailable, you can substitute 1/4 cup of standard Persian lime juice combined with 1/4 cup of lemon juice; this approximation gets close to the complex flavor profile of the true key lime. Finally, ensure your cereal is fresh and crisp. Stale cereal will result in dense, disappointing treats. A quick trick is to briefly toast the cereal in the oven for five minutes at 300°F (150°C) before starting the recipe; this ensures ultimate crunchiness and enhances the overall depth of flavor.
Storing & Reheating
Store these tropical squares in an airtight container at room temperature for up to three days—refrigeration makes them hard. Do not reheat them! If they lose their softness, leave the container lid slightly ajar overnight to let them absorb a little moisture from the air, returning them to their glorious chewy texture.
Expert Key Lime Crispies Tips
- Use fresh key limes; the bottled stuff simply lacks the fragrant punch necessary for true Key Lime Pie Rice Krispie Treats flavor.
- Always butter your spatula or line your pan with parchment paper before pressing the mixture to avoid a sticky, frustrating mess.
- For stability and better slices, let the treats cool completely, preferably for two hours, before cutting into sharp, beautiful squares.
My grandmother, a dessert purist, initially scoffed at the idea. But after she tried one bite, she secretly hid the remaining four treats in her purse. That, I decided, was the highest possible compliment.
Conclusion for Key Lime Pie Rice Krispie Treats
These refreshing and ridiculously simple Key Lime Pie Rice Krispie Treats prove that the best desserts don’t require an oven or complicated steps. We mastered the balance of tang and sweetness, ensuring maximum crispiness and chewiness. Whether you are hosting a tropical party or just need a bright pick-me-up on a Tuesday, this no-bake wonder is your new secret weapon. Don’t be afraid to experiment with the toppings or additions we discussed. Go forth and embrace the joy of citrus-infused marshmallow goodness!
Print
Key Lime Pie Rice Krispie Treats
Forget baking! Our Key Lime Pie Rice Krispie Treats marry sharp, fresh Key Lime zest/juice with buttery sweetness, delivering ultimate crunch.
- Total Time: 35 minutes
- Yield: 4 servings
Ingredients
- Unsalted ButterUse high-quality butter, as its flavor serves as the necessary rich base, binding the marshmallows and cereal together firmly.
- MarshmallowsStandard size marshmallows are best here, providing the optimal ratio for melting into a gooey, binding cloud of sweetness.
- Crisped Rice CerealThe structural backbone of the treat, ensuring the necessary crunch that contrasts beautifully with the soft, gooey filling.
- Fresh Key Lime JuiceThis is non-negotiable; bottled lime juice simply lacks the required sharp, vibrant acidity and authentic flavor profile we are building.
- Key Lime ZestThe zest contains the essential oils that deliver the most concentrated citrus aroma and pungent flavor, making the treat truly sing.
- Vanilla PowderA small amount helps to deepen the overall sweetness and provide a comforting background note, balancing the strong lime presence.
- Green Food Coloring (Optional)Use a few drops of gel coloring to achieve the iconic pale green color associated with traditional Key Lime desserts.
Instructions
- Step 1: Prepare the Pan and Citrus
- Step 2: Melt the Marshmallow Base
- Step 3: Introduce the Key Lime Flavor
- Step 4: Combine the Cereal
- Step 5: Press and Chill
- Step 6: Cut and Finish
Notes
- For optimal texture, store the cooled treats in an airtight container at room temperature for up to three days, as refrigeration tends to harden the marshmallow base too much.
- If the treats become too firm after resting, microwave a single square for just 5-7 seconds to restore a slight gooeyness without melting the structure entirely.
- Enhance the "pie" experience by drizzling the finished treats with a thin line of melted white chocolate or dusting them lightly with crushed graham crackers before serving.
- Incorporate the fresh Key Lime juice and zest only after the melted marshmallow is removed from the heat, as the acid can inhibit the treats from setting up firmly if added while boiling.
- Prep Time: 15 minutes
- Cook Time: 20 minutes
- Method: Stovetop
- Cuisine: American


Leave a Comment