
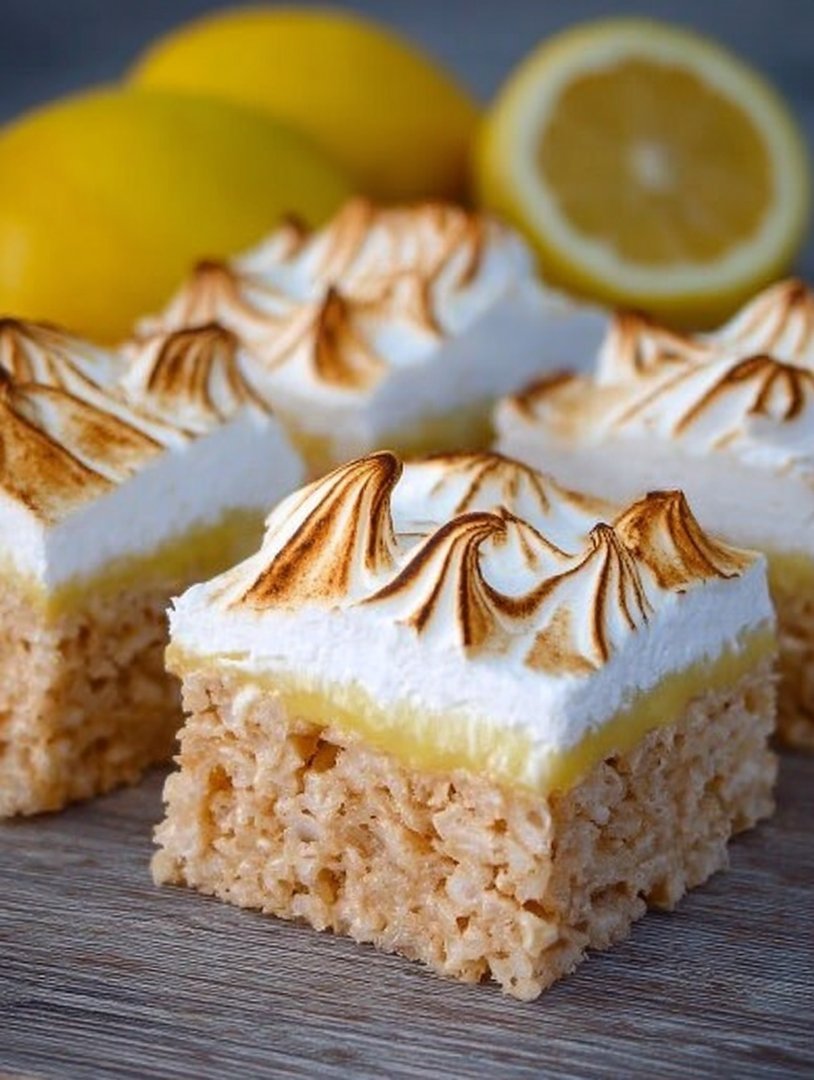
Imagine the crisp, satisfying crunch of a childhood favorite meeting the sophisticated, zesty tang of an afternoon delight. This glorious mashup results in the magnificentLemon Meringue Rice Krispie Treats, a dessert that truly belongs on a pedestal—or at least, a very nice plate.
This recipe isn’t just easy; it’s revolutionary, transforming the humble sticky square into a bright, airy, and spectacularly flavorful experience that will make you ditch the conventional marshmallow square forever.
- These treats offer an incredible texture contrast, combining the crispy lightness of puffed rice with the smooth, slightly chewy lemon-infused marshmallow base.
- The flavor profile perfectly balances intense citrus zest and smooth sweetness, mimicking a classic lemon meringue pie without any fuss or baking time.
- Visually, the toasted meringue peaks add an elegant, golden-brown finish, elevating this simple bar into a showstopper suitable for any gathering.
- This quick-fix dessert is incredibly versatile, making it the ideal centerpiece for bridal showers, summer picnics, or whenever you need sunshine on a plate.
Imagine me, age ten, attempting to make a meringue. It looked less like billowy clouds and more like sad, deflated bath foam. For years, the majestic lemon meringue pie remained my culinary Everest—too complex, too temperamental. But then I realized: why fight the classics when you can trick them? The solution wasn’t perfecting pie crust; it was fusing that sublime, tart flavor profile with the effortless joy of a Rice Krispie treat.
This dessert is the culinary equivalent of wearing a tuxedo T-shirt. It’s elegant where it counts (the bright lemon curd flavor and the torched meringue topping) but ridiculously simple at its core. We are essentially taking the fastest, least stressful dessert in the entire baking universe and giving it a high-society makeover. This isn’t just a bar; it’s an experience, a delightful shock to the system that screams, “I tried really hard!” even though you pulled it off in under thirty minutes. The secret lies in infusing the marshmallow base itself with real lemon zest and juice, creating a foundational tartness that cuts beautifully through the sweetness of the marshmallow.
The Culinary Collision Course: Why This Dessert Works
The magic of theLemon Meringue Rice Krispie Treatslies in their audacity. Who decided that puffed rice cereal bars had to be brown or pink? We’re reclaiming the snack square and giving it a sunny, vibrant personality. When developing this recipe, the goal was critical: achieve the distinct flavor notes of lemon meringue pie—the crispness, the tart filling, the soft topping—without touching an oven (except for a quick torching, if you’re feeling fancy). This required several engineering feats, primarily concerning moisture balance and flavor infusion.
You see, adding too much lemon juice can lead to a sticky, soggy mess that refuses to set, resembling more of a lemony puddle than a cohesive bar. Therefore, we rely heavily on lemon zest for the powerful aromatic punch and reserve a precise amount of fresh juice to brighten the flavor without compromising the structural integrity of the treats. Think of the melted marshmallows as the cement, and the lemon essence as the vibrant watercolor paint—you need just enough color to make an impact without dissolving the medium. We also introduce a secondary layer of chewiness and stability by using slightly browned butter, which adds a nutty depth that complements the brightness of the citrus remarkably well.
The Science of Sour and Sweet
To truly capture the ‘meringue’ experience, you need that fluffy, slightly ethereal topping. For the home cook who might not want to fuss with raw egg whites, we offer two paths. Path A involves a traditional meringue, stabilized and then briefly torched for that gorgeous golden-brown finish. Path B, for the truly speed-obsessed, involves a pre-made whipped topping stiffened with a touch of stabilizer like cornstarch, offering the cloud-like texture without the fuss of whipping egg whites. Whichever route you choose, the topping is essential. It provides the necessary textural contrast to the dense, crunchy base and the final visual flourish that transforms these simple bars into the Lemon Meringue Rice Krispie Treats of legend.
The beauty of this sweet-and-sour combination is its ability to refresh the palate instantly. While traditional marshmallow treats are pure, decadent sugar bombs, the intense acidity of the fresh lemon juice and zest prevents flavor fatigue. It’s a sophisticated dessert disguised as a casual snack. My neighbor once tried to guess what complicated French pastry I had spent hours assembling. When I told her it was simply Rice Krispies, her jaw dropped—and that, my friends, is the power of a little meringue magic. Remember, presentation counts, and a perfectly toasted topping is the easiest way to earn maximum admiration with minimum effort. If you don’t have a kitchen torch, don’t worry—a quick run under the broiler works wonders, provided you watch it like a chicken for approximately 45 seconds.
Ingredients for Lemon Meringue Rice Krispie Treats
Here’s what you’ll need to make this delicious dish:
- Unsalted ButterUse high-quality butter, and make sure to brown it slightly before adding the marshmallows for a deeper, more complex nutty flavor.
- Mini MarshmallowsMini marshmallows melt faster and more evenly than the standard large size, ensuring a smoother, easier-to-mix base.
- Lemon Zest and JuiceUse fresh, organic lemons for the best flavor; the zest provides intense aroma while the juice adds necessary acidity.
- Alcohol-Free Vanilla ExtractA small amount of pure alcohol-free vanilla extract helps round out the flavor profile and prevents the lemon from tasting overly harsh.
- Crispy Rice CerealThe foundation of the treat; ensure the cereal is fresh and crisp, as stale cereal will result in a chewy, lackluster final product.
- Egg Whites (for Meringue)Use pasteurized egg whites for safety, or ensure your eggs are very fresh if using a traditional meringue recipe.
- Granulated SugarNeeded for sweetening and stabilizing the meringue topping, resulting in those classic stiff, glossy peaks.
The full ingredients list, including measurements, is provided in the recipe card directly below.
How to Make Lemon Meringue Rice Krispie Treats
Follow these simple steps to prepare this delicious dish:
Step 1: Prep the Pan and Brown the Butter
Grease a 9×13 inch baking pan thoroughly with butter or line it with parchment paper, leaving an overhang on the sides for easy removal later. In a large, heavy-bottomed saucepan over medium heat, melt the unsalted butter. Continue heating and stirring until the butter foams, then subsides, and brown bits form at the bottom, releasing a rich, nutty aroma. Immediately remove the butter from the heat to prevent scorching.
Step 2: Create the Lemon Marshmallow Base
Return the saucepan to low heat. Add the mini marshmallows and stir continuously until they are completely melted and smooth, taking care not to let them burn. Once fully melted, stir in the alcohol-free vanilla extract, the fresh lemon zest, and the precise amount of lemon juice specified in the recipe card. Work quickly, ensuring all ingredients are fully incorporated before the mixture begins to set.
Step 3: Combine and Press the Treats
Remove the marshmallow mixture from the heat and immediately fold in the crispy rice cereal. Stir until the cereal is evenly coated with the lemon marshmallow mixture. Transfer the mixture to the prepared baking pan. Use a piece of parchment paper or a lightly buttered spatula to gently press the mixture into an even layer. Do not compact the mixture too heavily, as this can result in hard, rock-like treats; gentle pressure ensures a tender bite. Allow the base to cool and set completely at room temperature for at least one hour.
Step 4: Prepare and Apply the Meringue Topping
While the treats are setting, prepare the meringue. Whisk the egg whites until soft peaks form. Gradually add the granulated sugar, continuing to whisk until stiff, glossy peaks develop. This process might take 5 to 7 minutes using a stand mixer. Once the treats are set, spread the meringue evenly over the cooled rice cereal base, creating decorative swirls and peaks with the back of a spoon or a piping bag.
Step 5: Torch or Broil for a Golden Finish
For that authentic Lemon Meringue Rice Krispie Treats look, use a kitchen torch to quickly toast the peaks of the meringue until golden brown. Alternatively, place the pan under a preheated broiler for 30 to 60 seconds, watching constantly—literally do not blink—until the tips are caramelized. Remove immediately and let the treats cool for 15 minutes before cutting them into squares.
Transfer to plates and drizzle with extra lemon glaze (optional) for the perfect finishing touch, or serve them exactly as they are—a crunchy, zesty marvel.
Tips and Tricks for Perfect Rice Krispie Bars
Achieving the perfect texture in a rice cereal bar can feel like navigating a minefield. The biggest mistake people make is pressing the mixture too hard into the pan. This crushes the air pockets in the cereal, leading to dense, jaw-achingly hard squares. Use a light hand, or better yet, press it down with the flat base of a measuring cup coated lightly in butter. The goal is adhesion, not compression. If your mixture starts to cool and become too stiff before you can press it into the pan, place the bowl over a very low heat setting for about 30 seconds to re-soften the marshmallow just enough to handle.
Regarding the lemon flavor: only use fresh lemon juice. Bottled juice lacks the vibrant acidity and freshness needed to truly cut through the sweetness of the marshmallow. For an even more intense lemon punch, consider adding a tiny pinch of citric acid (available in the spice aisle) to the marshmallow mixture alongside the zest. This provides a clean, pure sour note without the added moisture of extra juice. Always ensure your meringue ingredients are at room temperature before whipping; cold egg whites refuse to whip into the voluminous, stiff peaks you need for an impressive topping. If you are baking these in a humid environment, you might need an extra tablespoon of cereal to compensate for the moisture in the air, ensuring they set correctly.
Troubleshooting Common Sticky Situations
If your treats are too sticky, it usually means you didn’t cook the marshmallows quite long enough, or you added too much liquid (like excess lemon juice). Marshmallows need to reach a specific temperature to achieve the perfect non-sticky structure. While we don’t always use a thermometer for this simple recipe, ensure the marshmallow mixture comes to a full, smooth liquefaction before mixing in the cereal. If the treats are too hard, you likely cooked the butter and marshmallows for too long, essentially turning the mixture into a brittle-like consistency. The key here is quick, decisive action: melt the butter, melt the marshmallows, mix in the flavorings, and fold in the cereal—all in rapid succession.
Another common issue involves meringue weeping or sliding off the treat base. This happens when the meringue is not adequately stabilized or when it is applied to a surface that is too warm. Ensure your rice krispie base is completely cool to the touch—as in, room temperature or even slightly chilled—before spreading the meringue. If you notice tiny beads of sugary liquid forming on your meringue (weeping), this is usually due to humidity or under-baking/under-torching. For a perfect, stable topping, always use a high ratio of sugar to egg white (like the recipe calls for) and ensure the sugar is fully dissolved before stopping the whipping process.
Storing Your Crunchy, Zesty Masterpiece
The beauty of the Lemon Meringue Rice Krispie Treats is their relatively good shelf life, although they are always best enjoyed within 48 hours of assembly. The enemy here is moisture and air. Store the cut bars in an airtight container at room temperature. If they are exposed to air, the meringue will start to absorb moisture and lose its crispness, and the cereal will eventually become stale. Never store these treats in the refrigerator unless absolutely necessary, as the cold environment tends to dry out the marshmallow base, making the treats unnecessarily hard and chewy. If you must chill them, ensure the container is tightly sealed to minimize moisture exposure.
For longer storage, you can prepare and set the rice cereal base (Step 3) and store that component in an airtight container for up to three days. Then, prepare and apply the meringue topping (Steps 4 and 5) just before you plan to serve them. This guarantees the meringue is at its absolute peak of fluffiness and flavor. These treats are the ultimate make-ahead dessert hack, perfect for parties where you want the wow factor without the last-minute kitchen chaos. They freeze reasonably well, too, if wrapped tightly without the meringue, making them an excellent choice for batch prepping sweet snacks ahead of time.
The Accidental Discovery of Sunshine on a Plate
I accidentally knocked a batch of lemon curd onto a freshly made sheet of cereal bars. Instead of crying over the mess, I tasted it. That happy accident—a perfect combination of bright citrus and gooey crunch—is how theseLemon Meringue Rice Krispie Treatswere born.
Let’s be honest, we all love a classic cereal bar, that delightful stick-to-your-ribs, butter-and-marshmallow marvel. But sometimes, life demands a little drama, a little pizzazz, something that screams, “I am sophisticated, yet I can also be eaten standing over the sink at midnight.” Standard treats are great for Tuesdays, but these brilliant yellow squares are for when you need to feel like you just won an impromptu baking competition, even though you used exactly zero ovens.
The first time I served these, I called them “Aggressively Optimistic Marshmallow Squares.” My guests loved the crunchy base, but when they hit the tart lemon filling and the fluffy meringue topping, silence fell. It was the silence of pure, unadulterated dessert shock. They couldn’t believe something so easy tasted so intricate. This recipe isn’t just about mixing ingredients; it’s about merging two iconic desserts that, frankly, should have gotten married ages ago.
Gathering Your Zesty Arsenal
Before you embark on this no-bake adventure, make sure you have the right supplies. You don’t want to be halfway through melting marshmallows only to realize your lemons have gone missing. Trust me, plain, unsullied Rice Krispie Treats do not compare to the tangy glory we are about to achieve. When selecting your marshmallows, remember the goal is gooey bliss. Since standard marshmallows often contain animal pectin, be sure to source high-quality, plant-based or pectin-free marshmallows to ensure the texture and adherence to dietary requirements without compromising the integrity of the treat.
Ingredients for the Crunchy Base
- 6 tablespoons unsalted butter (or plant-based butter alternative)
- 1 (10-ounce) bag pectin-free mini marshmallows
- 6 cups crisp rice cereal
- 1 teaspoon pure alcohol-free vanilla extract
Ingredients for the Lemon Curd Filling
If you are using store-bought lemon curd, ensure it is thickened using pectin or starch. If making it homemade, the addition of cornstarch or tapioca starch will provide the necessary stability.
- 1 cup prepared lemon curd (ensure pectin-free and well chilled)
- Zest of 1 large lemon (extra fine grate)
Ingredients for the Fluffy Meringue Topping
- 3 large egg whites, room temperature (pasteurized is recommended if not baked)
- 1/2 cup granulated sugar
- 1/4 teaspoon cream of tartar
- A pinch of salt
The Gooey Base: Marshmallow Mastery
The foundation of any great cereal treat is getting the marshmallow mixture just right. This is not the time to walk away and check social media; things go from melted to burnt in roughly 3.2 seconds. Start by melting the butter gently in a large pot over low heat. Once the butter is shimmering and smelling nutty, introduce the pectin-free mini marshmallows. Stir continuously until about 80% of the marshmallows are melted. This crucial step leaves some small, whole marshmallows, which adds a phenomenal chewiness to the finished bar.
Remove the pot from the heat immediately. Stir in the alcohol-free vanilla extract, ensuring it is fully incorporated before gently folding in the crisp rice cereal. You want to coat the cereal evenly without crushing it or stirring until the mixture cools too much. Working quickly is key here. Press the mixture into a 9×13 inch pan lined with parchment paper. Use a piece of waxed paper or a lightly buttered spatula to press the mixture down firmly but gently. If you smash it too hard, your teeth will stage a protest later. Place the base in the refrigerator while you prepare the lemon components.
Building the Bright, Tangy Center
While the base is setting up, you can perfect the heart of the treat: the lemon filling. In a small bowl, whisk the chilled lemon curd with the fresh lemon zest. Chilling the curd ensures it retains its structure and doesn’t melt into the warm cereal base. Once the base is cooled slightly (about 20 minutes in the fridge), spread the lemon curd evenly over the top. Use an offset spatula for the smoothest finish. Once the curd layer is complete, place the whole pan back in the refrigerator to chill thoroughly while you tackle the final flourish—the meringue.
This chilled preparation is vital for creating distinct layers, preventing the tartness of the lemon curd from dissolving the marshmallow structure beneath it. The juxtaposition of the chewy base and the smooth, cold curd is what makes these Lemon Meringue Rice Krispie Treats utterly addictive.
Perfecting the Cooking Process
First, prepare the lemon curd and let it cool completely; temperature is crucial. While the curd chills, melt your butter and pectin-free marshmallows. Combine the crisp rice cereal quickly, press it firmly into the pan, and then layer that bright lemon filling. Chill before topping with meringue.
Whipping Up the Airy Meringue Topping
The meringue topping is the crowning glory, offering a sweet, cloud-like contrast to the intense tartness below. Ensure your egg whites are at room temperature—this helps them whip up to maximum volume. In a clean, dry metal bowl (cleanliness is non-negotiable here!), whisk the egg whites, cream of tartar, and salt until soft peaks form.
Gradually, spoon in the granulated sugar, continuing to whip until stiff, glossy peaks form. You should be able to turn the bowl upside down without the meringue moving (though I don’t recommend testing this near carpet). Spread this beautiful cloud over the chilled lemon layer. This recipe shines when the meringue is lightly browned. If you own a kitchen torch, gently torch the peaks until they are golden brown. If not, you can briefly place the treats under a broiler for about 60 seconds—watch them like a chicken, as they burn instantly.
The whole purpose of the meringue is to complete the classic pie experience, transforming a basic cereal bar into a decadent, complex dessert. The moment the sticky crunch meets the airy fluff and the zesty cream, you realize these Lemon Meringue Rice Krispie Treats are in a league of their own.
Add Your Touch
Try substituting lime or orange zest for a different citrus kick. If you want a more luxurious filling, swirl in some cream cheese before adding the meringue. For extra texture, mix crushed shortbread cookies into the base layer for a buttery crunch.
If meringue feels like too much work, you can opt for a simple whipped topping, folded with a little powdered sugar and extra lemon zest, though you miss out on the traditional ‘pie’ feel. For those who enjoy deeper flavors, try folding a spoonful of finely chopped crystallized ginger into the marshmallow mixture; the warmth pairs wonderfully with the bright lemon. Another fun trick is to substitute half of the crisp rice cereal with toasted oat cereal for an earthier base that provides great structural integrity.
This is your kitchen, so feel free to experiment with flavors. However, stick to the rule of contrast: the base must be chewy and the filling must be tart. The successful execution of these bars relies on that satisfying play between sweet and sour, soft and crunchy. Don’t be afraid to add a sprinkle of edible glitter for that extra celebratory shine!
Storing & Reheating
Store these treats in an airtight container at room temperature for up to three days, though they rarely last that long. Avoid refrigeration, which can toughen the marshmallow base. Serve them immediately after torching the meringue for the best results.
If you need to make them ahead, complete all steps through spreading the lemon curd and chilling the bars. Wait until just before serving (within two hours) to prepare and torch the meringue. If the meringue sits too long, it can weep or dissolve the lemon layer beneath it, compromising that beautiful fluffy texture. If the marshmallow base does become a bit hard, let the treats sit at room temperature for an hour before serving to restore some of the intended chewiness.
- Use parchment paper with a slight overhang in your pan; this makes removing and cutting the incredibly sticky treats dramatically easier later on.
- Always use fresh, zesty lemons. Bottled juice lacks the vibrant, tart flavor necessary to cut through the sweetness of the marshmallow base.
- Do not press the mixture into the pan too tightly. Over-compressing the Rice Krispies makes the final bar rock-hard instead of pleasantly chewy.
My neighbor, usually a steadfast traditionalist, took one bite and declared these “the only cereal bar that deserves a fancy name.” High praise indeed for a dessert born from utter kitchen chaos!
Conclusion for Lemon Meringue Rice Krispie Treats
The journey to these bright, crunchy, and tangy bars might have started with a literal mess, but the result is pure genius. TheseLemon Meringue Rice Krispie Treatsoffer a beautiful contrast of texture and flavor—the light, airy meringue giving way to the zesty, creamy curd, all anchored by that satisfying snap. They are simple to make yet sophisticated enough for any gathering.
Mastering the simple steps of chilling the lemon curd and gently handling the cereal mixture guarantees success. Stop chasing complicated desserts; embrace the joy of a no-bake wonder that truly tastes like bottled sunshine and guarantees rave reviews from even the pickiest eaters.
Print
Lemon Meringue Rice Krispie Treats
Sunshine in a square! These zesty Lemon Meringue Rice Krispie Treats deliver tartness and satisfying crunch, elevated by fresh lemon zest. Quick stovetop melt method.
- Total Time: 35 minutes
- Yield: 4 servings
Ingredients
- Unsalted Butter: 4 tablespoons (1/2 stick)
- Mini Marshmallows: 10 ounces (for the base)
- Rice Krispies Cereal: 6 cups
- Fresh Lemon Zest: 1 tablespoon (from 2 medium lemons)
- Lemon Extract: 1 teaspoon
- Marshmallow Cream (Fluff): 7 ounces (1 standard jar)
Instructions
- Step 1: Grease a 9×13 inch baking pan thoroughly with butter or line it with parchment paper, allowing an overhang on the sides for easy removal.
- Step 2: In a large saucepan, melt the butter over medium-low heat. Once melted, add the 10 ounces of mini marshmallows and stir continuously until smooth and fully melted. Remove the pan from the heat.
- Step 3: Quickly stir in the lemon zest and lemon extract until combined. Add the 6 cups of Rice Krispies cereal and fold gently with a spatula until the cereal is completely coated with the lemon marshmallow mixture.
- Step 4: Transfer the mixture immediately to the prepared pan. Using a piece of wax paper or a lightly buttered spatula, gently press the mixture evenly into the pan. Allow the treats to cool and set for about 30 minutes at room temperature.
- Step 5: Once the base is set, carefully warm the jar of Marshmallow Cream (Fluff) in the microwave for 15-20 seconds to make it spreadable. Evenly spread the entire 7 ounces of fluff over the top of the treats to create the "meringue" layer.
- Step 6: Allow the treats to set completely (about 1 hour) before slicing into squares and serving.
Notes
- Store the treats tightly covered at room temperature for up to three days, ensuring they are kept airtight to prevent the meringue-style fluff topping from hardening or drying out.
- If the treats become too stiff after a day or two, avoid microwaving the squares whole; instead, let them sit in an airtight container near a slightly warm spot for 10-15 minutes to gently soften the base.
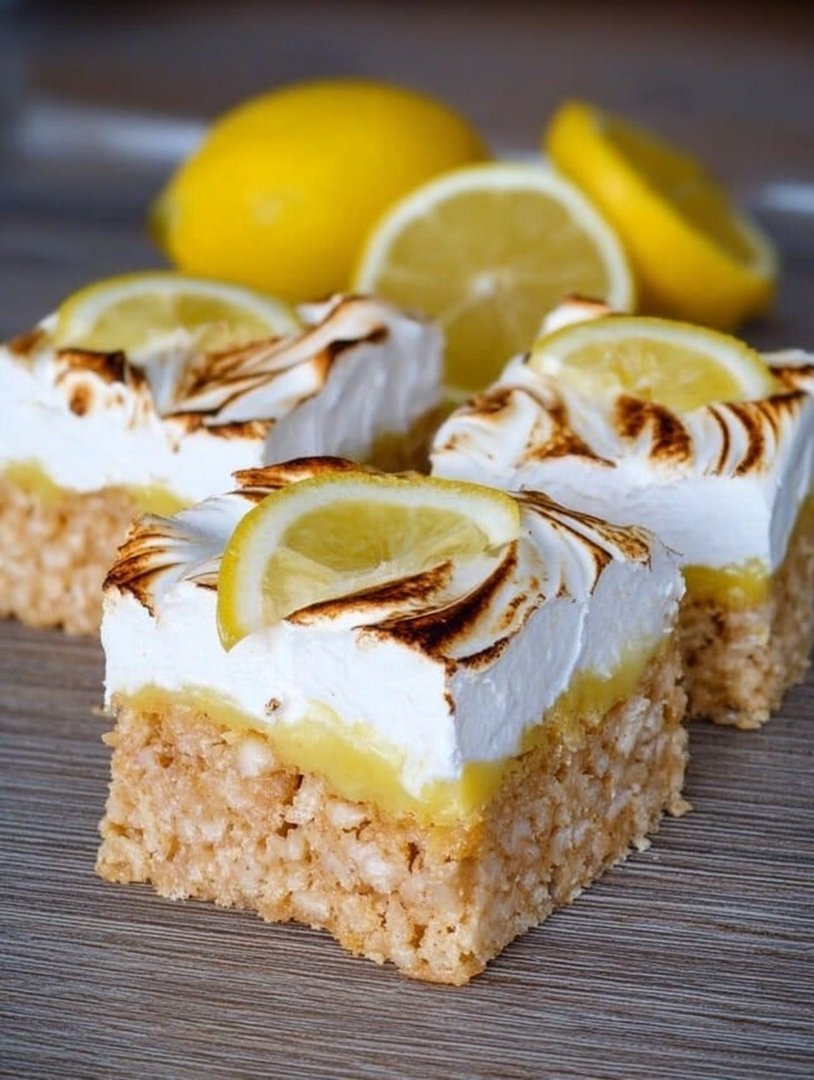
- For an elegant finish, dust the treats lightly with powdered sugar before serving, and consider adding a small curl of fresh lemon zest on each square to emphasize the bright flavor.
- When pressing the warm cereal mixture into the pan, remember to press gently, using just enough pressure to fill the pan—over-compacting the treats makes them hard and less chewy.
- Prep Time: 15 minutes
- Cook Time: 20 minutes
- Method: Stovetop
- Cuisine: American


Leave a Comment