

The air turns crisp, and suddenly, the only logical solution to seasonal stress is dense, fudgy chocolate mixed with that signature icy cool crunch. Nothing captures the holiday spirit quite like the triumphant mashup of rich dark cocoa and invigorating mint, which is why we are diving headfirst into the glorious world ofPeppermint Bark Brownies.
Forget store-bought holiday treats; these are intensely decadent, wildly festive, and shockingly easy to assemble, proving that the best gifts you give yourself often come dusted with crushed candy canes.
- Fudgy perfection meets crunchy delight, offering a complex texture that dances brilliantly between deep chocolate richness and cool, vibrant peppermint.
- These brownies are incredibly simple to prepare, relying on standard pantry staples to create an unforgettable, visually stunning dessert centerpiece.
- The festive red and white topping transforms a classic treat into a magnificent, jewel-toned display perfect for seasonal gatherings and gifting.
- Customize the base layer easily, swapping in different chocolate types or adding espresso powder to intensify the already decadent cocoa flavor profile.
Ingredients for Peppermint Bark Brownies
Here’s what you’ll need to make this delicious dish:
- Unsalted ButterUse high-quality butter for the best flavor payoff; it provides the necessary fat content for a fudgy texture.
- Granulated Sugar and Light Brown SugarThe combination of these two sugars ensures the brownies are moist, fudgy, and chewy without becoming cakey.
- EggsEggs bind the ingredients and contribute significantly to the rich, glossy crust that everyone loves on a great brownie.
- Alcohol-Free Vanilla ExtractUse pure alcohol-free vanilla extract to deepen the overall sweetness and provide a subtle aromatic warmth against the strong chocolate flavor.
- All-Purpose FlourMeasure the flour carefully by spooning it into the measuring cup and leveling it off to prevent a tough or dry brownie.
- Unsweetened Cocoa PowderOpt for Dutch-processed cocoa powder if possible, as it delivers a darker color and a smoother, less bitter chocolate intensity.
- Salt and Baking PowderSalt balances the sweetness, while a small amount of baking powder prevents the brownies from sinking dramatically after baking.
- Chocolate Chips (Semi-Sweet or Dark)These are melted into the batter to create the foundational, deep chocolate flavor and guarantee maximum fudginess.
- White Chocolate Baking BarUse high-quality white chocolate, not chips, for the bark layer; chips contain stabilizers that prevent them from melting into a smooth, pourable consistency.
- Peppermint ExtractA little goes a long way here; use a few drops to provide the signature cool mint flavor without overpowering the chocolate.
- Crushed Candy Canes or Peppermint CandiesThese provide the distinctive festive crunch and visual appeal of the traditional peppermint bark topping.
The full ingredients list, including measurements, is provided in the recipe card directly below.
How to Make Peppermint Bark Brownies
Follow these simple steps to prepare this delicious dish:
Step 1: Prep the Pan and Melt the Chocolate Base
Preheat your oven to 350°F (175°C). Line a 9×13 inch baking pan with parchment paper, leaving an overhang on the sides—this acts as a sling for easy removal later. In a large, heat-proof bowl set over a simmering pot of water (or using a microwave), melt the butter and chocolate chips together until completely smooth. Remove from heat and allow it to cool slightly while you move to the next step, ensuring the mixture is not too hot when the eggs are added.
Step 2: Incorporate Sugars and Eggs
To the slightly cooled chocolate mixture, whisk in the granulated sugar and brown sugar until thoroughly combined. This vigorous whisking creates those slightly chewy edges and fudgy centers we crave. Add the eggs one at a time, mixing well after each addition until the batter is thick, glossy, and beautifully emulsified. Stir in the alcohol-free vanilla extract.
Step 3: Fold in the Dry Ingredients
In a separate bowl, whisk together the all-purpose flour, cocoa powder, salt, and baking powder. Gradually fold these dry ingredients into the wet batter using a rubber spatula. Stop mixing just as the last streaks of flour disappear. Overmixing develops the gluten, which leads to tough, cake-like brownies, and we absolutely do not want that kind of structural failure in our fudgy treat.
Step 4: Bake and Cool the Brownies
Pour the brownie batter into the prepared pan and spread it evenly with the spatula. Bake for 25 to 30 minutes. The brownies are done when a toothpick inserted near the center comes out with moist crumbs attached, but not raw batter. Do not overbake! Once baked, transfer the pan to a wire rack and allow the brownies to cool completely—this step is crucial before adding the bark topping, or you will end up with chocolate soup.
Step 5: Prepare and Layer the Peppermint Bark Topping
Once the brownies are fully cooled, melt the white chocolate baking bar in a double boiler or microwave, stirring frequently until silky smooth. Remove from heat and stir in the peppermint extract. Pour the melted white chocolate over the cooled brownies and spread quickly into an even layer using an offset spatula. Immediately sprinkle the crushed peppermint candies or candy canes evenly over the white chocolate before it begins to set.
Step 6: Set, Slice, and Serve
Allow thePeppermint Bark Browniesto set completely. You can speed this process along by placing the pan in the refrigerator for about 30 minutes, which makes slicing much cleaner. Once set, lift the brownies out of the pan using the parchment sling. Cut them into squares and arrange them beautifully on a platter for a truly show-stopping presentation. Transfer to plates and drizzle with extra melted white chocolate, if desired, for the perfect finishing touch.
Mastering the Perfect Brownie Base
Achieving that perfect, slightly chewy, intensely fudgy texture is the holy grail of homemade brownie baking. Many amateur bakers accidentally wander into the dry, crumbly landscape of cakey brownies, but avoiding this fate is surprisingly simple. The secret lies predominantly in the ratio of fat to flour and, crucially, how you treat the eggs and chocolate. High-quality ingredients are non-negotiable; cheap chocolate melts unevenly and lacks the depth of flavor needed to stand up to the strong peppermint notes. Always use unsalted butter and genuine baking chocolate for the best results, as these foundational elements dictate the richness and moisture level of the final product.
The Importance of Cooling the Chocolate
A common mistake that leads to dry brownies is adding eggs to a mixture that is too hot. When you melt the butter and chocolate together, the temperature often exceeds what the eggs can handle, essentially starting to cook them upon contact. This ruins the texture. After melting, you must let the mixture cool for about ten minutes until it is just warm to the touch. Once the mixture is cooled, the aggressive whisking step when adding the sugar is paramount. Whisking air into the sugars and eggs helps build structure and creates that shiny, delicate crust on top of the finished brownie, which is the hallmark of a truly great recipe. Don’t skip this aeration step, as it significantly enhances the final appearance and texture. Furthermore, avoid overbaking at all costs. An extra two minutes in the oven can transform fudgy centers into dry disappointment. When you pull them out, they should still look slightly underdone in the very middle, as they will continue to set as they cool in the hot pan.
Tips for Stunning Peppermint Bark Topping
The topping is what transforms a standard chocolate dessert into festivePeppermint Bark Brownies. Since the bark layer is applied after baking, you have complete control over its smoothness and presentation. The key to a flawless bark is using the right kind of white chocolate. White chocolate chips contain stabilizers designed to help them hold their shape during baking, making them notoriously difficult to melt into a thin, smooth coating. Instead, purchase a good quality white chocolate baking bar or disks designed for tempering and melting. These will melt into a beautifully pourable consistency that spreads easily across the cooled brownie surface.
Handling Peppermint Flavor and Setting
When adding the peppermint extract to the melted white chocolate, remember that extracts are highly concentrated. Start with a small amount, taste, and add more if necessary; too much peppermint extract can result in a soapy, overpowering flavor that completely masks the rich chocolate base. Once you have mixed in the extract, you must move quickly. Melted white chocolate begins to set almost immediately once it is off the heat, especially when mixed with a cool extract. Pour it immediately over the cooled brownies and spread it thin. If the white chocolate starts to harden before you are ready, return it to the heat source for 15 seconds to loosen it up. The crushed peppermint candies should be sprinkled on immediately after spreading the white chocolate to ensure they adhere firmly to the still-wet surface, creating that iconic festive look and satisfying crunch.
Flavor Variations and Storage Suggestions
While the classic combination of chocolate and mint is unbeatable, you can easily adapt this recipe to suit different tastes or seasons by altering the bark element. For instance, outside of the holidays, you could omit the peppermint extract and crushed candies entirely and replace them with toasted pecans and a drizzle of caramel for a turtle-style brownie. Alternatively, try adding a layer of raspberry jam swirled into the white chocolate before setting, creating a vibrant chocolate raspberry bar. These variations maintain the structural integrity of the base recipe while offering exciting new flavor profiles.
Storing and Gifting Your Brownies
Proper storage ensures yourPeppermint Bark Browniesretain their fudgy texture and sharp peppermint crunch for days. Once the bark is fully set, store the brownies in an airtight container at room temperature. They will last beautifully for up to four days. If you need to keep them longer, wrapping individual slices tightly and freezing them is a great option. They can be thawed overnight at room temperature and still taste incredibly fresh. Since these brownies are so visually striking, they make excellent homemade gifts during the holiday season. Line a decorative tin with parchment paper and stack the squares neatly, perhaps tying the box with a festive ribbon. This recipe yields a generous batch, making it perfect for sharing with neighbors, friends, or simply keeping a substantial stash hidden away for those late-night, post-holiday-shopping cravings.
Remember that the key to avoiding a messy presentation when cutting these decorated desserts is temperature control. If the brownies and the bark topping are too warm, the knife will drag and smear the white chocolate, resulting in uneven edges. Chilling the entire pan briefly in the refrigerator after the bark has set results in clean, sharp lines every single time. A sharp, warm knife also helps; run your knife under hot water, dry it quickly, and slice, reheating the knife between cuts for the most professional-looking squares.
The Accidental Discovery of Sunshine on a Plate

It was a truly chaotic December evening when I ran out of baking chocolate but had leftover candy canes. Desperate for a festive dessert, I smashed those crunchy minty bits and layered them over my fudgiest brownie base. The resultingPeppermint Bark Brownieswere a surprisingly glorious, cool, and rich triumph!
Perfecting the Cooking Process
Achieve perfection by tackling the components in reverse order. First, melt and combine your chocolate and butter for the brownie base. While the batter chills slightly, prepare the white chocolate bark topping. This ensures the bark is ready to spread evenly the moment the warm brownies emerge from the oven.
Add Your Touch
If you prefer less intense mint flavor, swap half of the crushed candy canes for white chocolate chips or toasted pecans. For a deeper cocoa punch, consider adding a teaspoon of instant espresso powder to the brownie batter. You can also use dark cocoa powder for a richer color.
Storing & Reheating
Store these festive treats in an airtight container at room temperature for up to four days. If you prefer a chewier texture, refrigerate them. Freezing is also possible; wrap individual squares tightly in cling film and thaw at room temperature before serving. Never microwave them!
We all know the annual dilemma of holiday baking. You want something festive, jaw-dropping, and utterly delicious, but you definitely don’t want to spend four days creating a gingerbread village that will inevitably be knocked over by a rogue house cat. That, my friends, is why we turn to the humble, heroic brownie.
But these aren’t just any brownies. These are the show-stopping, conversation-starting, deeply fudgy chocolate mint squares that steal the spotlight every time. They combine a rich, dark cocoa base—the fudgiest you’ve ever experienced—with a crunchy, cool layer of peppermint white chocolate bark. It’s like Festive Season decided to throw a party inside a perfectly baked square.
The Quest for the Ultimate Fudgy Texture
The secret to achieving that coveted fudgy interior lies in the ratio of fat to flour and, crucially, avoiding excessive aeration. Unlike cake-like brownies, which rely on baking powder and extensive mixing, we want density. We melt our butter and chocolate together to ensure deep moisture retention and minimal air pockets. This technique produces a dessert so dense and satisfying it almost requires a fork (but we all know you’re eating it straight from the pan).
Using a mix of melted chocolate and cocoa powder gives the brownies layers of chocolate flavor—one robust and earthy from the cocoa, and the other smooth and rich from the melted squares. Trust me on this: skip the shortcuts and measure your ingredients precisely. Baking is chemistry, and we are aiming for delicious, minty magic.
Ingredients for Peppermint Bark Brownies
For the Fudgy Brownie Base
- 1 cup (2 sticks) unsalted butter, plus extra for greasing
- 4 ounces unsweetened baking chocolate, chopped
- 1 ½ cups granulated sugar
- ½ cup light brown sugar, packed
- 4 large eggs, room temperature
- 1 teaspoon alcohol-free vanilla extract
- 1 cup all-purpose flour
- ½ cup unsweetened cocoa powder
- 1 teaspoon salt
For the Peppermint Bark Topping
- 12 ounces white chocolate (or vanilla candy melts), finely chopped
- 1 teaspoon pure peppermint extract (or vanilla if preferred)
- ½ cup crushed candy canes or peppermint candies
- 1 tablespoon vegetable shortening (optional, for smoother melting)
Mastering the Technique: Step-by-Step Instructions
Crafting the Decadent Brownie Layer
First, preheat your oven to 350°F (175°C). Line a 9×13 inch baking pan with parchment paper, leaving an overhang on two sides for easy removal later. This little parchment trick is a lifesaver, especially when dealing with super fudgy treats.
In a medium saucepan, melt the butter and chopped baking chocolate over low heat, stirring constantly until completely smooth. Remove it from the heat immediately. This ensures the chocolate doesn’t burn and keeps the texture velvety. Stir in both the granulated and brown sugars until they are fully incorporated.
Allow the mixture to cool for about five minutes. If it’s too hot, you risk cooking the eggs prematurely, resulting in scrambled chocolate batter—a true kitchen tragedy. Now, whisk in the eggs one at a time, ensuring each is fully blended before adding the next. Stir in the alcohol-free vanilla extract.
In a separate bowl, whisk together the flour, cocoa powder, and salt. Gradually add the dry ingredients to the wet ingredients. Mix only until just combined; visible streaks of flour are acceptable. Overmixing activates gluten and turns your future masterpiece into a chewy brick. Pour the batter into your prepared pan and smooth the top gently with a spatula.
Bake the brownies for 25 to 30 minutes. The edges should look set, but a toothpick inserted near the center should still come out with moist, fudgy crumbs attached, not wet batter. Crucially, let the brownies cool completely in the pan on a wire rack before moving on to the topping stage. Patience is key here; you cannot rush the bark application.
Layering the Peppermint Crunch
While the brownies cool, prepare the glorious bark topping. Gently crush your peppermint candies. I usually seal them in a sturdy plastic bag and attack them lightly with a rolling pin—it’s therapeutic and effective. You want varying sizes, from fine dust to small, crunchy chunks.
In a double boiler or a microwave, melt the white chocolate (and shortening, if using) until smooth and creamy. White chocolate can be tricky, so heat it slowly, stirring often to prevent scorching. Once smooth, remove it from the heat and stir in the peppermint extract. If you find the chocolate too stiff, add a tiny bit more shortening or coconut oil to loosen it up.
Carefully pour the melted white chocolate mixture evenly over the completely cooled brownie base. Use an offset spatula to spread it quickly and smoothly to the edges. Immediately sprinkle the reserved crushed peppermint candies generously over the top of the smooth white chocolate layer. Press them down lightly so they adhere as the chocolate sets.
Now comes the hard part: waiting. Place the pan in the refrigerator for at least two hours, or until the peppermint bark topping is completely solid and firm to the touch. This hardening process is non-negotiable for achieving those clean, beautiful slices that define these festive chocolate bark bars.
Serving Suggestions: Making Them Shine
These chocolate mint squares are already gorgeous, but a few serving additions elevate them further. Consider serving them chilled for a satisfying snap when you bite through the bark layer. They pair perfectly with a cup of hot cocoa or a milky herbal chai. If you’re feeling extra festive, dust them lightly with powdered sugar just before serving for a snowy effect.
When cutting, remember that chilled knife trick mentioned earlier. Warming the knife helps the blade glide effortlessly through the hard bark without cracking it. Wipe the knife clean between each slice to ensure every single fudgy treat is presented flawlessly. Whether you are gifting them or just keeping them all to yourself (no judgment here), these festive desserts are guaranteed crowd-pleasers.
My neighbor, who claims to hate all things mint, ate three squares right off the cooling rack. That’s when I knew these easy holiday treats were definitely good enough for prime time blogging.
- For perfectly clean cuts, chill the finished Peppermint Bark Brownies in the refrigerator for at least 30 minutes, then use a warm, sharp knife dipped in hot water.
- Do not overmix the brownie batter once you add the flour; mixing too much develops gluten, which results in dry, cake-like brownies instead of fudgy ones.
- Ensure the white chocolate layer is slightly warm when spreading it over the cooled brownies; if it’s too hot, it will melt the brownie surface, causing swirling.
Conclusion for Peppermint Bark Brownies
These rich, fudgy Peppermint Bark Brownies represent the perfect collision of deep chocolate flavor and crisp, cool minty crunch. They are surprisingly simple to master, making them the ultimate centerpiece for any winter gathering or holiday dessert table. By following the precise steps—especially regarding the chilling and cutting—you guarantee a perfect, show-stopping presentation every single time. Stop stressing over complicated holiday baking; this is the easy, delicious answer. Get ready to watch these festive chocolate mint dessert bars vanish!
Print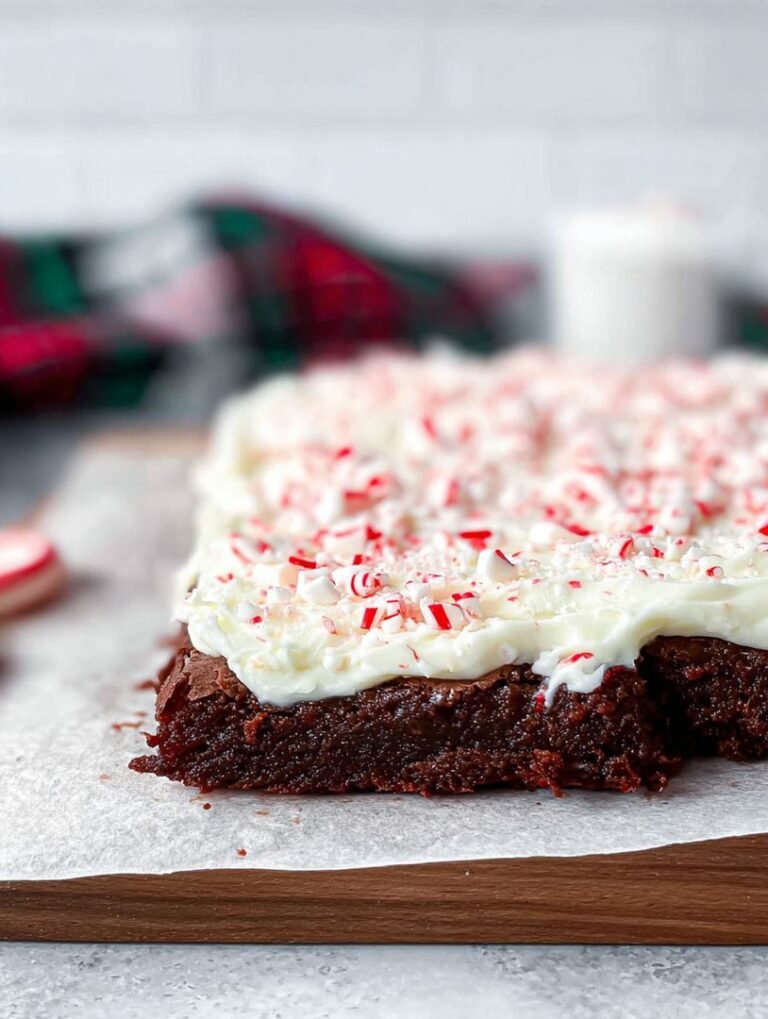
Peppermint Bark Brownies
Quick 8×8 baking! Master the perfect rich, fudgy brownie utilizing simple whisk and fold techniques with melted butter and cocoa. A minty crunch elevates the classic.
- Total Time: 35 minutes
- Yield: 4 servings 1x
Ingredients
- 1/2 cup unsalted butter, melted
- 1 cup granulated sugar
- 2 large eggs
- 3/4 cup all-purpose flour
- 1/2 cup unsweetened cocoa powder
- 1 cup white chocolate chips
- 1/2 cup crushed candy canes (peppermints)
Instructions
- Step 1: Preheat the oven to 350°F (175°C). Line an 8×8 inch baking pan with parchment paper, allowing the paper to overhang on two sides. In a large bowl, whisk together the melted butter and sugar until combined, then beat in the eggs one at a time.
- Step 2: In a separate bowl, whisk together the flour and cocoa powder. Gradually fold the dry ingredients into the wet ingredients until the batter is just combined and no streaks of flour remain.
- Step 3: Pour the brownie batter into the prepared pan and spread evenly. Bake for 25 to 30 minutes, or until a toothpick inserted near the center comes out with moist crumbs. Let the brownies cool completely on a wire rack.
- Step 4: Once cooled, prepare the topping. Melt the white chocolate chips using a microwave (heating in 30-second intervals, stirring between) or a double boiler until smooth.
- Step 5: Pour the melted white chocolate evenly over the cooled brownies, spreading quickly with an offset spatula. Immediately sprinkle the crushed candy canes over the top before the chocolate sets.
- Step 6: Refrigerate the brownies for at least 30 to 45 minutes, or until the white chocolate layer is completely firm. Use the parchment paper overhang to lift the brownies out of the pan, then slice into squares to serve.
Notes
- Store these festive treats in an airtight container at room temperature for up to 3 days, or refrigerate if you prefer a firmer, crunchier peppermint bark topping.
- Because of the delicate white chocolate bark topping, these are best enjoyed cold or at room temperature, but if you desire a truly decadent warm bite, microwave a single square for no more than 10 seconds.
- For a truly decadent holiday presentation, serve these rich brownies alongside a mug of hot cocoa topped with whipped cream or chilled with a scoop of vanilla bean ice cream.
- Ensure the crushed candy canes are fine (not powdery) and apply them immediately after spreading the white chocolate; this prevents the peppermint from bleeding color into the chocolate before it sets.
- Prep Time: 15 minutes
- Cook Time: 20 minutes
- Method: Stovetop
- Cuisine: American


Leave a Comment