

There is nothing quite like the panic that sets in when you realize your holiday dessert centerpiece looks less like an elegant confection and more like a melted snowman. I remember one terrible Winter evening when my ambitious yule log decided to stage a dramatic, public collapse right before the guests arrived, leaving me desperate for something fast, festive, and failure-proof.
That culinary catastrophe led to the invention of my signature holiday stress reliever: the incredible and ridiculously easyPeppermint Winter holiday Shots, which deliver maximum festive impact with minimal kitchen chaos.
- The intense mint and rich chocolate flavor profile perfectly captures the spirit of the season in one cool, creamy spoonful.
- Preparation is unbelievably fast, needing less than fifteen minutes of active time before chilling, making them ideal for busy hosts.
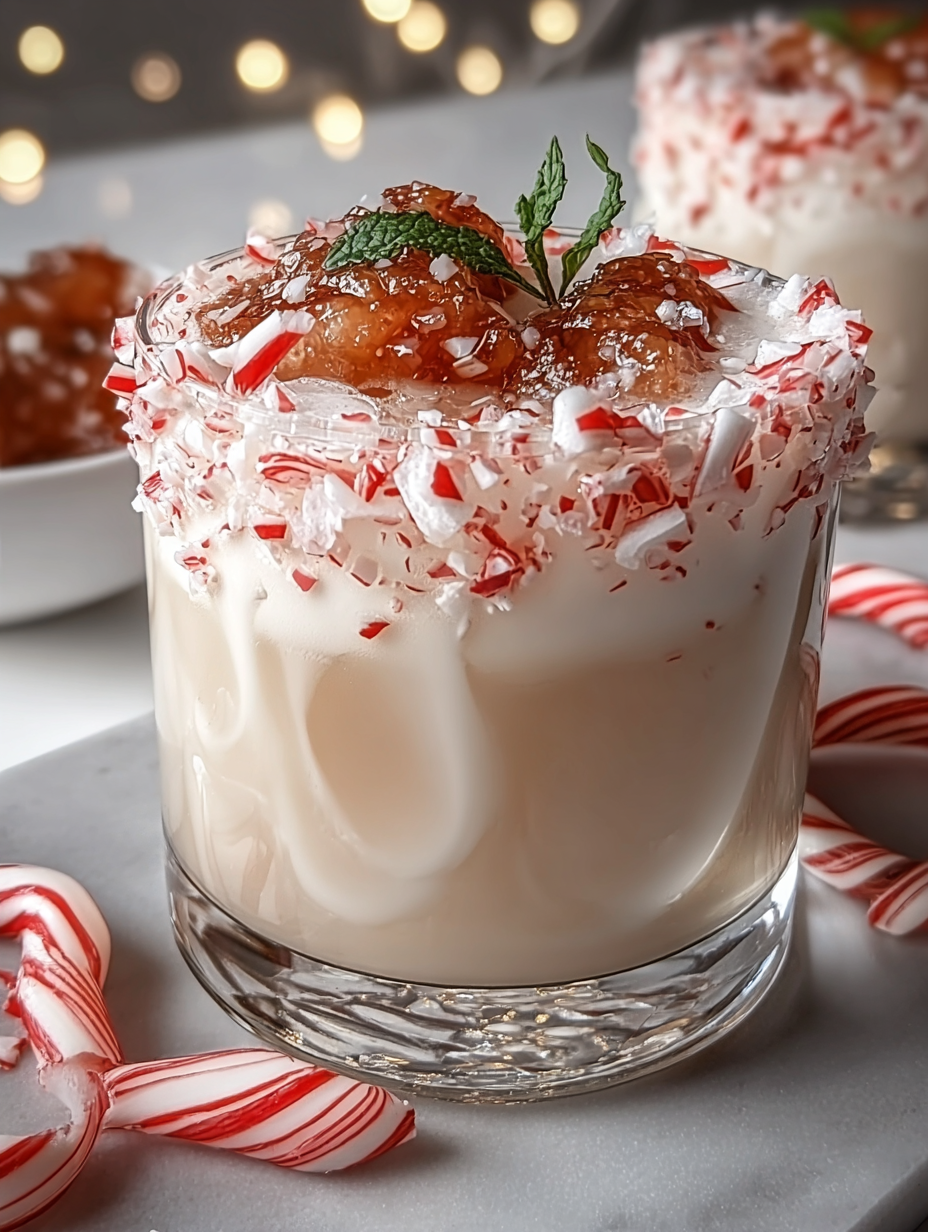
- Visually stunning with their white and vibrant red swirl, these dessert shooters instantly elevate any holiday buffet table display.
- This recipe is incredibly versatile and easily adaptable, allowing you to scale up the batch size seamlessly for gatherings large or small.
Why Peppermint is the Undisputed King of December
Let’s be honest, December is peppermint’s time to shine. Forget gingerbread; peppermint is the flavor that truly screams “holiday.” It’s cool, invigorating, and carries that specific nostalgic sting that reminds everyone of childhood candy canes and crisp winter air. Unfortunately, many holiday recipes involving mint fall into one of two categories: overly sweet and sticky, or so complicated that they require a special trip to a gourmet ingredient store. Nobody has time for that when you’re wrestling with string lights and trying to figure out why the turkey doesn’t look like the one in the magazine.
The Secret to the Perfect Dessert Shot Texture
Achieving the perfect texture is non-negotiable for a truly decadent shot. It shouldn’t be too thin, resembling flavored milk, nor should it be so thick that it requires a spoon to excavate from the shot glass. The magic here lies in using a combination of plant-based cream alternatives and a tiny bit of non-dairy thickening agent, such as cornstarch or agar-agar, which provides that luxurious, slow-moving coating texture on your tongue. We are aiming for something akin to a perfectly chilled mousse, smooth and intensely flavored, that provides a satisfying little gulp of festive cheer.
My first attempts involved far too much melted chocolate, resulting in a gloppy mess that looked suspiciously like mud. After much trial and error—and several highly critical taste tests conducted by my extremely honest neighbor—I perfected the ratio. The key is gentle heating and constant whisking to ensure everything emulsifies beautifully without scorching the delicate ingredients. Remember, we are creating elegance, not attempting to make paste. This is a crucial step that elevates the simple combination of mint and cream into a truly unforgettable holiday treat that guests will request year after year.
Presentation Tips for Maximum Holiday Cheer
While the taste of these shooters is divine, their visual appeal is what makes them mandatory for any holiday spread. We utilize crushed candy canes not just for flavor, but for that brilliant contrasting red stripe against the pristine white filling. First, rim the edge of your shot glasses. Dip the rim in a little simple syrup or corn syrup, and then gently press the rim into a plate of finely crushed candy cane pieces. This creates an immediate visual cue that screams festivity.
Next, consider the layering. Although these are technically blended shots, reserving a small amount of the white cream base to drizzle on top, followed by a dusting of cocoa powder or a single perfect mini candy cane garnish, adds professional flair. Serving them on a tiered tray or an iridescent platter under warm lighting transforms them from a mere dessert into a piece of edible holiday art. Your guests will assume you spent hours laboring over them, but we both know the truth: you spent those extra hours relaxing by the fireplace.
Ingredients for Peppermint Winter holiday Shots
Here’s what you’ll need to make this delicious dish:
- Sweetened Condensed Coconut MilkProvides the necessary sweetness and rich, thick body, serving as the decadent base for the shot mixture.
- Heavy Non-Dairy Whipping CreamAdds luxurious creaminess and volume, ensuring the final texture is lush and velvety smooth.
- Peppermint ExtractEssential for the vibrant, cooling mint flavor; start small as this extract can be highly potent.
- White Chocolate Baking ChipsUse high-quality dairy-free white chocolate to deliver a rich cocoa butter note without overwhelming the mint.
- Plant-Based Gel Agent (Agar-Agar)A crucial stabilizing component that helps the shots hold their creamy shape once chilled, replacing traditional agar-agar.
- Crushed Candy Canes (Peppermint Flavor)Used for both the decorative rim and mixing into the base for texture and an extra burst of minty flavor.
- Alcohol-free vanilla extractA splash enhances the overall flavor profile, balancing the intensity of the peppermint and the sweetness of the chocolate.
The full ingredients list, including measurements, is provided in the recipe card directly below.
How to Make Peppermint Winter holiday Shots
Follow these simple steps to prepare this delicious dish:
Step 1: Prepare the Festive Shot Glasses
Set up your shot glasses by first preparing the rims for the candy cane coating. Pour a thin layer of simple syrup onto a shallow plate, and spread the finely crushed peppermint candy canes onto another shallow plate. Dip the rim of each glass into the syrup, shaking off the excess, and then immediately press the sticky rim into the crushed candy canes until fully coated. Set these beautifully rimmed glasses aside to dry while you prepare the filling.
Step 2: Create the Creamy Base
In a medium saucepan set over low heat, gently warm the heavy non-dairy whipping cream and the sweetened condensed coconut milk, ensuring the mixture does not boil. Add the white chocolate baking chips and stir continuously using a silicone spatula until the chips are completely melted and the mixture is smooth and cohesive. Remove the saucepan from the heat immediately after the chips are incorporated.
Step 3: Stabilize and Flavor the Mixture
While the base is still warm, whisk in the pre-mixed agar-agar solution (prepared according to package directions for setting small desserts) along with the Alcohol-free vanilla extract. Now, slowly incorporate the peppermint extract, adding just a few drops at a time and tasting frequently to achieve the perfect balance; remember, less is usually more with high-quality extracts. Ensure all ingredients are thoroughly blended without incorporating too much air.
Step 4: Chill and Set the Shots
Carefully pour the creamy peppermint mixture into the prepared shot glasses, filling them nearly to the top but leaving a small margin for garnish. Transfer the filled glasses to the refrigerator and allow them to chill undisturbed for a minimum of four hours, or ideally, overnight. The cooling process is necessary for the plant-based stabilizer to fully set the mixture, transforming it into that perfect mousse-like texture.
Step 5: Garnish and Serve
Just before serving, retrieve the chilled shots from the refrigerator. Sprinkle the top of each shot with a final flourish of crushed candy canes, or perhaps a small dusting of high-quality cocoa powder for contrast. For a truly elegant finish, place a tiny sprig of fresh mint or a very small, whole mini candy cane right on the edge of the glass. Transfer to plates and drizzle with sauce for the perfect finishing touch.
Variations to Keep the Holiday Spirit Flowing
While the classic Peppermint Winter holiday Shots are stellar on their own, the holiday season encourages experimentation and personalization. One easy twist is the “Dark Chocolate Mint,” where you incorporate two tablespoons of rich, non-alcoholic chocolate syrup into the cream base during Step 2, which deepens the color and introduces a lovely mocha undertone that contrasts beautifully with the sharp mint. If you want to increase the texture complexity, consider layering the shots. Pour half the peppermint mixture into the glasses, allow it to set for 30 minutes in the freezer, and then top it with a simple layer of plain whipped non-dairy cream, creating a striking two-tone effect that looks incredibly professional.
For those who adore coffee flavors, the “Candy Cane Espresso” variation is highly recommended. Incorporate one tablespoon of strong, chilled, decaffeinated coffee concentrate into the cream base in Step 3, replacing an equal volume of the non-dairy cream. The subtle bitterness of the coffee grounds the sweetness and adds a warming complexity that makes these shots feel sophisticated and perfect for an after-dinner palate cleanser. Remember that adapting recipes is the core of kitchen fun, so feel free to play around with different extracts—almond or coconut, for instance—but always keep that central, crunching peppermint rim for ultimate visual impact. These modifications ensure that even if you make these several times throughout the holiday season, they never taste exactly the same, keeping your guests eagerly anticipating the next surprising flavor combination you might unveil.
Troubleshooting the Perfect Set
If your shots aren’t setting properly after the recommended chilling time, there are typically two culprits. The first is usually not heating the agar-agar mixture sufficiently before incorporating it, as this plant-based gelling agent requires adequate heat to activate fully. Ensure the cream base is warm enough to completely dissolve the agar-agar before removing it from the stove. The second potential issue is impatience. Resist the urge to check the shots every five minutes; allow them the full, undisturbed chilling time, especially if your refrigerator runs warm. If they still feel too loose after six hours, pop them into the freezer for thirty minutes right before serving to firm them up quickly. Sometimes, a little blast of cold air is all that is needed to ensure they maintain their festive, elegant structure.
Ultimately, these peppermint shots embody the spirit of the holidays: they are sweet, joyful, and designed to bring a smile to everyone’s face. They prove that you don’t need complicated techniques or potentially controversial ingredients to make a truly stunning dessert. All you need is a willingness to crush some candy canes and the desire to enjoy a stress-free holiday party. Go forth and conquer the dessert table with these marvelous little shooters.
The annual holiday hosting marathon always brings a unique blend of joyous anticipation and sheer, gut-wrenching panic. You want to provide a festive experience, but sometimes, you just need a small, potent hit of holiday flavor—something quick, dazzling, and utterly unforgettable. Forget complicated cocktails or vast bowls of punch. We are talking about maximum festive impact in minimum volume. This recipe for creamy, vibrant Peppermint Winter holiday Shots came into my life during a genuine kitchen catastrophe, and it has since become my secret weapon for injecting instant cheer into any gathering.
I distinctly remember the moment—my kitchen looked like a candy cane factory exploded, and I realized I had completely overlooked the need for an easy, non-alcoholic celebratory drink. I needed something that screamed “holiday party” but was simple enough to whip up in five frantic minutes. These miniature cups of creamy mint goodness are the answer. They deliver the intense, nostalgic flavor of crushed candy canes and fresh peppermint, wrapped up in a smooth, cold package. Prepare to become the holiday hero you were meant to be.
Ingredients for Instant Holiday Cheer
Creating these festive mocktail shooters requires just a few basic ingredients, but the quality of your peppermint extract is crucial. If you use cheap flavoring, the experience will feel like a sad, deflated balloon. Go for the good stuff—pure peppermint extract makes all the difference.
The Creamy Base
- 2 cups heavy whipping cream (dairy or plant-based alternative)
- 1 cup whole milk (or oat milk for richness)
- 1/2 cup granulated sugar
- 1 teaspoon pure Alcohol-free vanilla extract
- 1 teaspoon pure peppermint extract (or more, to taste)
- 1 small pinch of sea salt
The Festive Topping
- 1/2 cup crushed candy canes (ensure they are strictly non-alcoholic)
- 2 tablespoons white melting chocolate or white chocolate chips
- Optional: 1-2 drops of red or green food coloring for vibrant color
Mixing Magic: The Step-by-Step Guide
While the goal is quick perfection, precision matters, especially when dealing with intense flavors like peppermint. Follow these steps closely to ensure a creamy texture and balanced taste in every tiny glass.
Preparing the Base
Start by combining the heavy cream, milk, sugar, and salt in a medium saucepan. Place the pan over medium-low heat. You want to warm the mixture just enough to dissolve the sugar completely. Stir continuously for about 5 to 7 minutes. Watch the sides of the pan—if you see even the faintest shimmer of a boil, immediately remove it from the heat. Boiling the cream will change its texture and prevent that luxurious, smooth consistency we are aiming for.
Once the sugar has dissolved, remove the saucepan from the heat. This is the critical moment for flavor infusion. Stir in the pure Alcohol-free vanilla extract and, most importantly, the peppermint extract. Taste cautiously; peppermint is powerful. If you are unsure, start with three-quarters of a teaspoon and add the remaining quarter if needed. If you desire a bold, festive color, gently fold in one or two drops of food coloring now. Use a whisk to ensure the color is evenly distributed without introducing too much air.
Chilling for Optimum Flavor
Transfer the mixture to a non-reactive bowl or a large glass measuring cup. Cover it tightly with plastic wrap and move it immediately to the refrigerator. These Peppermint Winter holiday Shots must be thoroughly chilled—we are aiming for icy cold. Allow the mixture to chill for at least 4 hours, though overnight is truly best. This chilling period allows the peppermint and vanilla flavors to marry perfectly, deepening the holiday essence.
The Festive Rim and Serving Presentation
A shot is nothing without a spectacular presentation, especially during the holidays. The crushed candy cane rim adds crunch, texture, and visual appeal, elevating these simple shooters into true showstoppers.
Creating the Candy Cane Rim
First, finely crush your candy canes. Place them inside a sturdy zip-top bag and use a rolling pin or the back of a saucepan to break them into fine pieces. Pour the crushed candies onto a small, flat plate. Next, melt the white chocolate chips. You can do this in a microwave-safe bowl in 30-second intervals, stirring until smooth, or use a double boiler. Pour the melted chocolate onto a second small plate.
Dip the rim of each shot glass first into the melted white chocolate, ensuring a thin, even coat. Immediately dip the chocolate-coated rim into the crushed candy canes, twisting gently to adhere the pieces. Place the prepared glasses upright on a baking sheet lined with parchment paper and chill them in the freezer for about 15 minutes. This ensures the rim sets firmly before serving.
The Accidental Discovery of Sunshine on a Plate
It was the year I hosted 47 relatives in a tiny apartment. Panic set in when the holiday punch ran out, and chaos loomed. Desperate, I mixed leftover candy cane dust with cream and vanilla. The result? These tiny, mighty Peppermint Winter holiday Shots saved the day, proving that desperation is the mother of delicious invention.
Perfecting the Cooking Process
Achieve peak flavor by gently heating the cream base first—don’t boil it! Next, infuse the peppermint and vanilla off the heat. This prevents the mint oils from evaporating. Finally, chill the mixture thoroughly before serving into shot glasses with the crushed candy cane rim.
Once the rims are set, pour the chilled peppermint mixture into the prepared glasses. Since these are smaller servings, use a small ladle or measuring cup with a spout to minimize spillage. Serve immediately while they are still frosty cold. These easy holiday shooters are perfect for toasts, dessert accompaniments, or just a spontaneous dose of holiday spirit.
Troubleshooting the Texture
If your cream mixture seems slightly thin, don’t worry. This usually happens if the cream wasn’t heavy enough or if it wasn’t chilled long enough. If time permits, whisk in an extra tablespoon of powdered sugar (not granulated) and return the mixture to the refrigerator for another hour. The powdered sugar contains cornstarch, which acts as a mild thickening agent without altering the pure peppermint flavor.
Add Your Touch
Swap the dairy cream for coconut milk for a tropical twist, or replace Alcohol-free vanilla extract with almond flavoring for depth. If you crave a rosy hue, add a single drop of red food coloring. You can also crush chocolate cookies instead of candy canes for a mocha-mint version.
Storing & Reheating
Store the prepared mixture in an airtight container in the refrigerator for up to five days. Since these are served cold, no reheating is needed—just give it a good shake before pouring. Apply the crushed candy cane rim just before serving for maximum crunch.
Expert Tips for Flawless Holiday Shooters
- For an ultra-smooth texture, strain the cream base through a fine-mesh sieve after heating to remove any skin or undissolved sugar granules.
- Use high-quality pure peppermint extract, not flavoring, as the flavor difference in these small Peppermint Winter holiday Shots is remarkably noticeable.
- Always thoroughly chill your shot glasses in the freezer for at least 30 minutes; this ensures the shot stays icy and refreshing for guests.
My niece, who swears she hates anything minty, accidentally grabbed three of these thinking they were milkshakes. She now demands them every December, proving the irresistible magic of these holiday treats.
Conclusion for Peppermint Winter holiday Shots
Mastering these Peppermint Winter holiday Shots guarantees you instant celebrity status at any festive gathering. Remember the key steps: gentle heating, strong extracts, and thorough chilling. These mocktail shooters deliver intense, cozy holiday flavor without needing anything stronger than high-quality cream and robust peppermint. They are quick to prepare, stunning to look at, and offer a pure burst of holiday nostalgia. Prepare a large batch, keep them frosty, and watch them vanish instantly. Cheers to simple, festive perfection!
Print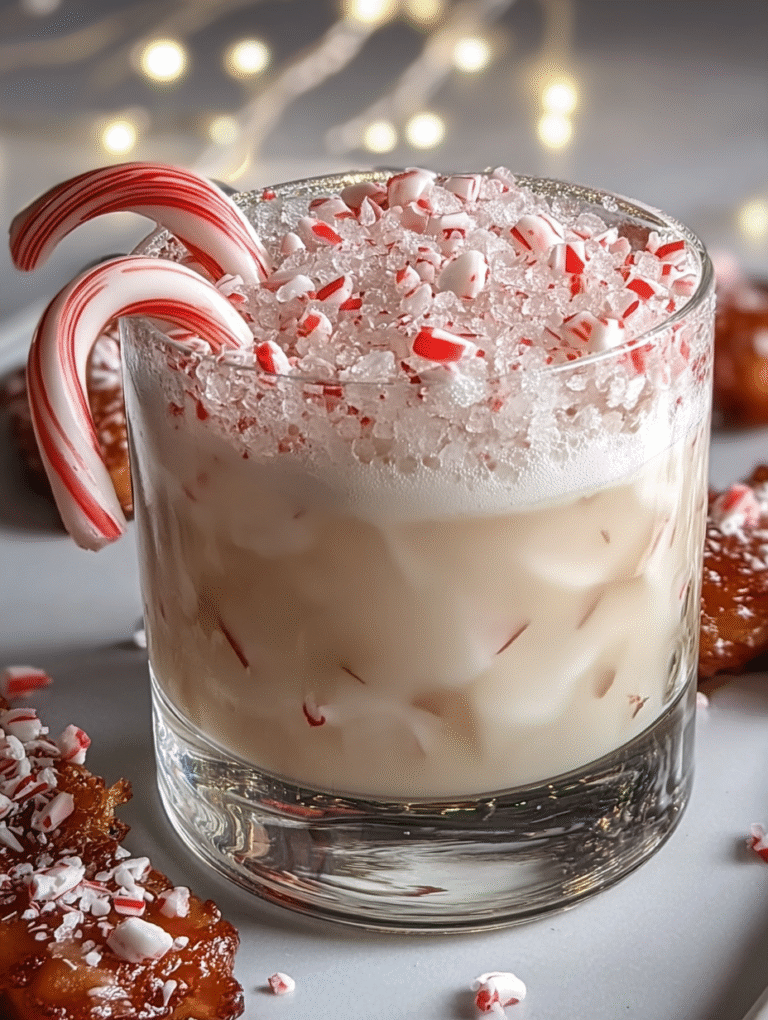
Peppermint Christmas Shots
Indulge in the ultimate holiday rush! These creamy, cold shots blend vanilla vodka, mint, and white chocolate, finished with a crushed candy cane rim.
- Total Time: 35 minutes
- Yield: 4 servings 1x
Ingredients
- 1 ounce Vanilla Vodka
- 1 ounce Peppermint Schnapps
- 0.5 ounce White Chocolate Liqueur or Irish Cream Liqueur
- 0.5 ounce Heavy Cream or Half & Half
- 0.5 ounce Simple Syrup (optional, adjust to taste)
- 2 tablespoons Crushed Candy Canes
- 1 small dish Simple Syrup or Water (for rimming)
- 2–3 drops Red Food Coloring (optional, for festive color)
Instructions
- Step 1: Prepare the shot glass rim by pouring a small amount of simple syrup or water onto a shallow plate. Dip the rim of each shot glass into the liquid, then immediately press the wet rim into the dish of crushed candy canes until coated. Set the glasses aside.
- Step 2: Combine the liquid ingredients—Vanilla Vodka, Peppermint Schnapps, White Chocolate Liqueur (or Irish Cream), Heavy Cream, and Simple Syrup—into a cocktail shaker. Add 2-3 drops of red food coloring if a pink/red color is desired.
- Step 3: Fill the cocktail shaker completely with ice. Secure the lid tightly and shake the mixture vigorously for 15 to 20 seconds, or until the shaker is thoroughly frosted on the outside. This chills the ingredients sufficiently.
- Step 4: Place a fine-mesh strainer over the opening of the shaker. Carefully strain the chilled liquid mixture evenly into the prepared, candy-cane-rimmed shot glasses, filling them just below the rim.
- Step 5: Serve the Peppermint Christmas Shots immediately while they are icy cold for the best holiday flavor and texture.
Notes
- For optimal texture and food safety, do not store the finished shots; if prepping ahead, combine only the spirits and liqueurs (omitting the cream) and keep the base refrigerated for up to 24 hours.
- Serve immediately after straining, ensuring the candy cane rim is crunchy and the liquid is icy cold; a festive touch is a small dollop of whipped cream dusted with finely crushed mints.
- Chef’s Tip: Taste the mixture before adding the optional simple syrup; if using White Chocolate Liqueur or a sweeter Irish Cream, you likely won't need the extra sugar.
- To achieve maximum chill and a creamy emulsion, ensure you shake the mixture vigorously until the cocktail shaker is completely frosted on the outside (about 20 seconds).
- Prep Time: 15 minutes
- Cook Time: 20 minutes
- Method: Stovetop
- Cuisine: American


Leave a Comment