
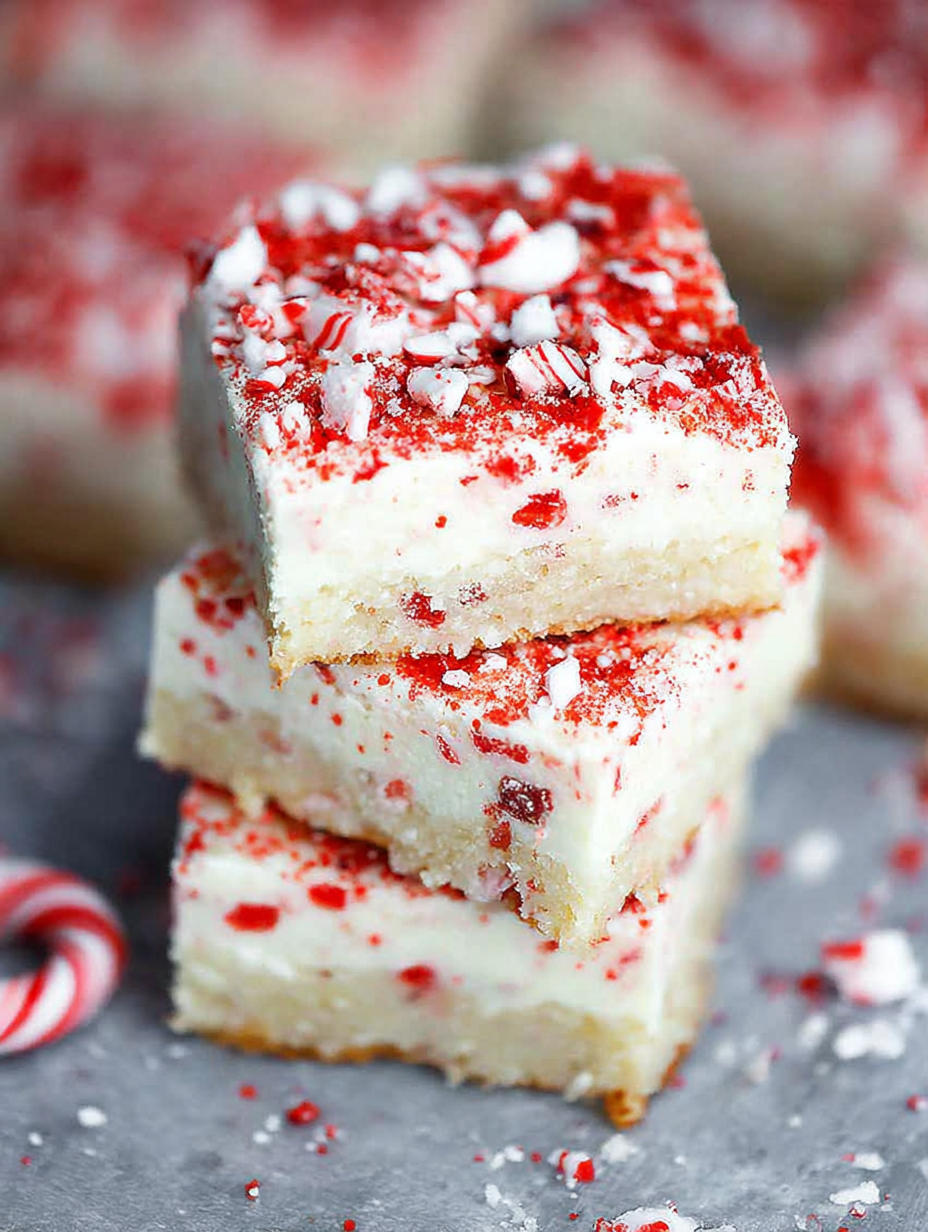
Forget fiddly cutouts and mountains of flour dust. The magic of winter hits your kitchen the moment the smooth, buttery scent of thesePeppermint Sugar Cookie Barsmixes with sharp, cool mint.
These bars capture the holiday spirit perfectly, offering maximum festive flavor with minimal effort, making them ideal for the busy baker who still craves that homemade touch.
- Simplifies the season by eliminating cookie cutters, offering a buttery, tender base that you can prepare and bake efficiently.
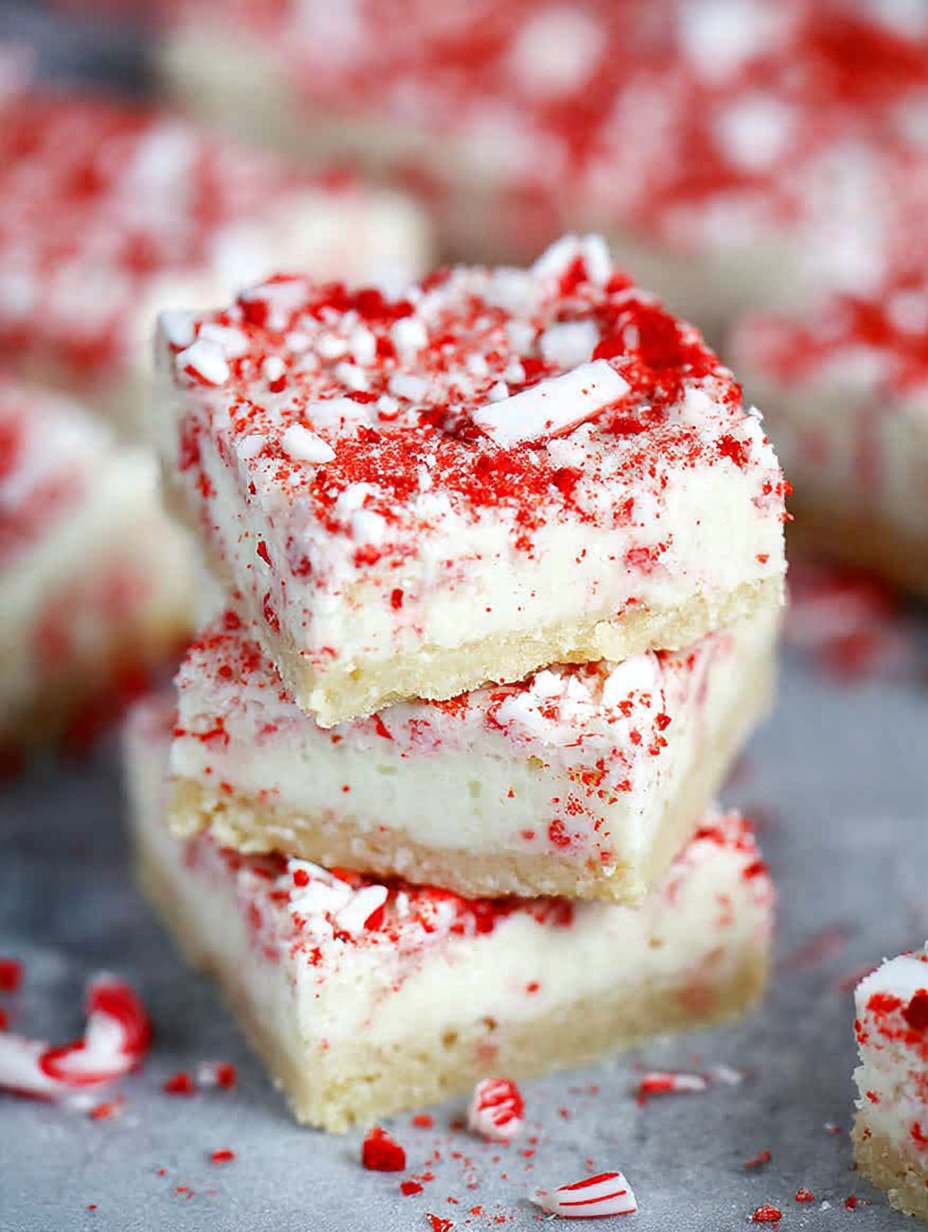
- Features a dynamic flavor profile blending creamy vanilla sugar cookie dough with a crisp, refreshing peppermint crunch topping that awakens the palate.
- Visually stunning, topped with a striking, pure white glaze and vibrant crushed candy canes, making them ideal for impressive holiday platters and gifting.
- Easily adaptable recipe; switch up the extracts and colors for simple adaptations, transforming this delicious dessert into a treat for any occasion throughout the year.
Why Peppermint Sugar Cookie Bars Are the Ultimate Holiday Treat
Every year, I start the holiday baking season with the highest intentions. I picture myself, serene and apron-clad, producing dozens of perfectly symmetrical, intricate cookies. Then reality hits. My “perfectly rolled” dough resembles a map of a poorly governed continent, and my intricate royal icing design looks suspiciously like I let a toddler decorate with a toothpaste tube.
The solution, my friends, is surrender. You must embrace the bar. Why spend three hours rolling, chilling, cutting, and meticulously frosting individual cookies when you can press that glorious dough into a pan, bake it once, and slice it into beautiful, easy-to-manage squares? That is the foundational philosophy behind these magnificentPeppermint Sugar Cookie Bars. They offer all the tender, buttery goodness of a classic sugar cookie, enhanced by the invigorating zing of peppermint, but without the existential dread of cleanup.
The Hilarious History of My Sugar Cookie Failures
My family still talks about the “Gingerbread Men Incident of 2018.” I spent an entire afternoon creating a whole battalion of gingerbread figures. When they emerged from the oven, they had merged into a giant, amorphous, tragic dough-puddle resembling a geological mistake. That day, I declared war on cookie cutters. I decided life was too short for precision baking, especially when the goal is simply delivering maximum deliciousness to your mouth.
This is where the sugar cookie bar truly shines. It forgives uneven rolling and slightly warm dough. It demands confidence, not meticulous technique. You press, you bake, you glaze, you sprinkle, and suddenly, you look like a domestic superhero. This recipe specifically balances the sweetness of the sugar cookie base with the cool, sharp flavor of peppermint, creating a sophisticated yet approachable dessert everyone devours.
Bar vs. Traditional Cutouts: A Time-Saving Showdown
In the culinary world, time is often the most expensive ingredient. Traditional sugar cookies require multiple chilling stages, leading to hours of waiting. The beauty of baking in bar form is that you move directly from mixing the dough to pressing it into the pan. This dramatically cuts down on preparation time.
Furthermore, bars usually stay significantly moister than their individual cookie counterparts because they retain more moisture during baking. The resulting texture is a delightful cross between a chewy cookie and a soft, tender cake. When topped with a simple yet elegant glaze and festive crushed candy canes, these minty cookie slices become the centerpiece of any holiday gathering. They transport easily, they stack well, and frankly, they just taste better because they carry less baggage of baking anxiety.
Ingredients for Peppermint Sugar Cookie Bars
Here’s what you’ll need to make this delicious dish:
- All-Purpose FlourUse bleached or unbleached flour, ensuring it is accurately measured using the scoop and sweep method for the best cookie texture.
- Unsalted ButterThe butter must be properly softened to room temperature so it creams easily with the sugar, creating an airy base.
- Granulated SugarProvides sweetness and helps create the necessary structure when creamed with the butter.
- EggsLarge eggs, also at room temperature, act as the primary binder in the cookie dough.
- Vanilla Bean PasteEssential for the classic sugar cookie flavor; use pure extract, not imitation, for superior taste.
- Baking Powder and SaltThe baking powder provides lift, and the salt balances the sweetness of the dough.
- Powdered Sugar (Confectioners’ Sugar)This is the base for the smooth, creamy peppermint glaze that tops the bars.
- Milk or CreamA liquid necessary for the glaze consistency; use whole milk or light cream for the richest result.
- Peppermint ExtractUsed both in the dough (optional) and definitely in the glaze to deliver that unmistakable cool mint flavor.
- Crushed Peppermint Candies or Candy CanesThese provide the vibrant visual appeal and the essential crunchy peppermint texture to the finished product.
The full ingredients list, including measurements, is provided in the recipe card directly below.
How to Make Peppermint Sugar Cookie Bars
Follow these simple steps to prepare this delicious dish:
-
Prepare the Oven and Baking Pan
Preheat your oven to 350°F (175°C). Line a 9×13 inch baking pan completely with parchment paper, leaving an overhang on the two longer sides. This parchment sling will ensure easy removal of the finished bars later.
-
Cream the Wet Ingredients
In a large bowl, using an electric mixer, cream the softened butter and granulated sugar together on medium speed until the mixture becomes pale and fluffy, usually taking 3 to 4 minutes. Beat in the eggs one at a time, followed by the vanilla bean paste and a touch of peppermint extract if using it in the dough.
-
Mix and Press the Dough
In a separate medium bowl, whisk together the flour, baking powder, and salt. Gradually add the dry ingredients to the wet mixture, mixing only until just combined and no streaks of flour remain. The dough will be thick and soft. Press the dough evenly into the prepared 9×13 inch pan, distributing it all the way to the edges.
-
Bake the Cookie Base
Bake the dough for 25 to 30 minutes. The edges should look set and lightly golden brown, but the center should still look pale and soft. Immediately transfer the pan to a wire rack and allow the bars to cool completely before attempting to add the glaze. Cooling completely is critical for clean slicing.
-
Whip Up the Peppermint Glaze
In a medium bowl, whisk together the powdered sugar, milk or cream, and 1 teaspoon of peppermint extract until the mixture is smooth and easily pourable. Add a few drops more milk if the glaze seems too thick. Ensure the glaze is thoroughly mixed to avoid lumps.
-
Glaze, Decorate, and Chill
Once the cookie base is completely cool, pour the glaze over the top and spread it evenly with an offset spatula. Immediately sprinkle the crushed peppermint candies over the wet glaze so they adhere. Allow the glaze to set for about 30 minutes before using the parchment sling to lift the bars out and slice them.
Transfer the cooled, sliced bars to a festive serving plate, displaying the vibrant colors for the perfect finishing touch.
Tips and Troubleshooting for Perfect Cookie Bars
Baking these bars is remarkably straightforward, but a few key details ensure they turn out absolutely perfect every time. Avoiding common cookie mistakes is paramount to achieving the ideal texture and flavor profile that makes these treats so addictive.
First, always ensure your butter and eggs are truly at room temperature. Cold ingredients do not emulsify properly, which results in a denser, less airy cookie base. When creaming the butter and sugar, do not rush this step; the process of whipping air into the fat is what gives these bars their tender, soft crumb. If the butter is too cold, the mixture will remain gritty and heavy. If the dough seems sticky when you try to press it into the pan, lightly flour your fingers or press it down using a piece of wax paper.
Achieving the Ideal Crumb and Texture
Overmixing the dough once the flour is added is the number one cause of tough, dry baked goods. When the flour is incorporated, the gluten strands begin to develop. For a tender bar, you want minimal gluten development. Mix only until the flour streaks disappear, then stop immediately. The dough will look slightly shaggy, and that is exactly what you want.
The second critical factor for texture is baking time. You are aiming for a soft-baked center. If you wait until the center looks fully set or deep golden, you have likely overbaked the bars, and they will become dry and crumbly once cooled. Pull them out when the edges are set and a faint golden hue appears, while the very center still looks soft and slightly pale. The residual heat from the pan will finish the cooking process as they rest on the wire rack.
Decorating Like a Professional (Without the Stress)
The beauty of these bars lies in their simple, striking presentation. The white glaze against the red and white candy cane pieces is instantly festive. When applying the glaze, ensure the cookie base is completely cool—even slight warmth will cause the glaze to melt and become transparent, losing its vibrant opaque color.
The trick to the crushed peppermint is twofold: first, use good quality candy canes that crush easily, and second, sprinkle them on immediately after you spread the glaze. The glaze forms a skin quickly, and if you wait too long, the peppermint pieces won’t stick properly. If you want ultra-fine crushed peppermint, process the candies briefly in a food processor. For a more rustic, chunky look, place the candies in a zip-top bag and smash them gently with a rolling pin.
How to Store and Serve Peppermint Sugar Cookie Bars
These peppermint bars are fantastic for making ahead, which is another reason they triumph over fussy individual cookies. Once the glaze has fully set (this takes at least an hour), you can store the uncut bars in an airtight container at room temperature for up to three days. For longer storage, you can refrigerate them for up to a week. If refrigerating, make sure the container is completely sealed to prevent the cookies from drying out or absorbing any refrigerator odors.
If you plan to freeze them, it is best to slice them first. Arrange the fully glazed and decorated bars in a single layer in a freezer-safe container, separating layers with parchment paper. They will freeze well for up to two months. Thaw them overnight in the refrigerator or simply allow them to come to room temperature on the counter before serving. They taste best when served at room temperature, allowing the buttery flavor of the sugar cookie base to truly shine through.
Frequently Asked Questions (FAQ)
Can I make the cookie dough ahead of time?
Yes, you can prepare the dough and refrigerate it for up to 24 hours. If chilling, allow it to sit at room temperature for about 30 minutes before pressing it into the pan, as cold dough will be very difficult to spread evenly.
What can I use if I don’t have peppermint extract?
While the peppermint extract is key to the flavor, you can substitute it with almond or lemon extract for a completely different but equally delicious sugar cookie bar, omitting the crushed peppermint candies in favor of sprinkles or citrus zest.
Why are my Peppermint Sugar Cookie Bars turning out hard?
Hard cookie bars are typically a sign of over-baking or over-mixing the flour. Ensure you measure the flour correctly and remove the bars from the oven promptly when the edges turn golden, leaving the center slightly soft to the touch.
How do I get clean slices without the glaze cracking?
First, make sure the glaze is completely set and hardened. Use a large, sharp chef’s knife and wipe the blade clean with a damp cloth between each slice to prevent sticking and dragging the glaze.
The Chaotic Beauty of Holiday Baking
Every December, I try to achieve “Pinterest Perfection.” You know the look: glossy, flawless treats presented effortlessly on a vintage sled. And every year, reality hits me harder than a rogue snowball. One year, I attempted 12 different cookie types in one afternoon. The kitchen looked like a confectionery crime scene. Flour coated the ceiling fan, there was a minor dispute involving melted chocolate and the cat, and my meticulously crafted gingerbread men looked suspiciously like startled walruses.
That year, I realized complexity is the enemy of holiday joy. We need speed, efficiency, and maximum flavor impact for minimal effort. Enter the glorious, life-saving creation known asPeppermint Sugar Cookie Bars. They provide all the buttery, crisp edges and soft centers of traditional cut-outs, but without the hassle of chilling, rolling, and intricate decorating. You press the dough into a pan, bake, slather on some incredible frosting, and shower it with crushed candy canes. It’s the ultimate holiday cheat code.
Why You Need These Stress-Free Holiday Treats
These bars are the solution to the annual holiday chaos. They require minimal precision and deliver maximal festive cheer. The base is soft, chewy, and holds up beautifully under the weight of the creamy peppermint frosting. Unlike traditional cookies that risk burning their delicate edges, these bars remain moist throughout. Plus, they look incredibly impressive on a dessert platter, suggesting hours of labor when, in reality, you probably made them while simultaneously wrapping gifts and shouting at a poorly constructed inflatable Santa. They capture the taste of winter joy in every delicious square, ensuring you spend more time relaxing and less time scrubbing hardened dough from your countertop.
The classic sugar cookie flavor provides the perfect canvas for the cool, vibrant mint profile of the topping. This flavor combination is essential for holiday nostalgia, reminding everyone of candy canes hanging on the tree and cozy winter evenings. Furthermore, the bar format means consistency; every piece is equally tender and thick, eliminating the disappointment of those thin, over-baked edges we all know too well. These are the showstoppers that will earn you immediate baking credibility.
The Essential Ingredients for Festive Baking
Gathering your supplies is the easiest part. You probably have most of these items hiding in your pantry already. Ensure your butter is properly softened—this is not the time for stubborn, cold blocks! Temperature control makes a huge difference in the final texture of your dough. Remember that high-quality extracts truly elevate the overall flavor profile, so avoid the cheap stuff if you can.
For the Buttery Sugar Cookie Base
- 2 3/4 cups all-purpose flour
- 1 teaspoon baking soda
- 1/2 teaspoon baking powder
- 1 cup (2 sticks) unsalted butter, softened
- 1 1/2 cups granulated sugar
- 2 large eggs
- 1 tablespoon vanilla bean paste
- 1/2 teaspoon almond paste (optional, but highly recommended for depth)
The Icy Peppermint Frosting
- 1 cup (2 sticks) unsalted butter, softened
- 4 cups confectioners’ sugar (powdered sugar)
- 1/4 cup milk or heavy cream
- 1 teaspoon peppermint extract (use sparingly!)
- 1/2 teaspoon vanilla bean paste
- A pinch of salt
The Essential Toppings
- 1 cup crushed candy canes or peppermint candies
- Optional: white chocolate drizzle (melted white chocolate chips)
Baking Brilliance: Step-by-Step Instructions
Ready to transform basic ingredients into the most delightful Peppermint Sugar Cookie Bars you have ever tasted? Follow these steps precisely, and try not to eat all the frosting before it reaches the pan. I speak from unfortunate personal experience on that front, resulting in a very sticky, but very happy, morning.
Preparing the Perfect Cookie Base
- Preheat your oven to 350°F (175°C). Line a 9×13 inch baking pan with parchment paper, leaving an overhang on the sides. This overhang acts as handles later, making removal ridiculously easy.
- In a large bowl, whisk together the flour, baking soda, and baking powder. Set this dry mixture aside.
- In a separate, large mixing bowl, beat the softened butter and granulated sugar together until they become light and fluffy. This step takes about 3 to 5 minutes using an electric mixer. Don’t rush this essential creaming process!
- Beat in the eggs one at a time, ensuring each egg is fully incorporated before adding the next. Stir in the vanilla and almond extracts.
- Gradually add the dry ingredients to the wet ingredients, mixing only until just combined. The dough will be very thick and slightly stiff. Be careful not to overmix; too much mixing develops gluten and results in tough, dense bars.
- Press the dough evenly into the prepared 9×13 inch pan. You can use your hands, a lightly floured rolling pin, or the bottom of a measuring cup to achieve a smooth surface right up to the edges.
- Bake for 25 to 30 minutes. The edges should look set and lightly golden, but the center should still look soft and slightly pale. We aim for a chewy bar, not a crisp biscuit, so avoid browning the center.
- Let the cookie base cool completely on a wire rack before attempting to frost it. Warm cookies plus frosting equals a sugary, buttery puddle, and nobody wants that mess.
The Icing Showdown and Final Touches
- While the bars cool, prepare the peppermint frosting. Beat the softened butter in a large bowl until creamy and smooth.
- Gradually add the confectioners’ sugar, alternating with small splashes of milk or cream, beating until smooth and lump-free. Start with half the liquid, and add more until you achieve your desired spreading consistency—you want it thick but spreadable.
- Mix in the peppermint extract, vanilla bean paste, and a pinch of salt. Taste test and adjust the peppermint—it is incredibly strong, so err on the side of caution and start small before adding more.
- Once the cookie bars are completely cool, spread the frosting evenly over the top using an offset spatula. Ensure the layer is thick and consistent across the entire surface.
- Immediately sprinkle the crushed candy canes over the frosting, pressing lightly so they adhere securely. If you are adding a white chocolate drizzle, melt the chocolate and zigzag it across the top for extra visual appeal and flavor complexity before the frosting sets.
- Allow the frosting to set for about 30 minutes before cutting the bars into neat squares. Use the parchment paper handles to lift the entire creation out of the pan before slicing for perfectly clean, professional edges.
Perfecting the Cooking Process
To ensure peak efficiency, first mix the dry ingredients, then cream the butter and sugar thoroughly, and while the base bakes and cools, prepare the peppermint frosting and crush the candy canes. This sequential approach minimizes downtime and prevents the creamy frosting from becoming too stiff before application.
Add Your Touch
Try substituting the peppermint extract with almond or orange extract for a sophisticated flavor profile if mint is not your favorite. For a richer cookie base, brown the butter slightly before creaming it with the sugar. Alternatively, fold small, finely diced freeze-dried strawberries into the frosting for festive color and added tang.
Storing & Reheating
Store these bars in an airtight container at room temperature for up to four days, or refrigerate for up to one week if your kitchen is very warm. If chilling, allow the bars to warm slightly at room temperature before serving to soften the frosting and enhance the characteristic chewiness of the sugar cookie base.
Chef’s Best-Kept Secrets for Peppermint Sugar Cookie Bars
My grandmother once brought these bars to a holiday party, and they vanished so quickly a guest genuinely asked if the plate was merely a mirage. They are a guaranteed, unforgettable crowd-pleaser.
- Always use room temperature butter and eggs; this ensures the batter emulsifies properly, leading to a tender and wonderfully consistent final cookie texture.
- Measure your flour accurately by spooning it into the measuring cup and leveling off, which prevents dense, tough bars caused by accidentally adding excess dry ingredients.
- Crush your candy canes inside a sturdy Ziploc bag using a rolling pin right before topping; older crushed pieces often turn sticky due to moisture in the air.
Frequently Asked Questions
How do I get clean cuts when slicing the bars?
The crucial secret lies in chilling the finished dessert. After the frosting is completely set, place the entire pan in the refrigerator for about 30 minutes. Use a very sharp, hot knife (run it under hot water and wipe it completely dry) to slice, cleaning the blade thoroughly between each cut. This technique creates those perfect, sharp edges you see in bakeries.
Can I make the cookie base ahead of time?
Absolutely. You can easily prepare and bake the cookie base up to two days in advance of the event. Once the base is cooled entirely, wrap it tightly in plastic wrap and store it at room temperature. Frost and decorate the bars just before you plan to serve them for the freshest, most appealing appearance.
What if I don’t have parchment paper for lining the pan?
If you lack parchment paper, grease your 9×13 inch pan heavily with soft butter or high-quality baking spray and then dust it lightly with flour. While this method works for preventing sticking, it makes removal and clean slicing significantly harder compared to using the convenient parchment paper sling, so be prepared for a messier extraction.
Why did my Peppermint Sugar Cookie Bars turn out dry and crumbly?
Dry and crumbly bars are usually the direct result of overmixing the dough or, most commonly, overbaking the base. Mix the dry ingredients only until streaks of flour disappear, and pull the bars from the oven when the center still looks slightly underdone, as they continue to cook from residual heat after removal.
Is it possible to use non-dairy alternatives for the frosting?
Yes, you can easily adapt the recipe. Substitute the standard dairy butter with a high-quality plant-based butter alternative for the cookie base and the frosting. For the liquid, use a neutral, unsweetened non-dairy milk, such as almond or oat milk, to maintain the creamy consistency without altering the overall flavor.
Conclusion for Peppermint Sugar Cookie Bars
These magnificent Peppermint Sugar Cookie Bars truly capture the spirit of the season without requiring hours of delicate cookie decorating. We embraced the simplicity of a single-pan bake, resulting in tender, chewy squares topped with creamy white chocolate and a festive shower of crushed mint candy. Whether you need a speedy offering for a last-minute gathering or a batch bake for holiday gifting, these festive shortbread treats are guaranteed crowd-pleasers. They are fast, delightfully minty, and spectacularly easy to transport. So skip the individual rolling and cutting this year, and enjoy the pure, unadulterated joy of sinking your teeth into a perfect slice of holiday cheer.
Print
Peppermint Sugar Cookie Bars
Skip the messy rolling! This pressed dough sugar cookie bar yields a supremely soft, buttery base kissed with cool peppermint. Instructions and complete nutrition facts included.
- Total Time: 35 minutes
- Yield: 4 servings 1x
Ingredients
- 2 3/4 cups All-Purpose Flour
- 1 cup (2 sticks) Unsalted Butter, softened
- 3/4 cup Granulated Sugar
- 1 Large Egg
- 1 teaspoon Vanilla Powder
- 1/2 teaspoon Peppermint Extract (for the dough)
- 2 cups Powdered Sugar
- 1/2 cup Crushed Candy Canes
Instructions
- Step 1: Preheat the oven to 350°F (175°C). In a large bowl, cream together the softened butter and granulated sugar until light and fluffy. Beat in the egg, vanilla bean paste, and 1/2 teaspoon of peppermint extract until fully combined.
- Step 2: Gradually mix in the all-purpose flour until a soft, uniform dough forms. Press the dough evenly into the bottom of a lightly greased 9×13 inch baking pan.
- Step 3: Bake for 20-25 minutes, or until the edges are lightly golden and the center is set. Remove the bars from the oven and place the pan on a wire rack to cool completely before frosting (approximately 1-2 hours).
- Step 4: Prepare the frosting: In a clean bowl, beat 1/2 cup of softened butter with the powdered sugar, adding 1 teaspoon of peppermint extract and 2-3 tablespoons of milk until the mixture is smooth, fluffy, and spreadable.
- Step 5: Once the sugar cookie bars are entirely cooled, use an offset spatula to spread the peppermint frosting evenly over the top layer.
- Step 6: Immediately sprinkle the 1/2 cup of crushed candy canes over the wet frosting. Allow the frosting to set slightly before slicing the bars into squares.
Notes
- Keep leftover bars fresh by storing them in an airtight container in the refrigerator for up to 5 days, but allow them to sit at room temperature for 15 minutes before eating to restore maximum softness.
- If the bars become too firm, you can gently soften a single serving by microwaving it for just 5 to 8 seconds, being careful not to overheat and melt the delicious peppermint frosting.
- Elevate this festive treat by serving a square alongside a mug of rich hot chocolate or a dollop of whipped cream garnished with extra crushed candy cane dust.
- For maximum crunch, do not crush the candy canes until the frosting is already spread, as exposure to air and moisture can cause the peppermint pieces to dissolve quickly.
- Prep Time: 15 minutes
- Cook Time: 20 minutes
- Method: Stovetop
- Cuisine: American
FAQs
How do I properly store Peppermint Sugar Cookie Bars to maintain freshness?
Keeping your festive dessert squares fresh is key to holiday happiness! Once the cookie bars have cooled completely and the icing has set, slice them into squares. Store these delicious treats in an airtight container at room temperature for up to four days. If you need them to last longer, you can refrigerate them for about a week. For maximum longevity, flash freeze the bars individually before transferring them to a freezer-safe bag, where they will keep beautifully for two months. Just ensure they are fully thawed before serving to recapture that perfect, tender crumb, making your Peppermint Sugar Cookie Bars taste fresh every time.
What common mistakes lead to tough or overly crumbly holiday cookie bars?
Achieving the perfect texture for your sugar cookie bars requires precision and patience. The most frequent culprit for tough bars is over-mixing the dough after adding the dry ingredients; mix only until just combined. If your bars are overly crumbly and won’t hold their shape, you likely didn’t measure the flour correctly. Always scoop the flour lightly into the measuring cup and level it off. Another cause of dryness is over-baking. Pull the bars out of the oven when the edges are set and the center looks slightly underdone—they will finish cooking on the pan as they cool, ensuring a wonderfully tender result, preventing any brittle texture in these beautiful minty treats.
Can I substitute the white chocolate ganache topping on my Peppermint Sugar Cookie Bars?
Absolutely, while the classic white chocolate ganache adds a rich, glossy finish, you have plenty of substitution options. A basic cream cheese frosting or a simple vanilla buttercream works wonderfully and provides a slightly tangier counterpoint to the sharp peppermint flavor. If you want to keep the peppermint profile strong but skip the chocolate, use a standard powdered sugar glaze mixed with extra peppermint extract and a few drops of red food coloring for a vibrant look. Remember that the topping seals in the moisture, so make sure whatever you choose completely covers the baked sugar cookie base to ensure the bars stay chewy and delicious.
What is the easiest method for crushing the peppermint candy for the topping?
Getting the perfect peppermint dust without making a colossal mess can be a challenge. The easiest method is using a sturdy zip-top bag and a rolling pin. Place your candies inside the bag, seal it tightly (squeezing out excess air), and gently tap the candies with the rolling pin or the flat side of a meat tenderizer until they break into smaller chunks. For finer dust, transfer the chunks to a food processor and pulse briefly. Avoid grinding too long, or the heat from the blades might cause the candy to clump. Aim for a mix of fine dust and small crunchy bits for the best texture contrast on your homemade Peppermint Sugar Cookie Bars.


Leave a Comment