
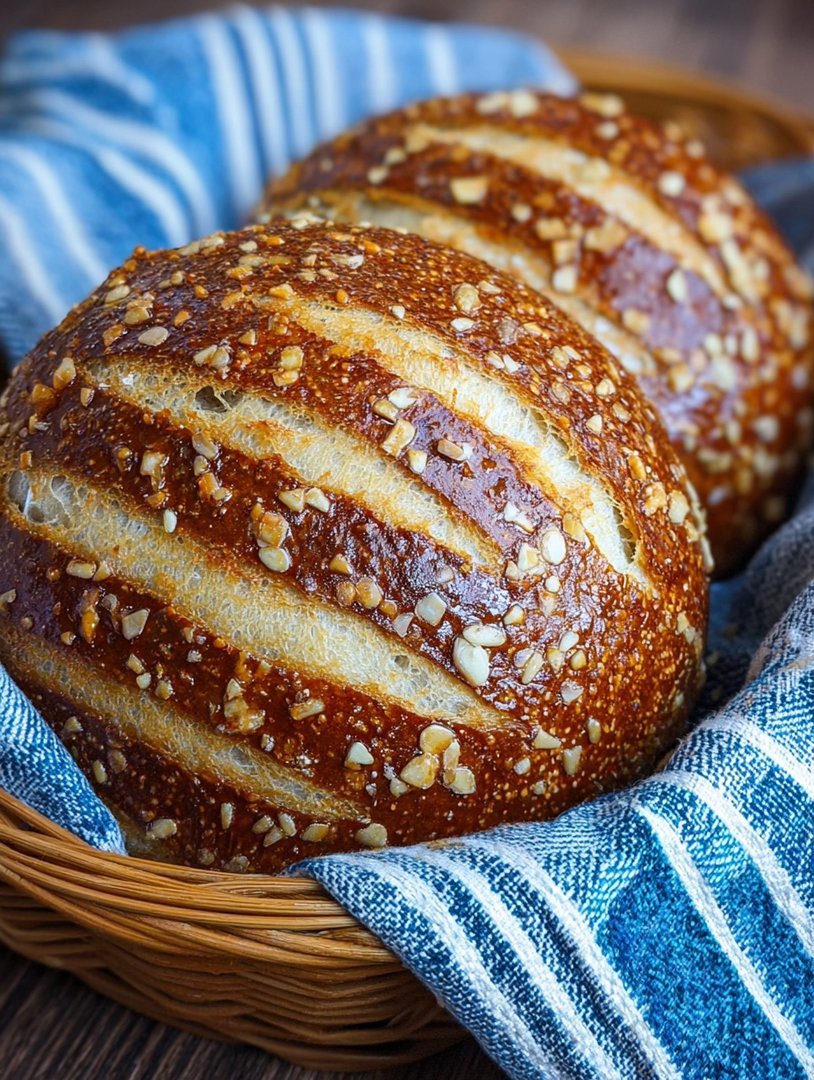
If there is one thing I’ve learned about comfort food, it’s that sometimes the simplest recipes deliver the biggest punch, especially when it comes to the irresistible golden crust of perfectPretzel Bread. That iconic chewiness and the savory, salty bite transport you immediately back to a bustling marketplace or a cozy movie night, but making it at home is easier than you think.
Forget the fear of complicated yeast work; this recipe focuses on mastering the brief, magical alkaline bath that gives the bread its signature mahogany hue and satisfying texture. Prepare to become the undisputed champion of salty snacks in your own kitchen.
- Achieve the coveted, deep mahogany crust through a simple, safe alkaline boiling bath that supercharges flavor and visual appeal.
- This recipe yields an unbelievably soft and airy interior crumb that contrasts perfectly with the delightfully chewy, malty exterior finish.
- The shaping process is highly versatile, allowing you to easily create traditional loaves, sturdy sandwich rolls, or fun individual buns.
- The distinct savory flavor and satisfying saltiness make this bread the perfect pairing for robust cheese sauces or thick, winter soups.
Ingredients for Pretzel Bread
Here’s what you’ll need to make this delicious dish:
- Active Dry YeastEssential for lift and flavor development; make sure it is fresh and proofed properly in warm liquid.
- All-Purpose FlourThe foundation of the dough; use a standard unbleached variety for the best texture and structure.
- Warm Water or MilkUsed to activate the yeast; ensure the temperature is between 105°F and 115°F (40°C to 46°C).
- Melted Cultured ButterAdds richness and tenderness to the dough, contributing to that wonderful soft interior.
- Baking Soda (Sodium Bicarbonate)Crucial for the alkaline bath, which gives the bread its distinct color, flavor, and crust texture.
- Coarse Salt (Pretzel Salt)Applied generously before baking to provide the iconic, crunchy saltiness that defines the finished product.
The full ingredients list, including measurements, is provided in the recipe card directly below.
How to Make Pretzel Bread
Follow these simple steps to prepare this delicious dish:
Step 1: Activating the Yeast and Mixing the Dough
In a large mixing bowl, gently combine the warm water, yeast, and a pinch of sugar. Allow this mixture to sit for about five to ten minutes until foamy. Once proofed, incorporate the flour, melted butter, and salt. Mix thoroughly, then turn the dough onto a lightly floured surface and knead for 6–8 minutes until it is smooth and elastic. You are aiming for a soft yet firm dough ball.
Step 2: The Critical First Rise
Lightly grease a clean bowl with a neutral oil, place the dough inside, and turn it once to coat. Cover the bowl tightly with plastic wrap or a kitchen towel. Allow the dough to rise in a warm, draft-free spot for 60 to 90 minutes, or until it has doubled in size. This slow fermentation is vital for developing complex flavor.
Step 3: Shaping and Preparing for the Bath
Gently punch down the risen dough to release the air. Divide the dough into equal portions—depending on whether you are making rolls, sticks, or a whole loaf. Shape the dough firmly into your desired shape. Once shaped, place them on a parchment-lined baking sheet and freeze for 15 minutes. Chilling the dough slightly helps it hold its shape when dipped in the hot alkali solution.
Step 4: The Alkaline Bath (The Magic Trick)
Preheat your oven to 425°F (220°C). Bring 10 cups of water to a rolling boil in a large pot. Carefully whisk in the baking soda—it will foam up aggressively, so use a deep pot. Reduce the heat slightly to maintain a gentle simmer. Using a slotted spoon, immerse each piece of dough for exactly 30 seconds, flipping halfway through. Do not exceed this time, as it can cause a metallic taste. Drain the excess water and return the pieces immediately to the parchment-lined baking sheet.
Step 5: Scoring and Baking
Once dipped, score the top of the bread pieces with a sharp knife or razor blade to allow for expansion. Generously sprinkle the tops with coarse pretzel salt immediately before they go into the oven. Bake for 12 to 18 minutes, depending on the size of the pieces, until they achieve a deep mahogany brown color. Cool slightly on a wire rack before serving.
Transfer to plates and drizzle with a mustard dipping sauce or serve alongside thick, comforting chili for the perfect finishing touch.
The Unexpected Science Behind That Famous Crust
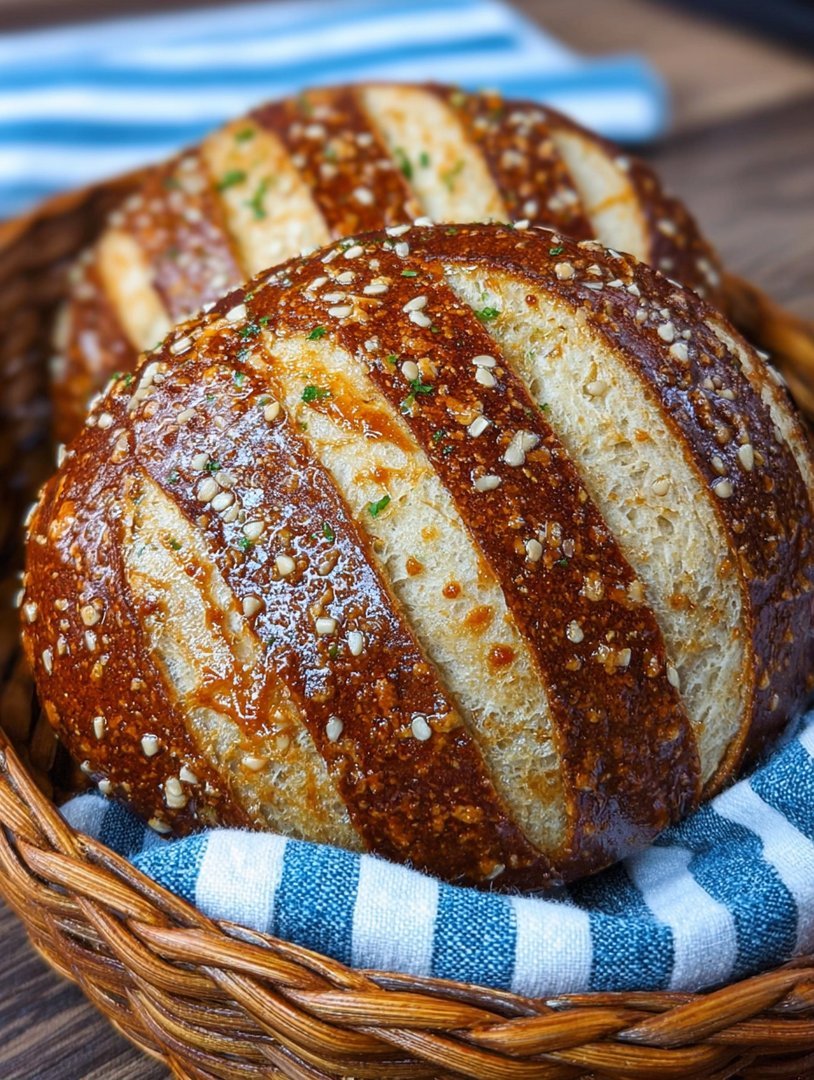
Baking is often viewed as an art, full of intuitive feeling and delicate folding, but making truly exceptionalPretzel Breadis a fascinating exercise in kitchen chemistry. When I first attempted pretzels years ago, I thought the recipe was playing a joke on me. “Boil the dough in a baking soda bath? That sounds like a spa treatment gone terribly wrong!” Yet, this seemingly bizarre step is the secret sauce—or rather, the secret solution—that transforms a humble yeast roll into a glorious Laugengebäck.
The standard bread crust is formed by the Maillard reaction, a chemical process that results in a lovely golden brown color. However, when you immerse the dough in the hot alkaline solution (our baking soda bath), you drastically increase the pH level on the surface of the bread. This high pH supercharges the Maillard reaction during baking, ensuring that the bread browns incredibly quickly and develops that distinctive, deep mahogany color and savory flavor profile. If you skip this bath, you simply end up with a very dense, round roll, which is nice, but definitely not a pretzel. The science here is simple: more alkaline environment means faster, deeper browning and the unmistakable pretzel flavor we all crave.
Mastering the Art of Shaping Your Dough
While the classic knotted pretzel shape is iconic, baking this salty, chewy loaf allows for significant creative license. Don’t feel obligated to twist yourself into a knot trying to replicate the perfect figure eight; sometimes, simplicity is key, especially when dealing with hot, slick dough fresh out of the bath. My preferred method for ease and maximum structural integrity is the simple pretzel bun or the sturdy loaf. The bun is excellent for sandwiches, offering a salty, stable foundation that stands up well to robust fillings and prevents sogginess.
If you choose to create a whole loaf, shaping it into a smooth oblong boule will maximize the soft interior crumb and provide ample space for slicing. If you decide on sticks or rolls, ensure they are uniform in size to guarantee even dipping and consistent baking times. Remember that the cold rest period in the freezer (Step 3) is your essential friend here; it temporarily tightens the gluten structure. If your dough is too warm, it will relax immediately upon hitting the boiling bath, resulting in misshapen, flat disks that look slightly tragic. This is where a little bit of patience pays off handsomely. Plan your dipping process carefully, making sure you have a landing spot ready on the baking sheet for the wet, glistening rolls immediately after they exit the alkali bath.
When transferring the delicate, wet dough from the bath to the baking sheet, always use a large, wide slotted spoon or a wire spider. This minimizes distortion and allows excess liquid to drain quickly. Work fast once they are out of the bath, as the crucial moment for scoring and salting is right before they hit the heat of the oven. A dull knife will drag the dough, so use the sharpest blade you have to ensure quick, clean cuts that direct the oven spring beautifully.
Beyond the Butter: What to Serve with Pretzel Bread
A loaf of warmPretzel Bread, glistening with salt, is undeniably tempting as a meal unto itself, yet it begs for strong companions. Forget the boring side dishes; this bread deserves dips and spreads that match its robust personality. The savory, slightly malty flavor works wonders alongside sharp, tangy flavors, contrasting the warmth of the bread beautifully.
Savory Dip Suggestions
- Cheese Spread with Malt VinegarA rich, creamy cheddar spread infused with dark malt vinegar and mustard powder offers a perfect contrast to the salty crust. The tangy vinegar cuts through the richness, balancing the flavor profile brilliantly.
- Smoked Paprika and Herb ButterWhipping cultured butter with finely chopped chives, parsley, and a generous pinch of smoked paprika creates an intensely flavorful spread that melts beautifully into the warm crumb, adding smoky depth.
- Thick, Hearty Chili or StewThe sturdy crust and soft interior of the bread make it an ideal scooping vessel for thick, hearty ground beef chili or a rich, slow-cooked beef stew. Use the edges to scoop up every last drop of the rich sauce.
- Sweet and Tangy MustardA simple combination of Dijon mustard mixed with a touch of honey or maple syrup creates a classic German dipping sauce that highlights the deep, baked flavor of the dough.
Troubleshooting and Storage Tips
If your bread comes out pale and lacks that beautiful deep brown color, it means the bath was either not hot enough, or you did not leave the dough in the alkaline solution long enough. Ensure the water is simmering vigorously when you add the baking soda, and stick strictly to the 30-second timing for the dip. Remember, the brief dip is where the transformation begins.
While this bread is undeniably best eaten within hours of coming out of the oven, any leftovers can be stored at room temperature for up to two days in an airtight container. Because of the crust structure, it will inevitably soften over time due to moisture redistribution. If the bread loses its crunch (and it will), a quick five-minute blast in a preheated 350°F (175°C) oven will brilliantly revive the crust, making it crisp and warm again. If the interior seems dry after a day or two, slicing it for toast or using it for savory French toast (prepared with eggs and milk) is a fantastic way to extend its lifespan and avoid food waste. Never underestimate the enduring power of a slightly stale, buttery pretzel slice for absorbing the goodness of a hearty bowl of soup.
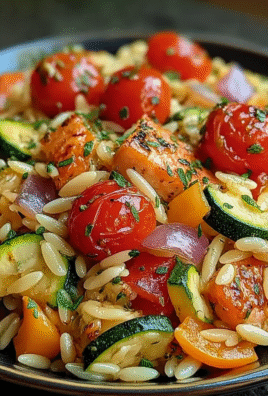
The Accidental Discovery of Sunshine on a Plate
My quest for the ultimate sandwich roll led to a kitchen catastrophe involving spilled flour and a forgotten bottle of molasses. Instead of quitting, I repurposed the dough, accidentally discovering that perfect, chewy crust and fluffy interior we now adore in this magnificent batch ofPretzel Bread.
The Unexpected Joy of Lye-Like Baths
There is a certain magic that happens when plain, soft dough meets a highly alkaline bath. For centuries, traditional bakers utilized true lye, which gives these rolls their iconic flavor and deep mahogany color. However, for the home kitchen, baking soda creates a perfectly safe and equally delicious crust. I remember the first time I lowered a pale, puffy roll into the simmering baking soda water. It looked entirely wrong, like I was boiling a tiny, fragile bread cloud. But upon retrieving it, the dough had already transformed, exhibiting that tacky, slightly slick surface that guarantees serious crunch later.
The transformation is dramatic and fast. This brief, 30-second dip changes the pH of the dough’s exterior, allowing the Maillard reaction to go into overdrive during baking. The result is a savory roll that has depth and character unlike standard dinner rolls. This crucial step is what separates a simple yeasted loaf from true German-style baked goods, granting them that distinctive, complex flavor profile that pairs wonderfully with everything from sharp mustard to robust roast beef.
Kneading for Glory: Achieving the Right Texture
The dough itself is deceptively simple: flour, water, yeast, and a little bit of fat, usually butter or oil. However, treating it right during the kneading phase dictates the final outcome. Many bakers rush this step, leading to dense, brick-like results. You want a dough that passes the “windowpane test”—meaning you can stretch a small piece thin enough to see light through it without tearing. This indicates sufficient gluten development.
If you are using a stand mixer, let it run on medium speed for about 8 to 10 minutes until the dough pulls cleanly away from the sides of the bowl. If you are kneading by hand, prepare for a satisfying mini-workout, possibly requiring 12 to 15 minutes of rhythmic pushing and folding. Patience during the first rise is equally important; let the dough double in size slowly in a warm, draft-free spot. I once tried to speed this up with a hairdryer—a mistake I still regret—resulting in dried-out, grumpy dough that refused to rise correctly and looked quite sad in the oven. Remember, the dough is working for you, not against you, so give it the time it deserves to become airy and light.
Perfecting the Cooking Process
Shape the rolls immediately after the first rise, then proof them briefly in the freezer to maintain their sharp shape before the alkaline bath. Prepare the baking soda solution while the oven preheats, ensuring everything moves swiftly from the boil to the bake for maximum crust development.
The Crucial Chill and Dunk
The brief chill time (about 15 minutes in the freezer) is the secret weapon of professional bakers when working with this style of dough. Why? Because the dough needs to be cold and slightly firm when it hits the hot, alkaline solution. If the dough is too warm or overly proofed, the sudden shock of the boiling water causes it to collapse dramatically, resulting in flat, lifeless rolls. The cold helps the dough hold its structure perfectly through the dunking phase.
When preparing the bath, use a wide, shallow pot. Bring eight cups of water to a rolling boil and slowly whisk in half a cup of baking soda. The solution will bubble up dramatically, so be careful not to overflow your pot. Using a slotted spoon or spider, gently lower the rolls into the simmering bath, one or two at a time. Flip them once after 15 seconds. Ensure the entire surface of the roll gets submerged, then immediately transfer them back onto a baking sheet lined with parchment paper—do not skip the parchment, as the wet, alkaline dough is incredibly sticky.
The Art of the Slash and Bake
Once your rolls are safely on the baking sheet, they must be scored before baking. This is not merely cosmetic. The slash controls where the roll expands (or “springs”) in the oven. Without it, the crust would crack wildly and unevenly wherever the trapped steam decides to escape.
Use a very sharp tool—a fresh razor blade inserted into a holder is ideal, or a sharp paring knife works in a pinch. Slice swiftly and deeply along the top of the roll, perhaps 1/4 inch deep. For classic rolls, a single straight slash down the center is traditional. For pretzel sticks, you might opt for several small diagonal cuts. Immediately sprinkle the rolls with coarse salt—pretzels need that signature crunch! Then, straight into the hot oven they go. Baking these rolls requires a high, intense heat, usually around 425°F (220°C). This initial blast of heat locks in the moisture and helps set the color achieved during the bath. They typically take about 15 to 20 minutes, depending on the chosen shape, until they achieve that coveted deep brown color.
Add Your Touch
Customize yourPretzel Breadby mixing everything bagel seasoning onto the tops before baking, adding shredded cheddar cheese to the dough for a savory twist, or incorporating fresh herbs like rosemary and thyme for an earthy, aromatic flavor profile.
Creative Flavor Twists
While the classic coarse salt topping is undeniably delicious, these homemade savory rolls are surprisingly versatile. For a spicy kick, try adding a pinch of smoked paprika or cayenne pepper to the salt blend before sprinkling. If you want an internal flavor boost, consider mixing some finely minced caramelized onions or sun-dried tomatoes directly into the dough during the final stages of kneading. This adds texture and robust flavor, turning a simple roll into a gourmet offering perfect for dipping into robust beef stew or serving alongside grilled chicken.
For something completely different, forgo the salt entirely and create cinnamon-sugar pretzel knots. Instead of dipping them in the baking soda solution, brush the formed dough with a little melted butter, roll them in a generous mix of cinnamon and sugar, and then bake them until golden brown. These sweet versions are fantastic as a weekend brunch treat, proving that the magic of the pretzel method extends far beyond savory applications.
Storing & Reheating
Store leftoverPretzel Breadin an airtight container at room temperature for up to three days. To reheat, sprinkle them lightly with water and bake in a 350°F (175°C) oven for about five minutes until the crust crisps up again.
Maintaining Freshness
These rolls are always best consumed the day they are baked, but proper storage allows them to retain quality. If you anticipate having leftovers, consider baking them slightly underdone (pull them out when they are light brown) and then freezing them once completely cool. This method prepares them for a full reheat later.
To freeze, wrap the cooled rolls tightly in plastic wrap, then place them in a freezer-safe bag or container. They will last up to two months. When ready to serve, thaw them completely at room temperature, spritz them with water, and then pop them into a hot oven (400°F or 200°C) for five to eight minutes. This quick refresh will revive the crust, making it crisp and chewy as if they just came out of the oven.
Expert Tips for Fluffy Perfection
-
Always weigh your flour instead of scooping it; too much flour results in dense, dry rolls that refuse to reach optimal fluffiness in the oven.
-
Use hot, but not boiling, water for the baking soda bath to ensure the solution activates properly without softening the dough too much before baking.
-
If you don’t have a razor blade for the slash, chill your rolls longer, then use sharp, kitchen scissors to snip a clean, deep line across the top.
My grandmother once declared this the only bread worth tearing apart with your bare hands. We still argue over who gets the end pieces, proving that simple savory rolls bring true family joy.
Conclusion for Pretzel Bread
Mastering the perfectPretzel Breadis a rewarding culinary journey that transforms simple ingredients into an extraordinary baked good. The secrets lie in the diligent kneading, the precise timing of the alkaline bath, and the intense heat of the oven, yielding that iconic chewy exterior and soft crumb.
Don’t be intimidated by the process; the results—warm, salty, deeply browned rolls—are worth every minute spent proofing and dunking. Whether you serve them as dinner rolls, sandwich bases, or snack them plain with good mustard, these delightful rolls are guaranteed to elevate any meal and impress even the toughest critics in your kitchen. Get ready to enjoy the ultimate savory bread experience!
Print
Pretzel Bread
Achieve that irresistible soft interior and signature chewy crust! This kneaded, doubled-rise Pretzel Bread uses simple pantry staples. Full instructions and nutrition breakdown included.
- Total Time: 35 minutes
- Yield: 4 servings
Ingredients
- All-Purpose Flour: 3 cups
- Warm Water (105-115°F): 1 1/4 cups
- Active Dry Yeast: 2 1/4 teaspoons
- Granulated Sugar: 1 tablespoon
- Kosher Salt (for dough): 1 teaspoon
- Baking Soda: 1/2 cup
- Coarse Sea Salt (for topping): 2 tablespoons
Instructions
- Step 1: In a large bowl or stand mixer, dissolve the yeast and sugar into the warm water and let stand for 5-10 minutes until foamy. Add the flour and kosher salt, then mix until a shaggy dough forms. Knead by hand or with a dough hook for 6-8 minutes until the dough is smooth and elastic.
- Step 2: Place the dough in a lightly oiled bowl, turn to coat, cover loosely with plastic wrap, and let rise in a warm place for 60-90 minutes, or until the dough has doubled in size.
- Step 3: Punch the dough down gently, divide it into desired portions (loaves or rolls), and shape accordingly. Preheat your oven to 400°F (200°C). In a large pot, bring 8 cups of water and the 1/2 cup of baking soda to a rapid, rolling boil.
- Step 4: Carefully drop one piece of dough at a time into the boiling soda bath, boiling each piece for approximately 30 seconds total, flipping halfway through. Use a slotted spoon to transfer the dough to a parchment-lined baking sheet, allowing excess water to drain.
- Step 5: Using a sharp knife or bread lame, score a shallow slash or "X" on the top of each piece of bread immediately after the bath, then sprinkle generously with coarse sea salt.
- Step 6: Bake the pretzel bread for 18–25 minutes (depending on size) until the crust is deep mahogany brown. Let cool slightly on a wire rack before serving.
Notes
- For short-term storage, keep the bread at room temperature in a loosely sealed paper bag; storing in plastic will quickly soften the desirable crunchy crust.
- To revive day-old pretzel bread and restore its crisp exterior, reheat loaves or slices briefly in a 350°F (175°C) oven for 5 to 7 minutes before serving.
- Serve this versatile bread alongside hearty German mustard and thinly sliced sharp cheddar, or slice rolls and use them as the base for robust sliders.
- The quality of the deep mahogany crust depends entirely on the alkalinity of the soda bath; ensure the solution reaches a vigorous, rolling boil before immersing the dough pieces.
- Prep Time: 15 minutes
- Cook Time: 20 minutes
- Method: Stovetop
- Cuisine: American


Leave a Comment