
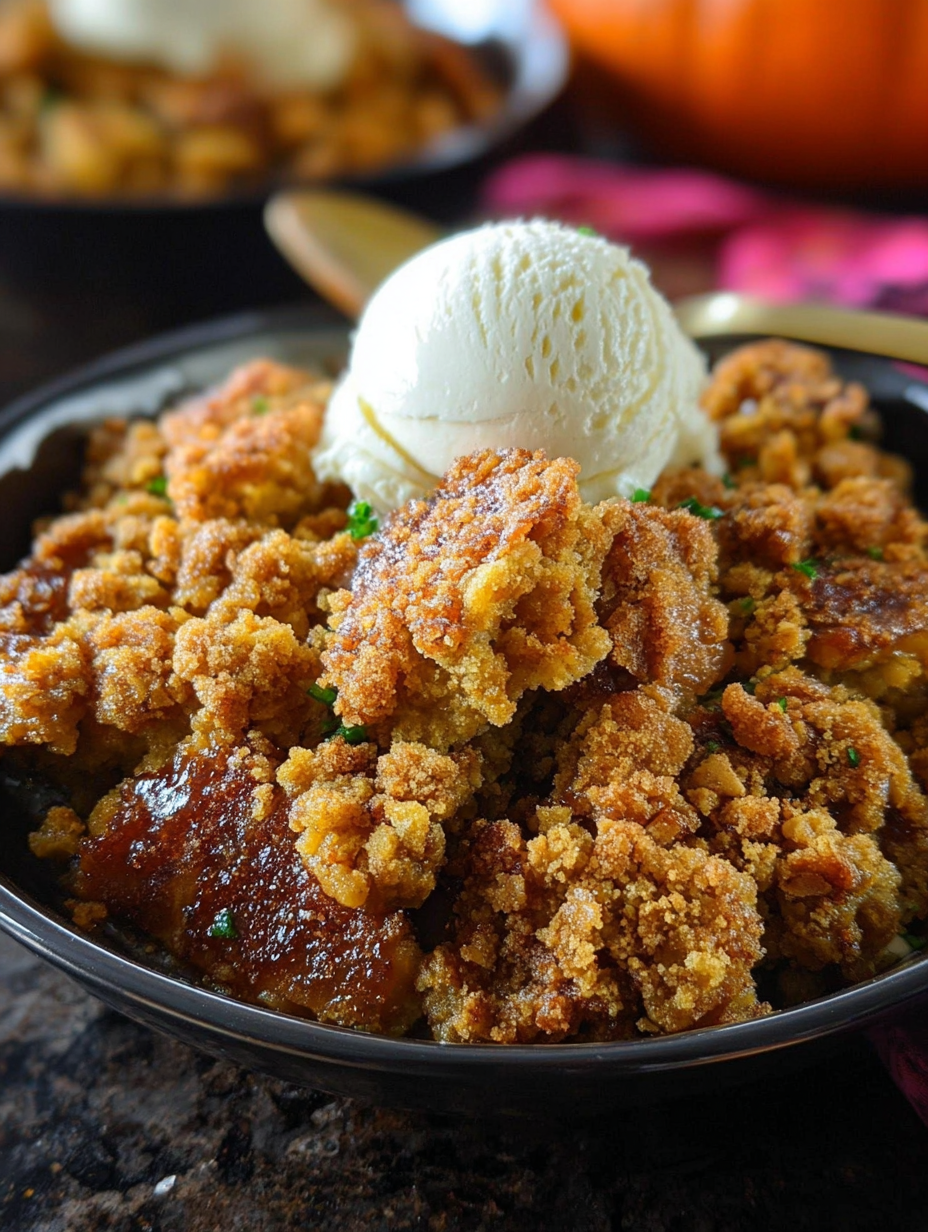
The aroma of cinnamon and nutmeg instantly transports you to sweater weather, but nothing screams autumn louder than a perfectly bakedPumpkin Crispstraight from the oven. This dessert is the comforting hug your tastebuds desperately need right now.
Forget the fancy pies; this recipe brings together creamy pumpkin filling and a buttery, oat-studded topping that is so easy, even your perpetually confused uncle could make it successfully. It is pure, unadulterated comfort food designed for minimal effort and maximum autumnal joy.
-
Remarkably quick preparation time means you can enjoy this warm dessert without spending hours wrestling with finicky pastry dough.
-
The flavor profile balances spiced, earthy pumpkin with the sweetness of brown sugar and satisfying textural crunch from oats.
-
This beautiful, rustic dessert requires no complicated plating, offering a gorgeous visual appeal right in the serving dish.
-
Customize your experience easily by adding dried cranberries or toasted pecans to the topping mixture for extra depth and flavor.
Ingredients for Pumpkin Crisp
Here’s what you’ll need to make this delicious dish:
- Canned Pumpkin PuréeUse 100% pure pumpkin, not pumpkin pie filling, as the pie filling already contains sweeteners and spices we will add ourselves.
- Evaporated MilkThis provides rich creaminess and moisture to the filling without making it runny, unlike regular dairy milk.
- EggsEggs are essential binding agents that ensure the pumpkin base sets up nicely and holds its shape after baking.
- Granulated Sugar and Brown SugarWe use granulated sugar for filling sweetness and brown sugar for that deep, molasses flavor in the topping.
- Pumpkin Pie SpiceThis convenient blend includes all the necessary autumn spices like cinnamon, ginger, nutmeg, and cloves, saving you measuring time.
- All-Purpose FlourThis forms the base of the crisp topping and provides structure, ensuring the final texture is beautifully crumbly.
- Old-Fashioned Rolled OatsOats are the defining characteristic of a crisp, lending an unbeatable chewy and rustic texture to the buttery topping.
- Unsalted ButterCold, cubed butter is crucial for creating that characteristic crumbly texture when cut into the dry ingredients.
The full ingredients list, including measurements, is provided in the recipe card directly below.
How to Make Pumpkin Crisp
Follow these simple steps to prepare this delicious dish:
-
Prep the Oven and Baking Dish
Preheat your oven to 350°F (175°C). Use a standard 9×13 inch baking dish. Lightly grease the dish or line it with parchment paper for easy cleanup later. This prevents the rich pumpkin filling from sticking to the bottom.
-
Mix the Creamy Pumpkin Base
In a large mixing bowl, combine the pumpkin purée, evaporated milk, eggs, granulated sugar, and pumpkin pie spice. Whisk vigorously until the mixture is completely smooth and uniform in color. Pour this delicious, spiced filling evenly into the prepared baking dish.
-
Prepare the Crisp Topping
In a separate medium bowl, whisk together the flour, both types of sugar (brown and granulated), and the rolled oats. Next, cut in the cold, cubed butter using a pastry blender, two knives, or even your fingertips until the mixture resembles coarse crumbs. The key is keeping the butter cold to achieve maximum crispness.
-
Assemble and Bake
Sprinkle the crumbly topping evenly over the wet pumpkin filling, making sure to cover the entire surface. Place the dish in the preheated oven and bake for 45 to 55 minutes. You know it is ready when the center is set (no longer jiggly) and the topping is golden brown and bubbling slightly.
-
Cool Before Serving
Remove the finished Pumpkin Crisp from the oven and allow it to cool on a wire rack for at least 30 minutes. The residual heat allows the filling to fully set, preventing a messy, liquid outcome. This rest is vital for texture.
Transfer to plates and drizzle with a little maple syrup or add a generous dollop of whipped cream for the perfect finishing touch.
Why the Pumpkin Crisp Reigns Supreme
There is a dessert hierarchy, and frankly, the classic pumpkin pie often finds itself relegated to the bottom shelf. Why? Because assembling a pie crust requires precision, patience, and a willingness to accept flour explosions across your kitchen. The incrediblePumpkin Crisplaughs in the face of such high-maintenance baking. It offers all the signature flavors of Harvest celebration dessert without the stress of lattice work or blind baking. This recipe works flawlessly every time, delivering a dessert experience that is both sophisticated in flavor and incredibly humble in execution.
My first attempt at making a traditional pumpkin pie ended in tears—mostly mine—and a bottom crust that was simultaneously soggy and burnt. I realized then that life is too short for subpar desserts. The crisp is the answer. It’s an easy-to-master technique that utilizes the rustic charm of oats and butter, resulting in a perfectly caramelized crunch that complements the smooth, creamy filling below. This textural contrast is genuinely the hallmark of a truly great autumn treat. We utilize cold butter and precise chilling methods to ensure every bite offers that gratifying snap.
Crisp Versus Crumble: Understanding the Dessert Dynamic
While the terms “crisp” and “crumble” are often used interchangeably, a distinct difference separates them. Knowing this distinction helps you appreciate the textural artistry we are aiming for in this recipe. A crisp, traditionally, includes oats in its topping mixture. These oats not only lend a nutty flavor but are essential for creating that specific, well-defined crunch when baked. The topping is slightly less uniform and more distinctively textured thanks to the rolled oats. On the other hand, a crumble typically features a topping made primarily of flour, sugar, and butter, creating a tighter, more uniform, streusel-like texture without the chewy addition of oats. Since we are enthusiastically embracing the oat inclusion, this glorious dessert is undeniably a fantasticPumpkin Crisp.
Furthermore, the high moisture content of the pumpkin filling requires a robust topping structure to prevent it from dissolving during baking. The oats provide that necessary backbone, absorbing some moisture while maintaining their structural integrity. This engineering ensures we achieve a beautiful golden-brown layer that stands up proudly against the creamy interior. When serving, remember that this is a dessert designed for messy, glorious scoops—perfection is overrated when the flavor is this good.
Creative Twists and Serving Suggestions
While the basic recipe for thisPumpkin Crispis flawless, you can effortlessly customize it to suit your palate or to match the theme of your seasonal gathering. Making small additions to the topping or playing with serving temperatures can completely transform the experience. Consider adding a half-cup of toasted, chopped pecans or walnuts to the oat mixture for an even deeper, nuttier flavor profile. If you enjoy a touch of tanginess, throw in a handful of dried cranberries; they provide a delightful burst of color and sourness that cuts through the richness of the pumpkin and butter.
For those who love intense spice, try grating a small amount of fresh ginger root directly into the wet pumpkin filling before baking. Fresh ginger adds a pungent warmth that canned spice blends simply cannot replicate. Remember, always taste your pumpkin base mixture before pouring it to ensure the spices meet your desired intensity level. Baking is about having fun and adjusting the flavor dial until it hits your personal sweet spot. This crisp is incredibly forgiving, encouraging experimentation without fear of failure.
Perfect Pairings: What to Serve with Your Crisp
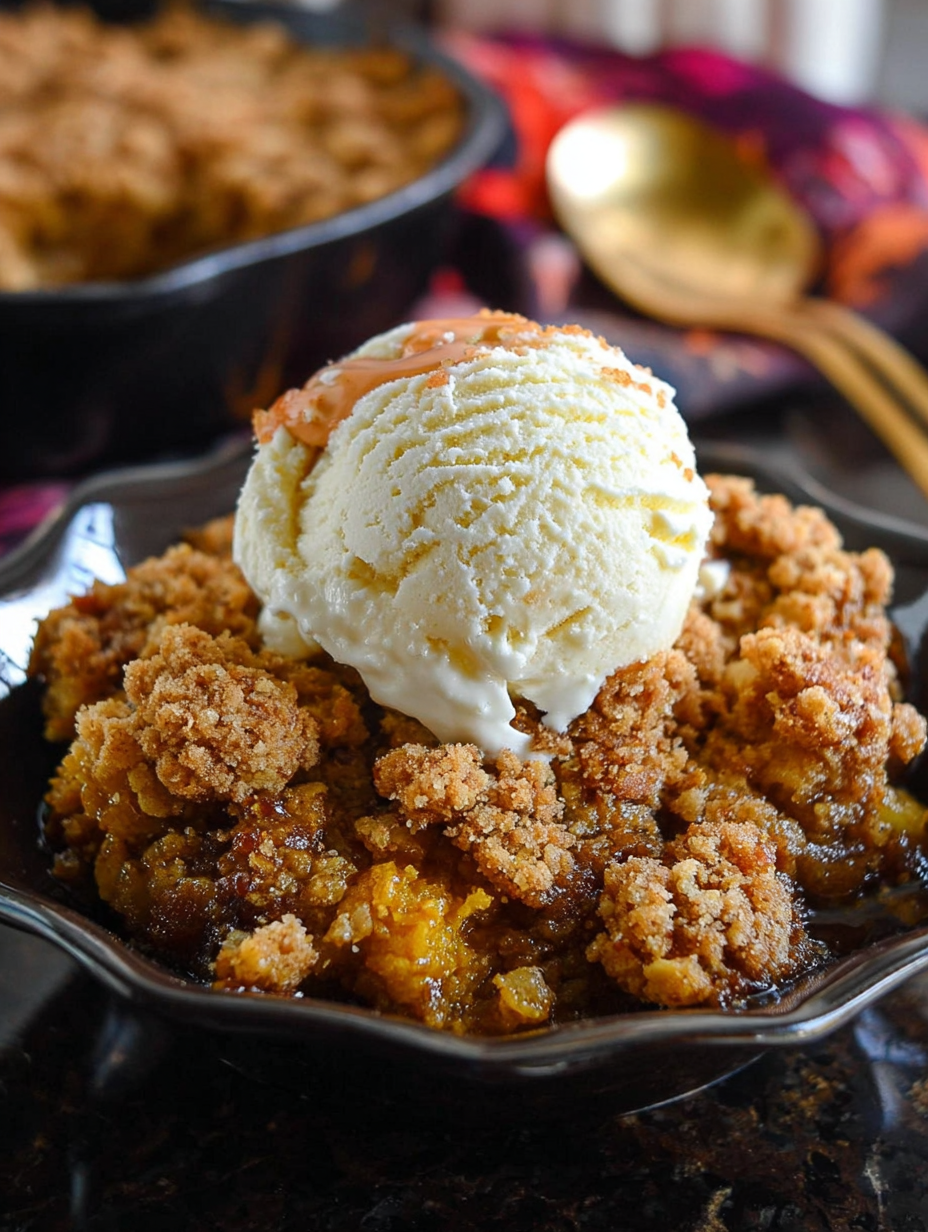
A warm crisp demands a cool, creamy accompaniment. The classic choice is a scoop of high-quality vanilla bean ice cream. The temperature contrast between the hot, spiced dessert and the melting ice cream is genuinely heavenly. If you want to elevate the dessert, consider a drizzle of homemade salted caramel sauce. That sweet and savory complexity layered over the warm dessert is an indulgence that is hard to beat.
For a lighter option, slightly sweetened Greek yogurt or a simple whipped coconut cream offers a refreshing counterpoint without overwhelming the rich pumpkin flavor. Serving the crisp still warm is non-negotiable; that is when the topping is at its most volatile and crunchy, providing the maximum possible textural satisfaction. Store leftovers tightly covered in the refrigerator for up to four days, though it rarely lasts that long.
Troubleshooting Common Crisp Issues
Even though thisPumpkin Crisprecipe is straightforward, sometimes things can go awry. Knowing how to fix common baking mishaps ensures your results are consistently excellent. One frequent issue is a topping that browns too quickly before the filling is set. If you notice the crust getting overly dark around the 30-minute mark, simply loosely tent the baking dish with aluminum foil. This blocks direct heat exposure to the topping while allowing the filling to continue cooking thoroughly underneath.
Another common concern is a filling that remains too watery. This usually happens if you mistakenly use regular milk instead of evaporated milk, or if your eggs were too small to provide sufficient binding. If your filling seems too liquid after the suggested baking time, give it an extra 10 to 15 minutes in the oven, ensuring the temperature remains steady. The center must be firm when gently jiggled. If the problem persists, next time, add a teaspoon of cornstarch to the wet ingredients before mixing to guarantee a firm, pudding-like consistency. Remember, patience is key, especially during the crucial cooling phase; waiting for the crisp to set is essential for texture.
Frequently Asked Questions About Pumpkin Crisp
Can I use fresh pumpkin instead of canned purée?
Yes, absolutely! If you opt for fresh pumpkin, make sure you cook it down and purée it until it is perfectly smooth, removing as much excess moisture as possible before measuring. The consistency must match canned purée closely for the recipe to set correctly.
How should I store leftovers?
You should store any leftover Pumpkin Crisp in an airtight container in the refrigerator for up to four days. For the best flavor and texture, reheat individual servings briefly in the oven or microwave before eating.
What is the best way to reheat the crisp to maintain crunch?
The best method for restoring the crunch is to reheat the leftovers in a toaster oven or standard oven at 350°F (175°C) for about 10-15 minutes. The dry heat will re-crisp the buttery topping effectively, making it taste freshly baked.
Can I prepare the filling ahead of time?
You can prepare the pumpkin filling up to 24 hours in advance and store it covered in the refrigerator. However, do not add the crisp topping until you are ready to bake. Adding the topping too early will cause it to absorb moisture from the filling, ruining the desired crunchy texture.
The moment the temperature dips below 60 degrees and the local coffee shop starts peddling maple-flavored everything, I know it is time. It’s time to retire the salad tongs, pull the heavy blankets out of storage, and embrace the glorious reign of the oven. Autumn requires comfort, and frankly, nothing delivers that profound, nostalgic hug quite like a classic fall dessert. But let’s be honest, sometimes the classic pumpkin pie is just a little too… polite. It sits there, perfect and proper, demanding hours of chilling time and a stressful encounter with a flaky crust.
That is where my ultimate recipe forPumpkin Crisp—or as I sometimes call it, “Pumpkin Chaos in a Pan”—saves the day. This recipe maintains all the velvety, spiced goodness of pumpkin pie but throws out the fussiness. Instead, we crown that rich custard with a glorious, messy, buttery oat crumble that delivers the kind of satisfying crunch usually reserved for breaking a world record. It is the dessert you make when you want to look like a culinary genius, but only spent thirty minutes of active cooking time. If you are ready for a dessert that pairs perfectly with oversized sweaters and bad made-for-TV Autumn celebration movies, let’s dive into this spectacular autumn bake.
Ingredients for the Best Pumpkin Crisp
For the Velvety Pumpkin Filling:
- 1 (15 oz) can 100% pure pumpkin puree (not pie filling)
- 1 (12 oz) can evaporated milk
- 2 large eggs, lightly beaten
- 3/4 cup granulated sugar
- 1/4 cup packed light brown sugar
- 1 teaspoon ground cinnamon
- 1/2 teaspoon ground ginger
- 1/4 teaspoon ground nutmeg
- 1/8 teaspoon ground cloves
- 1 teaspoon alcohol-free vanilla extract
- 1/4 teaspoon salt
For the Crunchy Oat Topping:
- 1 1/2 cups all-purpose flour
- 1 cup rolled oats (old-fashioned, not instant)
- 3/4 cup packed light brown sugar
- 1/2 cup chopped pecans or walnuts
- 1 teaspoon ground cinnamon
- 1/2 teaspoon salt
- 1 cup (2 sticks) unsalted butter, chilled and cut into small cubes
Step-by-Step Instructions
Preparing the Filling: The Creamy Foundation
- Preheat your oven to 350°F (175°C). Lightly grease a 9×13 inch baking dish.
- In a large mixing bowl, combine the pumpkin puree, evaporated milk, and beaten eggs. Whisk until fully incorporated and smooth.
- Add the granulated sugar, brown sugar, cinnamon, ginger, nutmeg, cloves, alcohol-free vanilla extract, and salt to the wet mixture. Whisk thoroughly until the filling is uniform in color and texture.
- Pour the entire pumpkin filling into the prepared 9×13 inch baking dish and set it aside while you prepare the topping.
Crafting the Crisp Topping: The Crunch Factor
- In a separate medium bowl, combine the flour, rolled oats, brown sugar, chopped nuts, cinnamon, and salt. Use a spoon or whisk to mix these dry ingredients well.
- Add the cold, cubed butter to the dry ingredients. Using a pastry blender, a fork, or your fingertips, cut the butter into the flour mixture until it resembles coarse crumbs. We are looking for pieces ranging from pea-sized down to cornmeal consistency. Do not overmix; some larger clumps are desirable for maximum crunch.
- Sprinkle the crumb topping evenly over the pumpkin filling in the baking dish. Ensure the entire surface of the pumpkin layer is covered.
Baking and Cooling
- Place the baking dish into the preheated oven. Bake for 50 to 60 minutes. The crisp is ready when the filling is set (it should only jiggle slightly in the center) and the oat topping is deeply golden brown and crunchy.
- Remove the Pumpkin Crisp from the oven. Let it cool on a wire rack for at least 30 minutes before serving. This cooling time is crucial, allowing the creamy pumpkin layer to firm up properly.
- Serve warm with a generous scoop of vanilla bean ice cream or a dollop of fresh whipped cream.
Perfecting the Cooking Process
Start by preheating the oven and combining the wet filling ingredients thoroughly until smooth. Prepare the dry crumb topping next, ensuring the butter is fully cut into the flour mixture for maximum crunch. Pour the filling, layer the crisp topping evenly, and bake immediately.
Add Your Touch
Try substituting half the pecans in the topping with chopped walnuts for deeper flavor complexity. If you enjoy a zestier finish, incorporate a teaspoon of orange juice into the pumpkin filling. For a richer texture, swap the evaporated milk for full-fat coconut cream.
Why This Dessert Reigns Supreme
The brilliance of thePumpkin Crisplies in its textural contrast. You have the silky, almost pudding-like foundation of the spiced pumpkin custard resting beneath a blanket of rugged, caramelized oats and nuts. While a traditional pie requires precision and often turns out soggy if mishandled, this bake is incredibly forgiving. If your measurements are slightly off, the dessert still tastes magnificent. Furthermore, it scales beautifully—perfect for a small family gathering or a massive holiday feast, easily doubling the recipe for a sheet pan version. This simple fall dessert offers all the necessary autumnal notes without the high-stress baking requirements, making it a genuine crowd-pleaser that often disappears faster than a plate of cookies at a scout meeting.
Storing & Reheating
Store cooled leftovers tightly covered in the refrigerator for up to four days. To reheat and restore the crispy texture, place servings in a toaster oven or standard oven at 300°F (150°C) for ten minutes until warmed through. Microwaving is not recommended, as it compromises the crisp.
My cousin once tried to eat this dessert straight out of the oven and burned his tongue; now, waiting ten minutes before serving is mandatory. The anticipation makes the first bite of the deliciousPumpkin Crispeven better.
Expert Chef Tips for the Ultimate Pumpkin Crisp
- For an extra deep flavor, gently toast the oats and nuts on a dry pan before mixing them into the crumble topping ingredients.
- Ensure your pumpkin puree is 100% pure pumpkin, not pumpkin pie filling, which already contains added sugars and spices.
- Allow thePumpkin Crispto cool completely before serving; this step ensures the filling sets properly, avoiding a runny mess.
Equipment Essentials
You do not need an arsenal of high-end equipment to nail this pumpkin crumble recipe, but having the right tools makes the process significantly cleaner and faster. First, a reliable 9×13 inch baking dish is non-negotiable. Glass or ceramic both work excellently, retaining heat well to ensure the filling cooks through evenly. Next, invest in a good pastry blender or two knives for cutting the cold butter into the flour mixture; this technique prevents the butter from melting and is key to achieving that signature, light crunch in the topping.
A sturdy whisk is crucial for blending the pumpkin filling—you need to break up those lumps and ensure the spices are evenly distributed throughout the custard base. Finally, a wire rack is essential for cooling. Placing the hot dish directly onto a cold countertop can prevent air circulation, potentially leading to a slightly soggy bottom. A wire rack lifts the pan, promoting airflow underneath and guaranteeing a perfect, set filling every single time.
Frequently Asked Questions About Pumpkin Crisp
How do I know when the filling is fully set?
The filling is ready when the edges look firm and slightly pulled away from the pan, but the very center still shows a slight, gentle wobble when you lightly shake the dish. Do not wait for the center to be completely motionless, as this will result in an over-baked, dry dessert.
Can I prepare the pumpkin filling ahead of time?
Yes, you can certainly prepare the pumpkin filling up to 24 hours in advance. Store it in an airtight container in the refrigerator. However, do not combine the filling and the crisp topping until just before baking, as the moisture from the filling will soften the topping, ruining the crispiness.
What if I don’t have evaporated milk?
Evaporated milk lends a specific density and richness. If you must substitute, full-fat heavy cream or a shelf-stable plant-based cream alternative will work. Whole milk can be used, but the filling might be slightly less rich and require an extra five minutes of baking time.
Is this dessert better served warm or cold?
ThePumpkin Crispis best served warm, shortly after it has cooled enough to set (about 30 minutes). Warm serving enhances the aroma of the spices and the gooey texture of the filling, especially when paired with chilled vanilla ice cream. Cold leftovers, however, are still quite delicious!
Can I freeze the baked pumpkin dessert?
While the filling freezes reasonably well, the crisp topping loses much of its texture upon thawing. If you plan to freeze it, wrap the cooled, baked dessert tightly in plastic wrap and then foil. Thaw it overnight in the refrigerator and then reheat it in the oven to try and revitalize the crunch.
The Great Pumpkin Panic and the Birth of the Pumpkin Crisp
There is a specific kind of culinary chaos that only occurs when you promise a magnificent, multi-tiered autumn dessert and then realize you possess the structural integrity of a damp napkin. My journey to perfecting the humblePumpkin Crispbegan not with inspiration, but with sheer desperation.
It was three years ago, just hours before Harvest celebration dinner. My ambitious pumpkin pie—the one I had promised would be “rustic and authentic”—had decided to weep profusely and collapse into a puddle of soupy sadness. I needed a miracle, and I needed it fast. Enter the crumble: the less fussy, more forgiving cousin of the pie. It requires almost zero artistry and delivers maximum comfort. If you can mix things in a bowl and sprinkle floury oats over them, you can achieve dessert hero status. This recipe is the result of that frantic, successful pivot—a dessert so good, I now actively sabotage my pies just so I have an excuse to make this instead.
Mastering the Ultimate Autumnal Dessert
Forget hours of kneading and blind-baking crusts. This method focuses on two distinct layers: a silky-smooth, deeply spiced pumpkin base, and a golden, crunchy topping that deserves an award for maximum textural contrast. We are looking for something warm, fragrant, and profoundly easy to assemble.
The Ingredients You Need for This Pumpkin Crisp
The beauty of a crisp lies in its simplicity. Most of these items are probably already hiding in your pantry, waiting for their moment of glory. If you don’t have pumpkin pie spice blend, don’t worry—we tackle that breakdown below.
- 1 large can (15 oz) 100% pure pumpkin puree (not pie filling)
- 1 cup evaporated milk or heavy cream
- 3/4 cup packed light brown sugar, plus 1/2 cup extra for the topping
- 2 large eggs
- 1 tablespoon pure alcohol-free vanilla extract
- 2 teaspoons pumpkin pie spice blend (or blend your own cinnamon, ginger, nutmeg)
- 1/2 teaspoon salt
- 1 1/2 cups old-fashioned rolled oats
- 1 cup all-purpose flour
- 1/2 cup (1 stick) unsalted butter, chilled and cut into small cubes
Achieving Peak Crumble Texture
The crumble topping is where we earn the “crisp” in the title. You want large, buttery clumps, not fine dust. The trick is keeping the butter cold and using your fingers, or a pastry blender, to achieve a coarse mixture.
Start by combining the rolled oats, flour, the remaining brown sugar, and a pinch of salt in a medium bowl. Add the chilled, cubed butter. Work the butter into the dry ingredients quickly. If your hands are warm, you might want to chill the mixture briefly after combining. When finished, the mixture should resemble coarse crumbs and small, pea-sized clumps. Resist the urge to overmix; we want texture, not a uniform paste.
The Assembly and Baking Process
Preheat your oven to 375°F (190°C). Lightly grease a 9×13 inch baking dish. For the filling, whisk together the pumpkin puree, evaporated milk, eggs, vanilla, sugar, spices, and salt until completely smooth. Pour this velvety mixture into the prepared baking dish.
Now, distribute the oat crumble topping evenly over the pumpkin layer. Don’t press it down! Sprinkling it lightly allows for maximum airflow and ensures a truly crisp finish. Bake for 45 to 55 minutes, or until the pumpkin filling is set (it should only jiggle slightly in the center) and the topping is deeply golden brown. Let the crisp cool for at least 20 minutes before serving. This cooling period allows the pumpkin base to firm up, making serving much cleaner, though we often fail this test because the smell is simply too intoxicating.
Serving Suggestions and Flavor Enhancements
While the basic autumn crumble is divine on its own, a few tweaks can elevate it to legendary status. Consider adding chopped pecans or walnuts to the crumble mixture for an extra layer of crunch. If you crave brighter notes, a dash of fresh lemon zest added to the pumpkin filling can cut through the richness beautifully.
We highly recommend serving this warm with a generous scoop of vanilla bean ice cream or a dollop of fresh whipped cream. For an extra autumnal touch, drizzle a touch of maple syrup over the top before serving. This versatile dessert is perfect for casual weeknights or festive holiday gatherings where ease is paramount.
Conclusion for Pumpkin Crisp
The Pumpkin Crisp is the undisputed champion of low-effort, high-reward autumn baking. It saves the day when pastry fails and provides cozy comfort without requiring complicated techniques. We explored how to achieve that perfect crunch using chilled butter and discussed the essential ingredients that make the spiced filling so addictive. Whether you are baking this for a massive gathering or simply treating yourself, this straightforward recipe delivers all the classic flavors of the season in a much more enjoyable, rustic package. Forget the fussy pies; embrace the crumble and prepare for rave reviews—you deserve a dessert this easy and delicious.
Print
Pumpkin Crisp
Master the ultimate holiday base! Whisk up a 9×13 pan of silky pumpkin, evaporated milk, and sugar, seasoned with 2 tsp of spice. Easy prep, perfect results at 350°F.
- Total Time: 35 minutes
- Yield: 4 servings
Ingredients
- Canned pumpkin puree: 1 (29 ounce) can
- Evaporated milk: 1 (12 ounce) can
- Granulated sugar: 3/4 cup
- Large eggs: 2
- Pumpkin pie spice: 2 teaspoons
- Yellow cake mix: 1 (15.25 ounce) box
- Unsalted butter, melted: 1 cup (2 sticks)
- Chopped pecans or walnuts: 1/2 cup
Instructions
- Step 1: Preheat your oven to 350°F (175°C). Grease and lightly flour a 9×13 inch baking dish.
- Step 2: In a large bowl, whisk together the canned pumpkin puree, evaporated milk, granulated sugar, eggs, and pumpkin pie spice until the mixture is smooth and evenly combined. Pour this filling into the prepared 9×13 inch baking dish.
- Step 3: Carefully sprinkle the dry yellow cake mix evenly over the top of the pumpkin filling. Do not stir the mixture; the cake mix should form a uniform dry layer.
- Step 4: Drizzle the 1 cup of melted butter evenly over the dry cake mix layer. Ensure that the butter covers as much of the cake mix as possible to prevent dry spots during baking. Sprinkle the chopped nuts over the top layer.
- Step 5: Bake for 50 to 60 minutes, or until the pumpkin filling is set and the crisp topping is golden brown. Let cool slightly before serving, optionally with whipped cream or vanilla ice cream.
Notes
- Store leftovers, covered tightly, in the refrigerator for up to three days; the topping will soften slightly, but the deep pumpkin flavor often improves overnight.
- For the best crisp texture, ensure every bit of the dry cake mix is saturated with the melted butter; gently spread the butter over any remaining dry white powder before placing the dish in the oven.
- Elevate the flavor profile by serving slices warm with a dollop of homemade bourbon-caramel sauce or a light dusting of finely grated fresh nutmeg.
- To restore a freshly baked crunch, reheat individual refrigerated servings in a toaster oven or conventional oven set to 300°F (150°C) for about 5 to 8 minutes.
- Prep Time: 15 minutes
- Cook Time: 20 minutes
- Method: Stovetop
- Cuisine: American
FAQs
How do I prevent my Pumpkin Crisp topping from becoming soggy?
The secret to keeping your topping crunchy is two-fold: cold butter and even distribution. Ensure the butter is thoroughly chilled when mixing the crumble ingredients; this helps create larger, stable clumps that resist melting too quickly in the oven. Additionally, avoid pressing the topping down onto the pumpkin filling. Sprinkle it gently over the surface. If your filling is particularly liquid, you might also consider pre-baking the pumpkin base for 15 minutes before adding the topping, which ensures the moisture barrier is firm before the oats go on.
Can I prepare the Pumpkin Crisp ahead of time?
Absolutely! Preparing this delicious Pumpkin Crisp in advance saves significant stress, especially during busy holidays. You can prepare the pumpkin filling and the oat crumble topping separately. Store the pumpkin filling covered in the refrigerator for up to 24 hours. Keep the crumble topping in a sealed container in the fridge as well, ensuring the butter stays cold. When ready to bake, assemble the dish and add about 10 minutes to the total baking time since you are starting from a chilled state. Serving it warm is always the best approach.
What is the difference between a Pumpkin Crisp and a Pumpkin Crumble?
While the terms are often used interchangeably, traditionally, a crisp includes oats in the topping, which are essential for that signature “crisp” texture, especially after cooling. A crumble usually relies on flour, sugar, and butter, yielding a denser, more cake-like texture. Since this specific recipe utilizes hearty rolled oats, it falls definitively into the Pumpkin Crisp category. Regardless of the name, both variations offer a significantly easier and faster alternative to traditional pumpkin pie, delivering those spiced, cozy flavors we all crave in the autumn.
Is it possible to make a dairy-free Pumpkin Crisp?
Yes, crafting a delightful dairy-free version of this spiced dessert is quite simple with a few smart substitutions. Instead of traditional unsalted butter for the crisp topping, substitute high-quality plant-based butter sticks, ensuring they are kept cold. For the filling, swap out the evaporated milk or heavy cream with a creamy non-dairy alternative like canned full-fat coconut milk or oat milk. These substitutions maintain the rich mouthfeel and moisture necessary for the pumpkin base without sacrificing flavor or the satisfying crunch of the topping.

Leave a Comment