

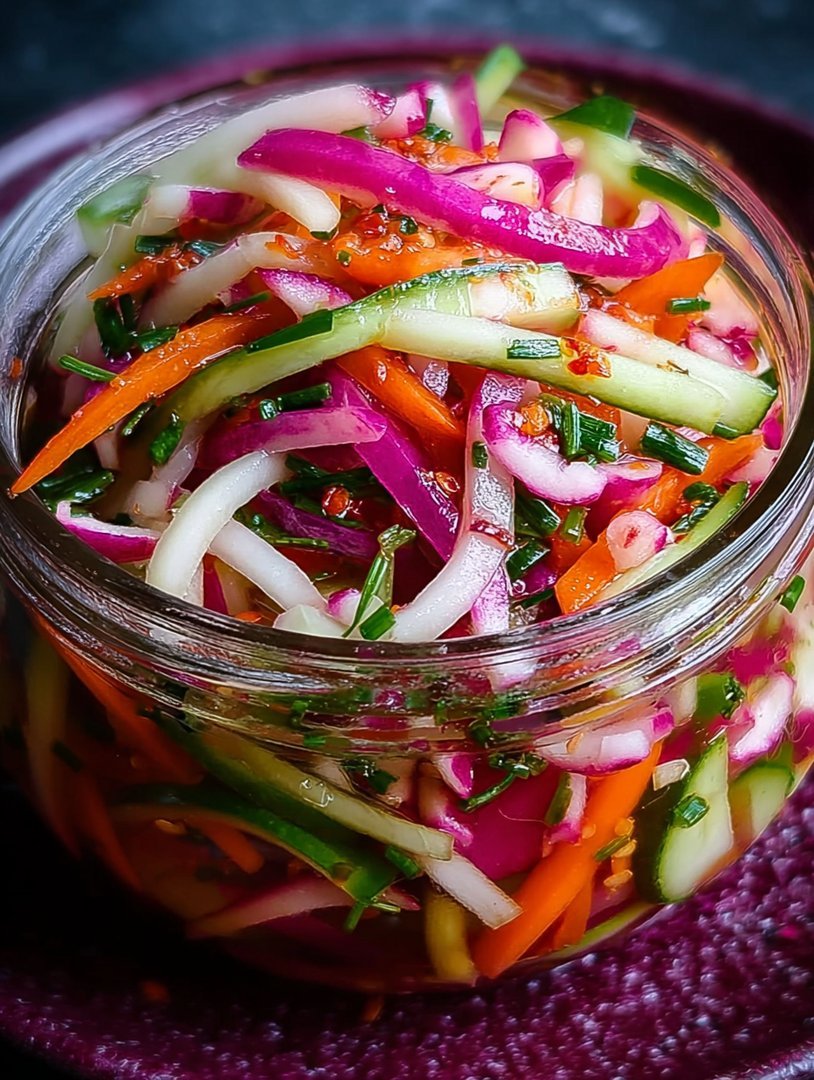
Are you tired of sad, mushy pickles? We need crunch, we need vibrancy, and frankly, we need speed. Say hello to the solution to all your bland sandwich woes: the gloriousQuick Pickled Radish Veggies.
These aren’t your grandma’s slow-fermented jars; this recipe delivers a bright, vinegary punch and stunning color, ready to upgrade tacos, salads, and everything in between in mere hours.
- Experience a perfect balance of sweet, sour, and spicy notes, transforming humble radishes into a zesty, addictive condiment.
- This speedy brine requires minimal chopping and zero sterilizing, making it the easiest way to preserve vibrant flavor instantly.
- The gorgeous magenta hue of the radishes provides an immediate pop of color, elevating even the simplest weeknight dinner presentation.
- Use these tangy slices to cut the richness of grilled meats, brighten up grain bowls, or add necessary crunch to pulled chicken sandwiches.
The Emergency Crunch Factor: Why We Need Quick Pickled Radish Veggies
Every home cook knows that sinking feeling. You’ve just spent forty-five minutes assembling the perfect pulled chicken sliders or a massive, satisfying grain bowl. The proteins are savory, the greens are fresh, but something is fundamentally missing. It’s flavor chaos. It’s textural boredom. What you need is acid, heat, and serious crunch, and you needed it, like, yesterday.
This is where the magic of refrigerator pickling saves the day. Traditional pickling is a beautiful, centuries-old art that involves patience, sterilization, and waiting—lots and lots of waiting. But honestly, who has time for existential fermentation when dinner is happening in an hour and a half? We lead fast-paced lives, and we demand fast-paced condiments. This recipe forQuick Pickled Radish Veggiesis specifically engineered for the modern cook who thrives on immediate gratification and bold flavor.
I stumbled upon the necessity for quick pickles when I accidentally made a batch of chili that tasted suspiciously like dirt. It was savory, yes, but it lacked that essential bright lift. I had a beautiful bouquet of radishes and carrots from the farmer’s market, and I thought, “What if I just drown them in hot vinegar and pray?” Miraculously, the prayer worked. The sharp, peppery bite of the radish, tamed only slightly by the sweet brine, became the perfect foil for the earthy chili. It was an instant flavor correction, a culinary defibrillator, and I haven’t looked back since. This quick pickling method pulls all the best qualities out of the radish and the carrot, leaving you with a snack or topping that keeps its integrity and signature crispness, making it indispensable for quick weekday meals or even fancy weekend spreads.
Mastering the Brine: Sweetness vs. Sourness
The secret to great quick pickles lies almost entirely in the brine ratio. You aren’t just splashing vinegar on things; you are creating a harmonious bath that cures the vegetables without rendering them floppy. If your brine is too vinegary, the radishes taste like a battery acid challenge. If it is too sweet, they become suspiciously dessert-like. We are aiming for a Goldilocks zone—just right.
Our goal is usually a 1:1 vinegar-to-water ratio, but we add a generous amount of sugar to soften the vinegar’s harsher edges. Don’t worry about the sugar making the finished product taste overtly sweet; it is necessary for chemical balance and structure. This delicate dance between the acidic and sweet components is what allows the radish’s natural peppery heat to shine through without being overwhelming. Furthermore, using hot brine speeds up the process significantly, slightly cooking the outside of the vegetables just enough to allow rapid flavor penetration while preserving the crucial internal crunch. If you’re feeling adventurous, you can slightly adjust the sugar down for a super sour pickle, or maybe add a few more red pepper flakes for an extra kick—but always stick to the base liquid ratios for the best structural results.
Ingredients for Quick Pickled Radish Veggies
Here’s what you’ll need to make this delicious dish:
- Radishes (The Star)Choose firm, brightly colored radishes, like the traditional red globe variety, ensuring they are free of soft spots for maximum crispness.
- Carrots (The Crunch Provider)Thinly julienned or sliced carrots add extra sweetness and texture, balancing the sharp bite of the radishes beautifully.
- Distilled White VinegarThis is the acidic backbone of the brine; use a 5% acidity variety for the classic tangy profile and clear color.
- Filtered WaterMix this with the vinegar to dilute the harshness and create the perfect base for dissolving the sugar and salt.
- Granulated SugarEssential for balancing the vinegar’s acidity and giving the brine depth; you can adjust the quantity slightly based on preference.
- Kosher Salt or Sea SaltUse a non-iodized salt, as the anti-caking agents in iodized salt can sometimes cloud the brine, affecting the final aesthetic.
- Garlic ClovesSlice a few fresh cloves, which infuse a subtle, savory warmth into the brine without overpowering the fresh vegetable flavor.
- Black Peppercorns and Bay LeafThese standard pickling aromatics provide a foundational layer of spice and earthy flavor complexity during the chilling process.
The full ingredients list, including measurements, is provided in the recipe card directly below.
How to Make Quick Pickled Radish Veggies
Follow these simple steps to prepare this delicious dish:
-
Step 1: Prep and Slice Your Veggies
-
Step 2: Prepare the Brine Solution
-
Step 3: Pour and Seal the Jar
-
Step 4: Cool and Chill for Flavor Fusion
Wash the radishes thoroughly and trim off both the tops and root ends. Use a mandoline or a very sharp knife to slice the radishes into thin, uniform rounds, aiming for about an eighth of an inch thickness. If using carrots, julienne them into matchsticks. Pack the sliced radishes and carrots tightly into a clean, heat-safe glass jar (a pint-sized jar works perfectly) along with the sliced garlic cloves and peppercorns.
In a medium nonreactive saucepan, combine the water, distilled white vinegar, sugar, and salt. Heat the mixture over medium heat, stirring constantly, until the sugar and salt are completely dissolved and the liquid is steaming but not vigorously boiling. This process only takes about three to five minutes, creating a powerful, crystal-clear pickling solution.
Carefully pour the hot brine directly over the vegetables in the jar, ensuring that the liquid fully submerges all the radishes and carrots. You may need to press the vegetables down gently to release any trapped air bubbles. Leave about half an inch of headspace at the top of the jar before securely sealing it with a tight-fitting lid.
Allow the jar to sit undisturbed on the counter for about 30 minutes to cool slightly to room temperature. Once cooled, transfer the jar to the refrigerator. TheseQuick Pickled Radish Veggiesneed at least two hours of chilling time to absorb the flavor, though they reach peak deliciousness after 24 hours. The radishes will turn a brighter, more beautiful magenta as they pickle.
These crunchy, tangy slices are fantastic piled high on barbecued shredded chicken tacos or served alongside rich, slow-cooked beef, providing necessary textural contrast.
Tips for Optimal Crunch and Long-Term Storage
Achieving that perfect, vibrant crunch is the main mission when making quick pickles. Nobody wants a soggy radish. The first key to maintaining crunch is the preparation: slicing the radishes uniformly ensures that they pickle evenly. If some pieces are too thick and others too thin, you’ll end up with a mix of perfectly crisp and disappointingly soft pieces. A mandoline slicer is truly your best friend here, delivering paper-thin perfection every time. If you do not have one, just take your time with a sharp chef’s knife and aim for consistency.
Temperature management is another important aspect. Pouring boiling hot brine over the vegetables helps expedite the pickling, but plunging the hot jar immediately into the refrigerator can cause the glass to crack. Always allow the jar to cool down on the counter first; 30 minutes is usually sufficient. Also, avoid reusing the brine multiple times. While technically possible, the brine degrades in flavor and potency with each batch of vegetables it cures, resulting in less flavorful pickles over time.
Storage and Serving Suggestions
Since this is a refrigerator pickle and not a traditional canning method, storage guidelines are crucial for safety and flavor retention. These quick-pickled vegetables should always be stored in the refrigerator, where they will maintain their optimal flavor and texture for up to three weeks. After three weeks, they might start losing their desirable crispness, but they will still be perfectly safe to eat.
The versatility of these quick pickles is truly astonishing. Their sharp, slightly sweet flavor profile cuts through rich, savory dishes like nothing else. Think beyond the classic sandwich topper! Try draining a few tablespoons of the brine and using it as a tangy element in vinaigrettes for salad dressings. The radishes themselves are phenomenal when served on top of huevos rancheros, folded into creamy tuna or chicken salads, or simply enjoyed straight from the jar as a refreshing, zesty snack. Next time you plan a charcuterie board, remember to include a small bowl of these vibrant slices; they look stunning and provide an essential flavor break among the cheeses and savory spreads.
If you find that you have pickled too many radishes, you can also finely mince them and blend them into mayonnaise to create a fantastic, bright pink aioli, perfect for serving alongside baked turkey burgers or roasted potatoes. This recipe transforms a sometimes-overlooked root vegetable into a centerpiece condiment that you will find yourself reaching for constantly.
The Accidental Discovery of Sunshine on a Plate
I stumbled upon this recipe during a chaotic kitchen clean-out, trying to save a massive pile of forgotten radishes. I combined a few basic pantry staples, and suddenly, I had a vibrant, crunchy side dish. This happy accident resulted in the glorious, zesty flavor ofQuick Pickled Radish Veggies.
The Humble Radish: From Garden Nuisance to Culinary Star
Let’s be honest, the radish often gets overlooked. It’s the silent observer in the salad bar, the spicy pink orb that occasionally surprises you when you least expect it. My personal journey with the radish began when I inherited a garden plot that seemed to exclusively grow three things: weeds, stubborn clay, and literally hundreds of magnificent, but deeply boring, radishes. I had so many, I started giving them away in grocery bags, much to the confused horror of my neighbors.
The solution wasn’t finding a hundred new salad recipes; the solution was pickling. Pickling, as any seasoned preserver knows, is less cooking and more magic. It transforms the mundane into the spectacular, especially when dealing with the crunchy root vegetables that are too often dismissed. I needed something fast, something that didn’t involve fermentation drama, and something that could handle a massive volume. Thus, the pursuit of the perfect quick pickle began.
Why Quick Pickling is Your Weeknight Hero
Traditional pickling is an art form involving time, sterilization rituals, and often, bubbling jars watched with parental anxiety. Quick pickling, however, is the rebellious teenager of the preservation world. You heat the brine, you dump the veggies, and you wait a few hours. That’s it. There’s no pressure, no fear of explosion, and the results are immediate gratification. For busy weeknights, or for those times when you realize you bought five pounds of radishes during a moment of market euphoria, quick pickling is the only answer.
This recipe specifically is designed for maximum flavor penetration in minimum time. We rely on high heat and high acidity to rapidly infuse the sliced vegetables. We are looking for that perfect balance—not mushy, not too soft, but still retaining a delightful, irresistible crunch that snaps back when you bite down. It is the texture that elevates theseQuick Pickled Radish Veggiesfrom a simple side dish to an obsession.
The Essential Ingredients for Bright Brine Bliss
You don’t need a pantry full of exotic spices for this masterpiece. The beauty lies in the simplicity of the brine components. The main flavor architect is white vinegar, balanced perfectly by sugar and salt. You can adjust the ratio to suit your palate—some prefer a sweeter pickle, others a sharper, more sour bite. I personally aim for the sweet and sour symphony that makes your tastebuds sing a tiny, high-pitched opera.
Gathering Your Crunch Crew
- The Radishes:Use globe radishes—the standard, vibrant red ones. Make sure they are washed thoroughly and trimmed of any greens or root ends.
- Carrots (The Supportive Co-Star):Carrots add color and a slightly sweeter dimension. Slice them into matchsticks to ensure they pickle at the same rate as the radishes.
- The Brine Base:A mixture of water, white distilled vinegar (or apple cider vinegar for a fruitier note), sugar, and fine sea salt.
- Optional Aromatics:Garlic cloves, mustard seeds, and perhaps a bay leaf. These are the supporting cast that adds depth without stealing the show.
The key to success is uniform cutting. If your vegetables are all different thicknesses, some will be crisp and wonderful while others will turn into sad, soggy specimens. Aim for thin, even slices—a mandoline slicer, if you have one, is your best friend here, but a steady hand and a sharp knife work just as well. This attention to detail dramatically improves the final texture of the pickles, ensuring a uniform bite throughout the batch.
The Speedy Symphony: Mixing and Waiting
The actual preparation time for this recipe is astonishingly short, clocking in around 15 minutes if you’re quick with the slicing. Once the veggies are cut and packed tightly into clean jars, you turn your attention to the brine. Bring the water, vinegar, sugar, and salt to a roaring boil, ensuring all the granular elements have dissolved completely. This liquid needs to be searingly hot when it meets the vegetables. If you are adding spices like mustard seeds or peppercorns, toss them directly into the brine while it heats.
Pour the hot brine directly over the packed vegetables. You will see a slight color change immediately as the radishes release some of their pigment into the liquid—that’s normal. Fill the jars right up to the brim, ensuring all the crunchy bits are submerged. Seal the jars loosely, allow them to cool to room temperature on the counter, and then transfer them to the refrigerator. While they are technically edible within an hour, patience, my friends, delivers a superior pickle. The magic truly happens overnight. The next day, you’ll have jars full of intensely flavored, brightly coloredQuick Pickled Radish Veggies, ready to elevate everything from tacos to sandwiches.
Perfecting the Cooking Process
For maximum crispness and efficiency, slice your vegetables thinly first using a mandoline or sharp knife. Next, prepare the hot brine immediately while the veggies are chilling. Pouring the piping hot liquid over the cold radishes ensures that delightful snap we all crave.
Add Your Touch
Feel free to experiment beyond just radishes and carrots. Swap sugar for agave or maple syrup for a different sweetness profile. Try adding a thumb of peeled, sliced ginger or a pinch of red pepper flakes if you prefer a fiery kick.
The Brine Balance: Adjusting Flavor Profiles
The brine is where you get to play mad scientist. If you find the initial batch too sweet, next time reduce the sugar by a teaspoon. If it tastes too vinegary, adjust the ratio of water to vinegar, perhaps using two parts water to one part vinegar instead of the standard 1:1 ratio. The key is finding your personal pickle equilibrium. Many people enjoy adding a few whole peppercorns or coriander seeds to introduce earthy, complex notes that deepen the flavor beyond just the sharp tang of the vinegar.
Another fantastic twist involves incorporating citrus peels. A few strips of lemon zest added to the boiling brine can lift the overall acidity and provide a fresh, aromatic finish that pairs wonderfully with the heat of the radish. Remember, the goal is flavor, so trust your instincts and tailor the spice and sweetness level to what makes you happiest.
Storing & Reheating
Store these pickles in an airtight glass jar in the refrigerator. They are best after about 24 hours but are edible almost immediately! They keep beautifully for up to three weeks. Note that pickling doesn’t require reheating, but keep them chilled for maximum enjoyment.
Chef’s Insider Tips for Perfect Pickles
- Always use the freshest radishes you can find; slightly wilted vegetables will absorb the brine unevenly and result in a less satisfying crunch.
- Ensure your brine boils vigorously for a full minute before pouring it over the vegetables, guaranteeing proper salt and sugar dissolution and maximum heat.
- Never use iodized salt in pickling, as it can make the brine cloudy and occasionally alters the flavor profile; stick to fine sea salt or kosher salt.
I served these once at a backyard barbecue, and my brother-in-law, who claimed to hate all things pickled, ate half a jar and then asked for the recipe. True story.
Conclusion for Quick Pickled Radish Veggies
We have successfully transformed the humble radish into a bright, tangy condiment that adds sunshine to any meal. This method of creatingQuick Pickled Radish Veggiesis efficient, easy, and requires minimal kitchen effort, making it ideal for the home cook dealing with a radish surplus. Remember the core principles: thin, uniform slices, a boiling hot brine, and the patience to wait until the next day for peak flavor performance. Whether you use them on sandwiches, stir-fries, or just snack straight from the jar, these pickles guarantee a delightful, sharp, and crunchy experience every time. Say goodbye to boring root vegetables and hello to your new favorite homemade pickle!
Print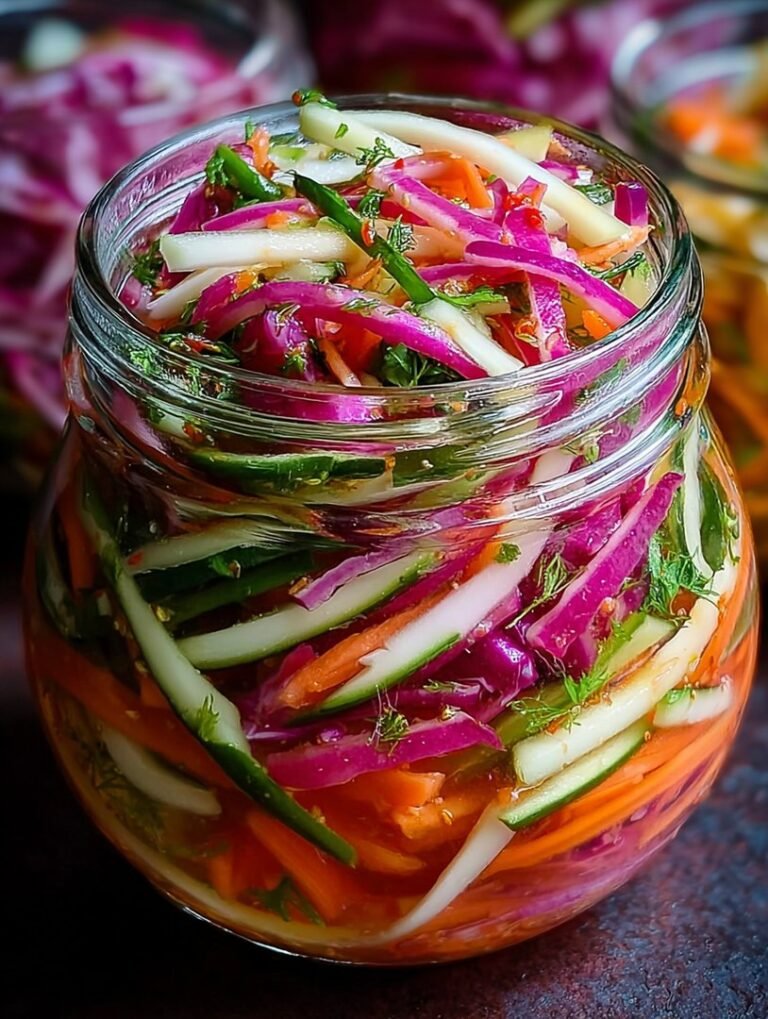
Quick Pickled Radish Veggies
Get perfectly tangy radishes without the wait! This recipe features a warm sweet-and-sour brine that transforms sliced radishes into an addictive topping.
- Total Time: 35 minutes
- Yield: 4 servings
Ingredients
- Radishes (1 large bunch, ends trimmed and thinly sliced)
- White Vinegar (1 cup)
- Water (1 cup)
- Granulated Sugar (2 tablespoons)
- Kosher Salt (1 teaspoon)
- Garlic (2 cloves, thinly sliced)
- Black Peppercorns (1/2 teaspoon)
Instructions
- Step 1: Thinly slice the radishes and pack them tightly into a clean pint-sized glass jar. Tuck the sliced garlic and black peppercorns in between the radish slices.
- Step 2: In a small saucepan, combine the water, white vinegar, granulated sugar, and kosher salt. Heat the mixture over medium heat, stirring constantly until the sugar and salt are fully dissolved (do not bring to a rapid boil).
- Step 3: Carefully pour the hot brine mixture over the radishes in the jar, ensuring the liquid completely submerges all the vegetables. Tap the jar gently on the counter to release any trapped air bubbles.
- Step 4: Leave the jar uncovered on the counter to cool completely to room temperature (this usually takes about 30-45 minutes).
- Step 5: Once cooled, seal the jar tightly with a lid and place it in the refrigerator. The pickled radishes are ready to enjoy after chilling for at least one hour, but the flavor is best after 24 hours.
Notes
- For maximum crunch and flavor, keep these radishes sealed in the brine and refrigerated; they will stay fresh and crisp for up to three weeks.
- Skip the heat! If you plan to use these pickles in a hot dish (like tacos or grilled cheese), drain them first, as heating them directly will soften the texture and dull the vibrant pink color.
- Elevate your next sandwich, burger, or shredded beef plate by piling these crunchy, tangy radishes right on top for a necessary acidic burst.
- If your brine level looks low after pouring, gently press down on the radishes with a clean utensil to ensure every slice is fully submerged beneath the liquid for proper preservation and pickling.
- Prep Time: 15 minutes
- Cook Time: 20 minutes
- Method: Stovetop
- Cuisine: American


Leave a Comment