

Summer just isn’t complete without a bowl of something ridiculously cold, creamy, and studded with bits of pure joy. I found that joy tucked away in this unbelievably frozen dessert, a flavor that manages to be simultaneously refreshing and deeply comforting.
Forget the store-bought tubs; making your ownRaspberry Chocolate Chunk Ice Creamis a non-negotiable summer requirement, and the reward is absolutely worth the (minimal) churning effort required for this magnificent treat.
The Culinary Saga of the Perfect Frozen Treat
I’m convinced that ice cream should count as a primary food group. Specifically, this specific ice cream. My history with frozen desserts is less a history and more a series of dramatic attempts to recreate the Platonic ideal of creaminess. For years, I struggled. My frozen experiments often ended up resembling sweetened freezer burn or tasting suspiciously like the leftover aluminum foil in the bottom drawer.
The turning point arrived during a heatwave so aggressive it convinced me that my kitchen counter was actively melting. I needed a fix that screamed “sophisticated summer party” but whispered “I made this while wearing pajamas.” I knew the combination had to be berries and dark chocolate. But not just chips; we needed chunks—serious, structural chunks that require a sturdy spoon to excavate. The sweetness of the cream base had to be counterbalanced by a tart, vibrant raspberry swirl, ensuring every spoonful was a delightful flavor skirmish between rich and bright.
The beauty of this recipe is that it ditches the often-fussy traditional custard base, which requires careful tempering of eggs. We are using a simpler, no-cook approach that achieves maximum creaminess with minimal effort. Think of this as the dessert recipe for people who believe patience is highly overrated, especially when chocolate is involved. When you bite into this velvety base, studded with sharp berries and luxurious chocolate, you’ll understand why I abandoned my post-dinner duties to guard the churner.
Why This Raspberry Chocolate Chunk Ice Cream Recipe Is Your New Obsession
- This base requires no tempering of eggs, making the prep time short and the process foolproof for novice ice cream makers trying a new recipe.
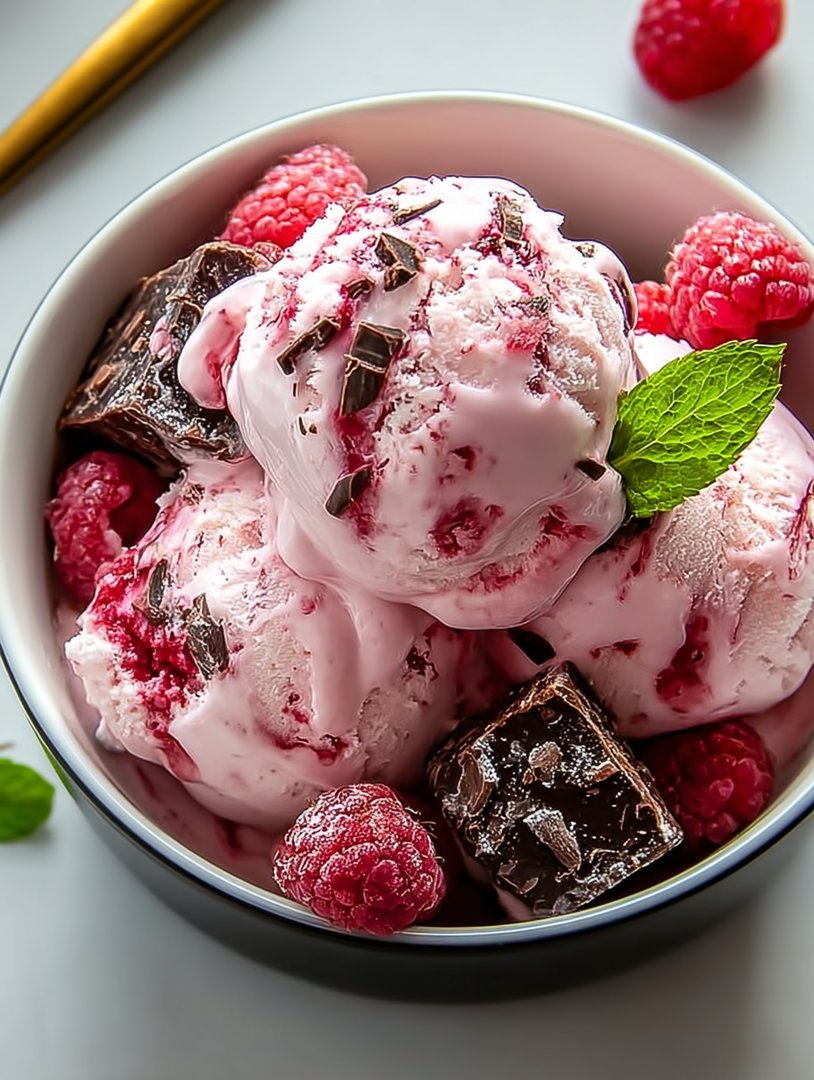
- The tartness of fresh berries cuts beautifully through the rich, dark chocolate chunks and the sweet, velvety cream base, achieving perfect balance.
- Watch the deep magenta swirls of raspberry ripple through the pale pink cream, creating a stunning visual feast that looks incredibly professional before serving.
- Perfect for cones, sandwiched between cookies, or served alongside a warm brownie for the ultimate contrasting dessert experience on a hot afternoon.
Ingredients for Raspberry Chocolate Chunk Ice Cream
Here’s what you’ll need to make this delicious dish:
- Heavy CreamUse high-quality heavy cream, preferably with a high-fat content, as this is essential for achieving a rich, luxurious texture.
- Whole MilkWhole milk adds volume and helps stabilize the cream base, preventing it from freezing into an icy structure.
- Granulated SugarThis sweetens the base and, crucially, lowers the freezing point, which contributes significantly to the final creamy consistency.
- Vanilla PowderOpt for pure vanilla powder to deepen the overall flavor profile of the ice cream base.
- Fresh or Frozen RaspberriesIf using frozen berries, there is no need to thaw them before cooking them down for the vibrant ripple component.
- Lemon JuiceA splash of fresh lemon juice brightens the raspberry flavor and helps balance the sugar in the berry puree.
- Dark ChocolateUse a high-quality dark chocolate bar (70% cocoa or higher) and chop it roughly into satisfying, uneven chunks.
The full ingredients list, including measurements, is provided in the recipe card directly below.
How to Make Raspberry Chocolate Chunk Ice Cream
Follow these simple steps to prepare this delicious dish:
-
Prepare the Raspberry Ripple
Combine the raspberries, 1/4 cup of sugar, and the lemon juice in a small saucepan over medium heat. Simmer gently for about 10 minutes, stirring occasionally, until the berries break down and the mixture thickens slightly. Remove from the heat and push the mixture through a fine-mesh sieve to remove the seeds, yielding a smooth, vibrant raspberry puree. Allow the ripple to cool completely in the refrigerator.
-
Mix the Ice Cream Base
In a large bowl, whisk together the heavy cream, whole milk, the remaining granulated sugar, and the vanilla powder until the sugar is fully dissolved. You should not feel any grit when you rub a small amount of the mixture between your fingers. This step is critical; ensuring the sugar dissolves guarantees a smooth texture.
-
Chill the Base Thoroughly
Cover the cream mixture and place it in the refrigerator. Chill the base for a minimum of 4 hours, or ideally, overnight. A very cold base churns faster and results in a significantly creamier final product. At this time, also place your ice cream maker bowl in the freezer if it isn’t already there.
-
Churn the Ice Cream
Pour the thoroughly chilled base into your ice cream machine and churn according to the manufacturer’s instructions. This usually takes between 20 to 30 minutes, resulting in a soft-serve consistency. While the mixture is churning, chop the dark chocolate into satisfying, random chunks.
-
Layer the Chunks and Ripple
Once the ice cream is churned, gently spoon half of it into a freezer-safe container. Drizzle half of the cooled raspberry ripple over the top, swirling it lightly with a knife—do not overmix. Layer the rest of the ice cream, followed by the remaining ripple and all the dark chocolate chunks. Swirl minimally.
-
Harden and Serve
Cover the container tightly with plastic wrap pressed directly onto the surface of the ice cream to prevent ice crystal formation, then seal with a lid. Place the container in the deepest part of the freezer for at least 6 to 8 hours to allow the ice cream to fully harden. Transfer to plates and prepare to enjoy the perfect combination of fruity tartness and deep chocolate richness.
Mastering the Perfect Ice Cream Texture
Achieving that dense, scoopable texture—the hallmark of great homemade ice cream—requires paying close attention to a few crucial details that often separate good ice cream from extraordinary ice cream. One of the most common mistakes is not chilling the base long enough. If the base goes into the churner warm, the mixture immediately starts forming ice crystals, leading to a grainy or icy texture. Always plan ahead and ensure the base is bone-chillingly cold before it meets the churner. A temperature below 40°F (4°C) is mandatory for success.
Secrets to a Smooth and Creamy Base
To avoid icy disappointments, you need to manage the ratio of fats to solids. Using whole milk alongside heavy cream boosts the fat content, resulting in smaller, more dispersed ice crystals. Additionally, consider adding a tablespoon of neutral-flavored syrup, such as corn syrup or brown rice syrup, to the base mixture. These syrups contain inverted sugars that disrupt crystal formation, ensuring the final product stays soft and pliable even after a night in the deep freeze. Remember to use high-quality ingredients; the flavor of your cream and vanilla will shine through brightly in this simple recipe.
Flavor Variations: Beyond the Classic Raspberry
Once you master this frozen dessert base, the possibilities become endless. Instead of raspberries, try substituting strawberries or blackberries for a different berry experience; adjust the sugar slightly depending on the sweetness of the fruit. For a richer, more complex flavor profile, you could substitute the dark chocolate chunks with milk chocolate or even white chocolate. A splash of rosewater added to the raspberry puree before cooling can introduce a subtle floral complexity that elevates the dish to gourmet status. Another excellent variation involves adding toasted chopped pistachios alongside the chocolate chunks for a nutty crunch.
If you prefer a highly intense raspberry flavor, consider using freeze-dried raspberry powder mixed directly into the base before churning. This technique provides a concentrated, tart fruit flavor without introducing extra liquid, maintaining the structure of the frozen treat perfectly. Just ensure you mix the powder until it is fully incorporated before chilling the mixture.
Troubleshooting and FAQs
Making homemade frozen desserts can sometimes present small challenges, but most issues are easy to solve with a bit of knowledge. From overly icy results to improper churning, here are the answers to the most frequently asked questions about this recipe.
Why is my ice cream icy instead of creamy?
Icy texture usually stems from two main issues: either the base was not chilled sufficiently before churning, or the mixture has too much water relative to fat and sugar. Ensure you chill the base for at least 6 hours, and do not reduce the fat content by substituting whole milk with skim milk. High sugar content also helps prevent ice crystallization.
Do I have to strain the raspberry seeds out?
While you certainly do not have to strain the raspberry puree, doing so results in a much smoother, more luxurious texture for the ripple. If you prefer a rustic style, you can skip the sieve, but be prepared for a noticeable crunch from the tiny seeds in your final scoop.
How should I store leftover ice cream?
Store your frozen treat in an airtight, narrow container designed specifically for the freezer. A narrow container minimizes the surface area exposed to air, which is what causes freezer burn. For the best quality, try to consume the homemade dessert within two weeks of preparation.
Can I make this recipe without an ice cream maker?
Yes, while the machine yields the best results, you can use the freezer-stir method. Pour the chilled base into a shallow metal pan. Freeze for 45 minutes, then scrape the frozen edges into the center and vigorously whisk the mixture. Repeat this process every 30 minutes for 3 to 4 hours until the mixture achieves the desired thick, creamy consistency before adding the chunks and ripple.
The Case of the Missing Summer Snack
There are few things in this world as frustrating as reaching into the freezer, full of hope, only to find a sad, icy block that vaguely resembles ice cream. I’ve been there. I once accidentally served what I thought was artisanal vanilla bean, but was actually frozen, week-old Greek yogurt. The silence at the dinner table was deafening. That catastrophic failure led me on a quest: a journey to create the ultimate, perfectly smooth, utterly decadent frozen treat that banished freezer burn forever.
I needed something bold, something that screamed summer, but whispered elegance. Enter the dynamic duo: raspberries and dark chocolate. This isn’t just plain fruit and candy mixed together; this is a carefully calibrated masterpiece of tart and sweet, yielding the most luxuriousRaspberry Chocolate Chunk Ice Creamyou will ever taste. Forget those boring store-bought tubs; we are achieving true frozen nirvana today. Trust me, once you master this recipe, your freezer will never again hold a block of disappointment.
Why Raspberry and Chocolate Are a Match Made in Heaven
The beauty of this flavor combination lies in the contrast. Raspberries bring that necessary, bright acidity that cuts through the richness of a proper ice cream base. If you use milk chocolate, the result can be too cloying. If you use white chocolate, the flavor profile becomes muted. We need the deep, slightly bitter notes of high-quality dark chocolate chunks—not chips, but big, glorious chunks—to stand up to the vibrant crimson swirl.
When developing this recipe, I experimented with countless stabilizers, from cornstarch sludges to various gums. I finally settled on a combination that yields maximum creaminess without requiring an elaborate custard base, keeping things straightforward. The secret is maximizing the fat content and ensuring a super-slow churn. This method guarantees that beautiful, scoopable texture, ensuring that your chocolate raspberry frozen dessert stays velvety smooth, even after a week in the deep freeze. Plus, the sight of those ruby red ribbons twisting around the dark chocolate pieces is just irresistible.
Ingredients for Your Creamy Dream
Gathering the right ingredients is half the battle. Quality matters immensely when dealing with such simple flavors. Opt for fresh raspberries if they are in season, but high-quality frozen ones work perfectly too, especially for the purée.
For the Raspberry Swirl Base:
- 2 cups fresh or frozen raspberries
- 1/2 cup granulated sugar
- 1 tablespoon fresh lemon juice (essential for brightness!)
- 1/4 teaspoon agar-agar powder (our secret weapon for structure)
For the Ice Cream Base:
- 2 cups heavy cream (full fat, please—this is not the time for dieting)
- 1 cup whole milk
- 3/4 cup granulated sugar
- 1 teaspoon pure vanilla powder
- Pinch of fine sea salt
- 5 ounces high-quality dark chocolate (70% cacao minimum), roughly chopped into chunks
Step-by-Step Guide to Frozen Nirvana
Making the Intense Raspberry Swirl
We start by creating the raspberry component first, as it needs ample time to chill and thicken. Combine the raspberries, 1/2 cup of sugar, and lemon juice in a medium saucepan. Heat this mixture over medium heat, stirring occasionally, until the berries break down and the sugar dissolves. This should take about 8 to 10 minutes. Once the mixture is bubbling, strain it through a fine-mesh sieve into a bowl, pressing down firmly on the solids to extract all the liquid essence. Discard the seeds and solids.
Return the smooth raspberry purée to the saucepan. In a tiny bowl, whisk the agar-agar powder with 2 tablespoons of cold water until smooth. Pour this slurry into the simmering purée, whisking constantly for 60 seconds. Simmer gently for two more minutes, then remove from the heat. Transfer the purée to a shallow container, cover, and chill in the refrigerator until completely cold and slightly thickened—at least 4 hours, but preferably overnight. This concentration of flavor is critical for the final deliciousness of theRaspberry Chocolate Chunk Ice Cream.
Preparing and Churning the Cream Base
While the raspberry element chills, prepare the creamy base. In a large bowl, whisk together the heavy cream, whole milk, the remaining 3/4 cup of sugar, vanilla powder, and sea salt until the sugar is fully dissolved. You don’t need to whip it, just ensure a smooth liquid mixture. Cover this base and chill it thoroughly alongside the raspberry purée. If you try to churn warm ingredients, you will end up with an icy disaster, which is why patience is the most important ingredient here.
Once both components are fully chilled (the colder, the better!), pour the cream base into your ice cream maker bowl and churn according to the manufacturer’s directions. This usually takes between 20 and 30 minutes. The mixture should thicken to the consistency of soft-serve ice cream.
The Chunk and Swirl Finale
Just before the ice cream finishes churning, or right as you transfer it, gently fold in the dark chocolate chunks. We want big pieces here, offering a satisfying snap of bitterness against the sweet cream. Transfer half of the churned ice cream base into a freezer-safe container. Drizzle half of the chilled raspberry purée over the top. Use a spoon or butter knife to lightly swirl the purée into the ice cream—don’t overdo it! We are aiming for dramatic ribbons, not uniform pink.
Repeat the layers with the remaining ice cream and raspberry purée. Cover the container tightly with plastic wrap pressed directly onto the surface of the ice cream to minimize crystal formation, then seal with a lid. Place the container in the coldest part of your freezer for a minimum of 6 hours, or until fully firm. Allowing it to harden properly is crucial for achieving that professional, decadent texture. Serving this fantastic chocolate raspberry frozen dessert is the ultimate reward for your patience.
Expert Tips for the Smoothest Scoop
I remember the first time I made homemade ice cream; it was gritty and sad. Now, after years of trial and error, I have refined my technique. These three pointers will ensure your batch ofRaspberry Chocolate Chunk Ice Creamis absolutely perfect.
- Always ensure your ice cream machine bowl is frozen solid for at least 24 hours before churning; this guarantees the fastest freezing process possible.
- Don’t skimp on the salt; a small pinch enhances the chocolate and berry flavors dramatically, preventing the final product from tasting flat.
- Chill your base ingredients for a minimum of four hours, ideally overnight; extreme cold is the secret to preventing the formation of large ice crystals.
My partner once tasted a batch I was testing and declared it better than the pricey artisan tub we usually buy. That was the moment I knew I had nailed the balance of sweet cream and sharp berry complexity.
Perfecting the Cooking Process
The sequence for maximum efficiency involves first preparing and chilling the raspberry purée, thickening it with agar-agar for stability. While the purée sets in the refrigerator, mix and chill the cream base, ensuring both components are deeply cold before churning begins.
Add Your Touch
For customization, try adding a tablespoon of balsamic vinegar to the raspberry purée before thickening for an extra depth of flavor. Alternatively, swap out the chocolate for caramelized pecans or sprinkle in some white chocolate shavings for a different dimension.
Storing & Reheating
Store this luxurious chocolate raspberry frozen dessert in an airtight container with plastic wrap pressed against the surface to prevent freezer burn. For the best scoopability, let it temper on the counter for 5 to 10 minutes before serving; never reheat.
Addressing Common Ice Cream Concerns
Making homemade frozen treats can sometimes lead to unexpected questions. We address the most frequent queries to ensure your success in creating the perfectRaspberry Chocolate Chunk Ice Cream.
Can I use frozen raspberries instead of fresh ones?
Absolutely! Frozen raspberries work wonderfully for the purée. Since you are heating and straining them anyway, the texture difference is negligible, and they often offer better color saturation than off-season fresh berries.
What is agar-agar and why is it necessary?
Agar-agar is a plant-based gelling agent derived from seaweed. In this recipe, we use it minimally to stabilize the raspberry purée, preventing the fruit liquid from separating or becoming icy when mixed into the cold cream base.
My ice cream is too hard. How do I fix the texture?
If your ice cream is rock-hard, it usually means there is too much water content or it wasn’t churned cold enough. Ensure you use heavy cream and whole milk for high fat content, which interferes with ice crystal growth, guaranteeing a smoother scoop.
How long will this homemade frozen dessert last in the freezer?
When stored properly in a sealed container, this homemade chocolate raspberry frozen dessert will maintain its excellent quality for up to two weeks. After that, the texture might degrade slightly, though the flavor remains delicious.
Can I make this recipe without an ice cream maker?
While an ice cream maker provides the best texture, you can use the “no-churn” method. Freeze the base in a shallow pan and whisk it vigorously every 30 minutes for the first three hours to incorporate air and break up crystals. Fold the raspberry swirl in during the last whisking session.
The joy of making your own frozen treats is unparalleled, especially when the result is this stunning. This particular combination of dark chocolate and bright raspberry is a showstopper, sophisticated enough for a dinner party yet simple enough for a Tuesday night craving. Go forth, embrace the chill, and banish boring desserts from your life forever. Enjoy every single creamy, chunky scoop of your homemadeRaspberry Chocolate Chunk Ice Cream.
Conclusion for Raspberry Chocolate Chunk Ice Cream
We have successfully navigated the creamy currents and achieved frozen perfection! Making homemade ice cream is truly a labor of love, but the reward is undeniable. This specific recipe for Raspberry Chocolate Chunk Ice Cream combines the bright, tart acidity of ripe raspberries with the decadent, slightly bitter notes of dark chocolate. Remember the three key steps: ensuring a proper, extended chilling of the base, using quality, rough-cut chocolate chunks, and minimizing air exposure during long-term storage. Scoop up a generous batch of this vibrant, intensely flavored treat. Forget those expensive store-bought pints—this homemade frozen dessert is the ultimate summer indulgence that will vanish instantly from your freezer and secure your status as a dessert legend.
Print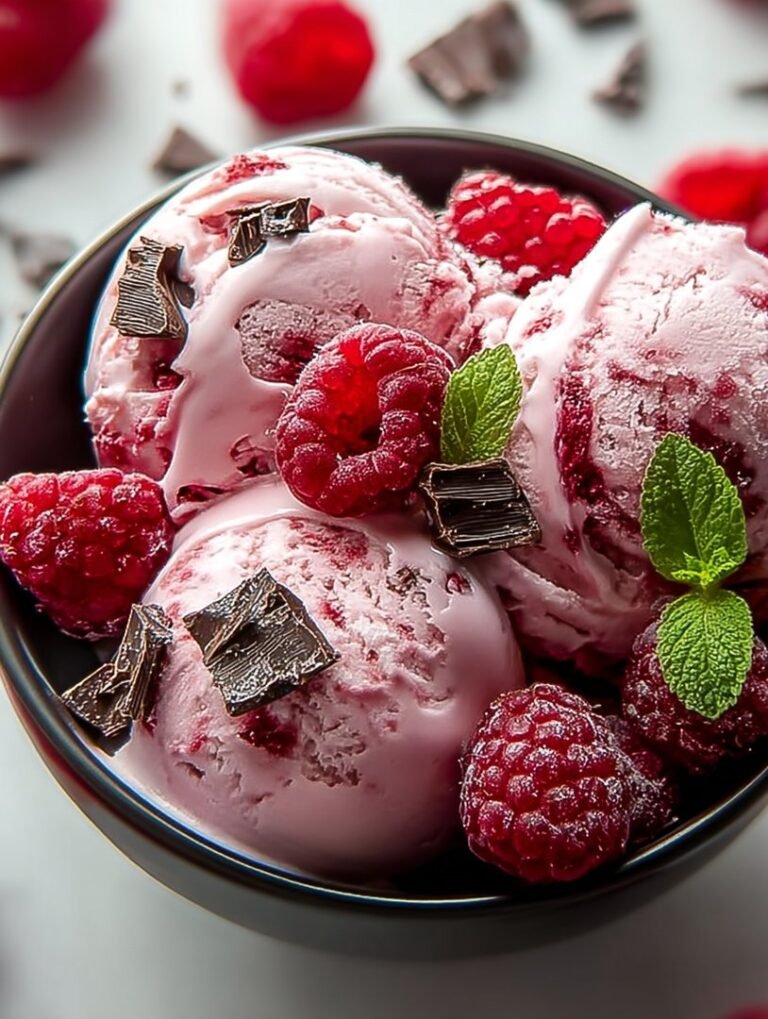
Raspberry Chocolate Chunk Ice Cream
Experience the perfect sweet-tart balance! Our Raspberry Chocolate Chunk Ice Cream features a simple whisked base and luscious mashed berries, leaving some pieces whole for texture.
- Total Time: 35 minutes
- Yield: 4 servings
Ingredients
- Heavy cream: 2 cups
- Whole milk: 1 cup
- Granulated sugar: 3/4 cup
- Fresh or frozen raspberries: 1 1/2 cups
- Dark chocolate (chopped into chunks): 4 ounces
- vanilla powder: 1 teaspoon
- Fine sea salt: 1/4 teaspoon
Instructions
- Step 1: Combine the heavy cream, whole milk, granulated sugar, vanilla powder, and salt in a large bowl. Whisk vigorously until the sugar is fully dissolved and the mixture is smooth.
- Step 2: Gently mash 1 cup of the raspberries in a separate small bowl with a fork, leaving some whole fruit, to create a slightly chunky sauce. Stir the mashed raspberries and any accumulated juice into the cream base.
- Step 3: Cover the ice cream mixture tightly and refrigerate for at least 4 hours, or preferably overnight, until thoroughly chilled. This is essential for proper churning.
- Step 4: Pour the chilled mixture into your ice cream maker and churn according to the manufacturer's directions (usually 20–25 minutes) until the ice cream is thick and resembles soft-serve consistency.
- Step 5: During the last 5 minutes of churning, or immediately after churning, gently fold in the remaining 1/2 cup of whole raspberries and the chopped chocolate chunks.
- Step 6: Transfer the finished soft ice cream into an airtight freezer-safe container and freeze for an additional 2–4 hours to allow the ice cream to harden completely before serving.
Notes
- For the best texture, press a piece of parchment paper directly onto the surface of the frozen ice cream before sealing the lid; this simple step prevents ice crystals from forming during long-term storage.
- If the ice cream is too hard immediately from the deep freeze, allow it to rest on the counter for 5 to 10 minutes before scooping; this brief temper allows the fats to soften for perfect texture.
- For a brighter, more intense raspberry flavor, macerate the 1 cup of mashed berries with one tablespoon of the sugar for 30 minutes before stirring it into the cream base.
- Try serving a scoop alongside a warm brownie or drizzled with a high-quality dark chocolate ganache to enhance the richness of the chocolate chunks.
- Prep Time: 15 minutes
- Cook Time: 20 minutes
- Method: Stovetop
- Cuisine: American
FAQs
How do I achieve the perfectly smooth texture in homemade ice cream?
The secret to a velvety smooth dessert, especially when making a batch of homemade berry ice cream, lies in the dairy ratio and the churning speed. Use full-fat milk and cream, and ensure you chill the base thoroughly—ideally for 12 to 24 hours—before churning. When adding the raspberry component, slightly mash the berries but leave some whole. Over-blending the raspberries can introduce too much water, which leads to icy crystals rather than the creamy consistency everyone expects from a top-tier frozen dessert. This careful balance guarantees a restaurant-quality mouthfeel in every bite.
Can I use chocolate chips instead of chunks when preparing Raspberry Chocolate Chunk Ice Cream?
While chocolate chips will certainly work, we highly recommend using true chocolate chunks, or even roughly chopping a high-quality dark chocolate bar. Chunks offer superior texture and prevent the chocolate from seizing up or becoming too brittle when frozen. Chips often contain stabilizers that keep their shape, which sometimes results in a slightly waxy mouthfeel at extremely cold temperatures. Using irregular, large chunks ensures you get those delightful, massive pockets of rich chocolate in every spoonful of your amazing Raspberry Chocolate Chunk Ice Cream, providing a much richer textural contrast.
Should I strain the raspberry puree to remove the seeds?
Removing the seeds is entirely a matter of personal preference, but many people find the tiny, gritty seeds disruptive to the smooth mouthfeel of ice cream. If you prefer an ultra-smooth base, strain about half of your pureed raspberries through a fine-mesh sieve before mixing them into the custard base. If you enjoy a rustic texture and the slight crunch the seeds provide, feel free to skip the straining step! If you choose not to strain, ensure you only slightly crush the berries to infuse the flavor without making the mixture too watery before beginning the churning process. This allows for maximum flavor with minimal icy consequences.
What is the best way to store my leftover Raspberry Chocolate Chunk Ice Cream to keep it soft?
Proper storage is crucial to preventing dreaded freezer burn and maintaining that luxurious scoopability. Transfer your freshly churned frozen dessert immediately to an airtight container. Press a piece of parchment paper or plastic wrap directly onto the surface of the ice cream before sealing the lid. This essential step prevents air contact, which causes flavor deterioration and ice crystals to form. For best results, allow the container to ‘ripen’ in the coldest part of the freezer for at least four hours. If the Raspberry Chocolate Chunk Ice Cream becomes rock-hard after a few days, simply let it sit on the counter for five minutes before attempting to scoop it.
Leave a Comment