

The moment that rich, cocoa-infused aroma hits your kitchen, you know magic is happening. We are ditching the dreary beige desserts today for something flamboyant, something that screams “celebration.” Get ready for the ultimate bake sale showstopper: the magnificentRed Velvet Blossom Cookies. These cookies are the theatrical performers of the dessert world, arriving in a striking crimson coat and delivering a perfect balance of moist chewiness and sweet, creamy surprise. They are surprisingly simple to execute, turning even the most novice baker into a confectionery rock star.
- Experience the rich, subtle chocolate base combined with a slight tanginess that defines classic red velvet flavor.
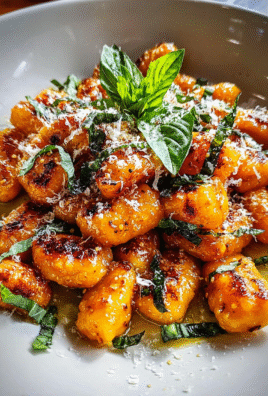
- The stunning visual contrast of deep ruby dough and a bright white confectioner’s sugar coating elevates these cookies instantly.
- Preparation is remarkably straightforward, requiring standard pantry staples and less than thirty minutes of active baking time.
- Perfect for holiday gatherings, impromptu celebrations, or simply indulging in a dramatic, delightful afternoon treat.
The Legend of the Crimson Cocoa Craving
You know that moment when you open the pantry and stare blankly at the flour, feeling an intense, almost primal need for drama in your dessert life? That was me last Tuesday. I had promised my neighbor, Brenda (a woman who takes her afternoon tea ritual more seriously than some heads of state), a small, comforting baked good. Comforting, however, is a synonym for ‘boring’ in my baking dictionary. I needed audacity. I needed velvet.
I distinctly remember the initial attempt at these crimson treats. I was trying to replicate a famous bakery’s version, but theirs looked like they were styled by a professional pastry architect, while mine looked like something a particularly frustrated toddler had pressed down with their fist. My first batch was technically red, but they spread so aggressively they fused into one giant, terrifying cookie continent. It was delicious, yes, but aesthetically, it was the definition of chaos. Brenda looked concerned when I presented the ‘Cookie Plateu of Doom,’ but she politely requested the recipe anyway, proving that even kitchen mishaps can inspire.
Mastering the Signature Red Velvet Hue
The secret to achieving that deep, luscious color without resorting to neon pink (a common rookie mistake) lies in the relationship between the cocoa and the coloring agent. Red velvet isn’t just vanilla with red dye; it’s a subtle dance where the slight acidity of the buttermilk reacts beautifully with the low amount of cocoa powder, enhancing the redness. I spent weeks testing various food colorings. Gel paste? Too thick. Liquid drops? Too diluted. Finally, I discovered the perfect balance: a high-quality gel paste that gives you saturation without adding unnecessary moisture to the dough. Think of it as painting a masterpiece; you need the right pigments. If your kitchen looks like a crime scene afterward, congratulations, you’ve done it correctly. Just remember to wipe down the counters before guests arrive, unless you enjoy explaining your methods with dramatic flair.
TheseRed Velvet Blossom Cookiesrequire attention to the chilling process. This isn’t a suggestion; it’s mandatory. If you skip the chilling, your beautiful spheres will melt into sad, flat puddles, ruining the dramatic contrast of the final cookie. Think of the chilling time as mandatory beauty sleep for the dough—it needs to firm up and regain its composure before facing the heat of the oven. This small, crucial step ensures you get that thick, chewy center and those gorgeously crinkled edges that make these cookies irresistible.
Ingredients for Red Velvet Blossom Cookies
Here’s what you’ll need to make this delicious dish:
- All-Purpose FlourThe foundation of our cookie structure; ensure it is properly measured, preferably using the spoon-and-level technique, for the best results.
- Unsweetened Cocoa PowderEssential for that characteristic red velvet flavor; use natural cocoa powder, not Dutch-processed, as the acid balance is important for the color reaction.
- Baking Soda and SaltThe necessary leavening agent and flavor enhancer; these work together to give the cookies their ideal lift and texture.
- Unsalted ButterNeeds to be softened perfectly, allowing it to cream smoothly with the sugar to incorporate necessary air into the cookie dough.
- Granulated Sugar and Brown SugarThe blend provides both sweetness and moisture; the brown sugar contributes to the wonderfully soft and chewy texture.
- Large EggsServe as the binder for the dough; make sure they are at room temperature so they incorporate evenly without curdling the creamed mixture.
- Vanilla Bean PasteEnhances the overall flavor profile; always use a high-quality pure vanilla bean paste for the best aromatic results.
- ButtermilkProvides the necessary acid and richness; if you don’t have buttermilk, you can substitute it with milk mixed with a teaspoon of white vinegar or lemon juice.
- Red Gel Food ColoringCrucial for achieving the deep red hue; use a high-concentration gel paste rather than liquid coloring to minimize extra moisture.
- Cream Cheese Frosting or KissesThe crowning glory for the center of the blossom; ensure they are unwrapped and ready to press into the hot cookies immediately after baking.
The full ingredients list, including measurements, is provided in the recipe card directly below.
How to Make Red Velvet Blossom Cookies
Follow these simple steps to prepare this delicious dish:
-
Prepare the Dry and Wet Ingredients
Preheat your oven to 350°F (175°C). Line two large baking sheets with parchment paper. In a medium bowl, whisk together the flour, cocoa powder, baking soda, and salt. Set this aside. In a separate large mixing bowl, using an electric mixer, cream together the softened butter, granulated sugar, and brown sugar until the mixture is light and fluffy, about three minutes.
-
Add Color and Flavor
Beat in the eggs one at a time, followed by the vanilla bean paste and buttermilk. Once fully combined, slowly incorporate the red gel food coloring until you reach a deep, consistent crimson hue. This is where the drama happens! Carefully add the dry ingredients to the wet mixture, mixing on low speed until just combined. Do not overmix the dough, as this can result in tough cookies.
-
Chill and Shape the Dough
Cover the dough tightly with plastic wrap and chill it in the refrigerator for at least 30 minutes. This step is non-negotiable for thick cookies. Once chilled, scoop the dough into one-inch balls (use a cookie scoop for consistency). Roll each ball lightly in your hands, ensuring they are smooth spheres, and place them about two inches apart on the prepared baking sheets.
-
Bake and Add the Blossom Center
Bake the cookies for 8 to 10 minutes. The edges should be set, but the centers should still look slightly soft and puffy. Immediately upon removing the baking sheets from the oven, gently press one cream cheese kiss or a dollop of cream cheese frosting into the center of each hot cookie. The heat will soften the center slightly, creating the signature blossom shape.
-
Cool and Serve
Allow the cookies to cool completely on the baking sheet for five minutes before carefully transferring them to a wire rack to finish cooling. This helps them set up and prevents them from breaking. Serve these gorgeousRed Velvet Blossom Cookiesonce they have fully cooled and the centers have set.
Achieving Perfect Cookie Results
Baking is a science, but occasionally, that science decides to rebel. To ensure your batch of crimson chocolate blossoms turns out perfectly every time, here are a few critical pieces of advice gleaned from my many chaotic kitchen experiments.
The Art of the Creaming Method
The foundation of almost any successful drop cookie lies in the creaming process—combining the fat (butter) and sugar until fluffy. This step incorporates essential air, which gives the cookie its rise and tender texture. If your butter is too cold, the air won’t incorporate; if it’s melted, the structure will collapse. Aim for butter that yields slightly when you press it, similar to the texture of soft modeling clay. If you are rushing, cut the butter into small cubes and let it sit for 15 minutes instead of relying on microwaving, which often melts the edges prematurely.
Why is My Red Velvet Dough Too Dry or Too Wet?
This usually comes down to flour measurement. If you scoop your measuring cup directly into the flour bag, you compact it, adding 25% too much flour instantly, resulting in dry, dense cookies that barely spread. Always spoon the flour into the measuring cup and level it off with the back of a knife. If your dough is too wet after adding the wet ingredients—perhaps your eggs were gigantic, or you added a bit too much buttermilk—don’t panic. Add one tablespoon of flour at a time until the dough pulls away from the sides of the bowl. Conversely, if it seems too stiff, a teaspoon of milk can often save the day.
Storage and Freshness
TheseRed Velvet Blossom Cookiestaste best within the first three days, though they remain perfectly enjoyable for up to a week if stored correctly. Store them in an airtight container at room temperature. Because of the cream cheese component in the center, they should ideally be eaten quickly. If you want to bake ahead, you can prepare the dough balls and freeze them. Roll them in the powdered sugar before freezing (if using that variation) and store them in a freezer bag for up to three months. When ready to bake, place the frozen dough directly onto the prepared baking sheet and add 2–3 minutes to the total baking time. This is a fantastic trick for always having fresh cookies ready for unexpected guests or sudden cocoa cravings.
Swapping the Centerpiece
While the classic center uses a white chocolate or cream cheese component for striking contrast, feel free to experiment with the topping. Sometimes, when I’m feeling particularly rebellious, I press a small square of high-quality dark chocolate into the hot cookie instead. The melted dark chocolate creates a beautiful, bittersweet counterpoint to the sweetness of the red velvet base. Just ensure whatever you press into the center is added immediately after removing the cookie from the oven, while the center is still pliable enough to cradle the filling.
The sheer joy these crimson velvet treats bring is infectious. They don’t just taste good; they look spectacular, making them the perfect centerpiece for any gathering. Mastering the texture and the vivid color means you’ll never settle for a plain cookie again. Enjoy baking these spectacularRed Velvet Blossom Cookies, and prepare for copious compliments!
The Legend of the Crimson Craving
There are some desserts that just feel fancy, even when they involve powdered sugar dusting the entire kitchen counter. Red velvet, in particular, carries a weighty reputation, often reserved for birthdays or the fanciest of potlucks. I used to think the intense crimson color demanded surgical precision and a degree from pastry school. That, my friends, was before I discovered the glorious simplicity of theRed Velvet Blossom Cookies—the ultimate proof that maximum drama requires minimum effort.
My relationship with red velvet started out rocky. My initial attempts resulted in cookies that were vaguely pink and tasted mostly of regret. I nearly gave up, deciding my destiny lay solely in brown food (specifically, chocolate chip cookies, which never betray you). But I realized the error was in my approach. I was trying too hard to be sophisticated when what red velvet truly demands is boldness, a little bit of vinegar-fueled science, and a generous splash of dramatic color gel.
These blossom cookies, unlike their fussy cake counterparts, are refreshingly direct. They deliver that classic, subtle cocoa flavor combined with a tender, velvety crumb, all wrapped up in a snowy coating of powdered sugar. They look like tiny, festive snow globes, and when you press that chocolate drop firmly into the center, you create the signature “blossom” that makes them irresistible. They are the perfect combination of visual stunningness and eat-it-before-anyone-sees-you urgency.
The Secret Weapon: Buttermilk and Vinegar
If you’re new to the world of red velvet, you might wonder why we add a splash of acid, usually in the form of buttermilk and a little distilled white vinegar. This isn’t just a quirky tradition; it’s a non-negotiable chemical reaction. When cocoa powder (which is acidic) interacts with baking soda (a base), the vinegar enhances the reaction, leading to a softer, lighter texture. Crucially, this acid component also historically reacted with the low-pigment cocoa available decades ago, enhancing the slight red hue. Today, we rely on high-quality food coloring gel, but the acid remains essential for that signature velvet texture. Ignoring the vinegar is like skipping the bass line in a great song; it loses all its depth.
Furthermore, the vinegar counteracts some of the sweetness, lending a balanced complexity to these velvet treats. If you truly want the cookies to pop visually, investing in a quality no-taste red food coloring gel is the best advice I can offer. Forget the watery stuff; we are aiming for high-impact crimson that demands attention, not pale blush pink that looks slightly embarrassed to be on the plate. TheseRed Velvet Blossom Cookiesshould look like they dressed up for a formal event.
Gathering Your Arsenal: Ingredients for Success
MakingRed Velvet Blossom Cookiesdoesn’t require a specialty ingredient hunt, but precision matters here. Ensure your butter is at room temperature—soft enough to dent with a finger, but not greasy. The rolling process is crucial for the cracked exterior, so don’t skip the dual sugar layers! This recipe yields about 30 cookies, depending on the size of your dough balls (and your willpower to stop sampling the dough).
-
2 1/2 cups all-purpose flour
-
1/4 cup unsweetened cocoa powder
-
1 teaspoon baking soda
-
1/2 teaspoon salt
-
1 cup (2 sticks) unsalted butter, softened
-
1 1/2 cups granulated sugar
-
2 large eggs
-
1 tablespoon distilled white vinegar
-
1 teaspoon pure vanilla bean paste
-
1/4 cup buttermilk (or milk mixed with 1/2 tsp vinegar)
-
2 tablespoons red food coloring gel (use high-quality gel)
-
For Rolling: 1/4 cup granulated sugar and 1 cup powdered sugar
-
For the Topping: Approximately 30 unwrapped chocolate drops or standard chocolate pieces
The Art of the Roll and Bake
The beauty of these crimson cookies lies in their appearance, which demands a specific handling technique. First, combine your dry ingredients (flour, cocoa, baking soda, salt) and set them aside. In a separate large bowl, cream the softened butter and granulated sugar until light and fluffy. This step incorporates the air needed for the perfect texture. Beat in the eggs one at a time, followed by the vinegar, vanilla, buttermilk, and that gorgeous red food coloring.
Once the wet mixture is a shocking, vibrant red, gradually incorporate the dry ingredients until just combined. Do not overmix! Overmixing develops too much gluten, resulting in tough cookies. Now, the absolute non-negotiable step: Chill the dough for at least two hours, preferably four. Chilling is the key to preventing flat, sad discs.
Once chilled, preheat your oven to 350°F (175°C). Scoop the dough into small, 1-inch balls. Set up two small bowls: one with granulated sugar and one with powdered sugar. Roll each dough ball first in the granulated sugar (this provides structure) and then thoroughly coat it in the powdered sugar (this gives the crackle effect). Place them two inches apart on baking sheets lined with parchment paper.
Bake the cookies for 8 to 10 minutes. The edges should look set, but the centers should still look slightly soft. Immediately upon removing the baking sheet from the oven, gently press one chocolate drop into the center of each cookie. The residual heat melts the chocolate just enough for it to adhere and create that perfect blossom shape. Let them cool completely on the sheet for about five minutes before moving them to a wire rack. TheseRed Velvet Blossom Cookieswill now dazzle everyone.
The Accidental Discovery of Sunshine on a Plate

I once tried baking these during a blizzard, convinced a little color would fight the gray sky. I accidentally added double the vanilla, but the resulting scent and the shocking crimson of the dough, paired with that perfect powdered sugar crackle, brought unexpected joy. They were truly sunshine on a plate.
Perfecting the Cooking Process
Start by ensuring your butter is softened, not melted, for the perfect dough structure. Chill the dough thoroughly—this prevents spreading. Bake until the edges just set, then immediately press the chocolate kiss or drop firmly into the center while the cookies are still warm.
Add Your Touch
Swap traditional chocolate chips for white chocolate chunks for a dramatic contrast. For a citrus lift, incorporate a teaspoon of orange zest into the dough. If you prefer a nuttier profile, finely ground pecans or walnuts work wonderfully in the mix.
Storing & Reheating
Store baked cookies in an airtight container at room temperature for up to five days. If you need to refresh them, a quick 3-minute warm-up in a low oven (250°F) helps restore that delightful soft center and crisp edge.
Expert Tips for Flawless Cookies
-
Always use quality red food coloring gel, not liquid, to achieve the deep, vibrant crimson hue without altering the cookie’s texture.
-
Roll the chilled dough balls first in granulated sugar, and then generously in powdered sugar for that signature, beautiful cracked finish during baking.
-
Do not overbake these cookies; pull them from the oven when the centers look slightly soft, as they will continue firming up on the baking sheet.
My niece once mistook a batch for tiny velvet pillows. Since then, I always remember that the key to greatRed Velvet Blossom Cookiesis making them look as soft as they feel.
Conclusion for Red Velvet Blossom Cookies
These delightful treats are more than just a dessert; they are a miniature celebration of color and texture. We mastered the intense red hue and ensured that delicate powdered sugar coating cracked just right. By following these simple steps—chilling the dough, rolling them properly, and pressing the center immediately after baking—you guarantee bakery-quality results every time. Whether you bake them for a holiday party or just a Tuesday afternoon, these cookies bring a necessary bit of magic to the kitchen. Get ready to watch these stunning Red Velvet Blossom Cookies disappear quickly!
Print
Red Velvet Blossom Cookies
Capture the vibrant allure of Red Velvet Blossom Cookies! This recipe yields deep crimson, soft-centered cocoa treats. Creamed butter/sugar ensures a fluffy texture.
- Total Time: 35 minutes
- Yield: 4 servings
Ingredients
- All-Purpose Flour: 1 3/4 cups
- Unsalted Butter (softened): 1/2 cup (1 stick)
- Granulated Sugar: 3/4 cup
- Large Egg: 1
- Unsweetened Cocoa Powder: 2 tablespoons
- Red Food Coloring (gel): 1 1/2 teaspoons
- Baking Soda: 1 teaspoon
- Hershey's Kisses (unwrapped): 30 pieces
Instructions
- Step 1: Preheat oven to 350°F (175°C). Line two baking sheets with parchment paper. In a medium bowl, whisk together the flour, cocoa powder, and baking soda.
- Step 2: In a separate large bowl, cream together the softened butter and granulated sugar until light and fluffy. Beat in the egg, the red food coloring (and a dash of alcohol-free vanilla extract, if desired) until the mixture is uniform and intensely colored.
- Step 3: Gradually add the dry ingredients to the wet ingredients, mixing on low speed only until the dough comes together. Do not overmix. If the dough seems too soft, chill it for 15-20 minutes before shaping.
- Step 4: Roll the dough into 1-inch balls (about 1.5 tablespoons each). Place them 2 inches apart on the prepared baking sheets. Bake for 9 to 11 minutes; the cookies should look set on the edges but still slightly soft in the center.
- Step 5: Immediately upon removing the cookies from the oven, gently but firmly press one unwrapped Hershey's Kiss into the center of each cookie. Allow the cookies to set and cool on the baking sheet for 10 minutes before transferring them to a wire rack to cool completely.
Notes
- These cookies keep well in an airtight container at room temperature for up to 5 days; use parchment paper between layers to protect the soft chocolate Kisses from sticking.
- If the chocolate Kisses have hardened, microwave the cooled cookie for 8–10 seconds to restore a just-baked softness and melt the chocolate slightly.
- Serve these vibrant cookies with a cold glass of milk or a small scoop of classic cream cheese frosting for an extra decadent presentation.
- To ensure your red velvet color is intensely vibrant without overworking the final dough, make certain the gel food coloring is fully mixed into the butter and sugar mixture before incorporating the dry ingredients.
- Prep Time: 15 minutes
- Cook Time: 20 minutes
- Method: Stovetop
- Cuisine: American


Leave a Comment