

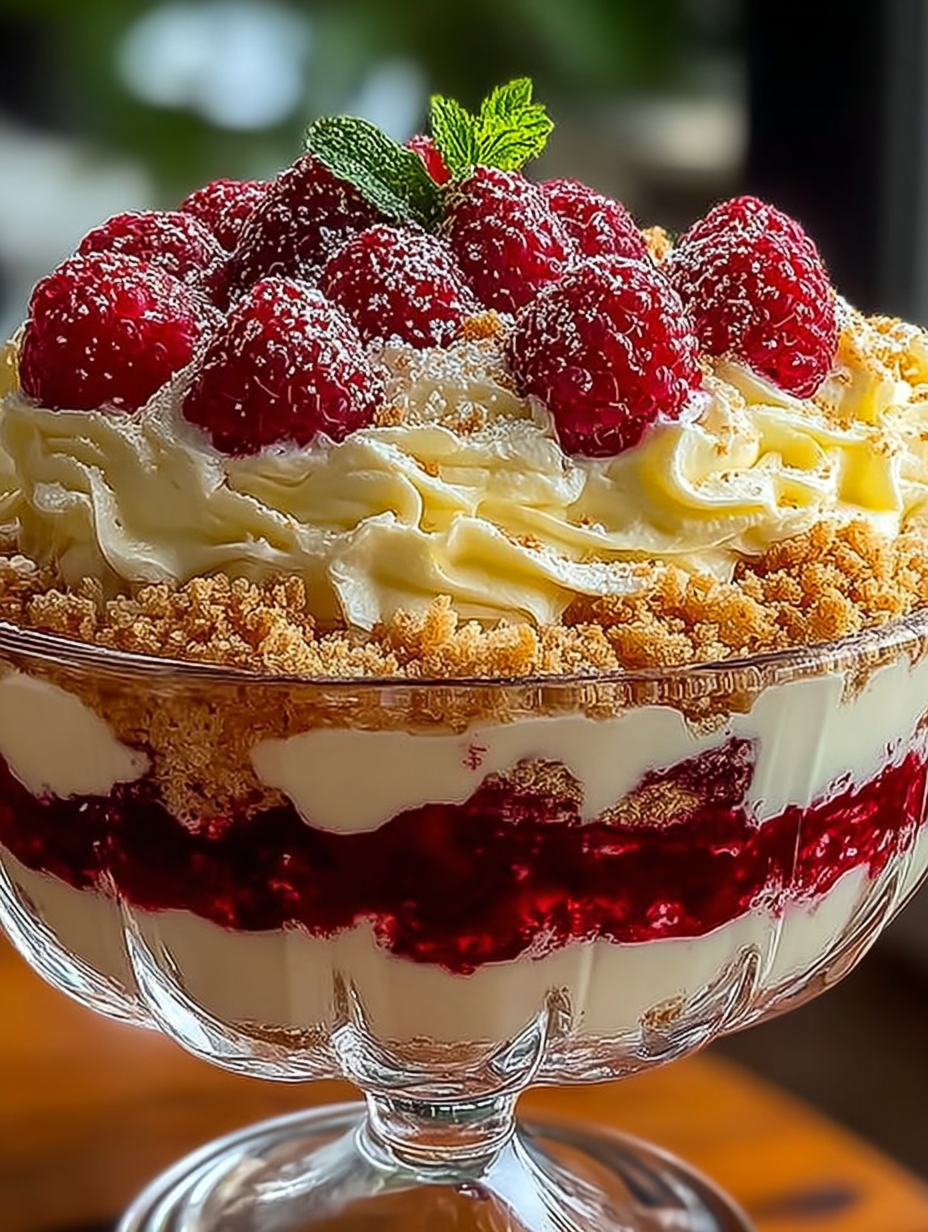
Have you ever met a dessert that demands attention, wearing a cape of crimson cake and a crown of creamy delight? This isn’t just dessert; it’s the legendaryRed Velvet Cheesecake Trifle, the star of every potluck, ready to steal the show.
Forget fussy layers and complicated techniques; this gorgeous confection delivers maximum flavor drama with minimum kitchen stress, ensuring your guests think you hired a pastry chef.
- This layered masterpiece combines rich cocoa notes and tangy cheesecake cream, offering a symphony of textures in every spoonful.
- The dramatic presentation, showcased beautifully through a glass dish, guarantees gasps of admiration from everyone gathered around the dessert table.
- Preparation is surprisingly simple and requires no baking, making it the ideal showstopper dessert for busy weeknight gatherings or large celebrations.
- Easily customizable, this trifle can adapt to any season or theme by swapping out the garnishes or adding fresh seasonal berries for brightness.
The Legend of the No-Bake Showstopper
My first encounter with the concept of a trifle was, predictably, a complete disaster. It involved stale sponge cake, lumpy custard, and a general sense of existential dread brought on by soggy textures. For years, I avoided trifles like they were my in-laws’ unsolicited financial advice. Then came the divine intervention: theRed Velvet Cheesecake Trifle.
This recipe is my culinary redemption arc. It’s the proof that sometimes, the most magnificent desserts are also the easiest to assemble. We skip the oven entirely, relying on store-bought cake (or homemade if you’re feeling ambitious and have infinite patience, which I do not) and focusing our energy on perfecting that luscious cheesecake filling. The beauty of a trifle is its inherently chaotic nature; gravity is your sous chef, pulling the decadent layers together into something truly magical. If a layer leans slightly, if the cream is uneven, who cares? It just looks more rustic, more homemade, and frankly, more appealing because it screams, “I was made with love, not a ruler.”
Why Red Velvet and Cheesecake Are the Perfect Duo
Red velvet cake is often misunderstood. People often assume it’s just chocolate cake dyed red, but the true magic lies in the subtle interplay of cocoa powder, a touch of vinegar, and buttermilk, which creates a deep, complex flavor profile that isn’t overwhelmingly sweet. When you pair this slightly tangy, deeply flavorful cake with a fluffy, slightly tart cheesecake mixture, you achieve balance. It’s like a meticulously coordinated dance troupe where the cake provides the dramatic backdrop and the cheesecake filling performs the elegant aerial silks routine.
Furthermore, trifles are the ultimate party trick because they serve a crowd without requiring individual plating. You simply stand back, watch your guests gather around the giant glass bowl, and accept the shower of compliments you absolutely deserve for having the foresight to create something so visually stunning and ridiculously delicious. This specific version is rich enough for a holiday celebration but easy enough for a random Tuesday when you desperately need cheering up. We are creating memories here, one decadent spoonful at a time, and avoiding any unnecessary baking mishaps in the process.
Ingredients for Red Velvet Cheesecake Trifle
Here’s what you’ll need to make this delicious dish:
- Red Velvet Cake BaseUse two standard boxes of red velvet cake mix baked according to package directions, or purchase two pounds of pre-made red velvet cake for maximum ease and efficiency.
- Cream CheeseUse full-fat, softened cream cheese for the creamiest, richest texture that truly elevates the cheesecake flavor profile of the filling.
- Granulated SugarThis provides the foundational sweetness necessary to complement the slight tanginess of the cream cheese and sour cream.
- Alcohol-Free Vanilla ExtractChoose a high-quality pure alcohol-free vanilla extract to enhance the overall flavor depth and add warmth to the cream base.
- Sour Cream or Plain YogurtA vital component that adds necessary acidity and lightness, preventing the cheesecake filling from becoming too dense or overly sweet.
- Heavy Whipping CreamUsed for making the whipped cream element, ensuring the layers are light, airy, and contrast beautifully with the dense cake pieces.
- Powdered SugarRequired for stabilizing and sweetening the freshly whipped cream, resulting in a cloud-like texture that holds its shape well within the trifle.
- Cocoa Powder (Optional)A small amount of unsweetened cocoa can be dusted between layers or over the top for an extra layer of color contrast and flavor sophistication.
The full ingredients list, including measurements, is provided in the recipe card directly below.
Mastering the Creamy Components
While the red velvet cake provides the structure and dramatic color, the cheesecake filling and whipped cream are the soul of thisRed Velvet Cheesecake Trifle. People often panic when faced with making homemade whipped cream, conjuring images of over-whipping and grainy disaster. Let me assure you, if you have a stand mixer, or even a determined hand mixer, achieving perfectly fluffy cream is entirely within your grasp.
Creating the Signature Cheesecake Filling
The secret to this incredible filling is treating it gently. Start with softened cream cheese—and I mean truly soft, not “I took it out of the fridge five minutes ago” soft. If the cream cheese is too cold, you’ll end up with lumps, and nobody wants a lumpy cheesecake layer. Cream the cream cheese with the sugar until it’s perfectly smooth and light, almost airy. This initial step is non-negotiable for achieving that velvety smooth texture that makes the trifle so luxurious.
Once the base is smooth, introduce the sour cream and alcohol-free vanilla extract. The sour cream is your friend here, cutting through the richness and giving the filling that characteristic cheesecake tang. Mix it just until incorporated. Over-mixing at this stage can sometimes break down the mixture, so stop the mixer the moment everything is homogenous. You should have a filling that is thick enough to hold its shape but soft enough to spread easily over the cake chunks.
Whipping Up the Fluffiest Topping
Next up is the star component: fresh whipped cream. Start with heavy cream that is icy cold; temperature is key here. Cold cream incorporates air faster and holds its structure longer. Add a touch of powdered sugar and vanilla, then whip on medium-high speed. Keep a vigilant eye on the bowl. You are looking for medium-firm peaks—peaks that stand up but have a slight curl at the very tip, like a relaxed mountain climber taking a moment to admire the view.
If you plan on making the trifle ahead of time (which is highly recommended, as the flavors deepen overnight), ensuring the whipped cream is stabilized slightly is a good idea. The powdered sugar helps, but you can also use a small amount of non-animal stabilizer if you are concerned about long-term holding power. Remember, the goal is layers of varying texture: moist cake, dense cheesecake cream, and ethereal whipped topping.
How to Make Red Velvet Cheesecake Trifle
Follow these simple steps to prepare this delicious dish:
-
Prepare the Cake and Cream Base
Ensure the red velvet cake is fully cooled and then cut or tear it into bite-sized pieces, roughly one-inch cubes. In a large bowl, beat the softened cream cheese with the granulated sugar until completely smooth and lump-free, approximately 3 to 4 minutes. Blend in the sour cream and alcohol-free vanilla extract until just combined.
-
Whip the Cream Components
Using a separate, chilled bowl, beat the cold heavy whipping cream with the powdered sugar until stiff peaks form. Gently fold about one-third of the whipped cream into the prepared cream cheese mixture. This lightens the cream cheese base, turning it into the signature tangy cheesecake layer. Reserve the remaining whipped cream for topping and layering.
-
Assemble the First Layer
Select a clear glass trifle bowl, which showcases the dramatic layers perfectly. Place half of the red velvet cake pieces evenly across the bottom. Gently press the cake down slightly to create a sturdy base. Ensure the cake adheres to the bottom surface.
-
Add the Cheesecake and Repeat
Carefully spoon or pipe half of the creamy cheesecake filling over the first layer of cake, spreading it gently to the edges of the bowl. Next, spread a thin layer of the reserved plain whipped cream over the cheesecake mixture. Repeat these steps: add the remaining cake pieces, followed by the rest of the cheesecake filling.
-
Chill and Finish the Trifle
Top the trifle generously with the remaining plain whipped cream, creating soft swirls or peaks. For added flair, you may dust the top layer lightly with cocoa powder or garnish with some extra cake crumbs. Cover the trifle lightly and refrigerate it for at least 4 hours, or preferably overnight, allowing the flavors to marry and the cake to absorb the moisture from the creams, creating the ultimateRed Velvet Cheesecake Trifle.
Transfer to plates and drizzle with sauce for the perfect finishing touch.
Tips for Trifle Perfection and Presentation
The difference between a good dessert and a legendary dessert often lies in the small details. Because the Red Velvet Cheesecake Trifle is a no-bake wonder, presentation is paramount. When selecting your trifle bowl, the clearer and taller the better. Think of it as a culinary showcase; every layer should be visible, creating that stunning striped effect that makes this dessert so photogenic.
Preparation and Storage Secrets
One of the greatest advantages of making a trifle is that it absolutely thrives when made ahead of time. Preparing it the night before allows the red velvet cake chunks to soak up all that decadent moisture from the cheesecake filling and the whipped cream, transforming them from simple cake into melt-in-your-mouth velvet goodness. If you assemble it too close to serving time, the cake layers might taste a bit dry and the flavors won’t be as deep. If you are preparing it 24 hours in advance, hold off on the final garnish until just before serving to ensure the topping looks fresh and crisp.
To store leftovers (assuming such a thing exists), cover the bowl tightly with plastic wrap and keep it refrigerated. This dessert holds up beautifully for three to four days, though the cake will become increasingly moist over time. Be warned, however: once people realize this delight is sitting in your fridge, its lifespan dramatically decreases, often disappearing in mysterious, midnight raids.
Presentation Prowess
Elevating the look of yourRed Velvet Cheesecake Trifleis surprisingly simple. Instead of just spreading the final whipped cream layer, use a piping bag fitted with a large star tip to create beautiful rosettes around the rim, giving it a professional finish. For contrasting color, use fresh whole raspberries or strawberries scattered strategically across the top, or shave white chocolate curls over the entire masterpiece. Remember, this dessert is meant to be fun and slightly theatrical, so don’t be afraid to embrace the drama. It is guaranteed to be the conversation starter, silencing even the loudest dinner guest with its sheer gorgeousness.
The Accidental Discovery of Sunshine on a Plate
I once attempted to bake a multi-tiered red velvet wedding cake—for my dog’s birthday. The cake layers crumbled spectacularly, transforming my kitchen into a cocoa-dusted crime scene. Defeated, I grabbed a giant glass bowl and started layering the salvaged crumbs with cheesecake filling. That beautiful, chaotic moment gave birth to this majestic layered masterpiece.
There is a profound joy in a dessert that looks infinitely complex but is secretly forgiving. While the nameRed Velvet Cheesecake Triflesounds incredibly gourmet, this layered dessert is essentially the culinary equivalent of a superhero origin story—born from chaos but delivering utter perfection. This recipe is for those of us who have stared sadly at a lopsided cake, realizing that true genius often involves embracing the mess. The trifle allows every component to shine, transforming crumbles and creamy fillings into a sophisticated, towering display that requires zero structural engineering skills.
Why Red Velvet and Cheesecake Are the Perfect Duo
Red velvet cake holds a special place in the dessert hierarchy. It’s not just a chocolate cake dyed red; it’s a nuanced flavor profile achieved through the interaction of cocoa, buttermilk, and vinegar, resulting in a rich, slightly acidic tang. This specific tang is what makes it an unparalleled partner for the smooth, sweet, and slightly salty notes of classic cheesecake. When these two meet in a glass bowl, layered with generosity and flair, they create a textural experience that moves seamlessly from the moist, saturated cake to the airy, chilled mousse.
The beauty of building a trifle is that the assembly process becomes part performance art. You are creating visible strata of flavor and color, often eliciting “oohs” and “ahhs” before the first spoonful is even served. This specific combination, showcasing the vibrant crimson cake against the stark white cheesecake filling, is particularly dramatic and festive, making it the perfect centerpiece for any gathering.
Essential Ingredients for Dessert Success
To ensure this red and white delight achieves its maximum potential, start with quality ingredients. While a homemade red velvet cake provides the deepest flavor complexity, a prepared or high-quality boxed mix is a completely acceptable shortcut. We are aiming for ease, after all, not advanced pastry certification. The true star, however, remains the cheesecake mousse.
For the Red Velvet Cake Layers
- 1 standard 9×13 inch red velvet cake (cooled completely and cut into cubes or crumbled)
- 1 cup buttermilk (ensure it’s fresh for the best moisture)
- 1 teaspoon alcohol-free vanilla extract
For the Decadent Cheesecake Mousse Filling
- 2 (8 ounce) packages full-fat cream cheese, softened to room temperature
- 1 1/2 cups powdered sugar, sifted
- 1 teaspoon pure alcohol-free vanilla extract
- 2 cups heavy whipping cream, chilled
- 1/2 cup granulated sugar
- 1 teaspoon lemon juice (essential for brightness)
For Assembly & Garnishes
- 1/2 cup cooled, strong brewed coffee or pomegranate juice (for soaking)
- 1/4 cup white chocolate chips or curls
- Fresh berries (raspberries or strawberries) for color contrast
A note on the soaking liquid: While traditional trifles often use apple cider vinegar with sugar or other spirits, the strong coffee or cherry/pomegranate juice provides the necessary moisture and deep flavor profile without the need for alcohol. The coffee especially pulls out the deep cocoa notes in the red velvet, giving it an adult, sophisticated depth.
Perfecting the Cooking Process
Start by whipping the heavy cream to stiff peaks first; set it aside, refrigerated, like a tiny, stable snowdrift. Next, prepare the cheesecake base, blending the cream cheese until impossibly smooth. Fold the whipped cream into the base gently, ensuring that air stays trapped. Finally, crumble the cake layers just before assembly.
Building the Majestic Trifle Layers
The assembly process is where you transform simple ingredients into a showstopper. You must use a clear glass trifle bowl for maximum visual effect. If you don’t own a designated trifle dish, the largest, prettiest punch bowl will suffice. Start with one-third of the crumbled red velvet cake at the bottom. Press the cake slightly against the glass to give the layer definition.
Generously drizzle the soaking liquid—whether it is coffee or juice—over the cake layer. This is not the time to be cautious; the cake needs saturation to achieve that delightful, pudding-like consistency after chilling. Next, carefully spoon one-third of the cream cheese mousse onto the soaked cake. Use an offset spatula to push the mousse firmly against the edges of the bowl, creating a clean, dramatic line visible through the glass. This contrast between the deep red cake and the creamy white filling is what gives the Red Velvet Cheesecake Trifle its iconic look.
Repeat the layering process two more times: cake, liquid, mousse. Ensure that the final layer is the cheesecake mousse. This top layer will be smooth and pristine, ready for decorative garnishes. Once assembled, cover the bowl tightly with plastic wrap and let it chill. The chilling time is mandatory—this is when the flavors truly meld, the cake softens, and the mousse firms up to hold its shape.
Add Your Touch
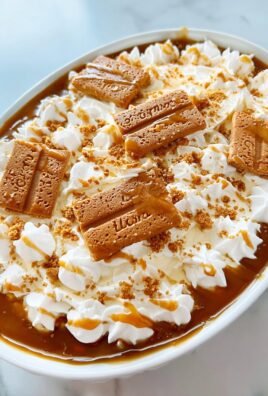
Swap the red velvet cake for chocolate fudge or even lemon cake for a tart contrast. For extra tang, mix a tablespoon of freeze-dried strawberry powder into the mousse. If you prefer a richer liquid, use warm caramel sauce instead of coffee for soaking, turning this dessert into a serious indulgence.
Creative Variations to Keep Things Fresh
While the classic Red Velvet Cheesecake Trifle is perfect, customizing this dessert is part of the fun. Consider using different textures in your layers. You could add crushed shortbread cookies beneath the first cake layer for an extra crunchy base. If you enjoy a zestier flavor, incorporating lime juice and zest into the cream cheese mousse instead of lemon juice offers a surprisingly tropical twist that cuts through the richness of the red velvet.
For seasonal variations, try swapping the red velvet for gingerbread cake during the winter holidays and soaking it with spiced apple cider. The core technique of “cake, liquid, cream” remains the same, proving that the trifle structure is endlessly versatile. Remember to garnish extravagantly—fresh berries, candied pecans, or a sprinkle of cocoa powder truly elevate the finished product from simple dessert to dazzling spectacle.
Storing & Reheating
Since this dessert is inherently cold, there is no reheating! Cover the Red Velvet Cheesecake Trifle tightly with plastic wrap and store it in the refrigerator for up to four days. For the best flavor and structural integrity, consume it within 48 hours of assembly, as the cake tends to soften significantly thereafter.
Expert Tips for Trifle Triumph
- Chill your mixing bowl and whisk attachment before whipping the heavy cream; this ensures you get maximum volume and the stiffest possible peaks quickly.
- Use room-temperature cream cheese, mixing it low and slow initially to avoid lumps, ensuring the final cheesecake mousse is perfectly silky smooth.
- Assemble the trifle at least 6 hours, or preferably overnight, before serving; this allows the soaking liquid to fully integrate and marry all the festive flavors.
My grandmother once declared this Red Velvet Cheesecake Trifle the best thing she had ever eaten, which is high praise considering she once hosted a bake-off judged by actual professional chefs. It truly became our holiday centerpiece.
Conclusion for Red Velvet Cheesecake Trifle
The journey to creating the ultimate Red Velvet Cheesecake Trifle often starts with a crumbled cake and a good idea. This layered dessert combines the deep, familiar comfort of red velvet cake with the light, tangy luxury of a cream cheese mousse. It requires minimal technique but delivers maximum visual impact and taste satisfaction. Whether you are hosting a grand celebration or simply indulging in a weekend treat, this trifled delight is guaranteed to impress. Remember the key steps: excellent ingredients, proper chilling, and generous soaking of those cake layers. Go forth and conquer the dessert table with this stunning, no-stress, layered masterpiece!
Print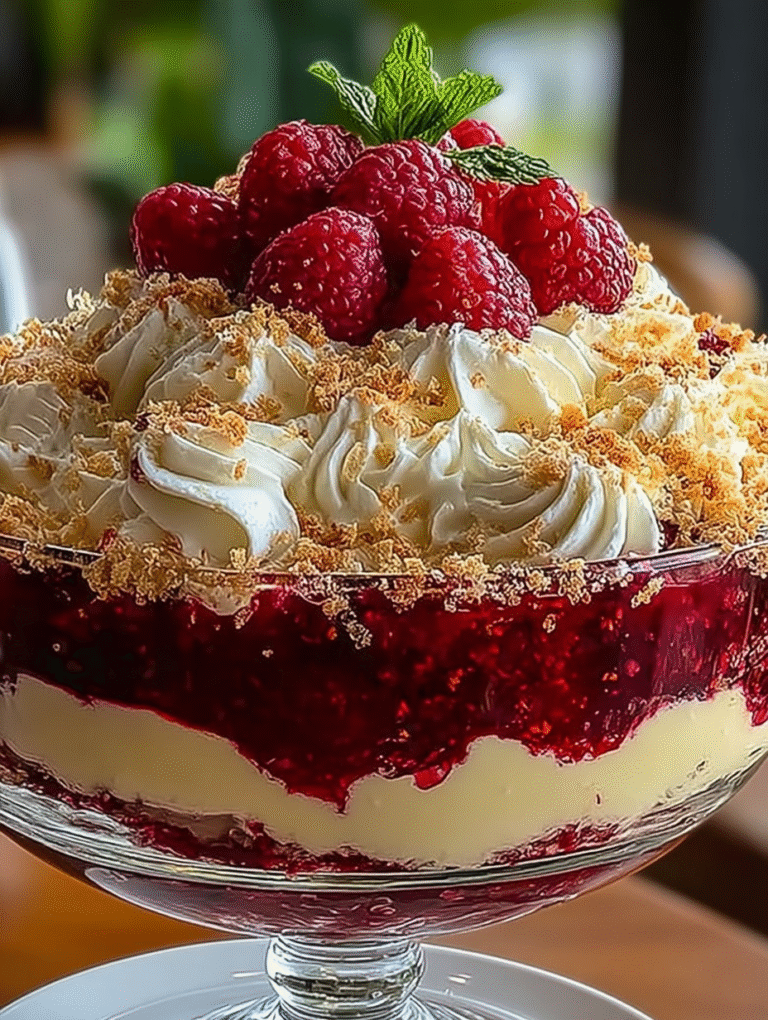
Red Velvet Cheesecake Trifle
Decadent Red Velvet Cheesecake Trifle! Layers of moist crumbled cake meet fluffy, tangy cream cheese filling blended with vanilla bean paste. Quick assembly—no baking required after the cake cools.
- Total Time: 35 minutes
- Yield: 4 servings 1x
Ingredients
- 1 box (15.25 oz) Red Velvet Cake mix (plus ingredients required on box)
- 2 (8 oz) packages cream cheese, softened
- 2 cups powdered sugar, sifted
- 1 teaspoon vanilla bean paste
- 1 (16 oz) container frozen whipped topping, thawed (e.g., Cool Whip)
- 1/2 cup mini chocolate chips
Instructions
- Step 1: Prepare the red velvet cake according to the box directions (usually baked in a 9×13 pan). Let the cake cool completely on a wire rack, then crumble or cut into 1-inch cubes.
- Step 2: Prepare the cheesecake filling by beating the softened cream cheese, powdered sugar, and vanilla powder in a large bowl with an electric mixer until the mixture is completely smooth and fluffy.
- Step 3: Gently fold the thawed whipped topping into the cream cheese mixture using a spatula until the filling is just combined and remains light and airy. Do not overmix.
- Step 4: Begin layering the trifle in a large, clear trifle dish (about 3-4 quart capacity). Start with one-third of the red velvet cake cubes, spreading them evenly across the bottom.
- Step 5: Follow the cake layer with one-third of the cheesecake filling, carefully spreading it over the cake cubes. Repeat the layering process (cake, then filling) two more times, ending with the cheesecake layer.
- Step 6: Top the final layer of filling with mini chocolate chips or reserved cake crumbs for garnish. Cover the trifle dish and refrigerate for at least 4 hours, or preferably overnight, to allow the layers to set before serving.
Notes
- Store any leftovers tightly covered in the refrigerator for up to 3 days; after 48 hours, the cake layers tend to become overly moist, though still delicious.
- As a chilled dessert, this trifle requires no reheating; simply ensure it has chilled for a minimum of 4 hours to set properly, or pull it from the fridge 10 minutes before serving for optimal texture.
- Enhance the presentation and flavor by serving individual portions alongside a dollop of fresh whipped cream dusted with a pinch of cocoa powder or a drizzle of warm fudge sauce.
- For the fluffiest filling, always ensure your powdered sugar is thoroughly sifted before adding it to the cream cheese, and stop folding immediately once the whipped topping streaks disappear—overmixing will deflate the airiness.
- Prep Time: 15 minutes
- Cook Time: 20 minutes
- Method: Stovetop
- Cuisine: American


Leave a Comment