
Forget sad, cracked sugar cookies; these vibrant, lushRed Velvet Thumbprint Cookiesbring drama and rich cocoa flavor to any dessert table.
They remind me of my grandmother’s kitchen, where every baking session was a chaotic, powdered-sugar blizzard, resulting in these irresistible bites.
- This straightforward dough recipe comes together quickly, making elegant baking accessible even for beginner cookie enthusiasts.
- Experience the perfect blend of deep, rich cocoa layered beneath a tangy, sweet cream cheese frosting center.
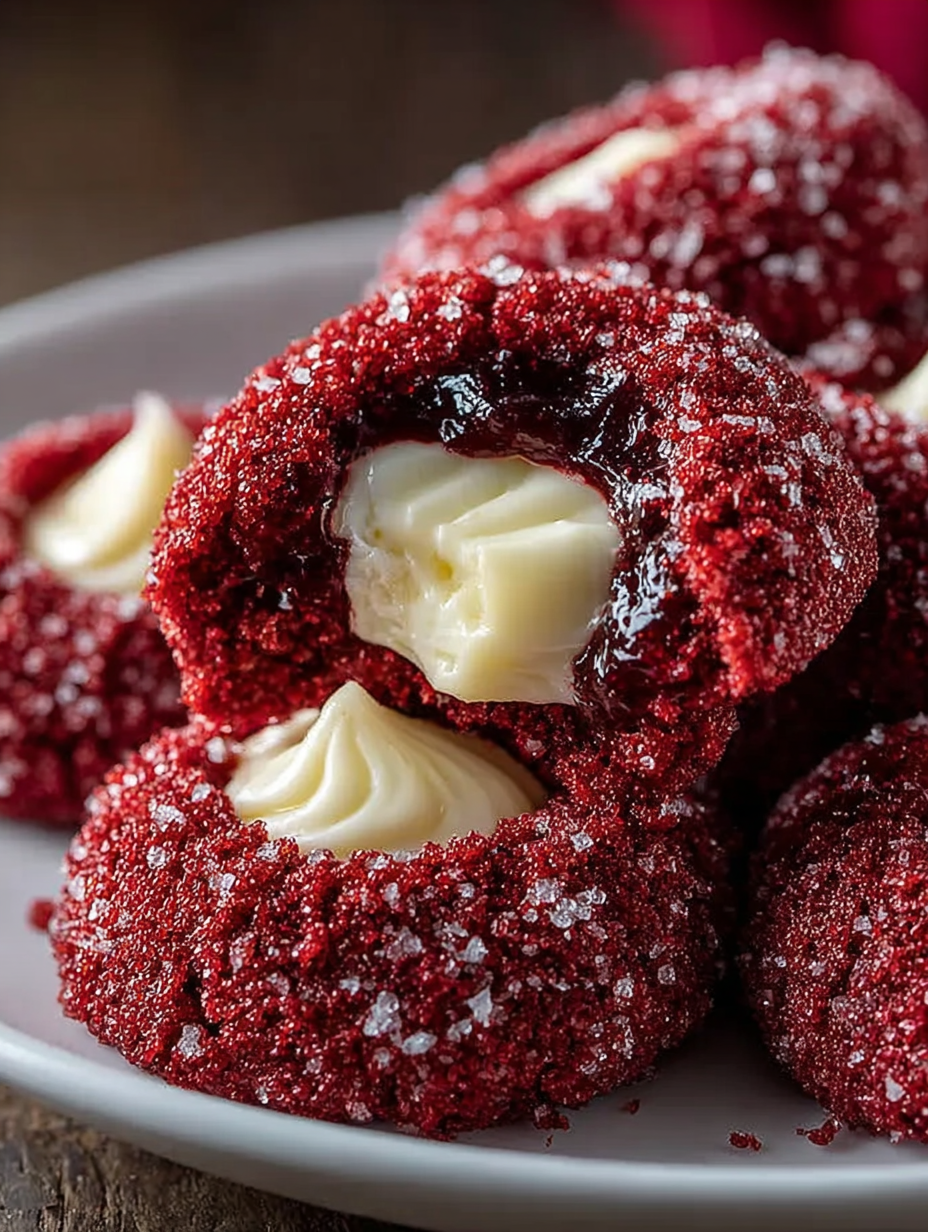
- The striking contrast of crimson cake and bright white filling creates a showstopping, irresistible holiday presentation.
- Ideal for cookie swaps, holiday gifts, or simply elevating your everyday coffee break with a burst of festive joy.
The Culinary Drama of Red Velvet
There is a mysterious allure surrounding red velvet, a dessert that often sparks lively debates about whether it’s just chocolate cake wearing a glamorous disguise. I’m here to tell you that red velvet is an experience unto itself. It’s not simply cocoa; it’s cocoa softened by buttermilk and vinegar, which traditionally enhanced the redness of the early, un-dutched cocoa powders, creating a subtle tang and an incredibly tender crumb. When you transform this beloved cake flavor into a cookie, specifically a thumbprint, you elevate the entire concept.
Thumbprint cookies are inherently charming because they offer a perfect, intentional vessel for gooey goodness. But when you marry the deep, sultry flavor of the crimson cookie base with a bright, slightly tart cream cheese filling, you create something transcendent. Suddenly, the chaotic kitchen blizzard of my childhood memories crystallizes into perfectly formed, jewel-toned treats. These cookies are ideal when you need something that tastes complex and rich, but requires a fraction of the effort of a full layer cake. They are the little black dress of the cookie world: simple structure, maximum impact.
Why Thumbprints Work Better Than Bars
While a Red Velvet cake roll or a bar might seem easier, the thumbprint format gives you that essential ratio of crust to filling in every single bite. With bars, the filling sometimes slides off or the ratio gets messy. The thumbprint method ensures that the dense, velvety cookie acts as a comforting cup, holding the tangy cream cheese filling securely in place. Plus, forming the dough balls and pressing that little indent with your thumb (or the back of a measuring spoon, if you prefer precision over personal touch) is genuinely therapeutic. It’s a hands-on process that reminds you baking should be fun, slightly messy, and absolutely delicious.
We are skipping the traditional liquid food coloring drama here; we want that deep, saturated color without compromising the texture of the dough. Using high-quality gel food coloring is key, ensuring the moisture balance stays intact while delivering that stunning, almost theatrical crimson hue that makes these classic chocolate thumbprints so famous. Remember, the goal is a soft, chewy cookie with a creamy, stable center—not a dry cracker.
Ingredients for Red Velvet Thumbprint Cookies
Here’s what you’ll need to make this delicious dish:
- All-Purpose FlourUse a standard unbleached variety, ensuring it is properly measured (spooned and leveled) to prevent a dense cookie.
- Unsweetened Cocoa PowderEssential for the signature flavor; opt for natural cocoa powder as it reacts best with the baking soda and vinegar.
- Baking Soda and SaltThe leavening agent and flavor enhancer; baking soda helps achieve the classic lift and tender texture.
- Unsalted ButterNeeds to be softened slightly above room temperature to cream properly, helping incorporate air for a light dough structure.
- Granulated SugarProvides sweetness and helps the cookies spread slightly while baking, giving them a delightful chewiness.
- EggActs as a binder and adds richness; make sure it is also at room temperature for better emulsion with the butter and sugar.
- Vanilla ExtractEnhances the chocolate and cream cheese flavors; use pure vanilla for the best aromatic result.
- White Distilled VinegarThis seemingly odd addition reacts with the baking soda to help lift the cookie and also deepens the red color reaction.
- Red Gel Food ColoringHighly recommended over liquid coloring; gel provides intense color saturation without adding excess liquid to the dough.
- Cream CheeseThe star of the filling; must be full-fat and softened completely for a lump-free, supremely creamy frosting center.
- Powdered SugarUsed for the filling to dissolve easily and create a smooth, sweet, and firm cream cheese filling.
The full ingredients list, including measurements, is provided in the recipe card directly below.
How to Make Red Velvet Thumbprint Cookies
Follow these simple steps to prepare this delicious dish:
Step 1: Preparing the Dough Base
Preheat your oven to 350°F (175°C). Line two baking sheets with parchment paper or silicone mats. In a medium bowl, whisk together the flour, cocoa powder, baking soda, and salt. Set this dry mixture aside. In a large bowl, use an electric mixer to cream the softened butter and granulated sugar until the mixture is light and fluffy, usually about 3 minutes. Scrape down the sides of the bowl often to ensure everything is fully combined.
Step 2: Adding Color and Wet Ingredients
Beat in the room temperature egg, vanilla extract, and vinegar until fully incorporated. Now comes the fun part: add the red gel food coloring. Start with a generous amount—about 1 to 2 teaspoons, depending on your desired depth of color—and mix until the vibrant, deep red color is evenly distributed throughout the mixture. Ensure there are no streaks of uncolored dough; we want a uniform, velvety crimson base for these Red Velvet Thumbprint Cookies.
Step 3: Combining and Chilling the Dough
Gradually add the dry mixture to the wet ingredients, mixing on low speed just until combined. Be careful not to overmix, which can lead to tough cookies. The dough should be soft but manageable. If time allows, wrap the dough in plastic wrap and chill it for 30 minutes. Chilling prevents the cookies from spreading too much during baking, maintaining their beautiful dome shape, which is essential for holding the filling later.
Step 4: Shaping and Indenting the Cookies
Roll the chilled dough into 1-inch balls, placing them about 2 inches apart on the prepared baking sheets. For a little extra sparkle and texture, you can optionally roll the dough balls in a bowl of granulated sugar before baking. Use your thumb or the rounded back of a teaspoon to gently press an indentation into the center of each ball. Be careful not to press all the way through the dough to the baking sheet.
Step 5: Baking the Velvety Shells
Bake the cookies for 10 to 12 minutes. The edges should look set, but the center should remain soft. Right after removing the cookies from the oven, if the indentations have puffed up, quickly use the back of a spoon again to gently deepen the wells before the cookies cool and set. Let the cookies cool completely on the baking sheet for 5 minutes before transferring them to a wire rack to finish cooling.
Step 6: Preparing and Piping the Cream Cheese Filling
While the cookies cool, prepare the cream cheese filling. In a medium bowl, beat the softened cream cheese until perfectly smooth. Gradually beat in the powdered sugar until the filling is light, fluffy, and free of lumps. Transfer the filling to a piping bag fitted with a star tip (or a zip-top bag with the corner snipped off for a cleaner look). Pipe the filling generously into the indentations of the cooled Red Velvet Thumbprint Cookies.
Transfer to plates and drizzle with extra melted white chocolate, if desired, for the perfect finishing touch.
Tips for Creamy Centers and Flawless Baking
Maintaining the Perfect Cookie Texture
The secret to keeping these thumbprint cookies soft and tender hinges entirely on preventing over-baking. If you bake them until they are completely firm, they will turn dry and crumbly, and nobody wants a dry cookie, especially one associated with the moist texture of red velvet cake. Remove the cookies when the edges are set and lightly golden, but the center still looks slightly soft or even underdone. They will continue to firm up beautifully on the hot baking sheet.
Another crucial tip for ensuring the best texture is to invest in good quality cocoa powder. The rich, dark color and subtle bitter note of quality cocoa are essential for balancing the sweetness of the cream cheese filling. If your cocoa is old or poor quality, the entire flavor profile of these classic chocolate thumbprints will be diminished, resulting in flat, less complex notes.
Avoiding Common Thumbprint Mishaps
The primary issue people encounter with thumbprint cookies is spreading. This usually happens if your butter was too warm, your flour measurements were too light, or you skipped the chilling step. If you find your dough is excessively soft after mixing, don’t panic—just give it an extra hour in the refrigerator. Cold dough resists spreading and maintains that crisp, defined edge we are looking for.
Cracking around the edges is another common woe, particularly with cookies that lack high moisture content. A slight crack or two adds character, but if they are fracturing badly, it might mean your dough was too dry or you pressed the indentation too forcefully. If the dough feels crumbly while you are rolling the balls, add a teaspoon of milk or buttermilk to the dough until it comes together easily. And remember, when you make the indentations, aim for a gentle, firm press rather than a forceful smash.
Storing and Serving
These festive holiday cookies keep remarkably well, making them fantastic prep-ahead treats. Store them in an airtight container at room temperature for up to three days, though they will retain their freshest flavor and softest texture if kept in the refrigerator due to the cream cheese filling. If refrigerating, let them sit out for about 15 minutes before serving so the filling softens slightly back to its creamy, luscious state. The combination of the rich cocoa cookie and the tangy, cool center makes the Red Velvet Thumbprint Cookies truly irresistible for any occasion, from a casual afternoon snack to a sophisticated holiday dessert platter.
A Culinary Comeback: The Ultimate Red Velvet Thumbprint Cookie
Okay, let’s talk about fancy desserts. I used to think a successful holiday baking session required intricate piping, spun sugar, and at least three near-meltdowns. My attempt last December involved a seven-layer cake that promptly collapsed into a magenta puddle, resembling something a mythological beast had recently rejected. It was a culinary tragedy of epic proportions. I desperately needed a comeback—something glamorous, delicious, and, crucially, structurally sound.
Enter the inspiration: the deep, luxurious color of red velvet, but miniaturized and made manageable. I needed a cookie that screamed “effortless elegance” while only whispering “five ingredients.” I’ve always been obsessed with the contrast of deep crimson and pristine white filling. That’s how I landed on these marvelous treats. They capture all the drama of a towering cake in a perfect bite-sized package. Baking shouldn’t be a marathon of stress; it should be a quick sprint to joy, leaving you with treats that look like they belong in a fancy bakery window.
What sets these cookies apart is the texture. We’re not aiming for a sad, dry cakey cookie. We want crisp edges, a soft, chewy center, and that tell-tale tangy cocoa flavor that defines classic red velvet. And then, there’s the filling. Forget those dry, crumbly thumbprint centers; we are dropping a dollop of pure, creamy vanilla bliss right into the heart of these crimson jewels. This recipe forRed Velvet Thumbprint Cookiesbecame my salvation, transforming me from a culinary disaster artist into a confident baker overnight. They are the perfect combination of striking looks and unbelievable flavor, making them ideal for impressing guests or just eating straight off the cooling rack when nobody is looking (highly recommended).
The secret is using the right balance of acid (buttermilk and vinegar) to activate the cocoa and baking soda, ensuring that vibrant red hue doesn’t turn into a muddy brown disappointment. Trust me, these cookies are so straightforward, even my notoriously clumsy uncle managed to bake a batch without setting off the smoke detector. They are truly the easiest way to serve up gourmet glamour without spending an entire afternoon stressing over crumb coats and leveling layers. These cookies deliver maximum visual impact with minimal fuss, proving that sometimes, the simplest things are the most spectacular.
Ingredients for Flawless Red Velvet Thumbprint Cookies
For the Red Velvet Cookie Dough:
- 2 1/4 cups all-purpose flour
- 1/4 cup unsweetened cocoa powder (natural or Dutch process)
- 1 teaspoon baking soda
- 1/2 teaspoon salt
- 1 cup (2 sticks) unsalted butter, softened to room temperature
- 1 1/2 cups granulated sugar
- 2 large eggs
- 1 tablespoon vanilla extract
- 1/2 cup buttermilk
- 1 teaspoon distilled white vinegar
- 1 tablespoon high-quality red food coloring (gel paste works best)
For the Cream Cheese Filling:
- 8 ounces cream cheese, softened
- 1/2 cup (1 stick) unsalted butter, softened
- 3 cups confectioners’ sugar, sifted
- 1 teaspoon vanilla extract
- 1-2 tablespoons milk or cream (if needed for consistency)
Crafting Your Crimson Jewels: Step-by-Step Instructions
Prepping the Foundation
Start by preheating your oven to 350°F (175°C). Line two large baking sheets with parchment paper; this is crucial for preventing sticking and ensuring easy cleanup. In a medium bowl, whisk together the flour, cocoa powder, baking soda, and salt. Make sure the cocoa is fully dispersed, leaving no pockets of dry powder behind. This step sets the stage for the cookie’s signature velvet texture.
Mixing the Magic Dough
In a separate, large bowl, use an electric mixer to beat the softened butter and granulated sugar together until the mixture is light and fluffy, usually about three to five minutes. This creaming process incorporates air, giving the cookies their essential tenderness. Beat in the eggs one at a time, ensuring each is fully incorporated before adding the next. Stir in the vanilla extract, buttermilk, and vinegar. The acid from the vinegar reacts beautifully with the baking soda and cocoa, creating that classic flavor profile.
Adding the Color
Now for the fun part: adding the red food coloring! Start with one tablespoon and mix until the color is deep and even throughout the batter. If you desire a more dramatic crimson, add a little extra, drop by drop. Gradually add the dry ingredient mixture to the wet ingredients, mixing on low speed until just combined. Be careful not to overmix; overmixing develops gluten, leading to tough cookies, and nobody wants a tough cookie.
Shaping and Indenting the Dough
Roll the dough into uniform balls, approximately 1 inch in diameter, or use a small cookie scoop for consistent sizing. Place the dough balls onto your prepared baking sheets, leaving about two inches between them. Now, gently press your thumb (or the back of a small measuring spoon, which is even better for consistency) into the center of each ball to create a shallow well. Don’t press all the way through, but make a definite depression ready for the filling. Pop the baking sheets into the refrigerator for 20 minutes to chill the dough, preventing excessive spreading.
Baking Time
Bake the cookies for 9 to 11 minutes. The edges should look set, and the centers should appear slightly soft. They will continue to firm up as they cool, so resist the urge to overbake. Once baked, let them cool on the baking sheet for five minutes before carefully transferring them to a wire rack to cool completely. The cookies must be completely cooled before you attempt the filling step, otherwise, you’ll end up with a melted mess.
Whipping Up the Creamy Filling
While the cookies are cooling, prepare the cream cheese filling. Beat the softened cream cheese and butter together until incredibly smooth and light. Gradually add the sifted confectioners’ sugar, mixing until creamy. Stir in the vanilla extract. If the frosting seems too stiff for piping, add a tablespoon of milk or cream until you reach a perfectly smooth and pipeable consistency. Spoon or pipe a generous dollop of cream cheese filling into the center of each cooled thumbprint cookie. Serve immediately or store them in the refrigerator until needed.
The Accidental Discovery of Sunshine on a Plate

I stumbled upon the idea for theseRed Velvet Thumbprint Cookieswhile trying to salvage a batch of disastrous cake pops. The leftover dough was too good to waste, so I shaped it, indented it, and filled it with cream cheese. The result was an unexpected delight—a gorgeous, foolproof cookie that brought immediate sunshine to a very grumpy afternoon.
Perfecting the Cooking Process
To achieve peak perfection, first mix the dry ingredients thoroughly, then cream the butter and sugar until fluffy. After chilling the dough briefly to prevent spreading, roll and indent the balls before baking. Add the cream cheese filling only after the cookies are completely cooled to maintain the perfect, smooth texture.
Add Your Touch
You can easily customize these thumbprint beauties. Swap the vanilla extract for almond extract in the filling for a nuttier flavor, or roll the dough balls in powdered sugar before indenting for an extra crackle finish. For a dark twist, use dark cocoa powder to deepen the velvet color dramatically.
Storing & Reheating
Store cooledRed Velvet Thumbprint Cookiesin an airtight container at room temperature for up to four days, or refrigerate for longer freshness due to the cream cheese filling. If freezing, freeze the unfilled cookie bases; thaw them and add the fresh filling just before serving for the best texture.
The first time I served these, my neighbor asked if I’d bought them from a fancy French patisserie. The look on his face when I admitted I baked them myself was priceless, truly proving how impressive these humble cookies are.
Expert Baking Tips for Success
- To get that deep crimson hue, use gel food coloring instead of liquid coloring; it provides intense color without altering the dough’s critical consistency.
- Do not skip the chilling step! Even 20 minutes ensures the butter firms up, helping the cookies maintain their neat, perfect thumbprint shape while baking.
- Use the back of a half-teaspoon measuring spoon to make the indentations. It creates a cleaner, more uniform depression than simply using your thumb.
Conclusion for Red Velvet Thumbprint Cookies
These magnificentRed Velvet Thumbprint Cookiesprove that you don’t need complex techniques to achieve show-stopping results. Combining the tangy, rich cocoa cookie base with the sweet, smooth cream cheese filling creates a perfect textural and flavor harmony. Whether you are baking for a holiday gathering or simply need a spectacular afternoon treat, this recipe offers effortless glamour.
They are quick to prepare, fun to decorate, and guaranteed to earn rave reviews. So ditch the stress, grab your red food coloring, and prepare to elevate your cookie game from mundane to marvelous. Happy baking!
Print
Red Velvet Thumbprint Cookies
These buttery, deep crimson thumbprints are pure elegance. Rich cocoa undertones meet a tender shortbread base, achieved by creaming butter and egg yolk.
- Total Time: 35 minutes
- Yield: 4 servings 1x
Ingredients
- 1 3/4 cups All-purpose flour
- 1 cup Unsalted butter, softened
- 3/4 cup Granulated sugar
- 2 tablespoons Unsweetened cocoa powder
- 1 large Egg yolk
- 1 tablespoon Red liquid food coloring (or 1–2 tsp gel)
- 1 teaspoon Vanilla extract
- 1 cup Powdered sugar (for the glaze or dusting)
Instructions
- Step 1: Preheat oven to 350°F (175°C). In a medium bowl, whisk together the flour and cocoa powder until thoroughly combined; set aside.
- Step 2: In a separate large bowl, cream the softened butter and granulated sugar until light and fluffy. Beat in the egg yolk, vanilla extract, and red food coloring until the mixture is uniformly a deep red color.
- Step 3: Gradually add the dry ingredients to the wet ingredients, mixing on low speed until a cohesive dough forms. Wrap the dough and chill in the refrigerator for at least 30 minutes to firm up.
- Step 4: Roll the chilled dough into 1-inch balls and place them 2 inches apart on a prepared baking sheet. Use your thumb or the back of a small measuring spoon to create a noticeable indentation in the center of each cookie.
- Step 5: Bake for 10-12 minutes, or until the edges are just set. Allow the cookies to cool on the baking sheet for 5 minutes before transferring them to a wire rack to cool completely.
- Step 6: Once cooled, dust the cookies generously with powdered sugar or fill the indentations with a simple cream cheese glaze for the traditional red velvet finish.
Notes
- Store cooled cookies in an airtight container at room temperature for up to 4 days, or freeze the undecorated baked cookies for up to 3 months for future enjoyment.
- While generally enjoyed at room temperature, if the cookies harden after storage, microwave them for just 5-8 seconds to refresh that signature soft chewiness.
- For a festive serving presentation, arrange these deep red cookies with contrasting holiday favorites like shortbread or gingerbread, accompanied by a hot espresso or a glass of chilled sweet milk.
- To achieve the richest red velvet color, make sure to beat the food coloring thoroughly into the wet ingredients before adding the dry mixture, ensuring no streaks of plain butter remain.
- Prep Time: 15 minutes
- Cook Time: 20 minutes
- Method: Stovetop
- Cuisine: American


Leave a Comment