
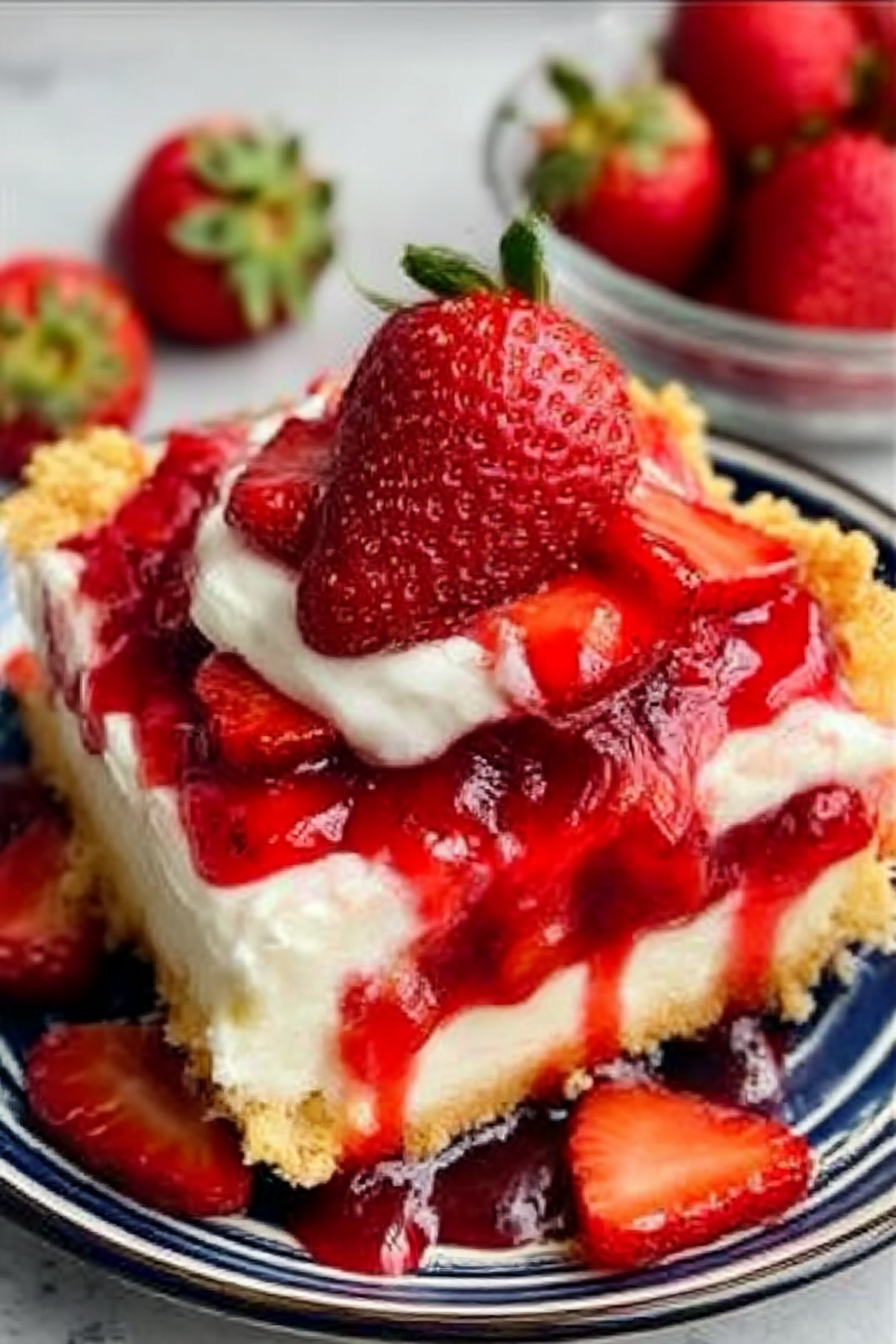
Imagine biting into a dessert that’s both comforting and exciting, where the tangy sweetness of strawberries dances with the creamy richness of cheesecake, all nestled on a buttery, crumbly base. This Strawberry Cheesecake Dump Cake brings together the best of all worlds, offering a symphony of flavors and textures that will leave you craving more.
Picture a lazy Sunday afternoon, the aroma of baking filling the air, as you effortlessly whip up this delightful treat. The vibrant red of the strawberries against the golden crust creates a visual masterpiece, perfect for sharing with loved ones or indulging in a quiet moment of pure bliss.
Here are some of the amazing highlights of this recipe:
- It’s ridiculously easy to make, just dump the ingredients and bake for a hassle-free dessert.
- The combination of fresh strawberries and creamy cheesecake creates a symphony of flavors that tantalizes your taste buds.
- The cake’s vibrant colors and rustic charm make it a visually appealing centerpiece for any gathering.
- You can easily customize it with different fruits or toppings, making it perfect for any occasion.
Ingredients for Strawberry Cheesecake Dump Cake
Here’s what you’ll need to make this delicious dish:
The full ingredients list, including measurements, is provided in the recipe card directly below.
How to Make Strawberry Cheesecake Dump Cake
Follow these simple steps to prepare this delicious dish:
Step 1: Prepare the Base
Preheat your oven to 350°F (175°C). Grease a 9×13 inch baking dish. In a large bowl, whisk together the flour, sugar, baking powder, and salt.
Step 2: Create the Crumb Topping
Cut the cold butter into small pieces and add it to the flour mixture. Use a pastry blender or your fingers to cut the butter into the flour until the mixture resembles coarse crumbs.
Step 3: Make the Cheesecake Filling
In a separate bowl, beat the cream cheese until smooth. Add the eggs and Alcohol-free vanilla extract and beat until well combined.
Step 4: Assemble the Cake
Pour the flour mixture into the prepared baking dish. Spread the cream cheese mixture evenly over the flour. Top with the sliced strawberries.
Step 5: Bake
Bake for 45-50 minutes, or until the top is golden brown and the cheesecake filling is set.
Step 6: Cool and Serve
Let the cake cool completely before slicing and serving. Enjoy with a dollop of whipped cream or a scoop of vanilla ice cream for an extra treat!
Perfecting the Cooking Process

To achieve optimal results for this Strawberry Cheesecake Dump Cake, layer ingredients precisely. Start with the cake mix base, followed by the creamy cheesecake filling, and then a generous topping of strawberries. Bake until golden brown for the perfect texture.
Add Your Touch
Consider swapping the strawberries for blueberries or raspberries for a delightful variation. A sprinkle of lemon zest in the cheesecake layer adds a bright, citrusy note. You can also add a crunchy oat topping for extra texture and flavor.
Storing & Reheating
To store, cover the Strawberry Cheesecake Dump Cake tightly and refrigerate for up to three days. To reheat, warm individual slices in the microwave for about 30 seconds or until heated through. This dessert is best enjoyed fresh but leftovers are still delicious!
Here are a few tips to elevate your Strawberry Cheesecake Dump Cake experience:
- Ensure your cream cheese is softened fully for a smoother, lump-free cheesecake layer that melts perfectly into the cake.
- Don’t overbake! The dump cake is ready when the top is golden and the filling is set; overbaking can make it dry.
- Let the cake cool slightly before serving; this allows the flavors to meld together beautifully, enhancing the overall taste.
(Personal anecdote)
The first time I made this, my friends devoured it in minutes at a summer BBQ. They asked for the recipe immediately, and now it’s a staple at all our gatherings.
Conclusion for Strawberry Cheesecake Dump Cake
This Strawberry Cheesecake Dump Cake is ridiculously easy and delivers maximum flavor with minimal effort. It’s the perfect dessert for potlucks, weeknight treats, or any time you crave something sweet and satisfying. The combination of moist cake, creamy cheesecake filling, and juicy strawberries is simply irresistible. Don’t be surprised if it becomes your new go-to dessert! It’s a guaranteed crowd-pleaser and a recipe you’ll make again and again.
Print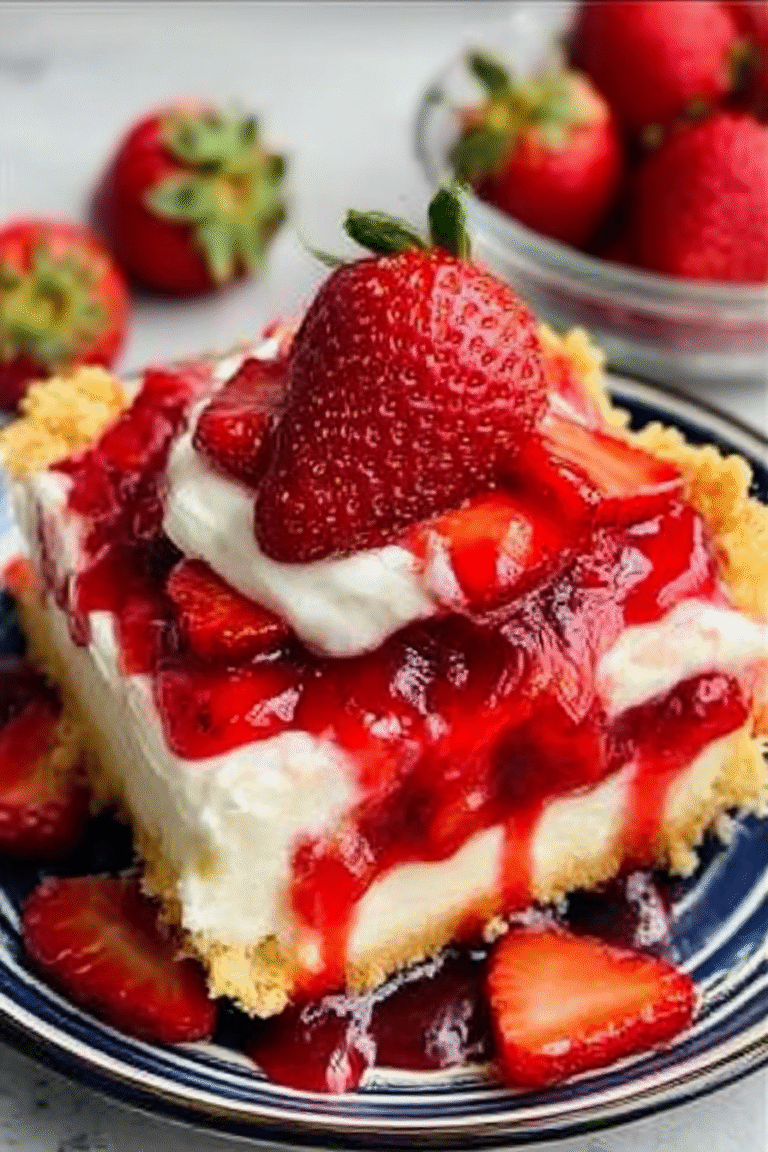
Strawberry Cheesecake Dump Cake
Delicious strawberry cheesecake dump cake recipe with detailed instructions and nutritional information.
- Total Time: 35 minutes
- Yield: 4 servings 1x
Ingredients
- 1 (21 ounce) can strawberry pie filling
- 1 (8 ounce) package cream cheese, softened
- 1/2 cup granulated sugar
- 1 teaspoon vanilla extract
- 1 (15.25 ounce) package yellow cake mix
- 1/2 cup (1 stick) cold butter, cut into pats
- 1/4 cup sliced almonds (optional)
Instructions
- Step 1: Preheat oven to 350 degrees F (175 degrees C). Grease a 9×13 inch baking dish.
- Step 2: In a medium bowl, beat together the softened cream cheese, sugar, and vanilla extract until smooth and creamy. Spread this mixture evenly over the bottom of the prepared baking dish.
- Step 3: Spread the strawberry pie filling evenly over the cream cheese layer.
- Step 4: Sprinkle the dry yellow cake mix evenly over the strawberry pie filling.
- Step 5: Distribute the cold butter pats evenly over the dry cake mix. Sprinkle with sliced almonds, if desired.
- Step 6: Bake in the preheated oven for 40-45 minutes, or until the top is golden brown and the filling is bubbly. Let cool slightly before serving.
Notes
- Store leftovers covered in the refrigerator for up to 3 days to maintain the cake's texture and prevent drying.
- Gently reheat individual portions in the microwave for 30-60 seconds for a warm, comforting treat.
- Serve with a dollop of whipped cream or a scoop of vanilla ice cream to enhance the strawberry and cheesecake flavors.
- For easier butter distribution, try grating the cold butter with a cheese grater before sprinkling it over the cake mix.
- Prep Time: 15 minutes
- Cook Time: 20 minutes
- Method: Stovetop
- Cuisine: American
FAQs
Can I use frozen strawberries in my Strawberry Cheesecake Dump Cake?
Absolutely! Frozen strawberries work wonders in this recipe, especially when fresh ones are out of season. Just thaw them slightly and drain any excess juice before adding them to the cake mix. This prevents the dump cake from becoming soggy. Imagine biting into a warm, comforting slice, the sweet and slightly tart strawberries mingling perfectly with the creamy cheesecake layer. It’s a burst of summer flavors, no matter the time of year. Don’t worry about them being perfectly thawed, the oven will take care of the rest!
What can I use instead of butter in this Strawberry Cheesecake Dump Cake recipe?
If you’re looking for a substitute for butter, you’ve got options! Melted coconut oil works surprisingly well, lending a subtle, tropical note to the cake. Or, you could use a plant-based butter alternative. Just ensure it melts smoothly and distributes evenly over the cake mix. Think of the possibilities! A hint of coconut, or the richness of a good butter substitute, each adding its own unique flair to this delightful dessert. The slight adjustment makes it special.
How do I prevent my Strawberry Cheesecake Dump Cake from getting soggy?
Ah, the dreaded soggy bottom! Fear not, there’s a simple solution. Make sure to drain any excess juice from your strawberries, especially if using frozen ones. Also, avoid over-mixing the ingredients. Remember, this is a dump cake, not a perfectly layered masterpiece. A little imperfection adds to its charm. Embrace the rustic look and focus on that delicious taste. A slightly imperfect, incredibly tasty cake is far better than a picture-perfect, soggy disaster.
Can I add other fruits to my Strawberry Cheesecake Dump Cake?
Oh, the possibilities are endless! While this recipe focuses on the classic strawberry cheesecake combo, feel free to experiment. Blueberries, raspberries, or even peaches would be delightful additions. Consider a mixed berry medley for a burst of different flavors and textures. Just remember to adjust the amount of fruit accordingly, so the cake doesn’t become too wet. Think of it as your own personal dessert adventure. Let your taste buds guide you!

Leave a Comment