
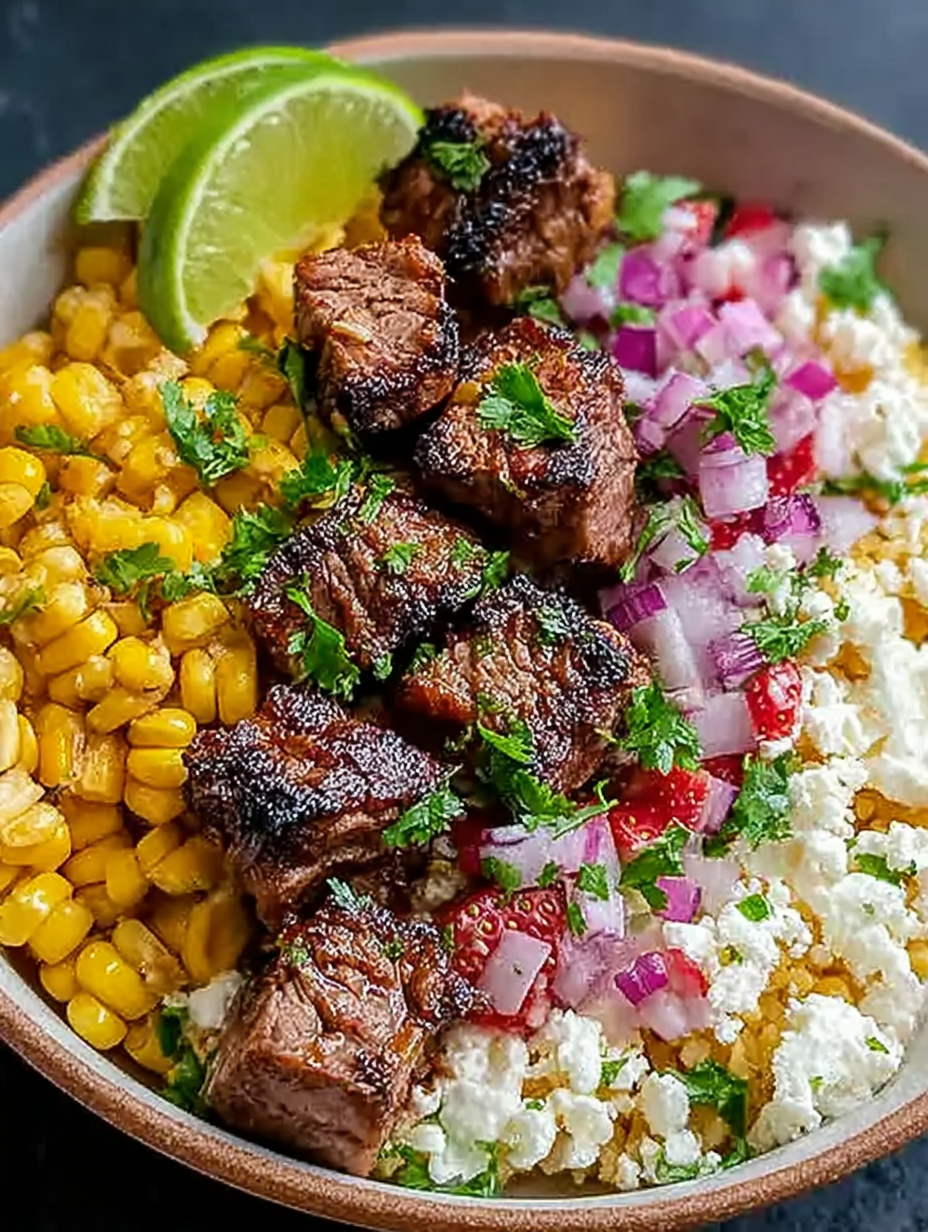
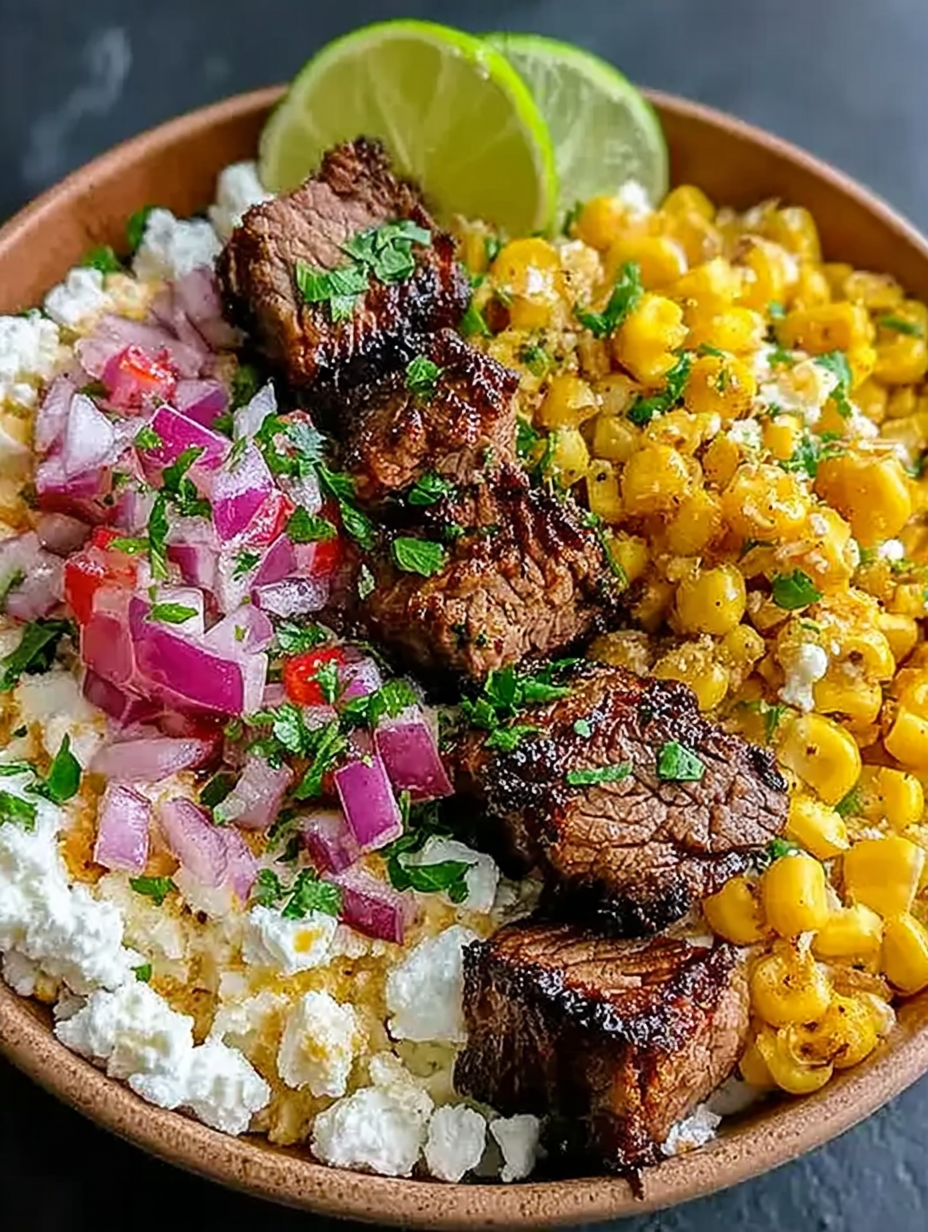
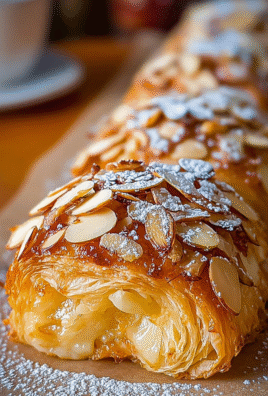
Remember that time dessert was boring? We decided to throw tradition out the window, merging crispy, creamy, and fruity heaven into one handheld delight. Prepare yourself for the wildly inventive and utterly irresistibleStrawberry Crunch Cheesecake Tacos, the dessert that proves everything is better folded.
This isn’t just cheesecake; it’s a flavor explosion wrapped in a golden shell, delivering nostalgic strawberry crunch bliss with every single, glorious bite.
- Effortless preparation allows even novice bakers to create a show-stopping dessert perfect for last-minute celebrations or indulgent weekend treats.
- The vibrant flavor profile balances tangy cream cheese, sweet vanilla, and the bright, fresh pop of strawberries for ultimate satisfaction.
- Visually stunning and highly customizable, these handheld treats are designed to impress guests at gatherings, turning heads at any dessert table.
- Their portable nature makes them incredibly versatile for picnics, parties, or simply enjoying on the couch during a binge-watching session.
The Dessert Revolution We Never Knew We Needed
I distinctly remember the moment the idea forStrawberry Crunch Cheesecake Tacoshit me. It was 2 AM, I was staring at an empty bag of tortilla chips, and lamenting the fact that the dessert platter looked sad and predictable. Why are tacos only for savory goodness? Why should cheesecake be confined to a crumbly graham cracker prison? It seemed fundamentally wrong. I needed a hero, and that hero, my friends, had a hard shell and a creamy, crunchy center.
The beauty of this recipe lies in its sheer audacity. It takes the beloved, nostalgic strawberry crunch topping—the one that defined childhood ice cream bars—and marries it with the sophistication of a rich, velvety cheesecake filling. Then, just to make sure things get exciting, we tuck it all inside a crispy, sweet taco shell. People laugh when you tell them you’re serving dessert tacos, but they immediately stop laughing and start demanding seconds the moment they take that first bite. This isn’t just a recipe; it’s an experience, a conversation starter, and quite possibly the reason your next dinner party becomes legendary.
Making the switch from plate-and-fork dessert to handheld architecture solved several problems. No more messy slicing, no more structural collapses when serving, and most importantly, maximum flavor delivery right to your face. We’re aiming for peak textural contrast here: the shatter of the shell, the silky cool filling, and the satisfying grit of the strawberry crunch topping. Forget everything you thought you knew about dessert because these delightful little packages are about to rewrite the rules. Get ready to roll up your sleeves and embrace the glorious chaos of the dessert taco movement!
Mastering the Components of the Strawberry Crunch Cheesecake Tacos
To achieve cheesecake taco perfection, we must treat each component—the shell, the filling, and the crunch—like the superstar it is. Sacrificing quality in any step means missing out on the full sensory experience that defines these handheld masterpieces.
Crafting the Ultimate Strawberry Crunch Topping
The crunch is the heart and soul of this dessert, providing that iconic flavor and texture contrast. We need volume, we need color, and most importantly, we need that unmistakable buttery crispness. The secret to achieving that vibrant strawberry flavor without relying on artificial ingredients often lies in freeze-dried strawberries. When crushed and mixed with crushed vanilla wafers and melted butter, they create a dazzling, ruby-red crumble that tastes intensely of summer.
Don’t rush the toasting of the crunch mixture. After combining the crushed wafers, freeze-dried strawberries, a touch of powdered sugar, and melted butter, spread it evenly on a baking sheet. Bake it at 350°F (175°C) for just about 8 minutes. You are aiming for dry, toasted crumbs, not burnt dust. Let it cool completely before using. A cool, crispy topping is crucial; if it’s warm, it will melt the delicate cheesecake filling instantly, and we certainly don’t want a structural catastrophe on our hands.
Whipping Up the Perfect Creamy Filling
The cheesecake filling must be rich, tangy, and, most importantly, stable enough to hold its shape inside a taco shell. Since we’re ditching traditional baking methods and pectin, stability comes from high-quality cream cheese and precise blending. Start with full-fat cream cheese, ensuring it is completely softened—this prevents lumps that can ruin the texture and cause structural weakness. Mix the cream cheese with powdered sugar, a splash of alcohol-free vanilla extract, and a touch of lemon zest to enhance that classic cheesecake tang.
Some recipes use heavy cream folded in, which is fantastic, but for maximum structural integrity in a taco, I recommend beating the mixture until it is exceptionally light and airy. The air incorporation helps it stabilize when chilled. After mixing, make sure you chill the filling for at least four hours, or preferably overnight. A cold, firm filling is much easier to pipe into the taco shells and provides a better contrast to the crispy exterior. Remember, patience is a virtue, especially when dealing with cream cheese stability.
The Crispy Canvas: Preparing the Taco Shells
While you can use store-bought dessert shells, for truly authentic and deliciousStrawberry Crunch Cheesecake Tacos, making your own is worth the minor extra effort. Start with small, soft flour tortillas. Brush them lightly with melted butter and dust them generously with a mixture of cinnamon sugar. This sweetens the shell and helps it caramelize beautifully.
To achieve that iconic taco shape, you have a couple of options. The easiest method is draping the warmed, buttered tortillas over the racks of your oven while baking at 375°F (190°C) for 8–10 minutes. The weight of the tortilla causes it to sag into a U-shape as it crisps. Alternatively, you can fry them quickly in hot oil (about 350°F / 175°C), immediately using tongs to fold them slightly while they cool on a paper towel-lined rack. Whichever method you choose, the resulting shell should be golden, crisp, and ready to cradle your magnificent cheesecake filling.
Ingredients for Strawberry Crunch Cheesecake Tacos
Here’s what you’ll need to make this delicious dish:
- Small Flour TortillasOpt for the small, street taco size; six to eight tortillas yield perfect handheld portions.
- Cream CheeseUse two standard blocks (16 ounces total) of full-fat cream cheese, ensuring they are completely softened to prevent lumps in the filling.
- Confectioners’ SugarAlso known as powdered sugar, this dissolves easily and provides the smooth sweetness necessary for the no-bake filling.
- Alcohol-Free Vanilla ExtractUse high-quality pure alcohol-free vanilla extract to enhance the creamy notes of the cheesecake base.
- Lemon ZestA small amount of freshly grated lemon zest brightens the filling and cuts through the richness, balancing the flavor.
- Unsalted ButterEssential for both binding the crunch topping and brushing the taco shells before baking or frying.
- Vanilla Wafer CookiesThese form the base of the crunch topping; ensure they are crushed finely but still retain some texture.
- Freeze-Dried StrawberriesCrucial for the vibrant color and intense, natural strawberry flavor of the crunch layer.
- Granulated Sugar and CinnamonUsed together to create the sweet coating for the outside of the taco shells before shaping and crisping.
The full ingredients list, including measurements, is provided in the recipe card directly below.
How to Make Strawberry Crunch Cheesecake Tacos
Follow these simple steps to prepare this delicious dish:
-
Prepare and Shape the Taco Shells
Preheat your oven to 375°F (190°C). In a small bowl, combine 1/4 cup granulated sugar and 1 teaspoon of cinnamon. Brush the tortillas lightly on both sides with melted butter, then dredge them through the cinnamon sugar mixture. Drape the prepared tortillas over two bars of the oven rack, allowing them to hang and form a taco shape. Bake for 8 to 10 minutes until they are golden brown and perfectly crisp. Remove them gently and allow them to cool completely before filling.
-
Make the Strawberry Crunch Topping
Pulse the vanilla wafers and freeze-dried strawberries in a food processor until they form coarse crumbs. Transfer the crumbs to a bowl and mix with 2 tablespoons of melted butter and 1 tablespoon of powdered sugar until evenly coated. Spread the mixture on a small baking sheet lined with parchment paper. Bake at 350°F (175°C) for 8 minutes to toast the crumbs slightly. Let the crunch cool completely and set aside.
-
Mix the No-Bake Cheesecake Filling
Ensure the cream cheese is fully softened. In a large mixing bowl, beat the cream cheese, 1 cup of powdered sugar, 1 teaspoon of alcohol-free vanilla extract, and the lemon zest using an electric mixer until the mixture is light, fluffy, and completely smooth. Taste and adjust sweetness if desired. Cover the bowl and refrigerate the filling for at least 4 hours, or until very firm. This chilling time is non-negotiable for stability.
-
Assemble the Strawberry Crunch Cheesecake Tacos
Transfer the chilled cheesecake filling to a piping bag fitted with a large star tip (or use a large Ziploc bag with the corner snipped off). Gently open the cooled, crispy taco shells. Pipe the firm cheesecake filling generously into the center of each shell, starting at one end and working your way to the other.
-
Garnish and Chill
Once filled, gently dip the edges of the creamy filling in the prepared strawberry crunch topping, ensuring the crunchy texture adheres nicely to the cream. You can also sprinkle any remaining crunch mixture over the top. Immediately return the finished Strawberry Crunch Cheesecake Tacos to the refrigerator for a final 30 minutes to ensure maximum coolness before serving.
Transfer to plates and drizzle with a light strawberry reduction or sprinkle with fresh strawberry slices for the perfect finishing touch.
Tips for Cheesecake Taco Perfection
Achieving structural integrity and incredible flavor requires attention to a few key details. Don’t cut corners on the chilling time; a warm filling equals a messy taco. Always use full-fat dairy for the richest flavor and best stability in a no-bake recipe. If you want an extra layer of flavor complexity, try adding a tiny pinch of salt to the cheesecake filling—it subtly enhances the sweetness.
If you choose to fry your shells, ensure the oil temperature is consistent (around 350°F or 175°C). Fry them quickly, about 30 seconds per side, and fold them immediately as they cool. This yields an even crispier shell that stands up beautifully against the creamy filling. For decorative flair, consider using a different color crunch on the opposite end, perhaps a simple vanilla or lemon crunch, to make yourStrawberry Crunch Cheesecake Tacoseven more visually dramatic.
Common Questions About Dessert Tacos
Can I make the shells ahead of time?
Yes, absolutely. You can prepare and shape the taco shells up to 2 days in advance. Store them in an airtight container at room temperature to maintain their crispness. Humidity is their enemy, so ensure they are completely cool before storing.
How long do these dessert tacos last?
The assembled tacos are best enjoyed within 24 hours. After that, the moisture from the cheesecake filling starts to soften the shells, compromising the crucial crunchy texture. Store any leftovers loosely covered in the refrigerator.
What can I use instead of vanilla wafer cookies?
If you don’t have vanilla wafers, you can successfully substitute shortbread cookies, golden Oreos (without the filling), or even simple digestive biscuits. The goal is a neutral, slightly buttery crumb that allows the freeze-dried strawberry flavor to shine through.
Are there any variations for the filling?
Certainly! While the classic cream cheese filling is divine, you could explore flavor variations by incorporating mango puree, melted white chocolate, or a touch of cocoa powder for a chocolate cheesecake taco experience. Just ensure that the consistency remains thick and firm for proper piping and structure.
Do I have to use freeze-dried strawberries?
Freeze-dried strawberries provide the most intense flavor and beautiful, dry color for the crunch topping. While you could technically use strawberry powder or extract, these alternatives usually result in a less vibrant crunch that lacks the texture achieved by using the freeze-dried fruit pieces.
Life is too short for boring desserts. We’ve all been there—staring mournfully at a predictable slice of pie or a perfectly nice, but utterly unexciting, scoop of ice cream. Sometimes, you need a culinary revolution, a sweet mashup that defies categorization and throws a party in your mouth. Friends, I present to you the answer to your dessert dilemmas: the magnificent, the glorious, the highly addictiveStrawberry Crunch Cheesecake Tacos.
This isn’t just a recipe; it’s an experience. Imagine the classic, nostalgic flavor of that famous strawberry shortcake ice cream bar, but elevated, deconstructed, and shoved happily into a crispy taco shell alongside a luscious, tangy cheesecake filling. The moment you take that first bite, combining the creamy interior with the shattering crunch and vibrant strawberry dust, you will understand why these tacos have become the stuff of legend.
Why Strawberry Crunch Cheesecake Tacos Are Your New Obsession
The secret to great dessert isn’t just sweetness; it’s texture. We have meticulously engineered this recipe to hit all the right notes: sweet, tangy, creamy, and gloriously crispy. If your current dessert routine feels like culinary beige, these vibrant pink beauties offer a much-needed splash of flavor and fun. They are surprisingly simple to create, making them the ideal showstopper for parties or a Friday night treat when the urge for something extraordinary strikes.
Most people stop at the basic strawberry crunch topping, but we take it further by housing that creamy, no-bake filling inside a perfectly crisp shell. The juxtaposition of the cold, dense filling and the warm, slightly savory notes of the taco shell is what makes this dessert truly transcendent. Forget fussing with water baths or delicate crusts; this is cheesecake liberated from the pan and ready to travel.
The Anatomy of the Perfect Dessert Taco
Success lies in balancing the three key components. First, you need the vehicle—a crispy, sweet vessel, typically crafted from small flour tortillas or even wonton wrappers, lightly fried or baked and dusted with cinnamon sugar. Next comes the heart: a velvety smooth, no-bake cheesecake filling that is dense enough to hold its shape but soft enough to melt luxuriously. Finally, the iconic, shimmering pink crunch provides the signature flavor and texture that seals the deal. We focus heavily on ensuring the shells remain crisp until the moment of consumption.
Gathering Your Sweet Arsenal: Ingredients List
Preparation is simple, requiring minimal specialty equipment, but maximum quality ingredients. Ensure all dairy components are at room temperature for the smoothest filling possible.
For the Crispy Taco Shells
- 10 small, 4-inch flour tortillas (or wonton wrappers)
- 2 tablespoons granulated sugar
- 1 teaspoon ground cinnamon
- 3 tablespoons unsalted butter, melted (or neutral oil for frying)
For the Creamy No-Bake Cheesecake Filling
- 16 ounces cream cheese, softened
- 1 cup powdered sugar
- 1/2 cup heavy whipping cream, cold
- 1 teaspoon pure alcohol-free vanilla extract
- 2 tablespoons lemon juice (for tang and stability)
For the Iconic Strawberry Crunch Topping
- 1/2 cup all-purpose flour
- 1/4 cup freeze-dried strawberry slices, crushed into a powder
- 1/4 cup granulated sugar
- 4 tablespoons unsalted butter, melted
- 1/2 teaspoon pure alcohol-free vanilla extract
- Pink or red food coloring (optional, for enhancing color)
Step-by-Step: Crafting Your Strawberry Crunch Cheesecake Tacos
Tackle this recipe in three distinct phases: the crunch, the shell, and the filling. Timing is important here; we want everything chilled and ready for immediate assembly.
Phase 1: Crunch and Shell Prep
- Make the Crunch:Preheat your oven to 350°F (175°C). In a medium bowl, combine the flour, crushed freeze-dried strawberries, sugar, melted butter, alcohol-free vanilla extract, and food coloring (if using). The mixture will look like wet sand.
- Bake the Crunch:Spread the mixture thinly on a parchment-lined baking sheet. Bake for 10–12 minutes until slightly dried out and crumbly. Let it cool completely. Once cooled, break up any large clusters to create the iconic crunch texture.
- Prepare the Shells:Mix the cinnamon and sugar in a shallow dish. Brush both sides of the tortillas lightly with melted butter. Bake or air fry them briefly until pliable but firm. Immediately drape the warm tortillas over the rungs of an upside-down cooling rack or taco stand to set the taco shape as they cool. Dust them with the cinnamon sugar mixture.
Phase 2: Whipping the Dreamy Filling
Ensure your cream cheese is thoroughly softened; this is vital for a smooth texture. Use an electric mixer for the best results, scraping down the bowl frequently.
- Cream the Base:In a large bowl, beat the softened cream cheese and powdered sugar until light, fluffy, and completely smooth. Add the alcohol-free vanilla extract and lemon juice, beating until incorporated.
- Whip the Cream:In a separate, chilled bowl, whip the heavy cream until stiff peaks form.
- Combine:Gently fold the whipped cream into the cream cheese mixture using a spatula. Do not overmix, or the filling will lose its airiness. Transfer the filling to a piping bag (or a zip-top bag with the corner snipped off) and chill for at least 30 minutes.
Phase 3: Assembly Time!
This is where the magic happens, but remember the golden rule: assemble right before serving to maintain maximum crispness!
- Pipe the Filling:Retrieve the chilled shells and the filling. Pipe a generous amount of cheesecake filling into each prepared taco shell.
- Add the Crunch:Hold the taco gently and roll the exposed filling edges through a shallow dish of the strawberry crunch mixture. Make sure the crunch adheres nicely to the sides.
- Serve Immediately:Garnish with additional fresh strawberry slices or a dusting of powdered sugar if desired. TheseStrawberry Crunch Cheesecake Tacosare best served within minutes of assembly.
Perfecting the Cooking Process
Start by baking the Strawberry Crunch first, letting it cool completely. While the crunch chills, prepare the creamy cheesecake filling. Fry or bake the shells last, allowing them to cool before assembling everything immediately for optimal crispness.
Add Your Touch
Try swapping the strawberry flavor for lemon or blueberry by using different freeze-dried fruit. For an extra rich filling, fold in a tablespoon of smooth cashew butter. A drizzle of melted white chocolate adds gourmet flair to the final plating.
Storing & Reheating
Store the filling, shells, and crunch separately in airtight containers. Do not assemble until serving, as the shells will quickly absorb moisture. Leftover filling lasts 3 days chilled, and crunch stays fresh for 1 week at room temperature.
Expert Tips for Taco Perfection
My cousin tried to assemble these 4 hours early once, resulting in sadness soup. I learned the hard way that patience and delayed assembly are crucial for crunch success!
- Ensure your cream cheese is completely softened to prevent lumps in the filling; lumps ruin the smooth cheesecake texture we are aiming for.
- If you fry the shells, use tongs to hold them in the taco shape immediately upon removal from the oil until they fully cool and set up.
- Use high-quality alcohol-free vanilla extract. In a no-bake recipe like this, the flavor of the vanilla really shines through and makes a difference.
These sweet tacos provide the perfect combination of textures—the sweet, tangy creaminess wrapped in a crispy hug and finished with a burst of strawberry flavor. They are fun, festive, and guaranteed to impress anyone looking for an exciting twist on dessert.
Frequently Asked Questions About Dessert Tacos
We often get questions about how to maximize the crunch factor and prep these treats efficiently.
Can I make the Strawberry Crunch topping ahead of time?
Absolutely. The strawberry crunch is exceptionally stable and keeps very well. Prepare the crunch mixture up to a week in advance and store it in a sealed container at room temperature. Just ensure it is completely cooled before storage to prevent condensation.
How do I keep the shells from getting soggy?
Sogginess is the nemesis of the dessert taco. To combat this, minimize moisture contact. First, ensure the shells are fully cooled before adding the filling. Second, and most importantly, only assemble the tacos within 30 minutes of serving. If you must prep slightly earlier, a thin layer of melted white chocolate brushed inside the shell provides a moisture barrier.
Do I have to fry the taco shells?
No, frying is optional. For a healthier or easier alternative, bake or air fry the tortillas. Baking them draped over the rungs of a cooling rack provides that perfect curved shape without the fuss of oil. Just be careful not to overbake them, or they will crack when shaped.
What if I can’t find freeze-dried strawberries?
While freeze-dried strawberries give the most authentic flavor and intense color, you can substitute them with strawberry wafer cookies, crushed finely, mixed with a little extra butter and flour for stability, and then baked briefly. The texture will be slightly softer but still delicious.
The Culinary Comedy of the Dessert Taco
We all know the dessert realm needed a shake-up. Cupcakes are charming, cookies are classic, but sometimes you just want dessert to be unapologetically fun—and slightly unstable. Enter the dessert taco! Forget everything you know about savory shells stuffed with shredded lettuce and salsa. We are talking about a sweet handheld masterpiece that marries the creamy tang of cheesecake with the nostalgic, vibrant flavor of a classic strawberry shortcake ice cream bar.
Why Tacos? Why Cheesecake?
The concept might sound bizarre, like combining a tuxedo with Crocs, but trust me, it works. The taco shape provides the perfect vessel for maximum filling containment while delivering a satisfying crunch with every bite. The cheesecake element must be no-bake, quick, and fluffy, ensuring it holds its shape against the crispy shell. This entire dessert structure—the crunch, the creaminess, the sweet fruit—is built for immediate happiness. If you’re looking for a dessert that shouts, “I’m here to party,” these sweet handheld treats are your answer.
Achieving the Perfect Strawberry Crunch
The secret to these amazing treats isn’t just the filling; it’s the iconic crunch layer. That beautiful, pink and buttery crumble brings the whole concept together. We achieve this texture using freeze-dried strawberries for intense color and flavor, combined with vanilla sandwich cookies for structure and sweetness. If you skip this step, you’re essentially just eating cheesecake dip in a shell, and while that’s still tasty, it lacks the essential character we are aiming for.
Ingredients for the Crunch Layer
Creating this crumb mixture takes minimal effort but delivers maximum impact. You will need high-quality vanilla sandwich cookies, freeze-dried strawberries (they must be freeze-dried, not fresh!), and a small amount of melted butter to bind everything without making it soggy. Blend the cookies and strawberries until you have a coarse meal, then mix in the butter until the mixture resembles wet sand. This ensures an even coating on the shells and a delightful texture in the filling.
Mixing the No-Bake Filling
The cheesecake filling is delightfully simple. We combine softened cream cheese, powdered sugar for sweetness and stability, a splash of vanilla, and a crucial ingredient: whipped topping. The whipped topping lightens the mixture considerably, making it airy and easy to pipe into the taco shells. Make sure your cream cheese is completely at room temperature before starting, otherwise, you risk a lumpy, frustrating filling. Whisk until the mixture is silken and lump-free.
Recipe Card: Strawberry Crunch Cheesecake Tacos
Ready to ditch the traditional dessert methods? Here is exactly what you need to create these Instagram-worthy, wildly delicious sweet tacos.
Ingredients List
- 8 small flour tortillas (or use pre-made waffle cone shells)
- 1 block (8 oz) cream cheese, softened
- 1 cup powdered sugar
- 1 teaspoon alcohol-free vanilla extract
- 8 oz tub frozen whipped topping, thawed
- 1 cup vanilla sandwich cookies
- 1/2 cup freeze-dried strawberries
- 2 tablespoons melted unsalted butter
- 1/4 cup white chocolate or candy melts (optional, for dipping)
Step-by-Step Instructions
- Prepare the Shells (If using tortillas):Preheat oven to 350°F (175°C). Lightly brush tortillas with water or butter spray. Drape them over the rungs of an oven rack or place them in a taco holder, ensuring they hold a U-shape. Bake for 8–10 minutes until crisp. Let cool completely.
- Make the Crunch:Pulse the vanilla sandwich cookies and freeze-dried strawberries in a food processor until a fine crumb forms. Transfer to a bowl and stir in the melted butter. Reserve 1/4 cup of the mixture for garnish.
- Prepare the Filling:In a large bowl, beat the softened cream cheese, powdered sugar, and alcohol-free vanilla extract until smooth and creamy. Gently fold in the thawed whipped topping until just combined. Do not overmix.
- Dip the Shells (Optional):If dipping, melt the white chocolate or candy melts. Dip the edges of the cooled taco shells into the melted chocolate, then immediately dip into the strawberry crunch mixture you reserved. Let them set on parchment paper.
- Fill and Serve:Scoop the cheesecake filling into a piping bag fitted with a star tip (or use a large ziploc bag with a corner snipped). Pipe the filling generously into the prepared taco shells.
- Garnish:Sprinkle the remaining strawberry crunch mixture liberally over the filling. Serve immediately or chill for up to 2 hours before serving.
Pro Tips for Taming the Taco Shell
While the filling is straightforward, the taco shells sometimes decide to rebel. If you opt for homemade shells using flour tortillas, watch them carefully in the oven. They transition from perfectly crisp to burnt crisp very quickly. Using pre-made mini waffle cone shells eliminates this hassle and provides an even sweeter foundation, which is highly recommended for beginners. If your finished dessert tacos feel a little unstable, refrigerate them for 30 minutes; the filling will firm up slightly and hold its shape better against the shell. This recipe works wonderfully for batch making, but always add the crunch topping right before serving to maintain maximum texture.
Conclusion for Strawberry Crunch Cheesecake Tacos
These Strawberry Crunch Cheesecake Tacos represent the perfect marriage of fun presentation and classic comfort dessert. They offer that delightful nostalgic flavor of strawberry crunch bars, beautifully housed in a crispy, satisfying shell. The no-bake filling simplifies the process, making this recipe accessible even for novice bakers looking to impress. Whether you are hosting a summer barbecue or simply craving a whimsical afternoon treat, these sweet tacos deliver on all fronts: texture, flavor, and sheer joyous absurdity. Stop settling for plain desserts; embrace the delicious chaos and treat yourself to this unique handheld creation.
Print
Strawberry Crunch Cheesecake Tacos
Bake soft tortillas into crispy taco shells, then fill them with luscious cream cheese mousse and a vibrant strawberry-wafer crunch.
- Total Time: 35 minutes
- Yield: 4 servings
Ingredients
- Small flour tortillas (soft taco size): 8 count
- Cream cheese (softened): 8 oz block
- Powdered sugar: 1 cup
- Frozen whipped topping (thawed): 8 oz container
- Vanilla wafer cookies (crushed): 1.5 cups
- Strawberry agar-agar mix (dry Jell-O): 3 oz box
- Unsalted butter (melted): 4 tablespoons
- Fresh strawberries (sliced for garnish): 1/2 cup
Instructions
- Step 1: Preheat oven to 375°F (190°C). Shape the tortillas into taco shells by draping them over the wires of an inverted muffin tin or a wire baking rack, allowing them to bake into a standing shell shape. Bake for 8 to 12 minutes until crispy and lightly browned. Let cool completely.
- Step 2: Prepare the strawberry crunch topping by combining the crushed vanilla wafers, dry strawberry carrageenan mix, and melted butter in a small bowl. Spread the mixture evenly on a baking sheet and bake for 5 minutes; let cool completely, then set aside.
- Step 3: Prepare the cheesecake filling: Beat the softened cream cheese and powdered sugar together in a medium bowl until light and fluffy. Gently fold in the thawed whipped topping until the mixture is uniform and smooth.
- Step 4: Using a spoon or a piping bag, fill each cooled, crispy taco shell with the prepared cheesecake mixture, ensuring the filling is slightly mounded at the open top of the shell.
- Step 5: Immediately roll the exposed edges of the cheesecake filling into the strawberry crunch mixture prepared in Step 2, ensuring the sides of the filling are completely coated. Garnish the filling with a few fresh strawberry slices before placing the finished tacos in the refrigerator to chill for at least 30 minutes prior to serving.
Notes
- Store finished tacos chilled in an airtight container for up to 3 days; however, for maximum crunchiness, consume within 12 hours of assembly.
- Never attempt to reheat these tacos; they are a chilled dessert, so ensure they set in the refrigerator for at least 30 minutes before serving for optimal filling consistency.
- For a dazzling finish, try dipping the tip of the taco into extra strawberry crunch mixture, then serving alongside a small drizzle of white chocolate or a scoop of vanilla bean ice cream.
- For intensely flavored crunch, ensure the dry strawberry mix is thoroughly and evenly incorporated into the vanilla wafer mixture before baking, as the brief heat helps bloom the powdered flavor.
- Prep Time: 15 minutes
- Cook Time: 20 minutes
- Method: Stovetop
- Cuisine: American
FAQs
How far in advance can I prepare Strawberry Crunch Cheesecake Tacos?
You can prepare the crunch topping up to three days in advance and store it in an airtight container at room temperature. The no-bake cheesecake filling can be made the day before and kept refrigerated. However, you should assemble the finished Strawberry Crunch Cheesecake Tacos no more than two hours before serving. If you assemble them too early, the moisture from the filling will soften the delicate shell and the crunch will start to lose its appealing texture. For the best, most satisfying result, keep the shells separate until just before filling and garnishing for your gathering.
Can I use fresh strawberries instead of freeze-dried ones for the crunch?
Using fresh strawberries is not recommended for the crunch topping. Freeze-dried strawberries are crucial because they contain very little moisture, which allows them to blend into a stable, vibrant powder that adheres perfectly to the cookie crumbs and chocolate. Fresh strawberries introduce too much water, resulting in a soggy paste rather than a crisp crumble. If you want to incorporate fresh strawberries, slice them thinly and use them as an extra garnish on top of the finished sweet tacos, adding a layer of juicy freshness.
What is the best way to store leftover Strawberry Crunch Cheesecake Tacos?
If you somehow manage to have leftovers (a rare culinary phenomenon), store them loosely covered in the refrigerator. Note that the crispy shell will soften considerably overnight due to the moisture content of the cheesecake filling. They remain safe to eat for up to 48 hours, but they are best enjoyed on the day of assembly when the contrast between the crispy shell and the creamy filling is strongest. To maintain crunch, only assemble the exact number of these delicious sweet tacos you plan to eat immediately.
Are there any suitable substitutes for the vanilla sandwich cookies in the recipe?
Absolutely! If you prefer a slightly different flavor profile, you can easily swap the vanilla sandwich cookies. Golden Oreos or shortbread cookies work excellently and maintain the necessary structural integrity for the crumble base. You could even use graham crackers for a slightly spicier, more traditional cheesecake crust flavor, though the texture might be marginally finer. The key is to select a dry, firm cookie that processes well into fine crumbs without turning oily when combined with the melted butter for this sweet taco treat.


Leave a Comment