
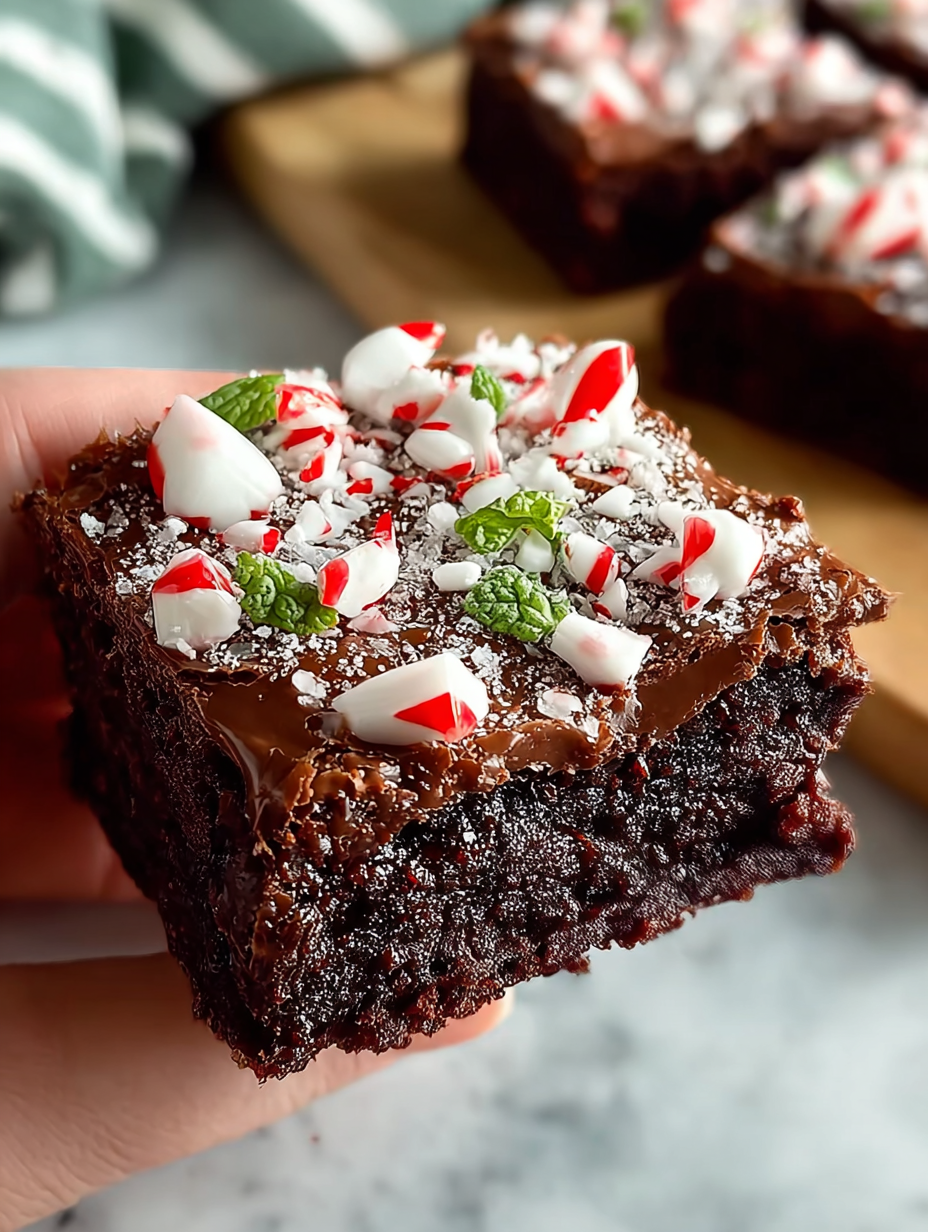
When the holiday stress hits, sometimes you just need dessert therapy, and this recipe delivers. Forget complicated baking projects; we are makingThe Easiest Ever Peppermint Brownies, guaranteed to melt away your worries.
The rich, fudgy chocolate married with a cool peppermint swirl creates a classic flavor that tastes like a cozy winter evening, making this treat absolutely essential for your next gathering or solo snack session.
- Achieve an intensely fudgy texture and a beautiful, crackled top without needing any complicated techniques or special equipment.
- The vibrant layer of creamy peppermint frosting transforms a simple brownie into a centerpiece dessert perfect for any festive table.
- This versatile recipe allows for endless customization, easily swapping toppings or adjusting the intensity of the refreshing peppermint flavor.
- Prepare this entire dessert from start to finish in under an hour, making it the ultimate grab-and-go option for last-minute events.
The Peppermint Dilemma: Why We Need These Brownies Now
Picture this: It’s December, the house smells faintly of pine needles and desperation, and you volunteered to bring “something festive” to the office potluck. Your initial ambitious plan involved a four-layer meringue torte that required specialized culinary tweezers and a prayer. Naturally, that ended with a dramatic kitchen explosion involving egg whites and a lot of swearing, proving once again that complex baking and holiday stress are terrible roommates.
That is precisely why I invented this recipe. I needed something ridiculously flavorful, undeniably festive, and so simple that a fully-grown adult could manage it while simultaneously answering emails and debating whether sweatpants count as business casual. This isn’t just a recipe; it’s a declaration of independence from fussy desserts. These brownies are the culinary equivalent of finding a twenty-dollar bill in a forgotten jacket pocket—pure, effortless joy.
The Secret to Ultimate Fudginess
Many brownie recipes promise fudgy results but deliver sad, cake-like squares. We skip that mediocrity entirely. The key here is twofold: melted butter and a careful balance of wet-to-dry ingredients. Melting the butter creates that desirable dense chewiness by inhibiting gluten development, ensuring the final product collapses perfectly into gooey magnificence rather than rising up like a sad little sponge cake. Do not rush the melting process; use good quality unsalted butter for the best, richest flavor. We also use a little extra cocoa powder to deepen the chocolate base, creating a dark canvas for the bright, white peppermint frosting.
Mastering the Peppermint Swirl
The frosting is where the magic truly happens. Unlike heavy, sickly-sweet buttercream, this version is light, airy, and intensely refreshing. We use powdered sugar, a touch of cream, and, critically, high-quality peppermint extract. A quick word of advice: peppermint extract is potent. Start with half the recommended amount, taste, and then slowly add more until it hits that perfect balance between refreshing and toothpaste-adjacent. Nobody wants a brownie that doubles as dental hygiene. If you find the frosting too thick for a perfect spread, add cream one teaspoon at a time until you reach a smooth, easily managed consistency. This light frosting contrasts beautifully with the dense, dark chocolate layer below.
Ingredients for The Easiest Ever Peppermint Brownies
Here’s what you’ll need to make this delicious dish:
- Unsalted ButterUse high-quality butter, melted completely but not boiling hot, to ensure that rich, dense texture.
- Granulated Sugar and Brown SugarThe combination adds depth and moisture; the brown sugar contributes to the ultimate fudginess.
- Eggs and Egg YolksUsing an extra egg yolk increases the fat content, which is the ultimate secret weapon for a chewy center.
- Vanilla PowderUse pure vanilla powder to enhance the chocolate flavor and round out the sweetness.
- All-Purpose FlourMeasure carefully; too much flour results in a dry, cakey brownie, which we are absolutely trying to avoid.
- Unsweetened Cocoa PowderOpt for Dutch-process cocoa if possible, as it provides a smoother, darker, and less acidic chocolate flavor.
- Powdered SugarThis is the base for our dreamy, light peppermint frosting, ensuring a smooth finish without any graininess.
- Peppermint ExtractUse sparingly at first; this powerful ingredient delivers the signature refreshing holiday kick.
- Milk or Heavy CreamA splash of cream provides the richness and structure needed for a luxurious, spreadable frosting.
- Crushed Peppermint CandiesThese are optional but provide the perfect crunchy garnish and visual appeal for a festive flair.
The full ingredients list, including measurements, is provided in the recipe card directly below.
How to Make The Easiest Ever Peppermint Brownies
Follow these simple steps to prepare this delicious dish:
Step 1: Prep the Pan and Melt the Butter
Preheat your oven to 350°F (175°C). Line an 8×8 inch metal baking pan with parchment paper, leaving an overhang on the sides for easy removal later. In a large, microwave-safe bowl or over a double boiler, melt the unsalted butter completely. Once melted, stir in both the granulated sugar and the brown sugar until fully combined. The mixture should look glossy.
Step 2: Incorporate the Wet Ingredients
Beat in the eggs and the extra egg yolk, one at a time, mixing well after each addition. The mixture should lighten slightly in color and thicken up. Stir in the vanilla powder. It is essential to mix this stage thoroughly—at least 60 seconds of vigorous stirring—as this helps dissolve the sugar, which contributes significantly to the shiny, crackled top we desire.
Step 3: Fold in the Dry Ingredients
In a separate, medium bowl, whisk together the all-purpose flour, cocoa powder, and a pinch of salt. Gently fold the dry mixture into the wet ingredients using a rubber spatula. Stop mixing immediately once you see no streaks of flour remaining. Overmixing develops too much gluten, which ruins the fudgy texture and creates tough brownies.
Step 4: Bake the Brownies
Pour the batter into the prepared baking pan, spreading it evenly into the corners. Bake for 25 to 30 minutes. The brownies are done when a toothpick inserted near the edge comes out clean, but a few moist crumbs still cling to a toothpick inserted into the center. This slight under-baking ensures the ultimate fudgy center. Allow the brownies to cool completely in the pan on a wire rack—cooling is crucial!
Step 5: Prepare the Peppermint Frosting
While the brownies cool, prepare the frosting. In a medium bowl, whisk together the softened butter and powdered sugar. Add the peppermint extract and start incorporating the cream, one tablespoon at a time, until the frosting is light, fluffy, and easily spreadable. You may need slightly more or less cream depending on your environment.
Step 6: Frost and Chill
Once the brownies are completely cool (this takes about an hour), lift them out of the pan using the parchment paper overhang. Spread the peppermint frosting evenly over the top layer. Sprinkle generously with crushed peppermint candies for a beautiful finish. Slice the brownies into squares and transfer to plates for the perfect finishing touch, perhaps alongside a cup of hot chocolate.
Customizing Your Festive Treat
One of the best parts about this recipe for The Easiest Ever Peppermint Brownies is how easily you can adapt the finished product to match your mood or the occasion. While the classic pairing is hard to beat, sometimes you need a little extra flair to truly elevate the dessert table. Consider adding a few simple twists to make this treat entirely your own.
Variations and Garnish Ideas
If you love texture, try folding a handful of chocolate chips or chopped dark chocolate chunks directly into the brownie batter before baking. This adds delightful pockets of melted chocolate throughout the base. Alternatively, infuse the base with subtle coffee notes by adding a teaspoon of instant espresso powder to the dry ingredients; coffee acts as a natural flavor enhancer for chocolate, making it taste deeper and richer without adding a noticeable coffee flavor.
For garnishes, ditch the standard peppermint if you want to dial back the mint intensity. A simple dusting of high-quality cocoa powder or a delicate drizzle of melted white chocolate creates a sophisticated, contrasting pattern. If you’re feeling extra festive, sprinkle edible silver or gold dust over the finished frosted product for a sparkly, elegant presentation.
Making the Perfect Batch Ahead of Time
This recipe is fantastic for advanced preparation, which saves you considerable stress during busy times. You can bake the fudgy brownie base up to two days in advance. Once baked and completely cooled, wrap the unsliced brownies tightly in plastic wrap and store them at room temperature. Prepare the frosting separately and keep it covered in the refrigerator. Just before serving, allow the frosting to soften slightly at room temperature, then spread it over the prepared brownie base and apply the final garnishes. This ensures a fresh taste and a stunning presentation.
Troubleshooting Common Brownie Issues
Even though this is labeledThe Easiest Ever Peppermint Browniesrecipe, baking sometimes throws curveballs. Don’t panic if something goes slightly awry. We’ve collected a few common issues and their straightforward solutions so you can achieve baking success every time.
Why are my brownies cakey instead of fudgy?
This is the number one complaint, and the culprit is usually too much flour or overmixing. Ensure you spoon and level your flour, avoiding scooping directly from the bag. Remember, vigorous mixing develops gluten, leading to a cake-like structure. As soon as the flour is incorporated, stop stirring—a few stray crumbs are better than a tough final result.
The frosting is too stiff or too runny! Help!
Adjusting frosting consistency is simple. If the frosting is too stiff, add a tiny splash of milk or cream (half a teaspoon at a time) until it reaches the desired smooth consistency. If the frosting is too runny, add a tablespoon of powdered sugar and mix well. Powdered sugar is very absorbent and quickly corrects runniness. Remember to always work slowly when making adjustments.
Frequently Asked Questions About Peppermint Brownies
Can I substitute oil for butter in the brownie recipe?
You certainly can use oil, but we highly recommend sticking to melted butter. Butter contributes a richness and depth of flavor that oil simply cannot match, and it aids significantly in achieving that signature fudgy texture and crackled top.
How long do these peppermint brownies last?
When stored in an airtight container at room temperature, these brownies will stay fresh for about three to four days. If you store them in the refrigerator, they can last up to a week, but the frosting may harden slightly; allow them to come to room temperature before serving for the best texture.
Can I freeze the baked brownies?
Yes, you can easily freeze the brownie base. Cool them completely, wrap them tightly in plastic wrap, and then foil. They will last for up to three months. Thaw them overnight in the refrigerator before adding the fresh peppermint frosting and garnishes.
Is it necessary to cool the brownies completely before frosting?
Absolutely necessary! If the brownies are even slightly warm, the peppermint frosting will melt immediately upon contact, creating a messy, runny situation instead of a clean, creamy layer. Patience is truly a virtue here, so wait the full hour until they are completely cool.
There you have it—a delicious, festive, and incredibly simple dessert that demands zero stress and delivers maximum holiday cheer. These irresistible treats prove that sophisticated flavors don’t require complicated techniques. Grab your whisk, make a batch ofThe Easiest Ever Peppermint Brownies, and go enjoy that well-deserved moment of sweet, chocolatey peace.
The Unexpected Magic of Mint and Chocolate
There are desserts, and then there are desserts that demand attention—the kind that stops conversations and elicits involuntary “mmmms.” For me, that dessert is anything involving chocolate and mint. It’s a flavor combination that feels both nostalgic and utterly modern, like watching a classic holiday movie while wearing brand new fuzzy socks. But let’s be honest: while we crave perfection, we rarely have the time to engineer it. Who wants to spend an entire afternoon fussing over cooling layers and temperamental frostings?
This is where the legend of these simple chocolate mint bars begins. I first attempted this recipe during a chaotic holiday season where I had promised eight different desserts and somehow managed to burn water. I needed a victory, a foolproof recipe that delivered maximum festive cheer with minimum effort. I started with a classic fudgy brownie base, the kind that cracks perfectly on top and stays gooey underneath, and then injected it with a vibrant wave of peppermint. The result? Pure bliss.
These aren’t just brownies; they are little squares of holiday confidence. They require so few steps you’ll swear you skipped three crucial parts, but trust me, you didn’t. They are truly beginner-friendly, perfect for that moment when you realize guests are arriving in 45 minutes and the dessert table looks suspiciously empty.
The Quest for the Perfect Fudgy Base
A great brownie starts with great ingredients, but technique matters just as much. Forget melting chocolate chips over a double boiler—we’re optimizing for speed here. We rely on good quality cocoa powder and melted butter, which creates a richer, fudgier texture without the fuss of tempered chocolate. The secret to that enviable shiny, crackly top? Beating the eggs and sugar vigorously until the mixture is lightened and slightly thick. This process incorporates air and creates a meringue-like structure that gives way to the dense, moist interior.
I once skipped the aggressive whisking step, thinking, “It’s just baking; how much difference can it make?” The resulting brownies tasted fine, but they looked like sad, flat chocolate squares. Never again. Now I treat that whisking time like my daily arm workout. It’s five minutes of intense activity followed by a lifetime of brownie satisfaction. Achieving that balance between dense fudge and flaky top layer ensures every bite is structurally perfect. This foundation is key before we even consider adding the holiday sparkle.
Essential Ingredients for Festive Flavor
You don’t need a pantry full of specialty items to create dessert magic. Simplicity is key to keeping these brownies easy. However, there are a few non-negotiables to ensure they taste distinctly like holiday cheer and not just ordinary chocolate squares. We need high-quality components to make these simple peppermint squares truly shine.
The Brownie Foundation Checklist
- Unsalted Butter: Melted, providing crucial moisture and richness.
- Granulated Sugar and Brown Sugar: A necessary mix that ensures both chewiness and depth of flavor.
- Eggs: The vital binding agent that contributes directly to the overall fudgy texture.
- High-Quality Cocoa Powder: Skip the cheap stuff; dutch-process cocoa offers a darker, richer flavor that stands up well to the intense peppermint note.
- All-Purpose Flour and Salt: Standard dry components for structure and flavor enhancement.
Introducing the Peppermint Punch
The true star ofThe Easiest Ever Peppermint Browniesis, unsurprisingly, the peppermint element. We tackle this in two phases: the extract and the topping. For the base, use pure peppermint extract, starting sparingly—a little goes a very long way. Peppermint extract is potent; one drop too many, and your kitchen will smell like a giant tube of toothpaste exploded. Seriously, start small, taste the batter (before adding eggs, if you are cautious), and adjust carefully.
For the topping, we skip complicated glazes and use a simple white chocolate coating, infused with a hint of extract, and topped with crushed candy canes. This adds a beautiful textural crunch and that quintessential red and white sparkle that screams holiday party. If you prefer a smoother coating, melt white chocolate chips with a tablespoon of refined vegetable oil for a thinner, drizzly consistency. Using vegetable oil prevents the white chocolate from seizing and creates a beautifully glossy finish.
Mixing, Baking, and the Waiting Game
Once you’ve assembled your ingredients, the process is incredibly fast. Preheat your oven and line your baking pan with parchment paper, leaving an overhang on two sides—this becomes your handy sling for lifting the whole batch out later, minimizing cleanup and maximizing efficiency. I learned this trick the hard way after scraping molten chocolate from a pan for what felt like three years.
Step-by-Step Assembly for Guaranteed Success
First, melt the butter, then whisk in the sugars until fully combined. Next, whisk in the eggs and vanilla powder (don’t forget the vanilla!) until the mixture turns pale and slightly ribbon-like. This is your foundation for supreme fudginess. Gently fold in the cocoa powder, flour, and salt until just combined. Overmixing the batter activates the gluten too much, leading to tough brownies rather than chewy, fudgy squares. We want barely mixed, slightly streaky batter—the sign of a truly superior dessert.
Pour the batter into your prepared pan and slide it into the preheated oven. Baking time is critical. Brownies are prone to overbaking, which instantly turns them into dry, crumbly sadness. We aim for that sweet spot: edges set and slightly pulled away from the pan, and a toothpick inserted into the center coming out with moist crumbs clinging to it, not wet batter. This indicates a perfect fudgy center that will set up flawlessly as it cools.
The Essential Cooling Period (The Hardest Part)
Once baked, the temptation to slice into these warm, fragrant beauties is overwhelming. Resist! This waiting period is arguably the most crucial step for achieving perfect, clean slices. Warm brownies are structurally unstable; if you cut them hot, you will end up with a mess of chocolate sludge, delicious, but certainly not photogenic.
Let the brownies cool completely in the pan—ideally for two hours—before adding the glaze and toppings. If you are extremely impatient (and I often am), pop the pan into the refrigerator for 30 minutes after they have cooled down slightly on the counter. Once cool, lift them out using the parchment sling and place them on a cutting board. Now they are ready for their festive transformation.
For the topping, spread the cooled white chocolate glaze evenly over the surface. Before the glaze sets, generously sprinkle crushed peppermint candies or candy canes over the top. The contrast of the dark, dense brownie, the creamy white topping, and the sharp pink and white crunch of the peppermint makes these squares absolutely irresistible.
Perfecting the Cooking Process

For optimal results, start by melting the butter and mixing the wet ingredients vigorously to ensure that coveted crackly crust. While the oven preheats, quickly fold in the dry ingredients until just combined. Bake until the edges are set but the center remains slightly gooey, guaranteeing a rich, fudgy texture every time.
Add Your Touch
Elevate these chocolate mint bars by swapping crushed candy canes for peppermint patties chopped into smaller pieces. For a richer flavor, add a layer of dark chocolate chips to the batter before baking. Alternatively, substitute a portion of the all-purpose flour with almond flour for a slightly denser crumb structure.
Storing & Reheating
Store these delectable chocolate mint bars in an airtight container at room temperature for up to four days, or refrigerate for up to a week. If refrigerated, allow them to come to room temperature before serving for the best texture. Freezing the unglazed squares is also possible for longer storage.
Expert Tips for Perfect Brownies
- Use room temperature eggs, as they emulsify better with the melted butter and sugar, contributing significantly to a smoother, fudgier batter consistency.
- Do not eyeball the peppermint extract; use a measured teaspoon and add slowly, tasting as you go, to prevent the flavor from becoming overpowering or medicinal.
- For clean slices, use a large, sharp knife dipped in hot water and wiped dry between each cut. This technique prevents dragging crumbs across the glaze.
My sister once declared that these brownies were so simple and delicious, they should be illegal. She polished off half a batch standing right next to the cooling rack, confirming that effort level does not correlate with flavor payoff.
Conclusion for The Easiest Ever Peppermint Brownies
We successfully navigated the treacherous waters of holiday baking and emerged victorious with a batch of The Easiest Ever Peppermint Brownies. This recipe delivers big flavor and a perfectly fudgy texture without demanding hours of your precious time. We confirmed that the key to perfection lies in resisting the urge to overbake, ensuring every square boasts a moist center and a satisfyingly crisp top. Whether you are prepping for a festive gathering or simply craving a simple, deeply chocolatey treat, these quick minty fudge squares are the absolute answer. Gather your simple ingredients, embrace the easy one-bowl method, and prepare for immediate holiday cheer that tastes truly phenomenal.
Print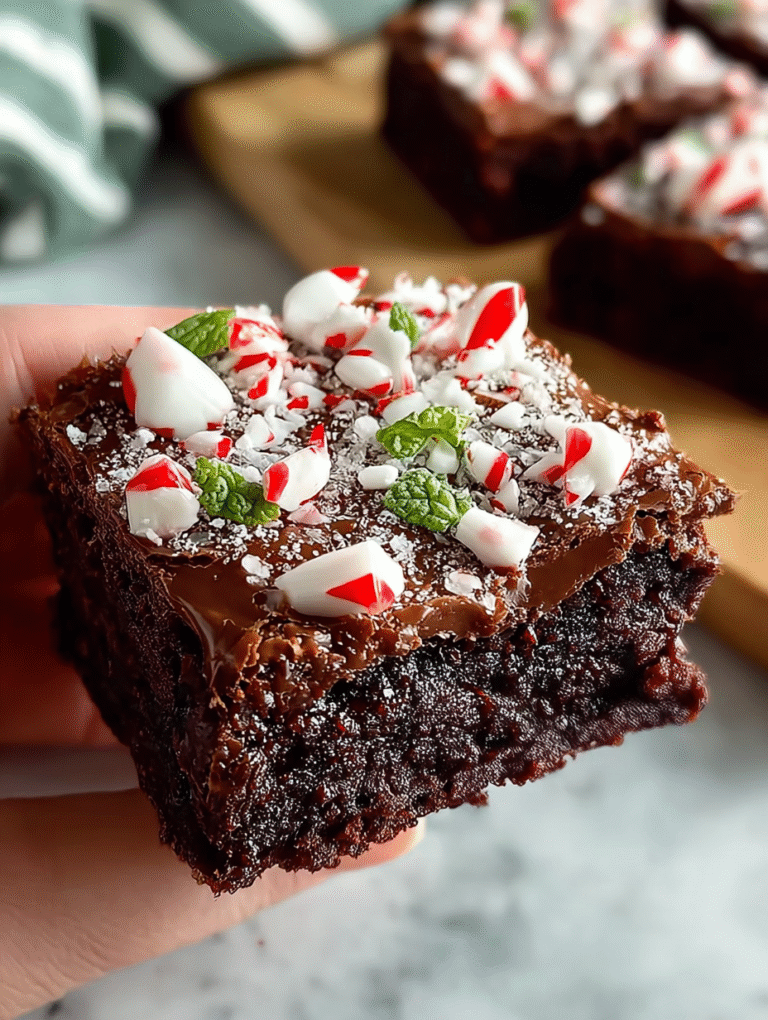
The Easiest Ever Peppermint Brownies
Forget complicated baking! These fudgy, intensely rich brownies get a cool blast of peppermint thanks to one secret ingredient. Quick prep, amazing results.
- Total Time: 35 minutes
- Yield: 4 servings 1x
Ingredients
- 1 (18.3 oz) family-size fudge brownie mix
- 1/2 cup vegetable oil (or amount specified on box)
- 1/4 cup water (or amount specified on box)
- 2 large eggs
- 1 teaspoon peppermint extract
- 1/2 cup crushed peppermint candies (or candy canes)
- Non-stick cooking spray or parchment paper
Instructions
- Step 1: Preheat the oven to 350°F (175°C). Line a 9×13 inch baking pan with parchment paper or generously grease with non-stick cooking spray, ensuring some overhang for easy removal.
- Step 2: In a large mixing bowl, combine the brownie mix, vegetable oil, water, and eggs. Stir the ingredients until they are just combined, making sure not to overmix the batter.
- Step 3: Stir in the peppermint extract until it is evenly distributed throughout the batter. Pour the mixture into the prepared baking pan and spread it evenly across the bottom.
- Step 4: Bake for 28-32 minutes, or according to the time specified on the brownie mix package, until a toothpick inserted near the center comes out with moist crumbs.
- Step 5: Immediately after removing the brownies from the oven, evenly sprinkle the crushed peppermint candies over the hot surface. Press lightly so they adhere to the melted chocolate top.
- Step 6: Allow the brownies to cool completely in the pan (about 2 hours) before lifting the brownies out using the parchment paper overhang and cutting them into squares.
Notes
- For optimal texture, store leftover brownies in an airtight container at room temperature for up to four days; refrigerating them tends to dry the fudgy center.
- Elevate this treat by serving squares slightly warmed and topped with a dollop of vanilla bean ice cream or a drizzle of melted dark chocolate to contrast the cool peppermint crunch.
- For the best "glaze" effect, ensure the crushed peppermint candies are sprinkled on the very moment the brownies exit the oven; the residual heat melts the surface chocolate just enough to hold the candies perfectly.
- If the brownies need a little refresh, microwave individual squares for 8-10 seconds to restore that warm, gooey center without melting the candy topping.
- Prep Time: 15 minutes
- Cook Time: 20 minutes
- Method: Stovetop
- Cuisine: American
FAQs
How do I ensure The Easiest Ever Peppermint Brownies have a perfect, fudgy center?
Achieving that coveted fudgy texture relies entirely on your baking time, so don’t be tempted to overbake them! Most oven temperatures vary wildly, so rely on the visual test rather than the clock alone. Start checking the brownies five minutes before the recipe suggests. You want to see the edges set and pulling slightly away from the pan, while the center still looks slightly soft. When you insert a toothpick, it should come out with moist, sticky crumbs clinging to it, not wet batter. If the toothpick comes out completely clean, you have officially ventured into cake territory, and nobody wants that when they are expecting perfectly rich, peppermint chocolate squares.
Can I substitute the flavor extracts required for these simple holiday treats?
While you can certainly customize the flavors, exercise caution when swapping the peppermint extract. Peppermint extract is potent, so always start with less than you think you need, especially if you are using a pure extract, and taste the batter before baking. If you only have peppermint oil, use half the amount specified for the extract, as the oil is much stronger and can easily overpower the lovely chocolate base. Feel free to use high-quality vanilla powder, as a good vanilla supports the depth of the cocoa wonderfully. Adding a tiny pinch of salt also helps boost both the vanilla and mint notes, ensuring a beautifully balanced flavor profile.
What is the best way to store these delightful peppermint chocolate squares?
Proper storage ensures your brownies stay fresh and incredibly fudgy for days. Once cooled completely, slice the brownies and store them in an airtight container at room temperature for up to four days. If you plan to keep them longer, or if you live in a very humid environment, you might prefer storing them in the refrigerator, where they last up to a week. To freeze them, wrap individual slices tightly in plastic wrap, then place them inside a freezer-safe bag or container. When you get a craving for The Easiest Ever Peppermint Brownies, thaw them overnight in the refrigerator or warm a slice briefly in the microwave.
What makes this recipe truly The Easiest Ever Peppermint Brownies compared to more complicated versions?
This recipe skips all the fuss typically associated with gourmet baking. We rely on the simple melt-and-mix method, requiring only one saucepan and a mixing bowl, meaning minimal cleanup and maximum deliciousness. You don’t need a stand mixer, and you don’t need any complex tempering of chocolate. The simplicity is baked right into the process. We use readily available pantry staples and rely on specific ratios of butter and brown sugar to guarantee a crackly top and chewy interior without requiring any fancy techniques. It’s a foolproof method designed for busy bakers who need a spectacular holiday treat instantly.

Leave a Comment