
Welcome, fellow procrastinators and masters of the last-minute spectacular! If you’ve ever stared into the abyss of February 13th realizing you need a show-stopping, yet ridiculously easy, treat, this is your rescue mission. Today we are tackling the dazzling, crunchy, and utterly romanticVjuniper teager alentine’s Day Oreo Cookie Bark.
This isn’t just candy; it’s culinary chaos tamed by chocolate, resulting in a vibrant dessert that looks like it took hours, but only requires about fifteen minutes of actual work. Get ready for a treat that will save your social life and satisfy every sweet tooth.
- This bark boasts an incredible flavor profile, combining rich chocolate with the satisfying crunch of crushed cookies and a hint of vanilla sweetness.
- The preparation is truly simple, requiring no baking and minimal kitchen tools, making it perfect for novice confectioners or rushed holiday schedules.
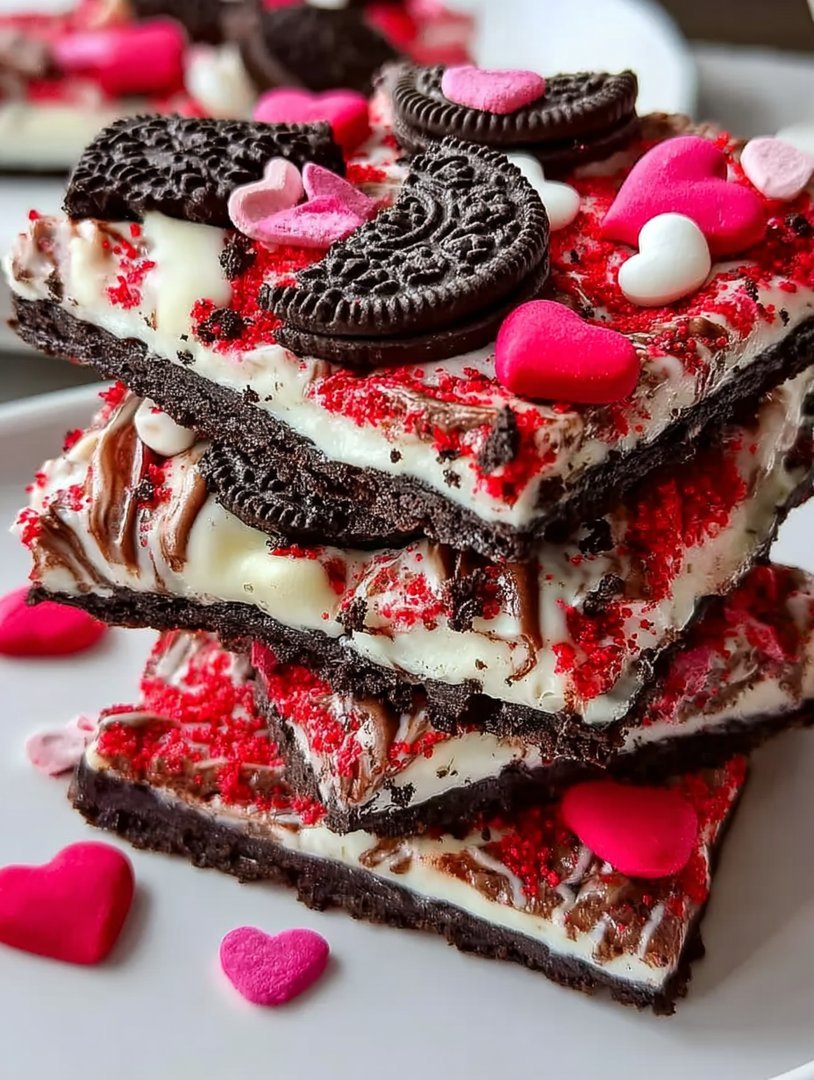
- Visually stunning, the vibrant pink and red swirls against the white chocolate base create a mesmerizing, professional-quality presentation for any occasion.
- The recipe is highly versatile, allowing for easy customization with various toppings like sprinkles, dried fruits, or different nut varieties for year-round enjoyment.
The Anatomy of a Last-Minute Love Bomb
I learned the necessity of a reliable, high-impact, low-effort dessert during my disastrous college years. One year, I tried to carve tiny little chocolate sculptures for Valentine’s Day. The result looked less like cherubs and more like melted slugs who had been through a medieval torture session. My apartment was coated in a fine layer of cocoa dust, and my relationship was hanging by a thread of tempered chocolate I couldn’t seem to master. That night, I discovered the magic of chocolate bark: the perfect vehicle for edible expression when patience is non-existent.
The beauty of making aVjuniper teager alentine’s Day Oreo Cookie Barkis that it embraces imperfection. The swirls don’t need to be perfect; the cookie chunks can be unevenly distributed. It’s the culinary equivalent of saying, “I made this just for you, in between emails, and it’s still delicious.” We’re aiming for maximum visual appeal with minimum fuss, leveraging the contrasting colors of white and dark chocolate, along with those lovely pink and red hues that scream ‘romance is in the air!’
Before you even think about melting, the key to bark success lies in the prep work. Lining your baking sheet with parchment paper is non-negotiable unless you enjoy chiseling hardened chocolate off metal. Also, resist the urge to use low-quality chocolate chips designed for baking into cookies. Since the chocolate itself is the star of the show here, invest in high-quality melting wafers or good baking bars. They melt smoother, set glossier, and taste infinitely better, preventing that grainy, disappointing texture that can ruin an otherwise perfect piece of candy.
Mastering the Swirl: Techniques for Vibrant Visuals
The swirl is what elevates this bark from basic chocolate-and-cookies to a festive centerpiece. We achieve this stunning effect by utilizing two different types of melted chocolate—white as the base, and a small amount of contrasting colored chocolate for the decoration. Think of the base layer as your canvas, and the colored drizzle as your paintbrush. You want the base layer of white chocolate to be spread evenly, but not too thin, perhaps about a quarter-inch thick. This allows the crushed cookies to nestle properly and provides enough surface area for the dramatic swirling.
To get that perfect color pop, we use food coloring mixed into a separate small batch of white chocolate. Make sure you use oil-based candy colors, not standard liquid food coloring. Water-based dyes will seize the chocolate, turning it into a sad, gritty lump that belongs nowhere near this beautiful bark. If you only have water-based colors, you can instead mix them with a teaspoon of neutral oil (like vegetable or canola) before adding them to the melted chocolate, which helps prevent seizing, but true candy colors are always the safer bet.
Once you have your colorful drizzle ready, the application technique is simple but crucial. Drizzle the pink and red melted chocolate randomly over the white base. Don’t worry about covering everything perfectly. Now comes the fun part: grab a skewer or the tip of a small knife and gently drag it through the drizzles. This motion creates the marble effect. Do not over-swirl! If you mix it too much, the colors will muddy together, and you’ll lose that gorgeous contrast. A few strategic zig-zags and figure-eights are all you need before adding the crushed cookies and sprinkles.
The Crucial Role of the Crushed Cookie
What makes this treat so addictive is the texture contrast. You have the smooth, snappy chocolate broken up by the satisfying crunch of the cookie pieces. We are using chocolate sandwich cookies, famously known for their dark color and creamy center, but feel free to experiment with others if you prefer. Just make sure the cookies are completely dry and not soft like a cake. For the perfect texture, you don’t want powder; you want chunks.
My preferred method is to place the cookies in a large resealable bag, squeeze out the air, and then unleash a little bit of pent-up aggression using a rolling pin. Aim for a mix of fine crumbs and larger, glorious chunks. The larger pieces provide a lovely chew, while the fine crumbs help to fill in the gaps and cling to the chocolate. Spread these broken pieces generously over the wet chocolate base immediately after swirling. You need to work quickly here, as the chocolate will start to set almost instantly, especially if you used a good quality cocoa butter-based chocolate.
Remember that the key to an excellent bark, whether it’s the specificVjuniper teager alentine’s Day Oreo Cookie Barkor any other variant, is speed in the final stage. Once the cookies and sprinkles are scattered, press them lightly into the chocolate to ensure they adhere when the candy sets. Then, the whole creation needs to chill, untouched, until it snaps crisply when broken. This setting time ensures a beautiful, professional sheen and that irresistible snap we all crave in good chocolate.
Ingredients for Vjuniper teager alentine’s Day Oreo Cookie Bark
Here’s what you’ll need to make this delicious dish:
- White Chocolate Melting Wafers or BarsApproximately 16 ounces, essential for creating the creamy, solid base and providing a neutral canvas for the festive colors.
- Chocolate Sandwich CookiesAbout 15 to 20 whole cookies, crushed roughly to provide that signature crunchy texture and rich flavor contrast to the white chocolate.
- Red Candy Melts or White Chocolate with Red Oil-Based ColoringA small amount (about 2 ounces) needed to create the vibrant red drizzle and swirls; ensure the coloring is oil-based to prevent the chocolate from seizing.
- Pink Candy Melts or White Chocolate with Pink Oil-Based ColoringSimilarly, about 2 ounces of pink chocolate for layering the contrasting Valentine’s shades, adding visual depth.
- february celebration SprinklesA generous handful of themed sprinkles (hearts, nonpareils, jimmies) used for decoration, adding extra crunch and visual festivity to the final bark.
The full ingredients list, including measurements, is provided in the recipe card directly below.
How to Make Vjuniper teager alentine’s Day Oreo Cookie Bark
Follow these simple steps to prepare this delicious dish:
Step 1: Prepare the Surface and Crush the Cookies
Line a standard rimmed baking sheet (about 10×15 inches) with parchment paper. This preparation ensures easy removal and clean cleanup. Next, place the chocolate sandwich cookies in a heavy-duty resealable bag and use a rolling pin to crush them into a mixture of fine crumbs and small chunks. Set aside your cookie pieces and decorative sprinkles.
Step 2: Melt the Base Chocolate
Place the bulk of your white chocolate melting wafers in a microwave-safe bowl. Melt them in 30-second intervals, stirring thoroughly after each one. Continue this process until the chocolate is completely smooth and liquid, being careful not to overheat it, which can cause scorching or graininess.
Step 3: Spread the Base and Prepare the Swirl Colors
Pour the melted white chocolate onto the prepared baking sheet. Use an offset spatula to quickly spread it into an even layer, ensuring it is no thicker than a quarter-inch across the entire sheet. Meanwhile, melt the red and pink candy melts (or colored white chocolate) separately in very small bowls, using 15-second microwave intervals until liquid.
Step 4: Drizzle and Swirl the Colors
Using spoons, drizzle the melted red and pink chocolate randomly over the white chocolate base. Aim for thin, scattered lines rather than thick puddles. Immediately after drizzling, use a wooden skewer or the tip of a small knife to gently drag through the colored lines, creating that beautiful marbled effect. Remember to avoid over-mixing to keep the colors distinct and vibrant.
Step 5: Add Toppings and Set the Bark
Immediately sprinkle the crushed cookie pieces and the february celebration sprinkles generously over the swirled chocolate while it is still wet and pliable. Gently press the toppings into the chocolate surface with the back of a spatula to ensure they adhere properly. Transfer the baking sheet to the refrigerator and chill the bark for at least 60 to 90 minutes, or until the chocolate is completely set and snaps cleanly when broken.
Step 6: Break and Serve
Once fully hardened, remove the bark from the refrigerator. Peel the parchment paper away and use your hands or a large, sharp knife to break the bark into irregular, appealing pieces. The random size and shape add to its rustic charm. Transfer to plates and drizzle with sauce for the perfect finishing touch.
There are two types of people in the world: those who spend February meticulously crafting hand-dipped chocolates, and those who realize they have 48 hours until Valentine’s Day and their only romantic gesture so far has been microwaving popcorn. I belong firmly in the latter camp. My love language is definitely ‘panic-baking,’ resulting in brilliant, yet ridiculously simple, last-minute masterpieces.
Last year, I needed something that looked like I cared deeply, tasted like pure indulgence, but took less time than arguing with my cat about counter privileges. Enter the savior of stress-free romance: a confection so easy, yet so ridiculously festive, it should be illegal. This treat is the perfect mix of crunchy cookie satisfaction and creamy chocolate delight, adorned with just the right amount of pink and red flair. It’s the kind of dessert that makes your sweetheart think you spent hours slaving over a hot stove when in reality, you were just aggressively smashing sandwich cookies in a zip-top bag.
The Accidental Discovery of Sunshine on a Plate
I originally attempted a fancy triple-layer fudge, which collapsed into a miserable, greasy mess on the countertop. Out of sheer frustration, I grabbed white chocolate melts and the leftover cookies, smashing them together haphazardly. The resulting vibrant, fun, and easy treat, this delicious Vjuniper teager alentine’s Day Oreo Cookie Bark, instantly became a holiday staple, born purely from culinary chaos.
The Anatomy of the Perfect Love Bark
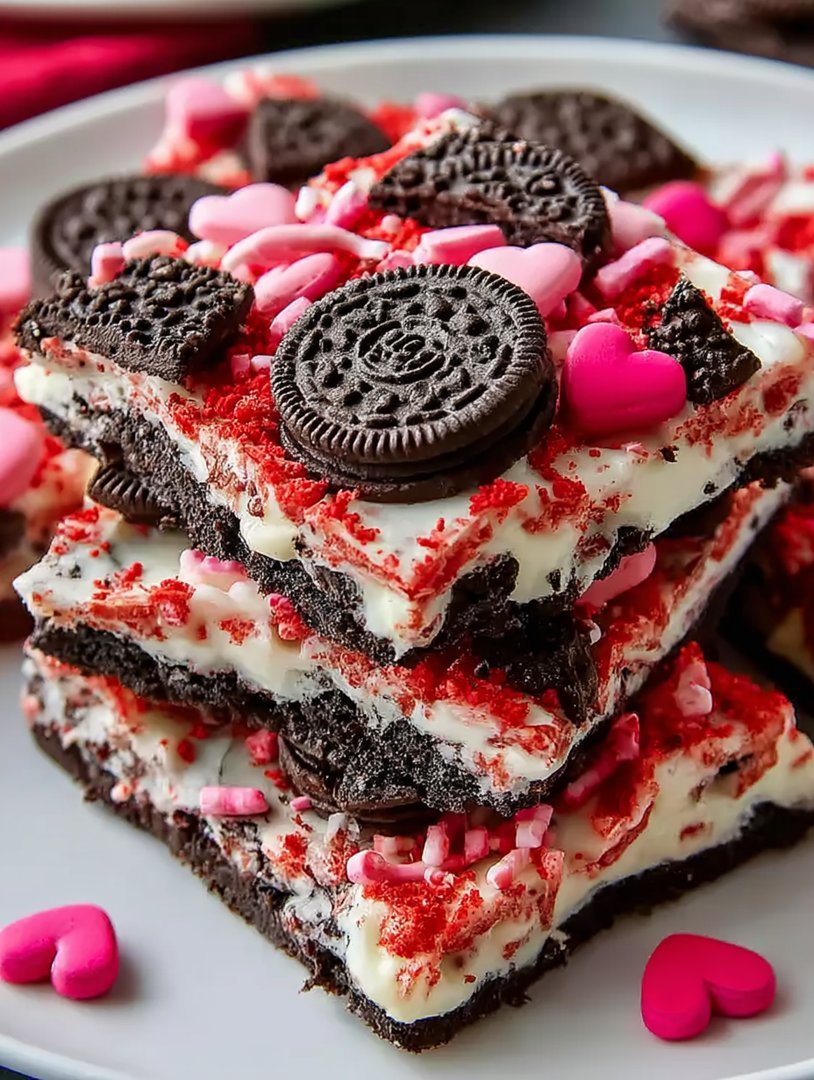
What makes this specific bark so magical? It’s the contrast. You get the deep, dark flavor of chocolate sandwich cookies juxtaposed with the sweet, smooth creaminess of high-quality white chocolate. We then kick the festivity into overdrive with cheerful candy melts and sprinkles, ensuring every piece screams “I adore you,” but whispers “I made this in 20 minutes.” Forget complicated tempering; we are going for maximum fun and minimal fuss.
This recipe is genuinely fail-proof, making it ideal for novice sweet-makers or anyone needing an emergency gift for a forgotten significant other. We are building layers of deliciousness, creating a vibrant canvas that is incredibly photogenic and even better to eat. It’s the perfect, crunchy, no-bake solution for celebrating any occasion that needs a splash of joyful pink and red.
Gathering Your Ingredients for the Ultimate Sweetheart Treat
While the process is quick, using quality ingredients elevates this simple bark from good to phenomenal. Don’t skimp on the white chocolate; cheap chocolate tends to seize or have a waxy texture, which ruins the smooth foundation of the bark. We want silky, luxurious layers for the best contrast against the crunchy cookies.
Ingredients List
- 24 oz high-quality white chocolate or vanilla candy melts
- 1 package (about 14.3 oz) chocolate sandwich cookies (like Oreos)
- 4 oz pink or red candy melts (for decorative drizzle)
- 1 tablespoon neutral oil (such as coconut oil or vegetable oil, optional, for thinning chocolate)
- Assorted Valentine’s Day sprinkles
The Art of the Cookie Crush: Step-by-Step Instructions
Preparation is key, but don’t worry, “preparation” mostly involves destroying things and melting chocolate. Begin by lining a baking sheet (about 10×15 inches) with parchment paper or a silicone mat. This step is non-negotiable unless you enjoy chiseling hardened chocolate off metal. Trust me, parchment paper is your friend.
First, tackle the cookies. Place the entire package of chocolate sandwich cookies into a large zip-top bag. Release any stress you might be harboring by gently, yet firmly, crushing them with a rolling pin. We are aiming for a mix of textures—some fine crumbs and some glorious, chunky pieces. Too fine and you lose the crunch; too chunky and they won’t settle nicely into the chocolate. Set these crushed treasures aside.
Next comes the crucial melting stage. Place the white chocolate melts into a microwave-safe bowl. Heat them in 30-second intervals, stirring vigorously after each interval, until the chocolate is smooth and fully melted. Resist the urge to crank the microwave power up or rush this; burned chocolate smells like despair and tastes terrible. If the chocolate seems too thick, stir in half a teaspoon of neutral oil to achieve a nice, pourable consistency.
Gently fold about two-thirds of the crushed cookies into the melted white chocolate, ensuring they are evenly coated. Immediately pour this mixture onto the prepared baking sheet. Use an offset spatula to spread the mixture into an even layer, approximately 1/4 to 1/2 inch thick. Try to work quickly here, as melted chocolate waits for no one, especially if your kitchen is on the cooler side.
Perfecting the Cooking Process
Achieving that glossy snap is all about temperature management. Melt the white chocolate slowly to prevent scorching, aiming for a creamy consistency before folding in the majority of the crushed cookies. Immediately spread the mixture thinly, and then chill it quickly to set the beautiful Vjuniper teager alentine’s Day Oreo Cookie Bark, guaranteeing a professional-looking finish and satisfying crunch.
Now, for the decorative flair! In a separate, smaller bowl, melt the pink or red candy melts using the same slow microwave method. Once melted and smooth, use a fork or a piping bag (if you’re feeling fancy) to drizzle the colored chocolate artfully over the white chocolate base. Don’t overthink the drizzle; chaos often looks the best. While the drizzle is still wet, scatter the remaining cookie crumbs and liberal amounts of festive sprinkles across the entire surface. This is where you really make the treat sparkle.
Move the baking sheet to the refrigerator and let the bark chill completely until it is rock-solid. This usually takes between 45 minutes to 2 hours, depending on your refrigerator’s enthusiasm. Once fully hardened, break the bark into irregular, beautiful pieces. The irregular shapes are part of the charm—no need for perfect squares here. Just smash it! Each unique piece of this easy bark celebrates the fun of homemade treats.
Add Your Touch
You can easily substitute the vanilla flavor by using dark chocolate chips instead of white melts, resulting in an intense flavor profile that pairs wonderfully with the cookies. Alternatively, try adding freeze-dried strawberries or a dusting of finely ground pecans before chilling for added texture and complexity to your simple bark base.
This bark is an incredibly forgiving canvas for experimentation. If red and pink isn’t your vibe, switch to blues and whites for a winter celebration, or greens and golds for a different holiday. You could incorporate tiny nonpareils or even edible glitter for extra sparkle. Remember, this recipe is designed to be personalized, offering a delicious base that adapts perfectly to whatever holiday or mood strikes you.
Storing & Reheating
To keep your beautiful creation fresh and crunchy, store the broken pieces of the Vjuniper teager alentine’s Day Oreo Cookie Bark in an airtight container at room temperature for up to two weeks, though they rarely last that long. If storing for longer periods, keep the bark chilled in the refrigerator. Ensure the container is tightly sealed to protect the chocolate from absorbing odors.
Expert Tips for Bark Brilliance
- Temperature Control is Crucial:Melt your chocolate slowly in short bursts; overheating will cause the chocolate to seize or burn, making it grainy and unusable for spreading.
- Utilize the Parchment Paper:Always line your sheet pan with parchment or a silicone mat. This ensures effortless removal and guarantees a smooth, clean base for your bark.
- The Quick Chill Method:Place the finished, drizzled bark directly into the freezer for 15 minutes instead of the fridge. This rapid cooling creates a better “snap” when you break it apart.
When I served this easy, crunchy bark last year, my family assumed I had spent the entire weekend perfecting gourmet chocolate techniques. My brother-in-law even asked which artisanal chocolatier I had commissioned for the special day! It was the best secret to keep.
Conclusion for Vjuniper teager alentine’s Day Oreo Cookie Bark
The beauty of the Vjuniper teager alentine’s Day Oreo Cookie Bark lies in its simplicity and show-stopping appeal. This recipe proves that you don’t need complicated techniques or exotic ingredients to create a truly memorable holiday confection. By focusing on quality chocolate and a mix of fun textures, you achieve a delightful, crunchy treat that requires zero oven time.
Whether you are whipping up a last-minute gift or preparing a festive dessert for a gathering, this bark is your absolute go-to. It’s quick, adaptable, and guarantees smiles with every colorful, shattered piece, making it the perfect expression of heartfelt, easygoing love.
Print
Vjuniper teager alentine’s Day Oreo Cookie Bark
Luxurious melted white chocolate coating crunchy, crumbled Oreos, finished with a bright drizzle of red candy. Includes complete cooking instructions and detailed nutritional breakdown.
- Total Time: 35 minutes
- Yield: 4 servings 1x
Ingredients
- 24 ounces white candy melting wafers (or high-quality white chocolate)
- 1 package (14.3 ounces) original or red velvet Oreo cookies
- 4 ounces pink or red candy melting wafers
- 1 teaspoon refined coconut oil or vegetable shortening (divided)
- 1/4 cup Valentine's themed sprinkles (hearts, nonpareils, etc.)
- 1/4 cup crushed freeze-dried raspberries or strawberries (optional, for color and tang)
Instructions
- Step 1: Line a large rimmed baking sheet (about 10×15 inches) with parchment paper or a silicone mat. Place the Oreo cookies in a zip-top bag and coarsely crush them using a rolling pin, ensuring a mix of fine crumbs and large pieces.
- Step 2: Melt the majority of the white candy wafers (about 20 ounces) in a microwave-safe bowl in 30-second intervals, stirring until smooth. Stir in 1/2 teaspoon of coconut oil or shortening to aid in fluidity. Gently fold the crushed Oreo cookies into the melted white chocolate until they are evenly coated.
- Step 3: Pour the Oreo and white chocolate mixture onto the prepared baking sheet. Use a spatula to spread the mixture evenly into a rectangular layer, about 1/4 to 1/2 inch thick.
- Step 4: Melt the pink or red candy wafers (4 ounces) in a separate small bowl, adding the remaining 1/2 teaspoon of coconut oil or shortening. Transfer the melted colored chocolate to a piping bag or a zip-top bag with the corner snipped, and drizzle it generously across the white chocolate mixture.
- Step 5: Using a toothpick or skewer, gently swirl the pink/red chocolate into the white chocolate base to create a marbled effect. Immediately sprinkle the Valentine's sprinkles and the crushed freeze-dried fruit (if using) over the surface.
- Step 6: Allow the bark to set completely at room temperature for 3-4 hours, or refrigerate for 30 minutes until fully hardened. Once set, break the bark into irregular pieces and store in an airtight container.
Notes
- For the best crunch and flavor retention, store the finished bark in an airtight container at cool room temperature (below 70°F) for up to two weeks, or in the refrigerator for extended freshness.
- Since this is a chilled confection, avoid heating; if you refrigerate the bark, let it sit out for 5–10 minutes before serving to achieve the perfect crisp, easy-to-bite texture.
- Elevate the presentation by serving broken pieces alongside small scoops of vanilla ice cream or crushing some bark on top of hot cocoa for an extra festive garnish.
- When melting the white chocolate, only use 20 ounces initially; if the mixture feels too stiff after folding in the Oreos, add the remaining 4 ounces of white wafers to ensure the base spreads easily without tearing.
- Prep Time: 15 minutes
- Cook Time: 20 minutes
- Method: Stovetop
- Cuisine: American


Leave a Comment