
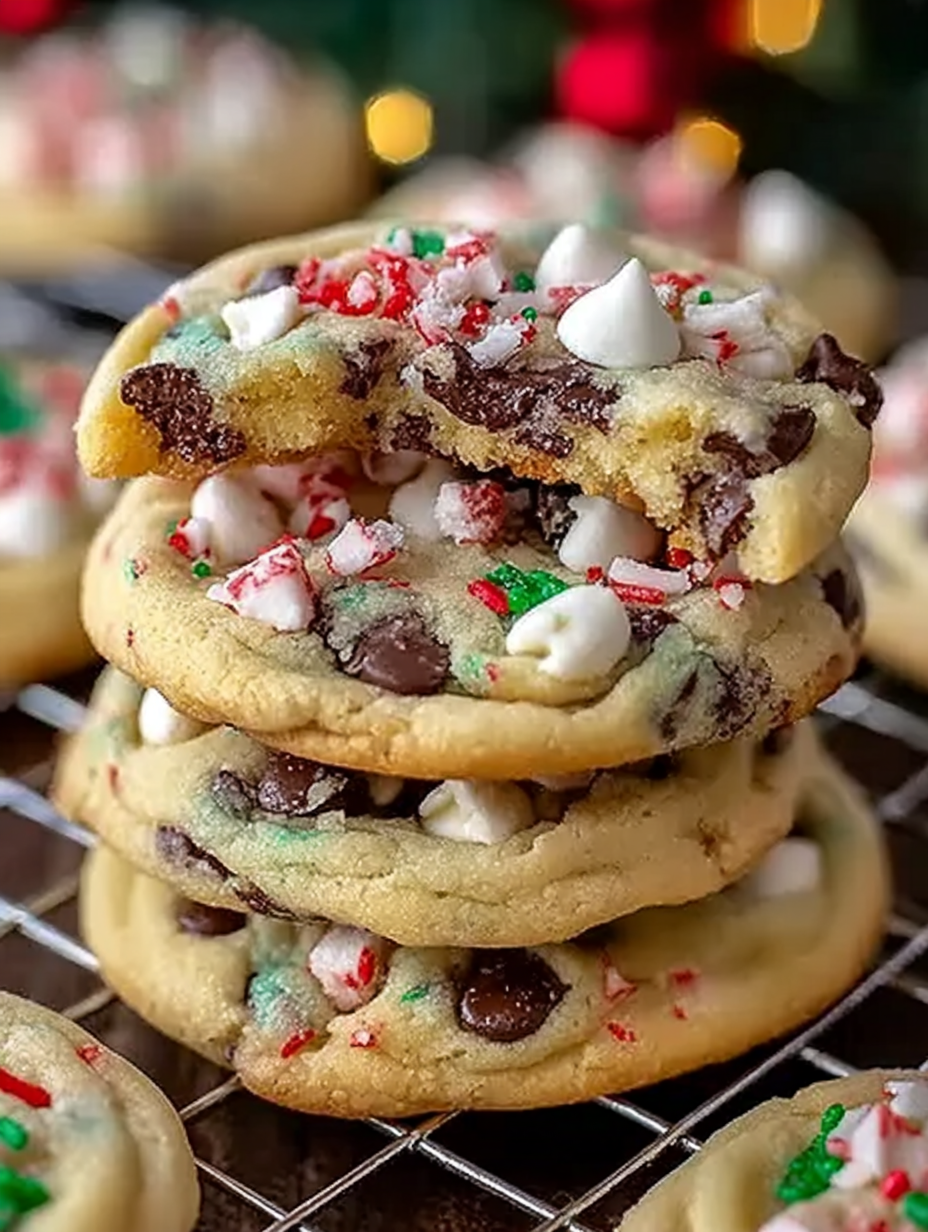
When the snow starts falling and the air smells like possibility, only one cookie can truly capture that specific magic. Forget those basic baked discs; we are whipping up the legendaryWinter Wonderland Chocolate Chip Cookies.
These aren’t just cookies; they are tiny, edible snow globes designed to bring cheer and warmth to even the frostiest evening. Prepare to transform your kitchen into the happiest place on earth, one chewy, chocolate-packed bite at a time.
- Achieve perfect crackled edges and chewy centers by mastering the crucial chilled dough technique, resulting in bakery quality treats every single time.
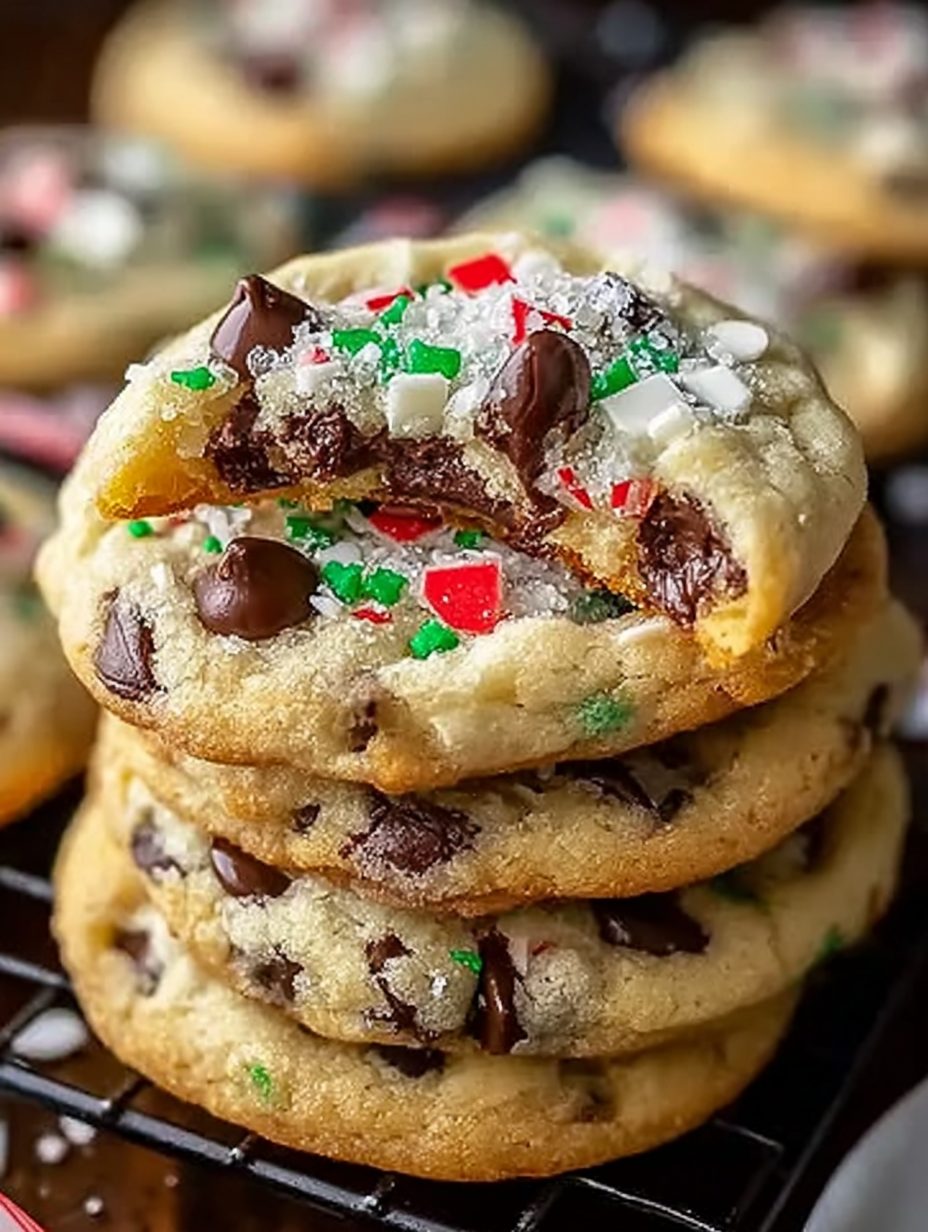
- The blend of premium dark chocolate and a hint of warm vanilla creates a deeply satisfying flavor profile perfect for cold evenings by the fireplace.
- These festive baked goods possess a dazzling visual appeal, specifically dusted with powdered sugar that mimics freshly fallen, glistening snow.
- Easily customize this versatile recipe with toasted pecans, dried cranberries, or seasonal spices to suit any family gathering or beautiful gift basket.
The Tale of the Perfect Holiday Cookie
Every baker understands the elusive pursuit of the “perfect” chocolate chip cookie—that delicate balance between crispy edges and a deeply gooey center. For the holiday season, however, the ante is raised. We aren’t just aiming for good; we are aiming for spectacular, cookies that make people stop mid-conversation and ask, “Wait, what is in this?” The secret to achieving the magic of theseWinter Wonderland Chocolate Chip Cookieslies not just in the ingredients themselves, but in the patience and technique applied during preparation.
The Magic of Browned Butter
If you skip this step, you make a fine cookie. If you embrace this step, you make a legendary cookie. Browning the butter transforms the entire flavor foundation of the cookie dough. As the butter melts and cooks gently, the milk solids toast, releasing nutty, caramel-like notes that deepen the overall richness. It provides a level of complexity that traditional melted butter simply cannot match. It’s the difference between a nice background singer and the star performing a showstopping solo. This technique requires mindful watching, swirling the butter until the foaming subsides and beautiful brown bits speckle the bottom of the pan, releasing a heavenly, nutty aroma. Remember to cool the browned butter slightly before adding it to the sugars; otherwise, you risk scrambling your eggs in the next step, which leads to a flat, sad cookie instead of a glorious, lofty one.
Why Chilling Dough is Your Secret Weapon
I know, I know. Waiting is torture when the smell of fresh dough is already filling your kitchen. However, resisting the urge to bake immediately is perhaps the most important discipline in cookie architecture. Chilling the dough does three critical things that guarantee success. First, it allows the flour to fully hydrate, which reduces the spread when baking, leading to thicker, chewier cookies. Secondly, the cold temperature solidifies the fat, preventing the cookies from melting too quickly in the hot oven. Third, and most importantly for flavor, the rest period gives the sugars and liquids time to mingle, concentrating the rich holiday flavors. Think of it as marinating your dough; the longer it rests, the more complex and delicious the final product becomes. Aim for a minimum of 24 hours in the refrigerator for truly superior snowy cookies, though 48 hours is the gold standard if you can manage that feat of self-control.
Essential Tools and Technique Tips
Making these celebratory chocolate drops doesn’t require specialized equipment, but a few key tools and techniques streamline the process and ensure consistency. A high-quality stand mixer fitted with the paddle attachment is invaluable for creaming the butter and sugars properly, incorporating air vital for lift. If you do not have a stand mixer, a hand mixer works perfectly well, or simply embrace the bicep workout and use a sturdy whisk and wooden spoon. The goal is to whip the mixture until it becomes pale and fluffy, usually taking about 3 to 5 minutes.
Achieving Uniform Size and Shape
Consistency is key when baking, especially if you plan on gifting these festive treats. To ensure every cookie bakes evenly, invest in a cookie scoop. A standard 3-tablespoon scoop (often labeled as a size 20 or 24) is ideal for achieving those bakery-style, robust cookies. Before placing the scoops on the baking sheet, roll them briefly between your palms to smooth the shape, then break the dough ball in half and place the jagged, broken sides facing up. This small trick promotes the beautiful, craggy texture and deep crevices that trap pools of molten chocolate, adding both visual appeal and textural interest.
Baking for the Perfect Texture
Oven temperature accuracy is crucial. Use an external oven thermometer, as built-in thermostats are notoriously unreliable and can vary by as much as 50 degrees, ruining your baking efforts before you even start. We bake these specific cookies at a slightly higher initial temperature to achieve a rapid lift and crisp edge, then decrease the temperature mid-way through. The cookies are finished when the edges are deep golden brown and set, but the centers still look slightly pale and deliberately undercooked. They will continue to set on the hot baking sheet for five minutes after removal. Transferring them immediately to a cooling rack is essential for halting the baking process and preserving that wonderfully chewy center we all crave.
Ingredients for Winter Wonderland Chocolate Chip Cookies
Here’s what you’ll need to make this delicious dish:
- Unsalted ButterUse high-quality butter because its flavor forms the base of the cookie; you will brown this to enhance the nutty notes.
- Granulated SugarProvides crispness to the edges and balances the richness of the dark chocolate.
- Light Brown SugarThe molasses content adds moisture, chewiness, and depth of caramel flavor to the final product.
- Large EggsAct as a binder and provide structure; ensure they are at room temperature for better emulsion with the fat and sugar.
- Vanilla Bean PasteUse pure vanilla for the best aroma, enhancing the overall sweetness and complexity of the batter.
- All-Purpose FlourThe primary dry ingredient; measure carefully by spooning it into the measuring cup and leveling off the top.
- Baking Soda and Baking PowderThese leaveners work together to provide lift and spread, creating that classic cookie puff.
- Sea SaltEssential for cutting through the sweetness and intensifying all the other subtle flavors in the dough.
- Dark Chocolate Chips or ChunksUse high-quality chips with at least 60% cacao for a deep, satisfying melt and intense chocolate flavor.
- Powdered SugarUsed for dusting the finished, cooled cookies to create the iconic “snowy” effect, essential for the winter wonderland aesthetic.
The full ingredients list, including measurements, is provided in the recipe card directly below.
How to Make Winter Wonderland Chocolate Chip Cookies
Follow these simple steps to prepare this delicious dish:
-
Step 1: Brown the Butter and Prepare the Dough Base
Melt the butter gently in a light-colored saucepan over medium heat, swirling occasionally. Cook until the butter foams, then sinks, leaving behind golden brown milk solids at the bottom and a nutty aroma. Immediately transfer the browned butter to a bowl to cool slightly. Once cooled, beat the butter vigorously with the brown sugar and granulated sugar until the mixture is light and fluffy, about three minutes.
-
Step 2: Incorporate Wet and Dry Ingredients
Beat in the room-temperature eggs one at a time, ensuring each is fully incorporated before adding the next. Stir in the vanilla bean paste. In a separate bowl, whisk together the flour, baking soda, baking powder, and salt. Gradually add the dry ingredients to the wet mixture on low speed until just combined; be careful not to overmix, as this develops tough gluten.
-
Step 3: Fold in Chocolate and Chill
Gently fold in the dark chocolate chips or chunks using a spatula until evenly distributed throughout the dough. Cover the bowl tightly with plastic wrap or transfer the dough to an airtight container. Refrigerate the dough for a minimum of 24 hours and up to 72 hours. This chilling process is non-negotiable for superior texture and flavor development.
-
Step 4: Scoop and Shape
Preheat your oven to 375°F (190°C) and line two heavy-duty baking sheets with parchment paper or silicone mats. Scoop the chilled dough using a 3-tablespoon cookie scoop. Place the dough balls onto the prepared sheets, leaving ample space between them to allow for proper spread. If you wish, press a few extra chocolate chunks onto the top of each dough ball for maximum visual appeal.
-
Step 5: Bake and Cool
Bake the cookies for 10 to 12 minutes, rotating the pan halfway through the baking time, until the edges are golden brown and the centers are still slightly soft and puffy. Remove the baking sheets from the oven and let the cookies set up on the sheet for 5 minutes. This carryover cooking firms up the center without over-baking the cookie itself. Transfer the snowy cookies to a wire rack to cool completely.
-
Step 6: Finish with the Snowy Dusting
Once the cookies have fully cooled to room temperature, gently dust them generously with powdered sugar using a fine-mesh sieve. This step provides the signature “winter wonderland” finish, creating a beautifully festive presentation perfect for any holiday platter.
Transfer to plates and enjoy immediately with a warm beverage for the perfect finishing touch, allowing the warmth of the chocolate to truly shine.
Tips for Storage and Gifting
If you manage to have any of these irresistible holiday chocolate drops leftover, proper storage ensures they remain fresh and chewy for several days. Store the cooled cookies in an airtight container at room temperature. Placing a slice of white bread in the container is a baker’s secret; the bread releases moisture slowly, which the cookies absorb, keeping them soft for longer periods. Avoid storing them in the refrigerator, as the cold air will dry them out quickly.
Freezing Dough for Future Feasts
The beauty of this recipe is its make-ahead potential. After chilling the dough, scoop the balls onto a parchment-lined tray and flash freeze them for about an hour until they are solid. Transfer the frozen dough balls to a freezer-safe bag, pressing out all excess air. Frozen dough keeps beautifully for up to three months. When the craving strikes, you can bake them directly from the freezer; simply add 2 to 4 minutes to the total baking time. This is a brilliant strategy for ensuring you always have fresh-baked festive cookies ready for unexpected company or quick, comforting treats on a busy weeknight.
Gifting Your Homemade Creations
TheseWinter Wonderland Chocolate Chip Cookiesmake truly magnificent homemade gifts. When preparing them for gifting, make sure to use sturdy packaging that prevents crushing. Layer the cooled, dusted cookies in tins or decorative boxes, separating the layers with parchment or wax paper to protect the snowy powdered sugar finish. Attach a small, hand-written tag with baking instructions or a warm holiday message. Few things convey thoughtful effort and seasonal cheer better than a batch of these glorious, snowy creations straight from your own kitchen.
There is a specific kind of cold that creeps into your bones—the kind that makes you question why you don’t live on a tropical island selling carved wooden parrots. When the gray skies descend and the thermostat battles the elements, only one thing truly saves the day: a warm oven and the glorious scent of vanilla and melted chocolate. This is how the legend of the cookie that brings indoor sunshine began, a treat designed specifically to combat winter gloom.
My quest for the ultimate cold-weather comfort food led me down many disastrous paths. I burned biscuits, flattened sugar cookies, and once accidentally substituted salt for sugar in a disastrous batch of oatmeal bars. My family was ready to stage an intervention. But then, one frosty afternoon, armed with extra brown sugar and a desperate need for cheer, I cracked the code. What emerged from the oven was pure magic—chewy, gooey, and studded with creamy white chocolate chunks that looked exactly like freshly fallen snow. These truly are the definitiveWinter Wonderland Chocolate Chip Cookies.
The Essential Elements for Pure Snowy Bliss
Before we dive into the baking ritual, let’s ensure our pantry is stocked for a blizzard of flavor. This recipe requires precision and quality ingredients, especially when dealing with the nuanced textures of a perfect drop cookie. We skip the heavy, complicated add-ins and focus on maximizing that classic chewy-center, crispy-edge dynamic that everyone loves. Remember, the quality of your butter matters immensely here; it provides the backbone for the entire operation.
Gathering Your Ingredients
- 1 cup (2 sticks) unsalted butter, softened
- ¾ cup granulated white sugar
- 1½ cups packed light brown sugar
- 2 large eggs, room temperature
- 1 tablespoon vanilla bean paste (the real stuff, please)
- 3 cups all-purpose flour (spooned and leveled)
- 1 teaspoon baking soda
- ½ teaspoon salt
- 1 cup semi-sweet chocolate chips
- 1 cup white chocolate chunks (for that “snowy” effect)
The Science of the Perfect Cookie Dough
Baking is chemistry, and this specific cookie requires a meticulous approach to mixing. If you over-cream the butter and sugar, you introduce too much air, leading to a flatter, cakier cookie. We are aiming for dense, chewy indulgence, so we incorporate just enough air to achieve fluffiness without sacrificing the chew. Furthermore, using a high ratio of brown sugar to white sugar locks in moisture, preventing your treats from drying out in the fierce heat of the oven.
Start by creaming the softened butter with both the white and brown sugars until they are just combined and pale—about three minutes on medium speed. Resist the urge to keep mixing until fluffy. Next, incorporate the eggs one at a time, ensuring the first egg is fully mixed before adding the second, followed immediately by the vanilla bean paste. Scrape down the bowl rigorously after this step to make sure no pockets of unmixed butter remain hidden at the bottom. Nobody wants a rogue pocket of shortening in their sweet treat.
In a separate bowl, whisk together the dry ingredients: the flour, baking soda, and salt. Gradually add this dry mixture into the wet ingredients, mixing only until just combined. The moment you see no visible streaks of flour, stop the mixer. Over-mixing gluten develops toughness, and tough cookies are no fun for anyone. Finally, fold in the semi-sweet chocolate chips and the white chocolate chunks using a rubber spatula. This gentle folding motion ensures the chocolate is evenly distributed without activating the gluten further.
The Accidental Discovery of Sunshine on a Plate
I originally aimed for a standard, straightforward holiday cookie, but chilling the dough for an unexpectedly long time transformed it entirely. That extra wait minimized spread and concentrated the flavors, yielding a thick, gorgeous cookie that tasted like pure, buttery cheer, an accidental masterpiece born from procrastination.
The Great Chill and Bake Sequence
Chilling the Dough for Maximum Flavor
This step is non-negotiable if you want the cookies to truly live up to the Winter Wonderland title. Chilling the dough solidifies the fat, preventing excessive spread during baking, which results in those beautiful, thick cookies with soft centers. Divide the dough into balls, about two tablespoons each, and place them on a parchment-lined sheet. Cover the tray loosely and allow them to chill for a minimum of 3 hours, but ideally overnight. Seriously, the longer the chill, the deeper the flavor and the better the texture.
Baking for Perfection
Preheat your oven to 350°F (175°C). Space the dough balls generously on a baking sheet; overcrowding results in steamed edges instead of crispy ones. Bake for 10 to 12 minutes. The edges should look golden brown, but the centers must still look slightly soft and underdone. The secret to achieving the perfect, gooey center is pulling them out when they look almost, but not quite, ready.
Allow the baked treats to cool on the baking sheet for five minutes before carefully transferring them to a wire rack to finish cooling completely. This rest period is crucial; the residual heat continues to cook the center, setting the structure while maintaining that sought-after chewiness. Patience is the secret ingredient for these snowy season cookies.
Perfecting the Cooking Process
Start by chilling the dough for at least three hours—this prevents spreading and concentrates the rich, buttery flavor profile. Bake them on parchment paper, rotating the tray halfway through for even color, and pull them out when the centers look slightly gooey.
Add Your Touch
Try swapping the white chocolate chunks for butterscotch chips to add a caramel depth, or introduce a teaspoon of alcohol-free almond extract alongside the vanilla for a richer aroma. For extra festive flair, sprinkle a pinch of sea salt on top of each dough ball before baking.
I remember one time I was desperate for a batch of these glorious chocolate drops, but I had run out of brown sugar. I substituted dark molasses mixed with extra white sugar, and the resulting deeper, almost caramel-like flavor was unexpectedly delicious, proving this recipe adapts beautifully to pantry emergencies.
Storing & Reheating
Store cooled cookies in an airtight container at room temperature for up to four days; if freezing, wrap them individually for up to three months. To revive them, warm them quickly in the microwave for ten seconds or in a low oven (275°F/135°C) for five minutes.
Expert Tips for Flawless Festive Baked Treats
-
Always use room temperature eggs, as they emulsify much better with the creamed butter and sugar, leading to a smoother, more uniform dough structure.
-
Measure your flour using the spoon-and-level method; scooping directly compacts the flour, resulting in dense, dry cookies nobody enjoys.
-
If you don’t have time to chill the dough overnight, freeze the scooped dough balls for thirty minutes, which achieves a similar, though slightly less intense, texture stabilization.
Conclusion for Winter Wonderland Chocolate Chip Cookies
These Winter Wonderland Chocolate Chip Cookies are more than just a sweet snack; they are a necessary antidote to the bleak midwinter. We learned that the secret lies in high-quality ingredients, meticulous dough chilling, and the confidence to pull them from the oven while they still look slightly underdone. Whether you are baking for a holiday gathering or simply seeking comfort on a snowy afternoon, these festive baked treats offer unparalleled chewiness and depth of flavor. Embrace the chill, crank up the oven, and savor every bite of this perfect, snow-dusted indulgence.
Print
Winter Wonderland Chocolate Chip Cookies
Achieve the ultimate chewy, soft-centered chocolate chip cookie using a rich blend of brown sugar and vanilla powder. Our detailed instructions ensure perfect creaming, delivering unmatched depth.
- Total Time: 35 minutes
- Yield: 4 servings
Ingredients
- Unsalted butter: 1 cup (2 sticks), softened
- Brown sugar: 3/4 cup, packed
- Granulated sugar: 1/4 cup
- Large egg: 1
- vanilla powder: 1 teaspoon
- All-purpose flour: 2 1/4 cups
- Baking soda: 1 teaspoon
- White chocolate chips: 1 1/2 cups
Instructions
- Step 1: Preheat the oven to 375°F (190°C). In a large bowl or stand mixer, cream together the softened butter, brown sugar, and granulated sugar until the mixture is light and fluffy, about 3 minutes. Beat in the large egg and vanilla bean paste until just combined.
- Step 2: In a separate medium bowl, whisk together the all-purpose flour and baking soda. Gradually add the dry ingredients to the wet ingredients, mixing on low speed until the dough just comes together and no streaks of flour remain. Do not overmix.
- Step 3: Gently fold the white chocolate chips into the cookie dough using a spatula. For the best texture, cover the dough and chill it in the refrigerator for at least 30 minutes, or up to 2 hours.
- Step 4: Scoop rounded tablespoons of dough onto ungreased baking sheets, spacing them about 2 inches apart. Optionally, lightly sprinkle the tops of the cookies with coarse white sparkling sugar before baking for a "winter frost" effect.
- Step 5: Bake for 9 to 12 minutes, or until the edges are golden brown and the centers are still slightly soft. Remove the cookies from the oven and let them cool on the baking sheet for 5 minutes before transferring them to a wire rack to cool completely.
Notes
- Do not skip the chilling step; a minimum 30-minute rest allows the flour to fully hydrate and the butter to firm up, guaranteeing a thicker, chewier cookie.
- If the cookies lose their initial softness, reheat them briefly in a microwave for 8-10 seconds to restore that lovely, gooey white chocolate center.
- For the ultimate winter indulgence, serve these cookies warm alongside a mug of spiced hot cocoa, perfect for dipping.
- Store baked cookies in an airtight container at room temperature for up to four days, or freeze unbaked cookie scoops for quick fresh batches anytime.
- Prep Time: 15 minutes
- Cook Time: 20 minutes
- Method: Stovetop
- Cuisine: American


Leave a Comment